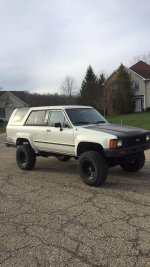
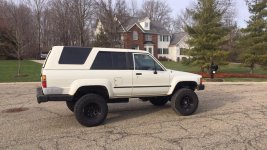
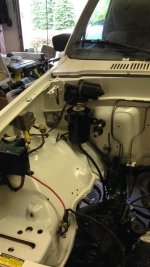
86 4Runner build "El Chapo"

Little bit of an update.

This weekend I addressed my rough idle upon warm starts by taking the IACV off and giving it a good cleaning. I also deleted the egr, cleaned the upper and lower intakes, replaced the PCV valve and put some new fuel injectors in.

after buttoning up everything the first time, with new gaskets and all, I had a coolant leak between the block and the lower intake... UGHH!!! so, I ended up pulling everything off, buying new gaskets again, and coating the two surfaces with silicon. worked like a charm!

drove back to school tonight and everything seems to be fine, i just need to do a little adjusting to the idle.

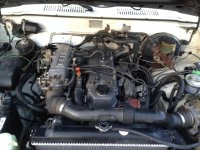
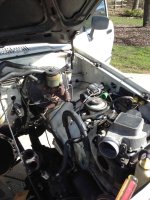
no pictures of anything, just a before and after engine shot (Sorry for the terrible quality). started to do some cleaning, but definitely needs some more.

before:
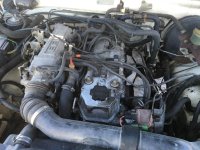
86 4Runner (9).jpg

after:
IMG_4973.jpg
 

Attachments

  • 86 4Runner (9).jpg
    86 4Runner (9).jpg
    134.7 KB · Views: 876
  • IMG_4973.jpg
    IMG_4973.jpg
    131.7 KB · Views: 824
Happy New Year everyone! It's been awhile since I have posted on here. I've just been bogged down with school.
The 4Runner is doing awesome! I've had a few hiccups here and there, but she gets to and from school everyday (50 miles round trip)

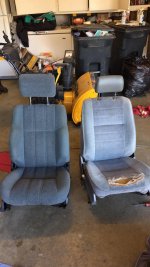
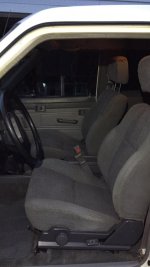
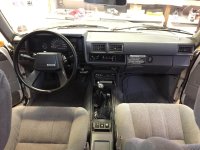
Last week when I was at the gym, my friend and I drove up, him in his army green plasti dipped FJ Cruiser, and me in my 4Runner. We noticed there was a nice, lifted FJ Cruiser outside. We went in to workout and eventually the owner of the lifted FJ asked about my 4Runner. He had actually stopped by my house close to 2 years ago because he saw my 85 extra cab sitting outside in the street. He owns a FJ40, FJ80, Fj Cruiser, & an 84 extra cab. Long story short, he GAVE me some awesome grey seats after I told him that my front seats were trash! Merry Christmas to me!

My interior is officially complete.

seats (old&new).jpg

seats(new).jpg
 

Attachments

  • seats (old&new).jpg
    seats (old&new).jpg
    122.4 KB · Views: 737
  • seats(new).jpg
    seats(new).jpg
    112.3 KB · Views: 731
I have a 2 wheel drive Grill on mine as well. I put in a 4Runner logo instead of the Toyota and really like the way it looks.

 
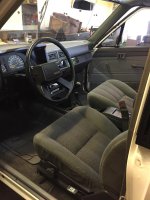
Here's a few more interior shots with the new seats. Oh, and a new glove box with the transfer case instructions. It came from a turbo, so it has a note about the turbo below the transfer case instructions

86 4Runner (77).jpg

86 4Runner (78).jpg
 

Attachments

  • 86 4Runner (77).jpg
    86 4Runner (77).jpg
    131.3 KB · Views: 685
  • 86 4Runner (78).jpg
    86 4Runner (78).jpg
    130.5 KB · Views: 754
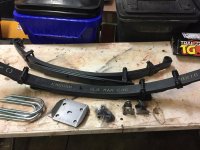
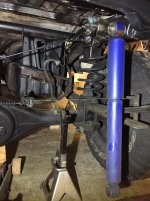
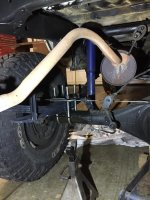
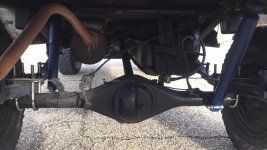
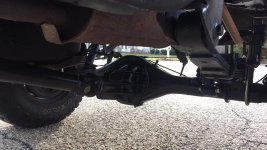
Finally decided to replace my old leaf springs. I was running the original springs along with the zuk mod using 3rd gen coils. The original springs were giving me a ton of axle wrap, and my u-joints were finally toast.

So, I went with OME medium load springs (CS009R) with a u-bolt flip kit and new bushings. I replaced my u-joints and rear pinion seal while I was at it.


86 4Runner (79).jpg


old setup:

86 4Runner (12).jpg


new setup:

86 4Runner (84).jpg


Pretty good stance with ball joints spacers up front:

86 4Runner (80).jpg

86 4Runner (83).jpg


Finished product underneath:

86 4Runner (81).jpg

86 4Runner (82).jpg


Still have to put my bump stops back on and trim the ends u-bolts a bit.
 

Attachments

  • 86 4Runner (79).jpg
    86 4Runner (79).jpg
    132.8 KB · Views: 789
  • 86 4Runner (80).jpg
    86 4Runner (80).jpg
    135.4 KB · Views: 815
  • 86 4Runner (83).jpg
    86 4Runner (83).jpg
    140.8 KB · Views: 1,075
  • 86 4Runner (81).jpg
    86 4Runner (81).jpg
    136.6 KB · Views: 760
  • 86 4Runner (82).jpg
    86 4Runner (82).jpg
    139.5 KB · Views: 770
  • 86 4Runner (12).jpg
    86 4Runner (12).jpg
    135.9 KB · Views: 808
  • 86 4Runner (84).jpg
    86 4Runner (84).jpg
    133.5 KB · Views: 827
looking good! SO you didnt touch the torsions at all to get it level? Most OME leafs i see look much higher in the back.

Thanks! Correct, I didn't touch the torsion bars. But, I do have bj spacers and I don't know if the torsion bars were cranked prior to owning it
 
Saw you on on Facebook. what I would recommend is moving your switches from the center console up above your radio. I have pictures to show what I did just don't have them on here at the moment. But I do have some I could send you through Facebook if you were interested. I can see if I can try to get them to upload here as well but I have to figure out how to get back into my Photobucket. Some reason I'm not able to sign in

After you get that done you can easily put the plugs from the radio area down into the center console or you could do like I did and get the coin holder out of the second generation forerunners. I just did that so that I could carry around $6 worth of quarters for emergency use. I can actually get 3 more quarters and because I broke the center piece out of each one. I just don't like having my switch is down there where something can get spilled on them or my daughter could step on them and break them. She likes to climb through from the front to back that way or at least did when she was younger.
 
Saw you on on Facebook. what I would recommend is moving your switches from the center console up above your radio. I have pictures to show what I did just don't have them on here at the moment. But I do have some I could send you through Facebook if you were interested. I can see if I can try to get them to upload here as well but I have to figure out how to get back into my Photobucket. Some reason I'm not able to sign in

After you get that done you can easily put the plugs from the radio area down into the center console or you could do like I did and get the coin holder out of the second generation forerunners. I just did that so that I could carry around $6 worth of quarters for emergency use. I can actually get 3 more quarters and because I broke the center piece out of each one. I just don't like having my switch is down there where something can get spilled on them or my daughter could step on them and break them. She likes to climb through from the front to back that way or at least did when she was younger.


That sounds pretty cool, but I don't have any issues with where they are now. Plus, I don't want to cut up any of my clean plastics. Thanks for the recommendation though!
 
I did not have to cut up anything except the wiring all I did was cut The Wire an inch and a half or so before the plug. I then extended the wires long enough to put them up in the empty holes above the radio. To do this I solder the wires and use heat shrink tape to make the best connection possible.

The only one I didn't do anything with was the window lock. I don't think any of us use the window lock anyway. All I did was take it and tuck it underneath of the center console and taped it to the wiring harness there.
 
I did not have to cut up anything except the wiring all I did was cut The Wire an inch and a half or so before the plug. I then extended the wires long enough to put them up in the empty holes above the radio. To do this I solder the wires and use heat shrink tape to make the best connection possible.

The only one I didn't do anything with was the window lock. I don't think any of us use the window lock anyway. All I did was take it and tuck it underneath of the center console and taped it to the wiring harness there.

I'll keep this mod in mind fir the future, but for right now I don't mind where the buttons are, and i like the stock look. I appreciate the info though!


looking real good man! Love the look of those duratracs on it!


Thanks! I love the duratracs! They really give the 4runner a more aggressive look
 
Engine Rebuild??

I believe I have developed a head gasket leak. After driving I noticed coolant steaming out between the head and the block. So, I know I will be doing a head gasket repair. Also, I have low compression on cylinder 2 (I forget the numbers) I believe it is leaky valve seal because the pressure stayed the about same after a wet compression test. Next, I found that I had low compression in cylinder 2 during diagnosis of a misfire. I found out that the misfire was because the exhaust valve on cylinder 2 was completely closed when it should have been open. adjusted the valve and misfire fixed. 5,000 miles after the misfire was fixed, it happened again, and it was the same thing, exhaust valve on cylinder 2 was closed.
What could be the cause of the valve closing? Along with the head gasket and valve seals, what should I replace? The timing chain looks fine, it looks as if it did wear against the block slightly at one point, but there are plastic guides on there now that are completely intact, so my assumption is that the timing chain is fine.

Someone recommended that I put a new head on with all new valves, springs,cam, rocker, etc...But, if I put a fresh, rebuilt head on there, should I pull the motor and inspect/rebuild the lower half?

extra info: 1986 22re. 195,000 miles.
engine related maintenance I have performed in the last 9 months or so:
cleaned upper and lower intakes and throttle body, new gaskets installed, new PCV valve
new plugs, wires, distributor, cap, and rotor
cleaned IACV, new thermostat
new exhaust manifold and gasket
fresh coolant
regular oil changes
valves adjusted, new valve cover gasket
new fuel injectors
I'm sure I'm missing more.

I hope this helps inform you what my plan of attack should be on this repair. Thanks in advance.

Side note, I will be graduating soon, so the 4runner might become my main project for an offroad rig. My dream would be SAS on 37s, front and rear lockers, 5.29 gears, bumpers, winch, sliders, etc... money, money, money...
 
Well if you want to keep the rig for a while I'd say pull the engine. You are so far into the engine at that point I think it would be totally worth it.
 
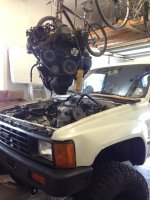
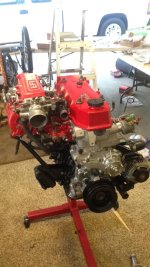
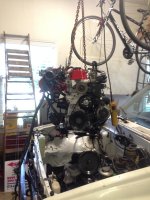
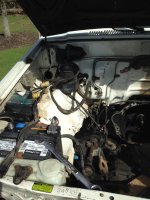
So, I decided to pull the motor the Friday before spring break. With a week off for spring break, I thought this would be the perfect time for the rebuild.
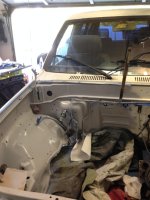
My plan is to clean up the engine and engine bay really well, paint and refresh everything I can, without going too crazy. I'll be putting a new head on and cam in from Engnbldr. Think I'm leaning towards the 261 cam, anyone have any opinions?? I'm also going to be having the block inspected.


Using our harbor freight hoist to pull out the engine. Did it by myself, worked great.

IMG_5660.jpg


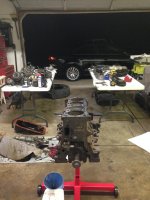
got every disassembled and organized by the end of the first day.

IMG_5685.jpg


The block is at the machine shop now, waiting to hear back on whether I need to bore out the cylinders or just hone it. In the meantime, I'll be doing a lot of cleaning.

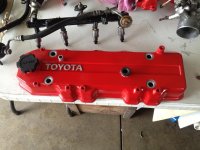
I'll leave a little shot of the valve cover here..

IMG_5716.jpg
 

Attachments

  • IMG_5660.jpg
    IMG_5660.jpg
    127.8 KB · Views: 611
  • IMG_5685.jpg
    IMG_5685.jpg
    132.2 KB · Views: 621
  • IMG_5716.jpg
    IMG_5716.jpg
    135.3 KB · Views: 620
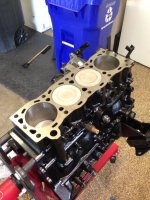
Well, the block finally came back from the machine shop! I found out the cylinders were bored at some point in the past and i could get away with honing them. After the crankshaft was polished and the block was decked, i had new bearings, rods, pistons, and rings installed. Once I got it home, I gave her a paint job and then started assembly.


IMG_6047.jpg


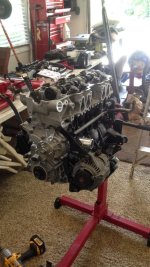
I ended up putting Engnbldr's StreetRV head on it with the 268C/Torkr Cam. Put a new water pump, oil pump, timing cover, and timing chain kit with steel backed guides on. Also put on a new clutch and flywheel.


IMG_6051.jpg

IMG_6055.jpg

IMG_6062.jpg


Painted the engine bay as well. The more time the block spent at the shop the more things I found that should be done.


IMG_5706.jpg

IMG_5707.jpg

IMG_5822.jpg

IMG_5865.jpg
 

Attachments

  • IMG_6047.jpg
    IMG_6047.jpg
    135.2 KB · Views: 546
  • IMG_6051.jpg
    IMG_6051.jpg
    115.3 KB · Views: 544
  • IMG_6055.jpg
    IMG_6055.jpg
    104.6 KB · Views: 545
  • IMG_6062.jpg
    IMG_6062.jpg
    130.7 KB · Views: 547
  • IMG_5706.jpg
    IMG_5706.jpg
    134.3 KB · Views: 545
  • IMG_5707.jpg
    IMG_5707.jpg
    135.9 KB · Views: 543
  • IMG_5822.jpg
    IMG_5822.jpg
    125.2 KB · Views: 561
  • IMG_5865.jpg
    IMG_5865.jpg
    83.4 KB · Views: 541

Members online

Forum statistics

Threads
278,312
Messages
3,554,085
Members
248,016
Latest member
Advally Service

Trending content

Back
Top