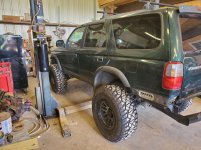
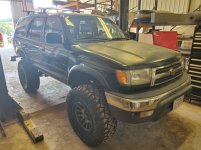
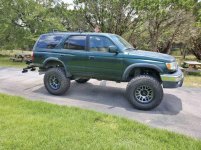
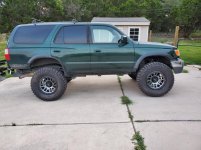
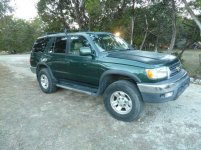
'99 manual SR5 occasional daily driver and weekend crawler build

rexassian

Member
Sup y'all, I've been mostly lurking and reading build threads over the last year and finally decided to document my own. I've also watched probably 20 hours of videos from [MENTION=120071]mtbtim[/MENTION] & [MENTION=102606]infamousRNR[/MENTION] so thanks for the wonderful resources to enjoy these awesome trucks.

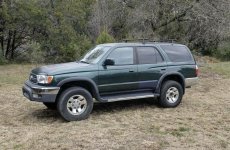
Starting out, I really wanted to get back into rock crawling and have always loved 3rd gen 4runners. I've previously owned a 4th gen 2wd daily and a 1st gen 4cyl daily that was in my family so I wanted to get back into a 4runner and build it up this time. I was also adamant on getting a manual transmission to make life a little more challenging and hopefully eventually use it to teach my kids to drive stick, it's a dying skill after all. So after a few months of searching, I found one on craigslist nearby and got it. It was a theft recovery from Cali that was driven to Texas. PO changed out timing belt, water pump, rad hoses, CV axles, and a rear axle seal so it was in good running condition. One thing it needed was valve cover gaskets but that's not an immediate thing so it was no big deal to me. The only thing missing was rear locker but that's OK, I'll re-gear and lock eventually. Also missing, thankfully, was a sunroof, I didn't want that extra complexity.

Being that it's a theft recovery, it had some "irregularities" like a new steering column with a key that doesn't match the doors. The thief had painted a purple fade on the bottoms of the doors and rear hatch so the PO replaced those but couldn't get the rear hatch key to match the door key so I lost the awesome roll down with the key feature. Also, no remote locks, just manual key. But whatever, it drove fine, shifted smoothly, and was comfortable.


I'll start adding mods below and link the posts here in a table of contents.


Next plans are to get 4.88 gears and e-lockers - coming soon...
 

Attachments

  • 00e0e_2iJBEGqBNpT_1200x900.jpg
    00e0e_2iJBEGqBNpT_1200x900.jpg
    140.4 KB · Views: 1,607
  • 20181229_2.jpg
    20181229_2.jpg
    141.8 KB · Views: 1,514
Register to hide this ad
Step 1 was remove the side steps and do some preventative maintenance. The idle got a little rough at times so I replaced the spark plugs w/ OEM set and new plug wires as well. That helped but didn't solve it.

Then it started dying at traffic lights at idle and I got a code about TPS so I replaced that and it helped, but still it was dying occasionally. So some searching and reading and I thought why not clean out the IAC.

Sure enough, the IAC was dirty AF and had a small chunk of RTV stuck in it. Cleaned everything up including the throttle body and put it all back together and it ran like a champ and idled great, right around 700 RPM.

Awesome!

At this point, I wanted better sound so I went to crutchfield and orderd up a Pioneer double din unit with carplay & android auto and 4 new speakers. Sorry, no pics but it was straight forward. I added a wireless steering wheel controller to make it seem like this car was somewhat modern...
 
next I knew I wanted to run 35's so I went ahead and ordered them.

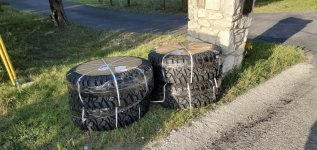
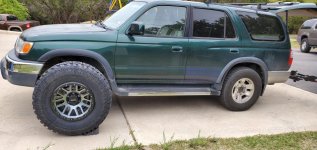
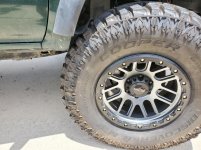
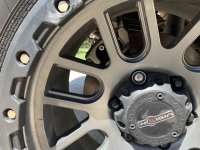
17x9 (4" back space) Vision Nemisis wheels and 35x12.5" Cooper Discoverer MTP tires. UPS guy didn't even want to drop them close to my garage and left them out on the street.

I mocked one up to see what I'm in for... :bigok:
 

Attachments

  • 20190329_1.jpg
    20190329_1.jpg
    149.9 KB · Views: 1,395
  • 20190331_114941.jpg
    20190331_114941.jpg
    142.8 KB · Views: 2,456
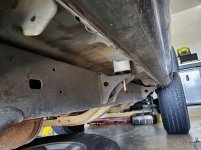
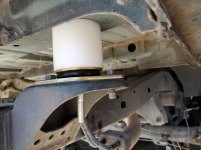
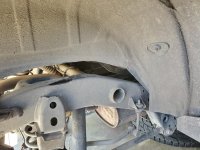
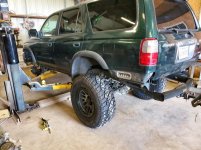
Now to make room I started with a 1.5" body lift from 4crawler. Simple enough...

Also, I wanted to make room early to ensure easy access to bolts and the stupid rear shock upper mounts so I could install my suspension lift with more ease...

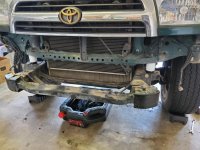
And instead of worrying about the rear bumper, I got rid of it until I can build one.
 

Attachments

  • 20190512_175137.jpg
    20190512_175137.jpg
    136.4 KB · Views: 1,390
  • 20190512_162926.jpg
    20190512_162926.jpg
    132.5 KB · Views: 1,411
  • 20190512_162900.jpg
    20190512_162900.jpg
    128.8 KB · Views: 1,348
  • 20190512_162915.jpg
    20190512_162915.jpg
    137.2 KB · Views: 1,381
Last edited:
Next I noticed the rear axle seals are leaking...so, 5 hours of watching Toyota time and researching online and I got my axles taken apart and old seals removed. I didn't have a press so I opted to take the axles to a local shop to have them press on the new bearings, etc. However, and I should have insisted or taken it elsewhere, they refused to swap the inner seal ring direction as was suggested. At the time, I thought fine, I'll just not press the new seals in all the way (give or take a mm).

The seals held for 3 wheeling trips but are leaking again...:mad2::frusty::frusty::frusty:
 
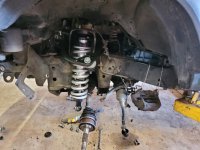
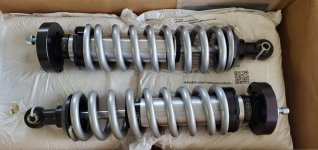
Finally it was time to put the lift on. I got the system1.2 with 2.5" long(er) travel radflo's. While I was in there, I wanted to change out all the other bushings and such so I added:

lower control arm bushings
new OEM lower ball joints
upper arms from SPC
new steering rack bushings from energy suspension
diff mount bushings from DuroBumps

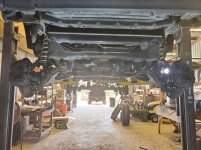
I took the whole 3-day weekend over July 4th and got it all done thanks in large part to using my buddy's shop with two-post lift. I probably raised and lowered 20 times so it was VERY handy!
 

Attachments

  • 20190706_180819.jpg
    20190706_180819.jpg
    127 KB · Views: 1,311
  • 4runnerCoils.jpg
    4runnerCoils.jpg
    141.1 KB · Views: 1,509
  • 20190707_142349.jpg
    20190707_142349.jpg
    137 KB · Views: 1,382
  • 20190707_161435.jpg
    20190707_161435.jpg
    136 KB · Views: 1,371
  • 20190705_175013.jpg
    20190705_175013.jpg
    135.2 KB · Views: 1,609
  • 20190707_165653.jpg
    20190707_165653.jpg
    138.5 KB · Views: 2,333
  • 20190707_165719.jpg
    20190707_165719.jpg
    135.9 KB · Views: 2,406
  • 20190713_131117_stripped4.jpg
    20190713_131117_stripped4.jpg
    136.9 KB · Views: 2,656
I started with the SPC arms in the C position and that rubbed badly, as you can see. After more tinkering, I set it all the way back at G as recommended in the SPC alignment thread : SPC UCA Alignment Sheets

and set my lower cam bolts to max caster to offset. Took it to Firestone for alignment and it drove great.

Maybe later I'll get those nice lower arms which move the ball joint forward 1" for more caster...
 

Attachments

  • 20190713_132150_stripped.jpg
    20190713_132150_stripped.jpg
    138.1 KB · Views: 1,943
  • 20190714_203216_stripped.jpg
    20190714_203216_stripped.jpg
    135.2 KB · Views: 1,911
Last edited:
I took it wheeling a few times to a local place here in central texas called Hidden Falls. There's lots of easy-ish trails there and it's great for beginners. Everything was working fine...until it wasn't. See here:

Coolant valve broke / engine overheat

basically the combo of 20 year old plastic, 1.5" body lift, and still some flex from off-roading caused the plastic nipple on the heater control valve to break and I didn't notice it in time. You can check the thread, but I added about a 1" drop down bracket to the heater control valve to keep the hoses from flexing the plastic nipples and eventually causing this valve to break like the original. I would highly recommend for anyone running a body lift to do this, even if you don't have a problem, as it's cheap and easy insurance.

Yea, yea, don't have a body lift and this won't be a problem. I definitely took the easy way out to try and not have a bunch of fender hacking to fit the 35's. Now I paid for it...
 
I thought I got away easy after the coolant leak but a few months later (early december), I started having issues again : bad head gasket, fix or motor swap, want to keep manual trans

after a lot of reading on rebuilds and looking for swaps, I decided for now that I can't let it sit while I rebuild the motor as I know myself (and my wife) and it will end up on jack-stands forever. I usually like to get into the work but a motor swap or rebuild will take it out for too long and that is not what I want. I want it back to running a quickly as possible. So for now, I put some Blue Devil stop leak in it and thankfully it sealed up. Of course, there's no telling how long it will last or what other issues it will cause but I was willing to take the risk.

Back-up plan, keep looking for a low millage insurance auction car to swap the motor over in a (long) weekend. For instance, here's one that I'm waiting to start: https://www.iaai.com/VehicleDetails...similarVehicleItemId=&isNext=&loadRecent=true . We'll see what it ends up going for but as of now, I think this is my best option if/when the stop leak lets go.
 
FINALLY, I had time to work on my runner again. This past week I replaced the rear axle seals, bearings, etc, with HUGE thanks to [MENTION=116195]weekendclimber[/MENTION] for the awesome press tool loaner. It turns out at some point, someone had cut off the retainer rings/ABS gear and there were nicks and cuts on the axle. I ended up filling them with JB weld and pressing the new retainers and ABS gear on while it was setting. At this point, if I have to do the seals again, I'm going with a new axle, what a pain!

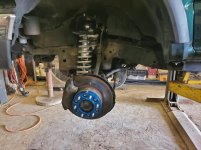
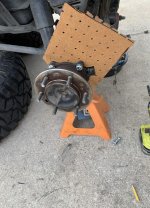
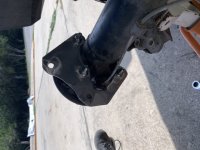
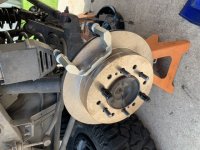
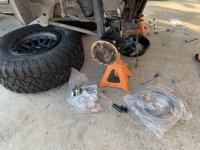
Also, I started the rear disk brake conversion. I have a bunch of 3/8" steel left over from my bumper work and will be making my own brackets using a plasma cutter (and drill press). For the conversion, I got all the parts from rock auto and ordered the e-brake and caliper flex hoses from [MENTION=118207]midcoma[/MENTION] . Here's the parts I used:

<HTML>
<table cellpadding = "5" cellspacing = "5"><tr><td> </td><th>Part Number</td><th>Part Type</td><th>Price EA</td><th>Core EA</td><th>Quantity</td><th>Total</td></tr>
<tr><td colspan="7">2003 TOYOTA 4RUNNER 4.7L V8</td></tr>
<tr><td>CENTRIC</td><td>12144128 (121.44128)</td><td>Rotor</td><td>$ 17.67</td><td>$ 0.00</td><td>2</td><td>$ 35.34</td></tr>
<tr><td colspan="7">2000 FORD MUSTANG 5.4L V8</td></tr>
<tr><td>ACDELCO</td><td>18K2410</td><td>Brake Bleeder</td><td>$ 2.86</td><td>$ 0.00</td><td>1</td><td>$ 2.86</td></tr>
<tr><td>BENDIX</td><td>SBC627A</td><td>Brake Pad</td><td>$ 17.28</td><td>$ 0.00</td><td>1</td><td>$ 17.28</td></tr>
<tr><td>POWER STOP</td><td>L4825A</td><td>Caliper</td><td>$ 54.79</td><td>$ 27.48</td><td>1</td><td>$ 82.27</td></tr>
<tr><td>POWER STOP</td><td>L4824A</td><td>Caliper</td><td>$ 54.79</td><td>$ 27.48</td><td>1</td><td>$ 82.27</td></tr>
<tr><td>Shipping</td><td colspan="5">Ground</td><td>$ 34.97</td></tr>
<tr><td>Tax</td><td colspan="5"> </td><td>$ 20.40</td></tr>
<tr><td>Order Total</td><td colspan="5"> </td><td>$ 275.39</td></tr></table></HTML>

the bleeders were just in case and are cheap for a pack of 10 so why not. Pads are bendix organic and hopefully will be OK, I'm not looking to lock up the rear tires or anything. Looking forward to getting this all together, hopefully by next weekend, and get back out on the trails.
 

Attachments

  • BD6ABB9B-0FF4-4D44-B2CB-7D6C7C099A1D.jpg
    BD6ABB9B-0FF4-4D44-B2CB-7D6C7C099A1D.jpg
    140.5 KB · Views: 1,213
Last edited:
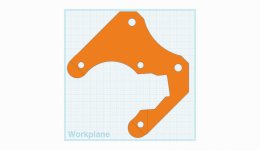
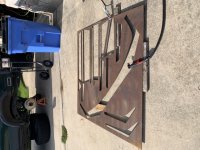
so that peg-board was a bad choice for template, too easy to break. Work was slow and it was very rainy here so I tried to create my own template on tinker cad. I wanted the calipers oriented around 45 degrees to make bleeding easy (in theory) rather than almost vertical as I have in the above picture. Here's what I drew up. For some reason, I couldn't upload the PNG format so compressed jpg it is for now. PM if anyone wants the original PNG, or SVG files for direct printing. I'm planning on cutting this out of sheet metal to test and adjust from there before plasma cutting out of 3/8" steel and figuring out the offsets needed for the spacers.
 

Attachments

  • caliper_bracket_v1_web.jpg
    caliper_bracket_v1_web.jpg
    136.2 KB · Views: 1,209
FINALLY, I had time to work on my runner again. This past week I replaced the rear axle seals, bearings, etc, with HUGE thanks to [MENTION=116195]weekendclimber[/MENTION] for the awesome press tool loaner. It turns out at some point, someone had cut off the retainer rings/ABS gear and there were nicks and cuts on the axle. I ended up filling them with JB weld and pressing the new retainers and ABS gear on while it was setting. At this point, if I have to do the seals again, I'm going with a new axle, what a pain!

Also, I started the rear disk brake conversion. I have a bunch of 3/8" steel left over from my bumper work and will be making my own brackets using a plasma cutter (and drill press). For the conversion, I got all the parts from rock auto and ordered the e-brake and caliper flex hoses from [MENTION=118207]midcoma[/MENTION] . Here's the parts I used:

<HTML>
<table cellpadding = "5" cellspacing = "5"><tr><td> </td><th>Part Number</td><th>Part Type</td><th>Price EA</td><th>Core EA</td><th>Quantity</td><th>Total</td></tr>
<tr><td colspan="7">2003 TOYOTA 4RUNNER 4.7L V8</td></tr>
<tr><td>CENTRIC</td><td>12144128 (121.44128)</td><td>Rotor</td><td>$ 17.67</td><td>$ 0.00</td><td>2</td><td>$ 35.34</td></tr>
<tr><td colspan="7">2000 FORD MUSTANG 5.4L V8</td></tr>
<tr><td>ACDELCO</td><td>18K2410</td><td>Brake Bleeder</td><td>$ 2.86</td><td>$ 0.00</td><td>1</td><td>$ 2.86</td></tr>
<tr><td>BENDIX</td><td>SBC627A</td><td>Brake Pad</td><td>$ 17.28</td><td>$ 0.00</td><td>1</td><td>$ 17.28</td></tr>
<tr><td>POWER STOP</td><td>L4825A</td><td>Caliper</td><td>$ 54.79</td><td>$ 27.48</td><td>1</td><td>$ 82.27</td></tr>
<tr><td>POWER STOP</td><td>L4824A</td><td>Caliper</td><td>$ 54.79</td><td>$ 27.48</td><td>1</td><td>$ 82.27</td></tr>
<tr><td>Shipping</td><td colspan="5">Ground</td><td>$ 34.97</td></tr>
<tr><td>Tax</td><td colspan="5"> </td><td>$ 20.40</td></tr>
<tr><td>Order Total</td><td colspan="5"> </td><td>$ 275.39</td></tr></table></HTML>

the bleeders were just in case and are cheap for a pack of 10 so why not. Pads are bendix organic and hopefully will be OK, I'm not looking to lock up the rear tires or anything. Looking forward to getting this all together, hopefully by next weekend, and get back out on the trails.

Not sure if you mentioned doing this but you might want to check the rear diff breather.. sometimes leaking seals indicate a clogged breather valve. there is no room for expansion/contraction. Truck looks good though man.
 
Not sure if you mentioned doing this but you might want to check the rear diff breather.. sometimes leaking seals indicate a clogged breather valve. there is no room for expansion/contraction. Truck looks good though man.

Yes! Great, point, I keep putting off the extended breather and checking for clogs. Thanks, I'll clean it up and extend it.
 
I'm doing a very similar build right now with a 99 5 speed, just a rig to haul the mountain bike around and to recover my fish house off the lake in the winter time, although in MN builds require rust repair before the fun stuff can start so i'm tackling that part first. :help:

Do you still rub after putting the SPC arms at the G settting? I have 315/75/16 duratracs on order and plan on tubbing the firewall but it would be nice to avoid it...
 
I'm doing a very similar build right now with a 99 5 speed, just a rig to haul the mountain bike around and to recover my fish house off the lake in the winter time, although in MN builds require rust repair before the fun stuff can start so i'm tackling that part first. :help:

Do you still rub after putting the SPC arms at the G settting? I have 315/75/16 duratracs on order and plan on tubbing the firewall but it would be nice to avoid it...

tubbing is the way to go. I have a slight rub when backing down my driveway but that's about it. I've not had the wheels fully turned when off-road so no comment on if it rubs there. I'm a bit afraid of breaking a CV axle in that situation. Regardless, a little hammering was necessary even with the G setting. With 315's being slightly narrower than my 12.5" wide tires, I think you might be good.
 
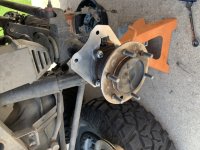
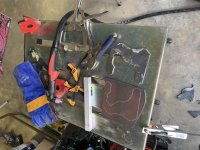
Getting closer on the brake caliper brackets. Today I printed the template and traced it onto thin sheet metal first and cut that out to test fit. You can see how the caliper bracket is sitting 2mm higher in the front than in the rear hence the pads are not straight on the rotor. I'll adjust by changing the drilled holes for the caliper bracket in the real adapter plates.

You can see I have *just* enough scrap steel for the brackets. Otherwise I got one cut today, plasma is messy on the opposite end of the cut and you have to grind off all the slag which takes a while and is my least favorite part of plasma cutting. Hopefully tomorrow I can get everything mounted up and maybe have time to bleed the brakes, add gear oil after the new seals, and give it a drive. E-brake will be installed later for sure.
 

Attachments

  • AB4DDF22-95B3-48CE-B69D-A8F027BDD7A7.jpeg
    AB4DDF22-95B3-48CE-B69D-A8F027BDD7A7.jpeg
    123 KB · Views: 591
  • C4A5019A-FFC8-4E24-9E7F-0607AD9CDE9E.jpeg
    C4A5019A-FFC8-4E24-9E7F-0607AD9CDE9E.jpeg
    97.1 KB · Views: 588
  • 4F598AAE-EB14-4BEC-B5EA-758BA37586B4.jpeg
    4F598AAE-EB14-4BEC-B5EA-758BA37586B4.jpeg
    126.5 KB · Views: 602
  • 425AE8C2-406F-497E-99CE-F94E97404116.jpeg
    425AE8C2-406F-497E-99CE-F94E97404116.jpeg
    96.1 KB · Views: 593
  • 8440532B-57D3-4484-B9D2-2B072C26AA26.jpeg
    8440532B-57D3-4484-B9D2-2B072C26AA26.jpeg
    121.4 KB · Views: 588
  • 69376773-4BA8-4EBB-BEE2-861A1F30550C.jpeg
    69376773-4BA8-4EBB-BEE2-861A1F30550C.jpeg
    126.9 KB · Views: 585
  • B1320BF3-C5CE-4564-8356-9A1A5F7B12A4.jpeg
    B1320BF3-C5CE-4564-8356-9A1A5F7B12A4.jpeg
    119.8 KB · Views: 602
Last edited:
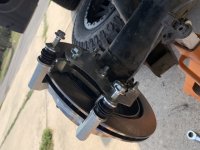
Finished the "real" brackets today and painted them. Unfortunately, I tried to adjust for the pads not being lined up and ended up having to drill out one of the caliper bolts a little extra to be able to thread the bolt in :frusty::doh: Hopefully not too big a deal as I see others have had to do this as well. We'll see how it holds up. I also didn't realize the calipers didn't come with banjo bolts so another trip to the parts store to get them and I think I'm all set now. Ran out of time to finish putting everything together today but hopefully I can finish and go for a test drive tomorrow. Then it's on to the e-brake setup, at least there, I was smarter and bought the kit from [MENTION=118207]midcoma[/MENTION] ...
 

Attachments

  • 12F1A191-56F6-4874-8F1F-05832D3D004D.jpeg
    12F1A191-56F6-4874-8F1F-05832D3D004D.jpeg
    134.5 KB · Views: 581
Last edited:
I got so excited putting it all together last night I forgot to take pics. But the brakes are done and it stops well enough :frog:

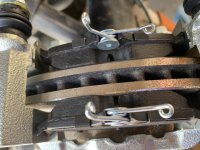
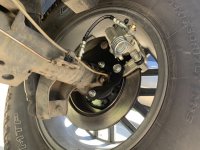
I'm going to drive it a bit to let the brakes settle in before bleeding again. The pedal isn't terrible but it's not great either. It's not diving in the front under breaking so I'd call that good (enough). Personally, I despise drum brakes and do not enjoy working on them, so to me, this is an improvement. I would not recommend doing this for any other reason than ease of future maintenance and only if you don't know how or like working on drum brakes. The drum brakes on our cars are plenty sufficient for the car.

Anyway, a few pics of the finished work and onto the e-brakes...
 

Attachments

  • 54EF641B-07A9-4944-8954-CAC7559F37E0.jpeg
    54EF641B-07A9-4944-8954-CAC7559F37E0.jpeg
    111.5 KB · Views: 567
  • 661BEADC-5244-4BBF-B207-C92D3348FDCA.jpeg
    661BEADC-5244-4BBF-B207-C92D3348FDCA.jpeg
    117.4 KB · Views: 552

Members online

Forum statistics

Threads
278,317
Messages
3,554,129
Members
248,016
Latest member
Advally Service

Trending content

Back
Top