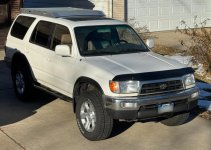
Ace's 1998 4Runner Build Thread

I just tried the u-bolt hardware that came with the SportRack box and it works- just had to move the crossbar at the front of the box forward.

After securing it the back of the box is about 1/2 inch from the raised wind deflector so I'll have to keep an eye on that.

Taking it out for a test drive to check noise & handling.
 
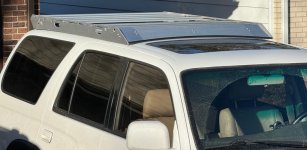
Sherpa Antero rack test drive -

Without the box the is a little wind noise (to be expected).

With the SportRack Xl box in place there is a definite rumble. It may have been there on the Suburban too but I didn't notice it because it was farther away from the driver's seat.

I opened the sun roof at 65 and there was definitely some air noise coming from the front of the box as it was just aft of the sunroof.

It wasn't that bad and I could't hear it with the music turned up.

I'm looking at installing some slot covers that slide into the cross bar openings, might reduce noise and will keep the channels clear-

Amazon.com

61w+7EAnyiL._SL1500_.jpg
 
Last edited:
Installed the extrusion slot covers into the 1st/front cross bar of the Antero rack this morning.

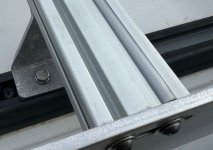
Here is the crossbar without covers...they are open to collecting dirt & ice as well as making noise -
 

Attachments

  • IMG_9093.jpg
    IMG_9093.jpg
    51.8 KB · Views: 238
and here is the cross bar with all of the slots filled (even the bottom two) -
 

Attachments

  • IMG_9095.jpg
    IMG_9095.jpg
    51.8 KB · Views: 804
One package in the Amazon link is enough to do one cross bar on the Antero rack.

They are easy to install and remove and it's my hope that they will reduce air noise.

There are a lot of colors available - I chose silver to have them blend in.

I'm not sure how well they will manage the sun & weather so time will tell. I ordered enough to do all of the cross bars on my rack.
 
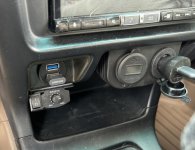
Yesterday I installed a small SPST rocker switch to disable the alarm audio sensor. This will allow me to leave my dog in the locked T4R and she won't be able to set off the alarm by barking or other noise.

Today I addressed a drivetrain rumble present at highway speeds (60 -75). Physical inspection of the cardan & u-joints on the axles looked fine so I removed the rear driveshaft and took it for a run in 4WD. The vibration was gone so I replaced the rear u joint and when I went to install the driveshaft I discovered a lot of play at the companion flange at the back of the transfer case.

I installed the driveshaft and took it for a test drive and found that the vibration had changed- gone under load but present when lifting off the throttle.

I'll get a replacement nut for the companion flange and see if tightening it up will solve the issue. If not I'll have to replace the flange.
 
Last edited:
Solved the loose companion flange issue with a new nut from my local Toyota dealer. Added some blue Loctite 243 to the threads before torquing the nut & staking.

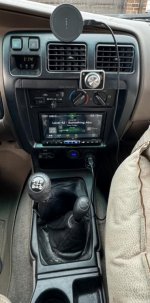
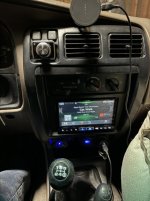
Also installed an Alpine RUX-H02 bluetooth volume/subwoofer control knob -
 

Attachments

  • IMG_9117.jpg
    IMG_9117.jpg
    49.5 KB · Views: 770
Last edited:
It's attached to the dash with velcro so I can easily move it if I want.

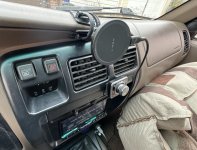
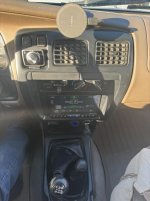
In the pic is my magnetic cell phone holder/charger -

The LISEN Magsafe Car Mount Charger works well and I mounted it to the dash using the adhesive tape on the mount -
 

Attachments

  • IMG_9118.jpg
    IMG_9118.jpg
    121.6 KB · Views: 754
Last edited:
I attached the switch for the alarm audio sensor to the side of the Bose subwoofer control knob using a big glob of hot glue -
 

Attachments

  • IMG_9119.jpg
    IMG_9119.jpg
    85.1 KB · Views: 765
I didn't like the remote volume knob where it was so I moved it over to the clock inset and it fits like a glove. The time is displayed on the iLX-507 screen -
 

Attachments

  • IMG_9122.jpg
    IMG_9122.jpg
    57.5 KB · Views: 769
Had a rumble at 65-75 mph in the 4Runner drivetrain, typically for these it's the rear U-joint that is bad. I removed the rear driveshaft and took it for a test drive in 4WD and the rumble was gone.

With the double cardan joint appearing fine I replaced the u-joint and when underneath discovered a LOT of play at the back of the transfer case at the companion flange. The staked nut was tight but the flange was moving behind the nut.

I went and bought a replacement nut at a dealer and after replacing it the flange was tight so I staked the nut, reinstalled the driveshaft and took it for a test drive.

On the drive I found the vibrations greatly diminished but changed- now it was only slightly apparent when at speed and decelerating.

I pulled the driveshaft again and test drove it to confirm it was still related to the driveshaft and not a wheel bearing or axle issue. I called around and after not getting good vibes from two shops that just wanted to sell me a $600 driveshaft (they wouldn't touch a double cardan joint) I then spoke with a third shop that seemed eager to evaluate the driveshaft for free and their rep online was top notch.

So I took it to this 3rd generation, family owned Mom & Pop driveshaft shop and they were great. They inspected it and were happy to see the HD Moog 387 u-joint that I installed and then told me that the double cardan joint appeared good but the balancer would tell the tale. I dropped it off yesterday and picked it up today, repaired for $80.

The owner told me the double cardan joint was fine but the propeller shaft was out of balance and slightly bent. He said that he sees them bent mostly by hitting the driveshaft off road or in a snow berm/pile on less travelled vehicles like mine. He straightened it out and added weights on both ends to get it balanced right and after greasing up the joints he even gave it a coat of paint.

So I brought it home, installed it and went for the test drive - success, no more vibration.
 
sounds like the other "shops" r just 3rd seller of parts and not a real drive-line shop like that last one, any shop afraid of double cardan isn't a driveshaft shop (a shop should be able to cut said off and weld to new shaft or joints to fit whatever application the customers needs, so the idea they won't replace a joint in said....)

The shop I use warned against Moog u-joints because they found issues with the caps being untrue (not perfect circle) that caused fitment issues (in fairness I've install a few and never had issue), they only use Precision U-joints on Toyota shafts.
Edit: I was corrected, he told me that what he said was that the caps are not size correctly, that some are slightly oversize and don't fit.
 
Last edited:
The HD Moog 387 greasable U-joint installed easily and without issue on my bench.

This is a good video on how to replace a 3rd gen ujoint without a press -

<iframe width="560" height="315" src="https://www.youtube.com/embed/9P7wkkdcFos?si=9Ps1cS7A_NDEAVqq" title="YouTube video player" frameborder="0" allow="accelerometer; autoplay; clipboard-write; encrypted-media; gyroscope; picture-in-picture; web-share" allowfullscreen></iframe>
 
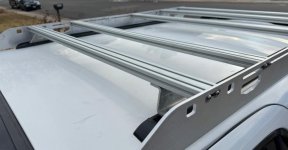
A few days ago I drove up the Sherpa Equipment main office in Berthod, Colorado and picked up a wind deflector from a Matterhorn rack and a scratch and dent cross bar to install on my Antero rack.

The Antero rack doesn't have this option but I wanted the deflector to reduce wind noise that I was getting from the rack.

I mounted the deflector to the cross bar with the supplied hardware and then sat it in place between the outer side rails. Once I had it where I wanted it I marked the sides of the cross bar with a sharpie and removed the assembly.

I transferred the hole locations from the end of the cross bar using masking tape that was trimmed to the size of the bar and then the screw holes punched in the tape. The tape was then aligned with the marks on the side rails and holes were drilled.

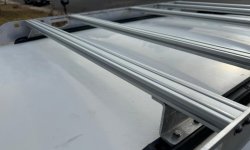
Here it is mounted - no trimming was necessary and on the test drive it sounded like the air noise was reduced -
 

Attachments

  • IMG_9141.jpg
    IMG_9141.jpg
    72.7 KB · Views: 646
  • IMG_9139.jpg
    IMG_9139.jpg
    105.7 KB · Views: 1,147
Last edited:
Installed set of Airlift airbags inside the rear springs to eliminate sag.

The kit came with enough air tubing to use a Tee & then one valve ie: the same pressure per side but I wanted separate lines & valves. The kit comes with two air valves but not enough line but fortunately I had extra line from an Airlift kit I installed in the past.

Overall it wasn't hard but I did drop each spring in order to properly cut the rubber inside the spring according to instructions.

Afterwards I found that the drivers side needed a lot more air pressure (with a full tank of gas) to be even with the passenger side so I believe that the springs need to replaced.

My plan is to drive it for a while to see if things settle out but most likely I'll be getting a new set of 1999 tall springs from Toyota & replacing the Bilstien 75K mile 4600 shocks with new.
 
Brakes got really soft last week & I found the rear passenger brake shield coated in oil.

When I removed the drum I found a black, gooey mess. I couldn't tell if the oil was brake fluid or axle lube since it was mixed with brake dust. The T4R has 233K miles so I drove over to my local Toyota dealer & bought a new inner oil seal for the axle.

I also ordered a set of brake shoes & wheel cylinders (always change in pairs) since I wasn't really sure where the leak was coming from and didn't want to take a chance on fouling the new set of brake shoes.

While I was waiting for parts to arrive I removed the axle and found a non-OEM inner axle seal that didn't have a steel shell, it was all plastic. I figured that this was a repair by a shop using off brand parts and the cheap seal just failed. So I R&R'd the seal & installed the axle.

When the parts arrived I cleaned everything up well, installed the new shoes & cylinders and bled the system with the Allstar one man bleeder.

Then I ensured the drums were adjusted correctly using the parking brake fine tuning after the initial "just starting to drag" installation procedure of the shoes.

When I test drove it the brakes were soft and when stopped the pedal would easily go almost to the floor. If I pumped them up and held pressure on the pedal the pedal would get tight & then slowly collapse to the floor.

So I ordered a new Advics (Asin) OEM replacement master cylinder from Rock Auto. When it arrived I bench bled it with this kit at Amazon and then installed it with a new Toyota gasket and then bled each corner with 40 pumps.

On the test drive I found the pedal to be somewhat soft although the sinking pedal of the 27 year old original master cylinder was cured so I took it to a dirt rode and activated the ABS about 10 times to purge old fluid and possibly trapped air - brakes back to normal.

 
Last edited:
Nice build thread!

How are those Powerstop calipers holding up for you? Im on the fence with them for my TBU project. Love to hear your feedback.

Any new updates to the 4runner? Thanks!
 

Members online

Forum statistics

Threads
278,308
Messages
3,554,057
Members
248,016
Latest member
Advally Service

Trending content

Back
Top