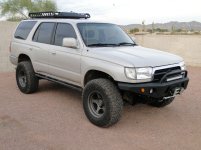
AllPro Apex Front Bumper

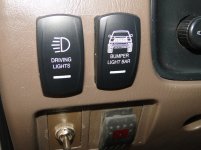
OEM fog light switch in place. This is going to control my LED light bar.

20141031_164147_zpscuh5xj1d.jpg~original
 
Skid plates have been added to the discount, and you can take 15% off those as well.
If you're going to be ordering please contact me.

Discounted pricing: 10/30-11/28
  • Apex Bumper- $595
  • LED Hoop- welded on $75; unwelded $64
  • Center Hoop- welded on $75; unwelded $64
  • Full Hoops- welded on $200; unwelded $170
  • Large & Small Skid Plate Combo- $170
  • Large IFS Skid Plate- $110
  • Small Transmission Skid- $68
Links
****Apex Bumper****
****Frame Modification****
****Skid Plates****
 
Last edited:
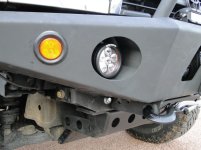
The bumper finally showed up today, and hopefully by the end of the weekend I'll have it installed. Below are some pictures of the bumper with the LED light bar hoop on it.

20141110_144049_zpsqegynwmi.jpg~original

20141110_144102_zpskqeba1ve.jpg~original

20141110_144124_zpsxzm1srlx.jpg~original

20141110_144033_zpsua79oip2.jpg~original

20141110_144015_zpsstqob3p1.jpg~original

20141110_144024_zpsgwsls8oq.jpg~original
 
Love the looks of this bumper, just not sure about the way it is shy of the flares. I wonder if they could extend the sides to match?
 
i really like the looks of it. The LED hoop looks like it is going to cover up most of the grille with it being so low.
 
Love the looks of this bumper, just not sure about the way it is shy of the flares. I wonder if they could extend the sides to match?

I don't think they'll modify the bumper that much, but it can't hurt to ask. I know it's not going to line up perfectly with the bumper, and that's fine with me. I already have the flares on my stock bumper removed as it is.

i really like the looks of it. The LED hoop looks like it is going to cover up most of the grille with it being so low.

I should cover just about all of it. We'll see this weekend if I have the time to get it mounted up.
 
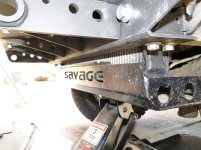
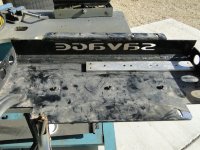
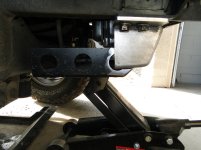
I bought one of these to go on my 96. Here is how I adapted my Savage skid plates to work with this bumper.

With the bumper mounted there is a 3/4"-1" gap between the front Savage skid plate and the Apex bumper. I plasma cut the front end out of the savage skid plate, leaving a 3/4" ledge along the front edge. I then cut the sides back to the center of the first hole and tangent to the bottom of the first hole. This allowed the Savage skid plate to nest neatly with the supplied radiator guard. I then welded the front Savage skid to the AP radiator guard.
 

Attachments

  • DSC01207.jpg
    DSC01207.jpg
    131.4 KB · Views: 1,019
  • DSC01211.jpg
    DSC01211.jpg
    133 KB · Views: 890
  • DSC01212.jpg
    DSC01212.jpg
    106.9 KB · Views: 829
going to install mine today hopefully

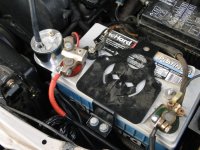
My install took a solid 2 days. Spent a few hours of that installing a battery box and, wiring the winch/lights and coming up with a new overflow can. Couple of things to watch out for -

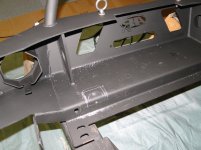
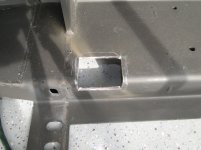
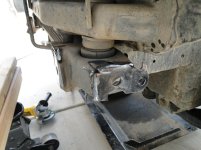
The side tabs that are supposed to attach to the existing tapped holes in the body mount bracket did not line up. I ended up cutting the front one off to get the holes to line up on the underside of the framerails. I then drilled a new hole thru the bumper tabs and the center of the body mount bracket, attached with a 1/2" bolt and nut.

One of the A/C lines also required me to notch the bumper so it would clear. I took the piece I cut out of the bumper, flipped it over and welded it back on.

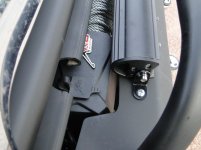
Also forgot to mock up the winch solenoid box. Could not get it to fit without clearancing the top of the bumper.
 

Attachments

  • DSC01195.jpg
    DSC01195.jpg
    111.3 KB · Views: 777
  • DSC01202.jpg
    DSC01202.jpg
    115 KB · Views: 788
  • DSC01201.jpg
    DSC01201.jpg
    115.1 KB · Views: 778
  • DSC01226.jpg
    DSC01226.jpg
    87.6 KB · Views: 830
Front is sitting about an inch low, will adjust the ride height later.
 

Attachments

  • DSC01236.jpg
    DSC01236.jpg
    137.6 KB · Views: 1,621
  • DSC01222.jpg
    DSC01222.jpg
    133.4 KB · Views: 6,615
  • DSC01223.jpg
    DSC01223.jpg
    107 KB · Views: 2,584
  • DSC01233.jpg
    DSC01233.jpg
    114.5 KB · Views: 1,589
Last edited:
[MENTION=116808]Azrckcrawler[/MENTION] well we did it, took about 8 hours but we didn't work continuously. I think its a great looking bumper, but if you have a body lift I'm not sure its worth the effort. There was a lot of cutting done and ended up pulling my ac line off since it didn't work anyways (onboard air?) I'll post up pics tomorrow and then more once I get the hoops built

 
I could have used another set of hands. Had to come up with creative ways to get this thing on/off. Put a complete write-up on my site for reference. The site navigation gets messed up if you use the direct link so if you want to see the entire project go to AZ Rockcrawler.com, then select Project 4Runner on the left.

or direct link:

Project 4Runner
 

Members online

Forum statistics

Threads
278,309
Messages
3,554,068
Members
248,016
Latest member
Advally Service

Trending content

Back
Top