
You are using an out of date browser. It may not display this or other websites correctly.
You should upgrade or use an alternative browser.
You should upgrade or use an alternative browser.
Another Bilstein 5100 question
- Thread starter ATLQuicksilver
- Start date


Timeslot
New member
It rides better. Firmer but not harsh. Doesn't wollow around as much. Reduced nose dive. I went with new springs for those results. I had the bilsteins set at .85 with stock spings and stock rear. I liked the level look vs stock but it was still too soft. This setup seemed to be a short lift with new springs. I could have went with Dobbinsons though. I may put 10mm spacer in front if the rear doesnt settle a little. It may be perfect with some weight in the rear. Pics are with little weight in rear.
2016 Trail
2016 Trail
Last edited:

sn_85
Senior Member
Can you tell us about the changes in the ride / driving characteristics?
Analysis paralysis my friend. I did the same thing. Pick a setup and don't look back. You'll be much happier/relieved when you do

It rides better. Firmer but not harsh. Doesn't wollow around as much. Reduced nose dive. I went with new springs for those results. I had the bilsteins set at .85 with stock spings and stock rear. I liked the level look vs stock but it was still too soft. This setup seemed to be a short lift with new springs. I could have went with Dobbinsons though. I may put 10mm spacer in front if the rear doesnt settle a little. It may be perfect with some weight in the rear. Pics are with little weight in rear.
2016 Trail
Yours looks pretty good! I just ordered the same rear coil's and this is pushing me towards ordering up a set of front coil's instead of running stock. Mine is a 16 Trail also. Does yours by chance have KDSS?
Lift installed. Netted 2” front & rear which is about what I was after.
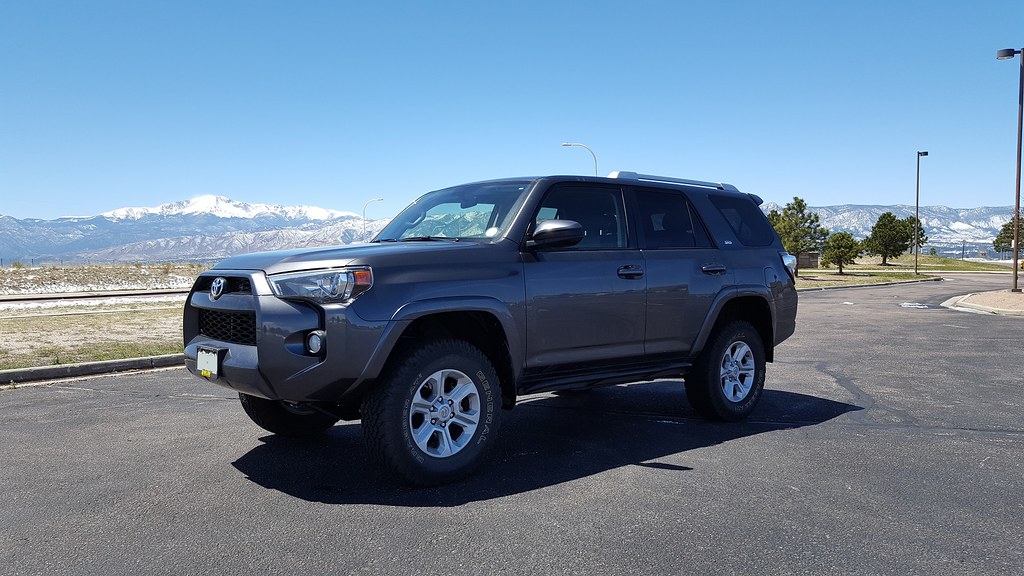
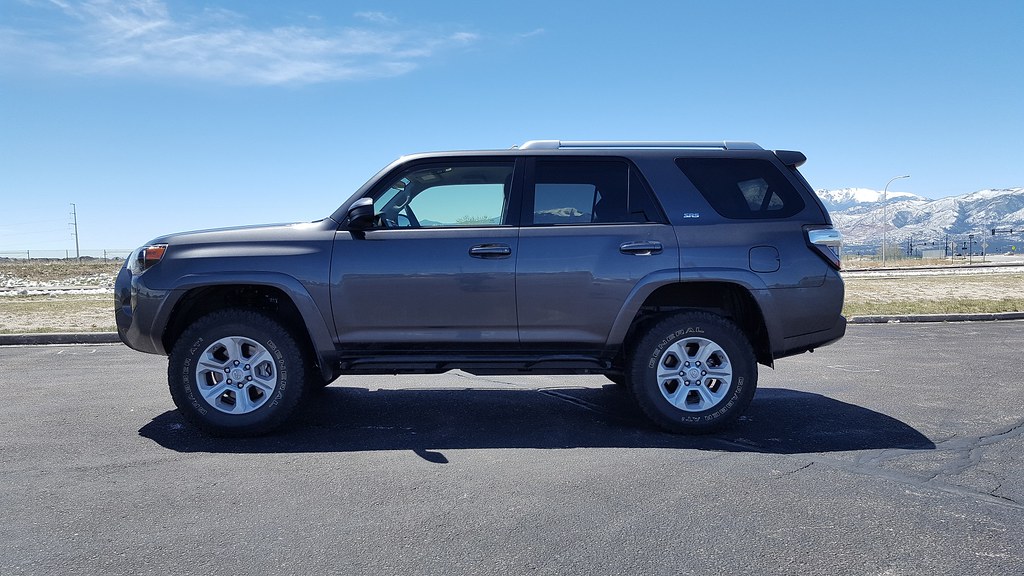
Before (note, great day for install, huh?):
(265/70/17 Gen Grab AT2, full set of steel Shrock skids plus sliders, 3rd row)
Driver, F: 34 1/4", R: 35 3/4"
Pass, F: 34 1/4", R: 36 1/4"


Front: Stock springs, Bilstein 5100s set to 1.75”, plus 1/4" poly top plate spacers from Wheeler’s.
Rear: Stock springs & shocks (for now…), Daystar 1.5” spacers, plus Firestone air bags.
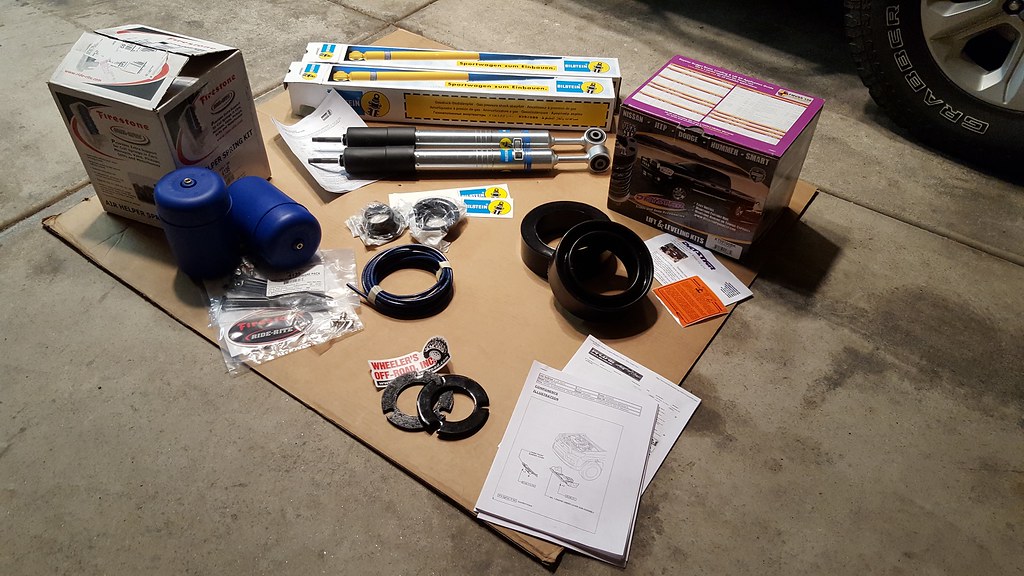
Alright, I apologize ahead of time for the photo bomb, but hopefully it helps somebody else along the way.
A few pointers I gleaned in the process:
TIP:
Not sure I’ve seen this mentioned before, but I just about overlooked it and really would have been second guessing myself were it not for the FSM linked for download elsewhere on this site. Installing the front, you need to be sure the lower part of the spring faces the REAR of the vehicle on BOTH SIDES. I probably would have installed the passenger side backwards were it not for the stock set-up causing me a little pause.


TIP:
I’ve seen several people post about fighting the LCA to get the coilover out, having to use some kind of leverage device to push it down, try to wrestle things around the sway bar & tie rod ends, et al. I did too on the first side and installing by myself, would have really appreciated an extra set of hands from a helper. On the second side, I happened to loosen both LCA adjusters beforehand and the whole arm dropped right out of the way, allowing the coilover assembly to be easily removed. Do yourself a huge favor and FULLY LOOSEN THE LCA BOLTS!!

TIP:
Save yourself a lot of headache down the road and pull the LCA bolts out now and COAT THEM WITH ANTI-SEIZE. Takes essentially no time at this point but will hopefully save you from seized bolts, sawzall, and torch later.

TIP:
I used TWO SETS OF SPRING COMPRESSORS to compress the coil. My pneumatic ratchet was not up to the task with only one set and you are not even supposed to use air tools on these things in the first place, so I wasn’t about to try my impact gun on them. Cannot imagine doing this by hand with just a ratchet!

Bilstein assembly with Wheeler’s poly spacers ready to go in:

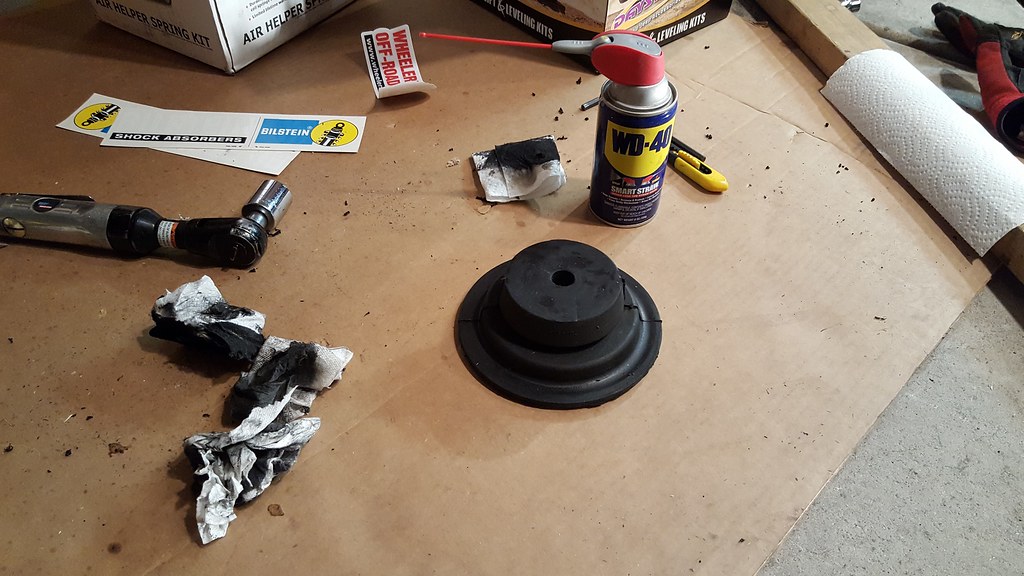
For the back, since I was installing a coil spacer that installs over the top of the stock bump stop, I left one segment of the factory bump stop in place, more or less the same height as the spacer. I cut it with a hand saw, then smoothed it out with a flap disc on my angle grinder… DON’T DO THAT!!! The high heat developed slung a tar-like mess of sticky fragments all over my work area… the back yard, in this case, which our dog proceeded to step in and track all around the house over the next several days. Doh!! WD-40 worked well to clean up the tacky remnants/surface, but didn’t find anything to help in the backyard rocks short of hand picking out the yuck as best I could and covering with a new layer of rock.
TIP:
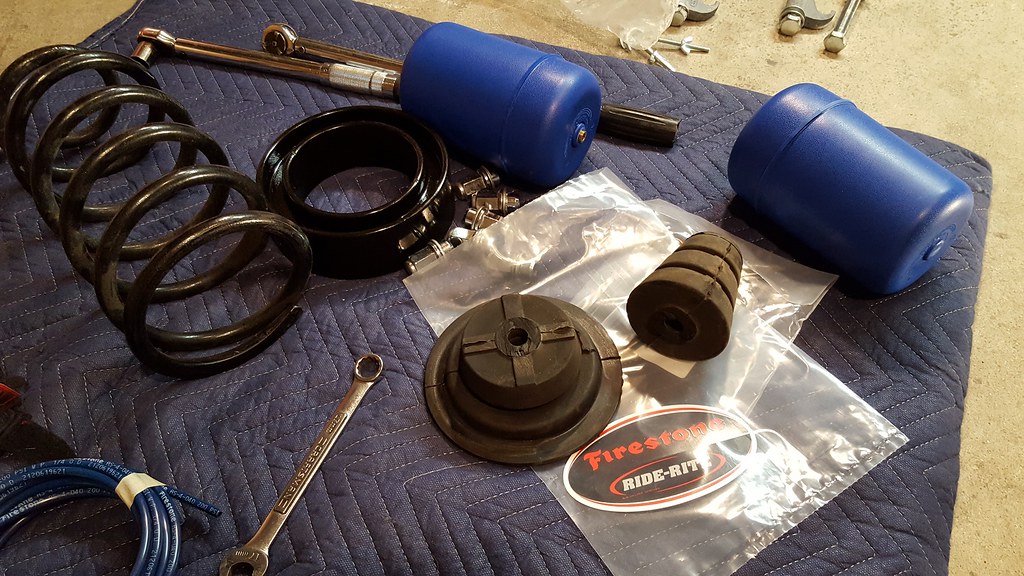
Seems Toyota is using a couple different isolator/bump stop sizes for our 5th gens. Be sure to CHECK BEFORE ORDERING! Short of pulling it out altogether, I found I was able to tell it was 5.0” and not 4.6” by jacking up the rear end and eye balling it close enough using a set of calipers. I needed the 5.0” model, KT09100BK. Props to Wayne @ Daystar for fielding all my email questions along the way, too.

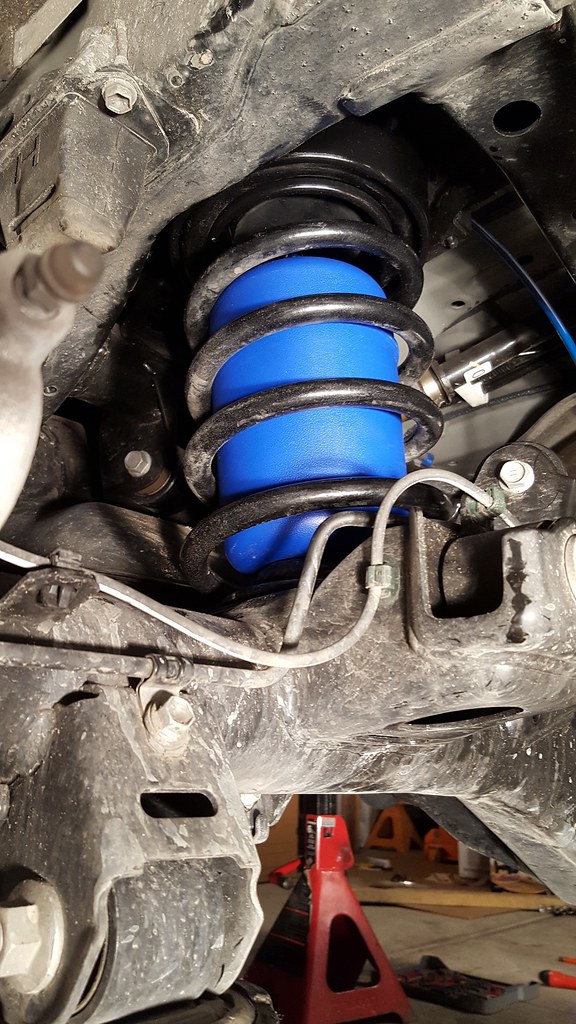
Rear installed:
Before (note, great day for install, huh?):
(265/70/17 Gen Grab AT2, full set of steel Shrock skids plus sliders, 3rd row)
Driver, F: 34 1/4", R: 35 3/4"
Pass, F: 34 1/4", R: 36 1/4"
Front: Stock springs, Bilstein 5100s set to 1.75”, plus 1/4" poly top plate spacers from Wheeler’s.
Rear: Stock springs & shocks (for now…), Daystar 1.5” spacers, plus Firestone air bags.
Alright, I apologize ahead of time for the photo bomb, but hopefully it helps somebody else along the way.
A few pointers I gleaned in the process:
TIP:
Not sure I’ve seen this mentioned before, but I just about overlooked it and really would have been second guessing myself were it not for the FSM linked for download elsewhere on this site. Installing the front, you need to be sure the lower part of the spring faces the REAR of the vehicle on BOTH SIDES. I probably would have installed the passenger side backwards were it not for the stock set-up causing me a little pause.
TIP:
I’ve seen several people post about fighting the LCA to get the coilover out, having to use some kind of leverage device to push it down, try to wrestle things around the sway bar & tie rod ends, et al. I did too on the first side and installing by myself, would have really appreciated an extra set of hands from a helper. On the second side, I happened to loosen both LCA adjusters beforehand and the whole arm dropped right out of the way, allowing the coilover assembly to be easily removed. Do yourself a huge favor and FULLY LOOSEN THE LCA BOLTS!!
TIP:
Save yourself a lot of headache down the road and pull the LCA bolts out now and COAT THEM WITH ANTI-SEIZE. Takes essentially no time at this point but will hopefully save you from seized bolts, sawzall, and torch later.
TIP:
I used TWO SETS OF SPRING COMPRESSORS to compress the coil. My pneumatic ratchet was not up to the task with only one set and you are not even supposed to use air tools on these things in the first place, so I wasn’t about to try my impact gun on them. Cannot imagine doing this by hand with just a ratchet!
Bilstein assembly with Wheeler’s poly spacers ready to go in:
For the back, since I was installing a coil spacer that installs over the top of the stock bump stop, I left one segment of the factory bump stop in place, more or less the same height as the spacer. I cut it with a hand saw, then smoothed it out with a flap disc on my angle grinder… DON’T DO THAT!!! The high heat developed slung a tar-like mess of sticky fragments all over my work area… the back yard, in this case, which our dog proceeded to step in and track all around the house over the next several days. Doh!! WD-40 worked well to clean up the tacky remnants/surface, but didn’t find anything to help in the backyard rocks short of hand picking out the yuck as best I could and covering with a new layer of rock.
TIP:
Seems Toyota is using a couple different isolator/bump stop sizes for our 5th gens. Be sure to CHECK BEFORE ORDERING! Short of pulling it out altogether, I found I was able to tell it was 5.0” and not 4.6” by jacking up the rear end and eye balling it close enough using a set of calipers. I needed the 5.0” model, KT09100BK. Props to Wayne @ Daystar for fielding all my email questions along the way, too.
Rear installed:
(continued...)
After (the next day/24 hours later, my how the weather changes quickly around here, lol):
(10 psi in rear bags)
Driver, F: 36 1/4", R: 37 7/8"
Pass, F: 36 1/2", R: 37 7/8"


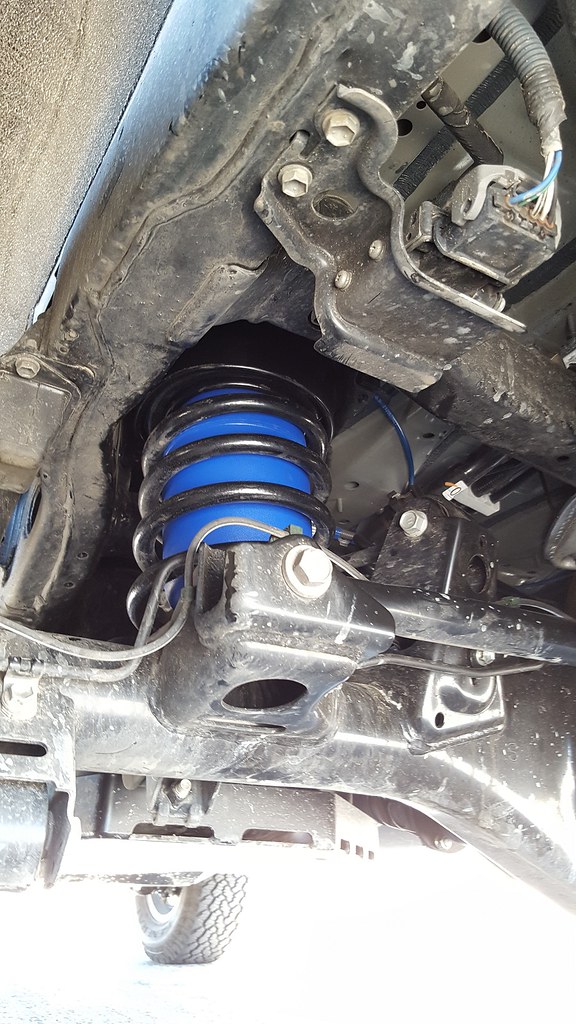
Final install, front & rear:

I used a T fitting on my airline for a single inflation point and better bag equalization/a bit more flexibility offroad. This looked as convenient a place as any for my air bag inflation valve at midnight after a long day:

Alignment, before and after. I specifically requested they max out the caster, but received a phone call 45 minutes after dropping it off that it was already done. They could certainly have done better had they spent some more time on it. I’ll try again another day/another location since I have a lifetime alignment service anyway, but until then it is not too far out of spec and seems to drive okay.


Dropped by the local dealer for a poser shot on the way home. Amazing how a small lift and some beefier meats really changes the look of these things!

Big thanks to all who’ve provided information, feedback, photos, etc in this thread and others. Sure helped research, visualize things and prepare along the way! A specific shout out to [MENTION=122557]ATLQuicksilver[/MENTION] for the photos/PMs, [MENTION=65614]Antman[/MENTION] & [MENTION=48991]sp8ball[/MENTION] for the install threads, and [MENTION=51294]nashman69g[/MENTION] for the downloadable FSM!!
After (the next day/24 hours later, my how the weather changes quickly around here, lol):
(10 psi in rear bags)
Driver, F: 36 1/4", R: 37 7/8"
Pass, F: 36 1/2", R: 37 7/8"
Final install, front & rear:
I used a T fitting on my airline for a single inflation point and better bag equalization/a bit more flexibility offroad. This looked as convenient a place as any for my air bag inflation valve at midnight after a long day:
Alignment, before and after. I specifically requested they max out the caster, but received a phone call 45 minutes after dropping it off that it was already done.
They could certainly have done better had they spent some more time on it. I’ll try again another day/another location since I have a lifetime alignment service anyway, but until then it is not too far out of spec and seems to drive okay.
Dropped by the local dealer for a poser shot on the way home. Amazing how a small lift and some beefier meats really changes the look of these things!
Big thanks to all who’ve provided information, feedback, photos, etc in this thread and others. Sure helped research, visualize things and prepare along the way! A specific shout out to [MENTION=122557]ATLQuicksilver[/MENTION] for the photos/PMs, [MENTION=65614]Antman[/MENTION] & [MENTION=48991]sp8ball[/MENTION] for the install threads, and [MENTION=51294]nashman69g[/MENTION] for the downloadable FSM!!
Last edited:

ATLQuicksilver
New member
(continued...)
Big thanks to all who’ve provided information, feedback, photos, etc in this thread and others. Sure helped research, visualize things and prepare along the way! A specific shout out to [MENTION=122557]ATLQuicksilver[/MENTION] for the photos/PMs, [MENTION=65614]Antman[/MENTION] & [MENTION=48991]sp8ball[/MENTION] for the install threads, and @nashman69 for the downloadable FSM!!
We are all here to help each other out.
That was my original plan as I was worried about kinking the line under articulation, but Firestone specs these installing upwards like this as opposed to downward like the Air Lift version and the line moves plenty freely thru the 3/4" clearance hole. That, and this looked simpler... it was late enough, lol. I've got plenty of left over airline if I have any problems and need to redo things later.
Does the height setting have anything to do with the ride stiffness? Im running 2.5/1.5 with factory springs with ko2's and it seems a litte too harsh for me... not sure if its just the difference a real tire makes or if its the springs because the 5100 changed the preload.

MidWesT4R
New member
lean on .85??
So I have the 5100s (all 4) and 2 OME 10mm spacers because I wanted to retain a little forward rake.. I'm doing the .85 setting up front (using stock springs and coils) and my question is, should I just put a single 10mm packer on the drivers side rear and leave the passenger rear stock to compensate for any "lean" from the subtle lift?? Or leave the rear completely alone with no spacers at all? I want to make sure I still yield somewhat of a forward rake..but NO REVERSE RAKE. I initially bought two 10mm packers to just raise the rear slightly to avoid the rear rake. But I was recently told by a member on here that the "lean" increases when raised and recommends just putting a single packer on the drivers side only. Yet I see guys on here with no packer at all in the rear, due to it only being a .85 lift... Any suggestions are welcome. Thank you.
So I have the 5100s (all 4) and 2 OME 10mm spacers because I wanted to retain a little forward rake.. I'm doing the .85 setting up front (using stock springs and coils) and my question is, should I just put a single 10mm packer on the drivers side rear and leave the passenger rear stock to compensate for any "lean" from the subtle lift?? Or leave the rear completely alone with no spacers at all? I want to make sure I still yield somewhat of a forward rake..but NO REVERSE RAKE. I initially bought two 10mm packers to just raise the rear slightly to avoid the rear rake. But I was recently told by a member on here that the "lean" increases when raised and recommends just putting a single packer on the drivers side only. Yet I see guys on here with no packer at all in the rear, due to it only being a .85 lift... Any suggestions are welcome. Thank you.
So I have the 5100s (all 4) and 2 OME 10mm spacers because I wanted to retain a little forward rake.. I'm doing the .85 setting up front (using stock springs and coils) and my question is, should I just put a single 10mm packer on the drivers side rear and leave the passenger rear stock to compensate for any "lean" from the subtle lift?? Or leave the rear completely alone with no spacers at all? I want to make sure I still yield somewhat of a forward rake..but NO REVERSE RAKE. I initially bought two 10mm packers to just raise the rear slightly to avoid the rear rake. But I was recently told by a member on here that the "lean" increases when raised and recommends just putting a single packer on the drivers side only. Yet I see guys on here with no packer at all in the rear, due to it only being a .85 lift... Any suggestions are welcome. Thank you.
If you aren't lifting the rear any at all I would let it be.... What would change if only lifting the front? If you are currently level side to side on all 4 corners and want to boost the rear a tad then lift the rear equally....10mm spacers on both rear sides would make sense..
Timeslot
New member
Some people have stated that the 2.5 setting rides a little stiff but I think the tires make a big difference especially if they are E load range.Does the height setting have anything to do with the ride stiffness? Im running 2.5/1.5 with factory springs with ko2's and it seems a litte too harsh for me... not sure if its just the difference a real tire makes or if its the springs because the 5100 changed the preload.
2016 Trail
Timeslot
New member
Do the front first and see how you like it then add spacers in the back if necessary. I had .85 up front for a while with no spacers in the back and I liked it. I don't have much weight in the rear. I have since went 2.5/1.5So I have the 5100s (all 4) and 2 OME 10mm spacers because I wanted to retain a little forward rake.. I'm doing the .85 setting up front (using stock springs and coils) and my question is, should I just put a single 10mm packer on the drivers side rear and leave the passenger rear stock to compensate for any "lean" from the subtle lift?? Or leave the rear completely alone with no spacers at all? I want to make sure I still yield somewhat of a forward rake..but NO REVERSE RAKE. I initially bought two 10mm packers to just raise the rear slightly to avoid the rear rake. But I was recently told by a member on here that the "lean" increases when raised and recommends just putting a single packer on the drivers side only. Yet I see guys on here with no packer at all in the rear, due to it only being a .85 lift... Any suggestions are welcome. Thank you.
2016 Trail

Brookey_813
New member
This might be a stupid question :bolt:, but here it goes...annnd I'm not sure if somebody has already covered this buuut... Does leveling/lifting without large tires make your turn radius better? I really do not like my turning radius now with the 5th gen. Miss my 3rd gen turning radius.

3wbdriver
New member
This might be a stupid question :bolt:, but here it goes...annnd I'm not sure if somebody has already covered this buuut... Does leveling/lifting without large tires make your turn radius better? I really do not like my turning radius now with the 5th gen. Miss my 3rd gen turning radius.
Won't change. The turn bump stops are attached to the lower control arms. The swivel points on those does not change.

dawudih
New member
Does the height setting have anything to do with the ride stiffness? Im running 2.5/1.5 with factory springs with ko2's and it seems a litte too harsh for me... not sure if its just the difference a real tire makes or if its the springs because the 5100 changed the preload.
For me, it was defiantly the shocks set to 1.75". I ran with original tires for a couple of weeks just to make sure. I later switched to 275/70 ko2's & not much difference in ride, just a lot heavier.
I'm going to drop the front to 0.85" with a 0.4" front spacer to reduce the increase in preload but maintain the height.
Similar threads

- Replies
- 4
- Views
- 3K


