ANTMAN'S Thread

Although I'll never ever ever do a quarter of the mods you've done, you, sir, are an inspiration. Very impressed to say the least.

It's going to break your heart when you sell this thing in the future. lol

...naaah. You should have seen my GTI. THAT broke my heart to sell!

Plus I think I'll keep this one awhile. I kinda like it :)
 
...naaah. You should have seen my GTI. THAT broke my heart to sell!

Plus I think I'll keep this one awhile. I kinda like it :)

PM me some pics. I, too, came from a VW only household. Actually, my wife still has hers, and still wants a Vdub for her new car.
 
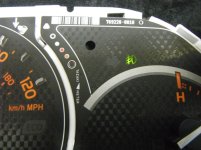
Very cool. I wonder how many warranties you've voided so far! j/k. Looks great. (I know you will end up getting the green LED, it's driving you crazy already isn't it?) ;)

Ummm- just got back from Baynesville Electronics. Green LED in hand...

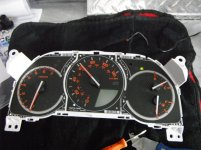
Pretty soon this dash will take itself apart!
 
Last edited:
Let the record show that i am officially nominating Antman for T4R.org Member of the month, for his crazy LED/fog light mod!
 
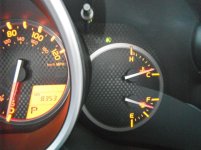
Just for the record- I like the green ALOT better. I'm done taking the dash apart for awhile! Good news is switching this out start to finish only took 45 mins.

Dare I say it???


THIS MOD IS DONE!!!!!!!!!!!!!:bravo::cheers:


011.jpg

012.jpg

013.jpg
 

Attachments

  • 011.jpg
    011.jpg
    88.7 KB · Views: 20,462
  • 012.jpg
    012.jpg
    95.8 KB · Views: 20,459
  • 013.jpg
    013.jpg
    87 KB · Views: 20,418
so it looks like the lack of the LED not lighting nagged you to long enough for you to cut into your cluster. Now you can change all the LED's to different colors and have a rainbow cluster. So Gay :lol:

Keep the mods coming...
 
so it looks like the lack of the LED not lighting nagged you to long enough for you to cut into your cluster. Now you can change all the LED's to different colors and have a rainbow cluster. So Gay :lol:

Keep the mods coming...

I don't know what's going on in Louisiana, but no rainbows for me, thank you...:50cal:


BTW- Thanks for your help with this mod!
 
I've thought about swapping out for the optitron dash, does anyone know what that entails or is it a straight one to one swap?

Great thread antman, you are one fearless modder. I like most of your mods but won't attempt them but if I ever did I know I could come back to some of your write ups to get the job done. Keep up the good work.
 
Last edited:
Completed this mod yesterday thanks to Antman. getting the little plug out of the stalk is very, very difficult. Like Antman, i put the little plug back in the factory spot when i was done. but instead of taping off the ends I put connectors on each end in case I want to reconnect everything like it was. this made me think, why did I disconnect that pita plug in the first place?! If i were to do this again I'd just cut the wires and leave the plug, plugged in.
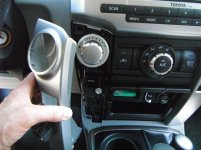
 
Completed this mod yesterday thanks to Antman. getting the little plug out of the stalk is very, very difficult. Like Antman, i put the little plug back in the factory spot when i was done. but instead of taping off the ends I put connectors on each end in case I want to reconnect everything like it was. this made me think, why did I disconnect that pita plug in the first place?! If i were to do this again I'd just cut the wires and leave the plug, plugged in.
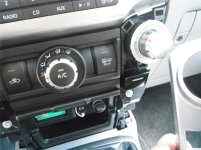
Nnnnnnooooo!! Everyone must suffer and remove the plug!

Why DID I put myself through that? Good point, sir.
 
ANTMAN MOD #5

12V Outlet Mod.
This mod allows you to use your factory 12V outlet in two different ways via a switch. The outlet will either function exactly like it does now, meaning 12v power during ignition-on only, or 12v power all the time, your choice. I find it most useful for charging my phone overnight, or charging my GPS for the return trip home…
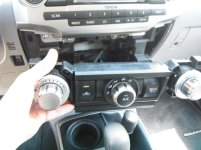
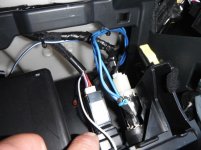
Yes. This MOD requires cutting, and drilling big ¾” holes :wtf: in Toyota plastic, yikes!! Truth be told- you only have to cut 1 tiny little green wire, and you can put the switch anywhere, so technically speaking-
You don’t need to drill a hole at all. Sticky-tape the switch to your dash, if that’s your thing. :)

Here’s what you need for the MOD:
<O:p
</O:p
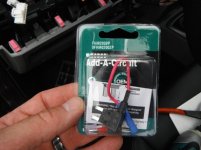
· Mini Fuse tap
· 10A Mini Fuses (2)
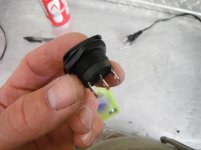
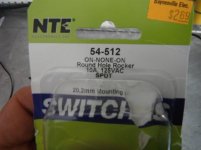
· SPDT switch.
· 16ga wire


<O:p</O:p
029.jpg


016.jpg

... hand is lookin' a 'lil bit rough. . .
017.jpg


<O:p</O:p
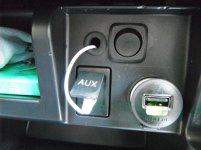
This is what the finished MOD looks like.

<O:p</O:p
002.jpg


<O:p</O:p
The white wire coming out of the hole is another mod for my CB- so ignore that, OK? The 12V MOD is just the switch- that’s it. I also chose to remove the flip-down cover over the 12V outlet. I just plugged in my USB adaptor, which has a built in LED, and I have visual indication of whenever the outlet is powered on.

Still in? Read on, my friends…


Before you ask, yes this MOD can be performed for the rear 12V outlet the same way, or you can check out what my friend REATA did with his… HERE… :bigok:


** Continued
 

Attachments

  • 029.jpg
    029.jpg
    68.9 KB · Views: 20,977
  • 016.jpg
    016.jpg
    47.5 KB · Views: 20,700
  • 017.jpg
    017.jpg
    49.2 KB · Views: 20,651
  • 002.jpg
    002.jpg
    89.5 KB · Views: 21,002
Last edited:
Start by pulling your dash apart. Everything just pulls towards you. Pics tell the story!


</O:p003.jpg

004.jpg

005.jpg


Disconnect the harness, and the strain-relief for the wire, and set all this stuff aside.


006.jpg


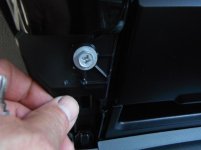
Get out the screwdriver, and remove these 2 screws on each side.

<O:p</O:p
</O:p
008.jpg


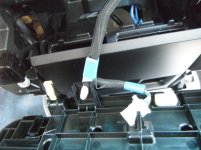
Now you can pull the panel down enough to get to what you need - the 12v
outlet wire connector.


010.jpg


NOTE- to take this panel out completely, you need to remove the top of the shifter console, and a bunch of other parts, so DON’T TRY TO RIP IT OUT!

Sorry for yelling…

<O:p</O:p

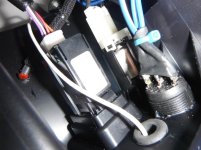
OK- yours won’t look like this inside, exactly. That’s because, the MOD is already done in the pic, and as SEATTLEMIKE pointed out, I’m trying to make my “interior look like one of those bad fiber-optic lamps from the 90’s”. , with all my orange accent LED's...

You can see one in the pic that lights up the storage area below the 12V outlet.


Confession-at last count I have 8 of those tiny orange LED’s lighting stuff up. I’m a geek.


Anyway- BacktotheMOD!


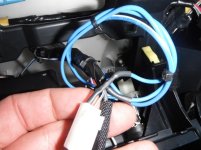
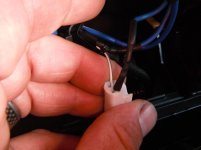
Remove wire connector from the 12V outlet. There are 2 wires attached to it. One is green. Cut the green wire.


<O:p</O:p
012.jpg


<O:p</O:p
Get your switch, decide where you want to mount it, and attach 16ga wire to each terminal. The switch I used required solder and heat shrink, but not all switches do…

Drill your hole. Mount your switch.

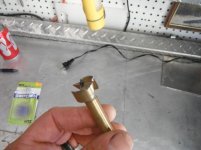
Check out what I drilled into my dash with! HA!


</O:p018.jpg


** Continued
 

Attachments

  • 003.jpg
    003.jpg
    89 KB · Views: 20,162
  • 004.jpg
    004.jpg
    89.6 KB · Views: 20,175
  • 005.jpg
    005.jpg
    82 KB · Views: 20,071
  • 006.jpg
    006.jpg
    95.9 KB · Views: 20,184
  • 008.jpg
    008.jpg
    42.2 KB · Views: 20,046
  • 010.jpg
    010.jpg
    87 KB · Views: 20,705
  • 012.jpg
    012.jpg
    52.8 KB · Views: 20,069
  • 018.jpg
    018.jpg
    63.6 KB · Views: 20,033
Last edited:
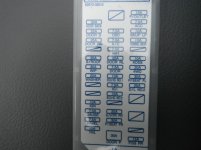
Get your Minitap, and plug it into a fuse blank that’s hot all the time. I utilized this unused spot- 4<SUP>th</SUP> down from the left labeled “DOOR RR”. Plug two 10amp fuses into the Minitap.

036.jpg


*** Time to make your connections


Let’s do the important one first:

1. The CENTER post on the switch must be connected to the green wire you cut, at the connector end (the end that plugs into the 12v outlet).

2. Pick an outside post and connect it to the cut green wire still attached to the wiring harness located in the dash.

3. The last outside terminal of the switch connects to the Minitap lead. Use the connector they provide.

<O:p</O:p
013.jpg


014.jpg
<O:p</O:p
(here's another good shot of that LED too)


That’s it , DONE! :moon:


Remember: :hello:


<O:p</O:p
CENTER OF SWITCH-------------GREEN WIRE AT 12v OUTLET WIRE CONNECTOR
OUTSIDE OF SWITCH-------------------------------GREEN WIRE AT HARNESS
OUTSIDE OF SWITCH-------------------------------MINITAP (12v constant+)

.
 

Attachments

  • 036.jpg
    036.jpg
    70.8 KB · Views: 21,169
  • 013.jpg
    013.jpg
    85.6 KB · Views: 20,026
  • 014.jpg
    014.jpg
    87.5 KB · Views: 19,983
Last edited:

Forum statistics

Threads
278,304
Messages
3,554,038
Members
248,016
Latest member
Advally Service

Trending content

Back
Top