ANTMAN'S Thread

You're a has been, replaced by all the new cool floor mat and bug deflector builds. Sad really how you try to hold onto your coolness well after it's expired :flipoff:

LOL- tell that to my PM box buddy.

I never took you for the jealous type...:pound::pound:
 
Hey Antman, spent a good portion of the morning going through all your posts, thanks for the great ideas and how to’s ...not sure I’m ready for some but you’ve given me hope a newbie can pull some of these off.
 
See this wire bundle? These are attached directly to the fog switch. Brown, and black under the shrinkwrap...


View attachment 46604
View attachment 46605


This plug is NOT easy to remove. I used a right angle pick on the top of the plug and pulled it out. Be patient here!


View attachment 46606

View attachment 46607


Cut the wires and connect each to a length of wire. I reinstalled the original plug (insulated), and shrinkwrapped the connections


View attachment 46608

View attachment 46609

View attachment 46610

View attachment 46611

If I may ask a question on this setup. Would it also work to just cut the wire as you did before and terminate it as you did. However this time do it with the plug still attached. Reasoning is based on you description of the process, it's a ***** to remove. This would eliminate that step as it looks like you are simply terminating that plug and redirecting the opposite end to your new destination correct?

Thanks
 
If I may ask a question on this setup. Would it also work to just cut the wire as you did before and terminate it as you did. However this time do it with the plug still attached. Reasoning is based on you description of the process, it's a ***** to remove. This would eliminate that step as it looks like you are simply terminating that plug and redirecting the opposite end to your new destination correct?

Thanks

Yes! It's actually mentioned a few posts later. It's one of those "Why did I even bother with that?" moments when I look back on it, lol.

Leave it there- much easier!
 
This is the first time I saw your thread, after seeing this "Antman" everywhere. I'm impressed!

Have you tackled the sleeping inside privacy issue yet? AkA, curtains or shades so pervs don't look inside while you sleep?

This is on my to-do list and haven't found anything inspirational yet.
 
This is the first time I saw your thread, after seeing this "Antman" everywhere. I'm impressed!

Have you tackled the sleeping inside privacy issue yet? AkA, curtains or shades so pervs don't look inside while you sleep?

This is on my to-do list and haven't found anything inspirational yet.

Perv Mod- lol. I only need that when [MENTION=47340]Titanpat57[/MENTION] is around.

I actually bought some cling (non-adhesive) dark window tint and have it over the rear quarter windows. It's cheap junk, BUT it does 2 things.

1- you absolutely CANNOT see inside.
2- Helps the fridge out by keeping sunlight from beating on it through the window.
It's kind of a pain because while backing up my boat I sometimes need to see out the pass side window and it's difficult. I can just pull it off if needed in a few seconds.

I may cover the driver's side with something more permanent though since I don't need to see out of that one while driving.

 
Perv Mod- lol. I only need that when [MENTION=47340]Titanpat57[/MENTION] is around.

I actually bought some cling (non-adhesive) dark window tint and have it over the rear quarter windows. It's cheap junk, BUT it does 2 things.

1- you absolutely CANNOT see inside.
2- Helps the fridge out by keeping sunlight from beating on it through the window.
It's kind of a pain because while backing up my boat I sometimes need to see out the pass side window and it's difficult. I can just pull it off if needed in a few seconds.

I may cover the driver's side with something more permanent though since I don't need to see out of that one while driving.

LOL I'll try it out.

The car peepers count in San Francisco is high. I'll google this. I'm thinking about sewing together some material and using suction cups, but after looking at the suction cups at Michael's, I think it will be really awkward.
 
LOL I'll try it out.

The car peepers count in San Francisco is high. I'll google this. I'm thinking about sewing together some material and using suction cups, but after looking at the suction cups at Michael's, I think it will be really awkward.

If you use dark tint (Antman’s temp or permanent) then put up a windshield screen (the kind to block the sun) folks really can’t see in. On occasion when I’ve been sleeping inside with folks nearby I pop the screen up in the windshield, that alone with the factory tint makes a big difference.
 
Rear Bumper Cup Holder - Lessons Learned

Antman,

First and foremost thanks for all of the amazing mod ideas.

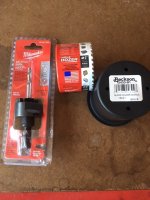
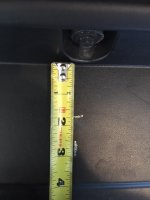
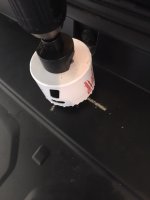
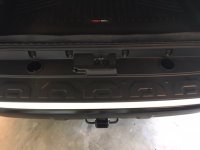
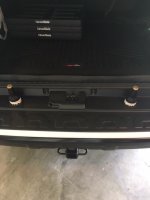
As I was watching the fourth of July parade with my kids baking in the 90 degree heat with no shade I resolved to just tailgate the damn thing next year. Of course this got me thinking about what mods to the 4Runner would make it the most enjoyable. The first thing that popped into my mind was the rear bumper cup holder mod. I knocked it out this morning and am overall happy with it, except for my bone head mistake measuring that resulted in the passenger side cup holder lip touching the vertical rise in the bumper and the driver side cup holder is 1/16 away from the vertical rise. Pissed me off something fierce. I will likely feel better once I drink a beer from the cup holder. Anyway...here are my lessons learned and thoughts on the mod:


1. Even with 2 3/4 hole saw the Dremel is needed to slightly enlarge the holes.
1A. I didn't own a dremel until this morning. I now want to Dremel everything.

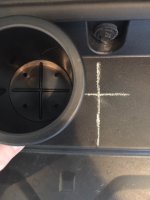
2. Chalk works well for marking up your bumper before cutting.
2A. I grabbed a piece of my daughter's yellow sidewalk chalk and it worked great.

3. There are vertical and horizontal lines / cross hairs on the inside of the cup holders from West Marine -- these are helpful when mocking up the cut ahead of time (draw the lines, then place the cup over the lines to get accurate view of placement).

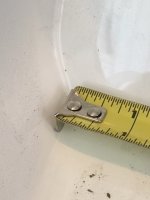
4. Either measure & mark both holes before cutting the first to ensure they are symmetrically placed OR once the first hole is cut, validate your second measure against the cut on the first. My cup holders are 1/16" off in the distance from the front and it's noticeable due to where the cup holder lip sits. I love the mod, but this will drive me crazy for all eternity.

5. If you have all of the tools and the cup holders in hand this should take you no more than 30 minutes.

6. There is some wiggle room for error from Antman's original measurements. Thank God.

7. The measurements Antman provided in 2011 still work on a 2018 TRDORP

8. This is super easy mod that just takes a bit of courage as you're placing a hole saw against the body of your baby.

9. Re-read #4 above again.
 

Attachments

  • IMG_2769.JPG
    IMG_2769.JPG
    127.4 KB · Views: 1,340
  • IMG_2773.JPG
    IMG_2773.JPG
    105.7 KB · Views: 1,309
  • IMG_2775.JPG
    IMG_2775.JPG
    103.6 KB · Views: 1,313
  • IMG_2790.JPG
    IMG_2790.JPG
    74.3 KB · Views: 1,322
  • IMG_2792.JPG
    IMG_2792.JPG
    63.3 KB · Views: 1,343
  • IMG_2793.JPG
    IMG_2793.JPG
    63.7 KB · Views: 1,358
  • IMG_2794.JPG
    IMG_2794.JPG
    67.6 KB · Views: 1,337

Members online

Forum statistics

Threads
278,306
Messages
3,554,045
Members
248,016
Latest member
Advally Service

Trending content

Back
Top