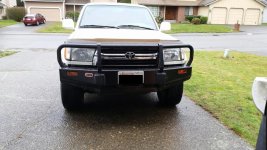
ARB Bumper Installation for 3rd Gen T4Rs: step-by-step

jsmithjr732

New member
Created a guide for those that need additional documentation when performing the install.

Link: https://docs.google.com/leaf?id=0B5...ZWViNWI2MzQ5NDU3&sort=name&layout=list&num=50

Alternate Link: http://dl.dropbox.com/u/17771739/ARB_bumper_install_3rd-gen_4runner.pdf

From the intro:
This install was created primarily based on the need to have a concise and documented procedure for installing an ARB bumper on a 3rd generation Toyota 4Runner. While the ARB instructions provide the necessary information to install the bumper, there is a shortage of pictures for 4Runner owners installing the Tacoma bumper. This install guide hopes to resolve that concern.

Disclaimer:
This install guide is provided AS-IS with no warranties expressed or implied. Use at your own risk and follow all safety procedures whenever working on your vehicle. If you have any questions regarding the installation, contact your ARB distributor or ARB directly at ARB 4x4 Accessories.

Enjoy!
 
Last edited:
Register to hide this ad
Nice write up. Those ARB instructions were a bit confusing to look at.


Thanks and agreed. If you look at the ARB instructions for a long enough time, they'll start to make sense. I thought it would be easier for us all if there was a 3rd gen 4runner specific version in one location.

Thanks to Brian2Sun for his review prior to upload as well as all of the others that have written install write-ups. I leveraged your information to help me document my install.
 
GREAT JOB JSMITHJR!!! :bravo:

I may be using this in the very near future. The only point that I thought could use some clarification is the exact location of the 1/2" hole you have to drill up through the bottom of the frame rail, and how you determine the location where you need to drill the hole. If you have any pictures of where you drilled, you might add that in there too. Otherwise, good work, and thanks for putting that up.
 
GREAT JOB JSMITHJR!!! :bravo:

I may be using this in the very near future. The only point that I thought could use some clarification is the exact location of the 1/2" hole you have to drill up through the bottom of the frame rail, and how you determine the location where you need to drill the hole. If you have any pictures of where you drilled, you might add that in there too. Otherwise, good work, and thanks for putting that up.

Thanks. I'll add it to the guide. When you install the absorbers, you'll see that the only hole in the bottom of it is where to drill. Matches up real nice with the top hole in the absorber as well.
 
great write-up! I might be getting a bumper soon and this would really help for install. You should add it to the tutorial, doc and reference sticky thread so people don't have to search for it.

again, great job
 
great write-up! I might be getting a bumper soon and this would really help for install. You should add it to the tutorial, doc and reference sticky thread so people don't have to search for it.

again, great job

Good idea. Just got to figure out how to do that. :)
 
Thanks for the write-up! I'm just wondering what your opinion is on the "end cap mod" a lot of people are doing, where you weld angle iron into the open end cap of the frame for another attachment point. It seems like overkill, especially since I'm not a huge rock crawler, and I'm not going to be pulling hard all the time. Are you confident in the existing mounting points for regular use?
 
Good stuff, now I can install my ARB with confidence......................:jk:, but thanks for the write-up.
 
question

My bumper doesnt look like the one in the picture. And I def didnt have the shock absorber.... I can make my bumper look like that one with some cutting but my question is. I have a 10000 lb winch that I am going to mount up to the arb bumper. If I got the shock absorber and cut my arb will it hold up if i need to winch myself out of something? Or should i just stick with what I have now?

I have a steel bracket welded to my frame and bolted to the arb right now.
 
Thanks for putting this together with pics.

One other install guide mentioned something about a slight frame mod across the front (not the mounting plate removal). Did you have to do anything like that?
 
I just purchased an ARB (5 minutes ago:reddance:) the guy I got it from had it in his Tacoma, he had a bracket that mounted accords the frame rails and the skid plate was mounted to it. It looked as if it might be part of the ARB mounting hardware, but he said it wasn't so we left it on his Tacoma. I want to make sure this is not a part that is necessary for the install on the 4Runner I couldn't see it in the install document above but I am wondering if anyone can clarify this for me before I drive back home (I'm 2 hours away).
Just in case the above was not clear is there a bracket for the front mounts of the skid plate that is part of the arb bumper?
 
I undertook this today. I ran into some problems outlined below:

I had one hell of a time getting some of those bolts loosened, even breaking one.

One of the chassis suspender things was welded improperly from the factory. I called an ARB dealer and he said to wait till monday to go down there (they're main office is 15 minutes down the road) and swap it out. I couldn't wait as I need to drive it. So I took a 2x4 and slivered a tiny bit off on my table saw to make a wedge and hammered the crap out of it into the part where it slides over the frame to widen it to the appropriate spec. Mad respect to wood!

I also noticed that my frame end on my driver side wasn't a perfect rectangle! It was slightly canted out on one side so that needed to be hammered in pretty hard and I ground down the edges a tiny bit to make it skinnier for the ARB part to fit over.

All of that and I ran out of daylight as my two drill bits died trying to get through the frame. So I got a new bit and tomorrow I plan to finish this thing. What a bore!

And yes, the factory instructions blow. I know the OP's instructions stated to use the ARB bolts to mount back the tie down. I don't understand why since the OEM tow hook bolts go back in. I also couldn't find the proper length with what they gave, so the OEM ones went back in.
 
Finally got it done. It was a major PITA to get it on there due to the warped bracket. As you can see the passenger side is a bit lower. I don't care right not. I'll have to remove it to put a winch in anyways.

One thing to note which wasn't mentioned by OP...Those caged nuts, there are two sizes. I didn't notice this at first so 4 of the 6 that are in there are the bigger threaded ones and 2 are the smaller, so I have 2 smaller bolts holding it in out of the 6. However, if I was supposed to use the bigger ones, they only had 4 in the package. So that's weird. They come with 4 of the bigger and about 10 of the smaller ones. M8 and 10 are listed in the manual. M10 was supposed to hold the bumper on. Not sure if that's the smaller one or not.
 

Attachments

  • unnamed.jpg
    unnamed.jpg
    143.9 KB · Views: 831
I put mine on yesterday. It was a total pain in the butt. It took all day (8 + hours). I did box in the frame ends. Mine is level, but off set to one side by about 1/4 inch. I put in a winch during the install to. Ill throw up a pic tomorrow.

I did have the correct number of nut inserts though.
 
I forgot to add this. I had to grind three Vs out of the bumper to allow for the install. The two corners (right before the bumper angles toward the car) were hitting my car's chassis. And a spot just inside of the shock absorber thing was hitting a cylinder by my radiator so that had to be cut too. I didn't really want to cut it, but you can't see it, so it's fine.
 

Members online

No members online now.

Forum statistics

Threads
278,312
Messages
3,554,083
Members
248,016
Latest member
Advally Service

Trending content

Back
Top