AssBurns 2000 Limited Build Thread

Thanks guys! I'm super stoked to get them mounted. Gears are still stock 4.30. Eventually I'll do 4.88 or 5.29 once I get a front locker. But for now I'll be rolling down the highway at lower RPM's and lower MPG's hahah.


Sent from my iPhone using Tapatalk
 
Thanks guys! I'm super stoked to get them mounted. Gears are still stock 4.30. Eventually I'll do 4.88 or 5.29 once I get a front locker. But for now I'll be rolling down the highway at lower RPM's and lower MPG's hahah.

leave your gears the same and just join the dual transfercase club :party:
 
I know those MTR's are great tires and mostly I'm just jealous but that nonsymmetrical tread would drive me crazy !


It is kinda weird having asymmetrical tires. Luckily every other aspect of these tires are pretty much exactly what I was looking for in a tire.
 
It is kinda weird having asymmetrical tires. Luckily every other aspect of these tires are pretty much exactly what I was looking for in a tire.

I'm kind of tempted myself right now because I can get a used set in the same size ( 80 % Tread ). 5 for $ 600 . Probably good I don't have $600 right now .
 
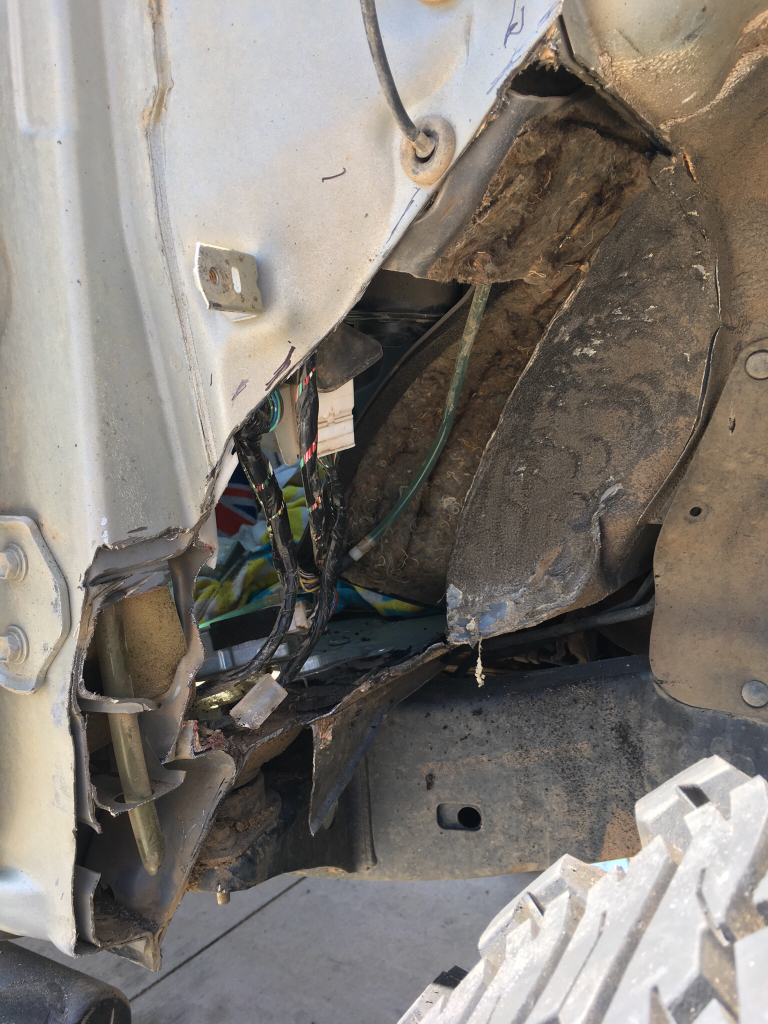
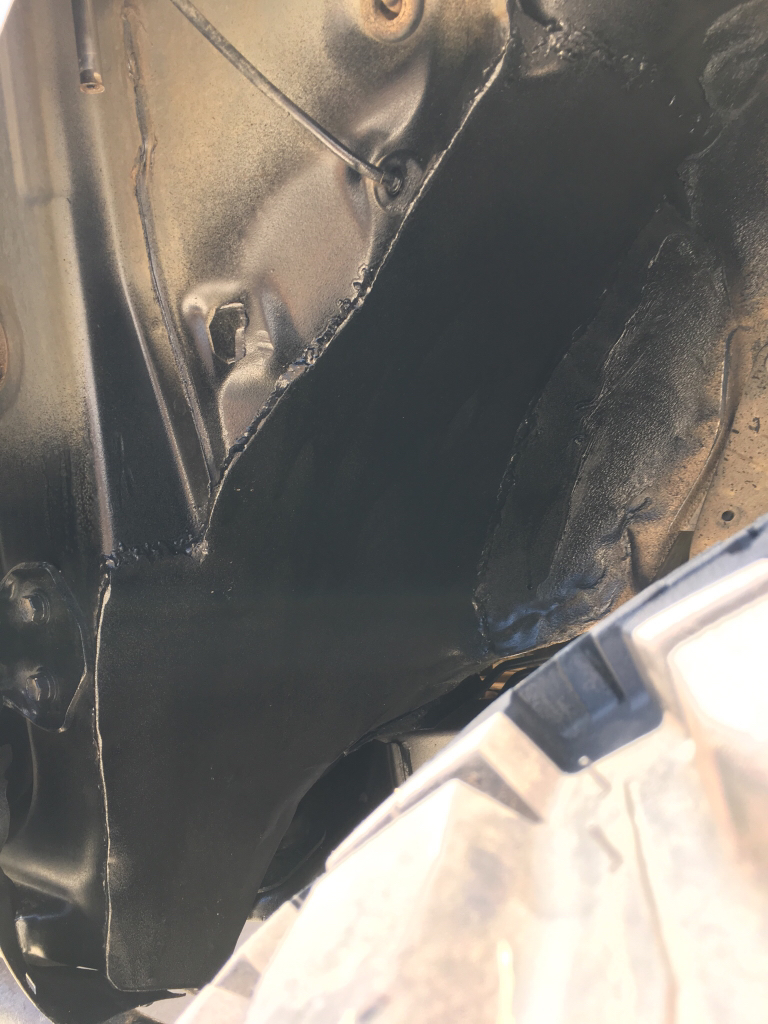
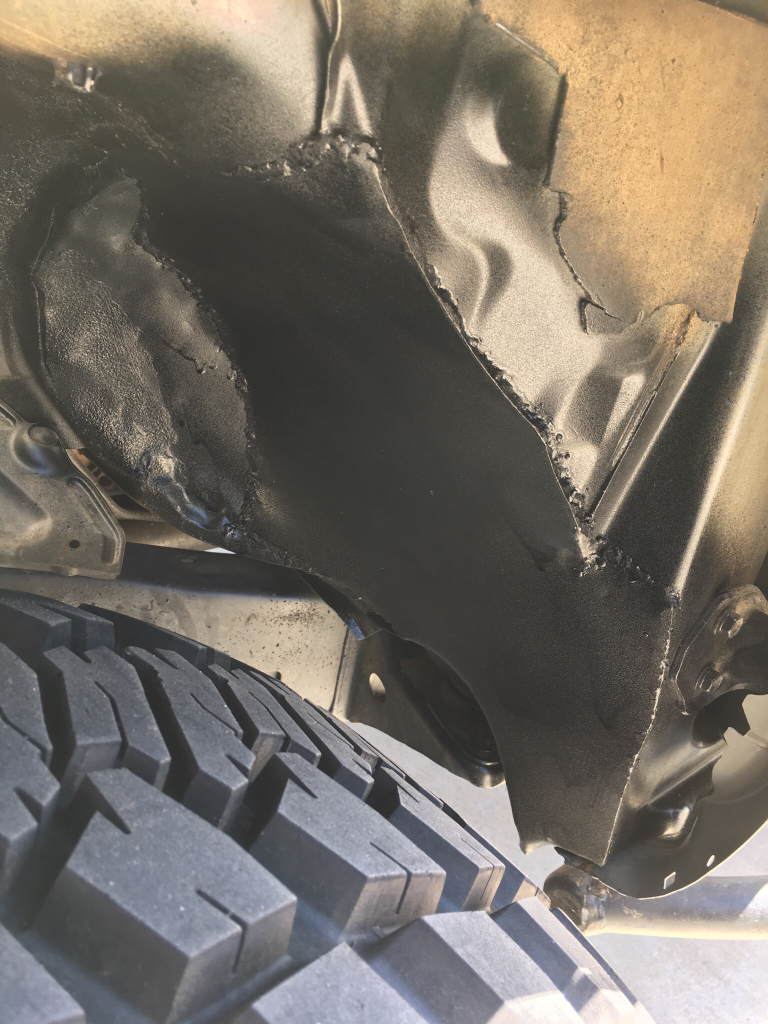
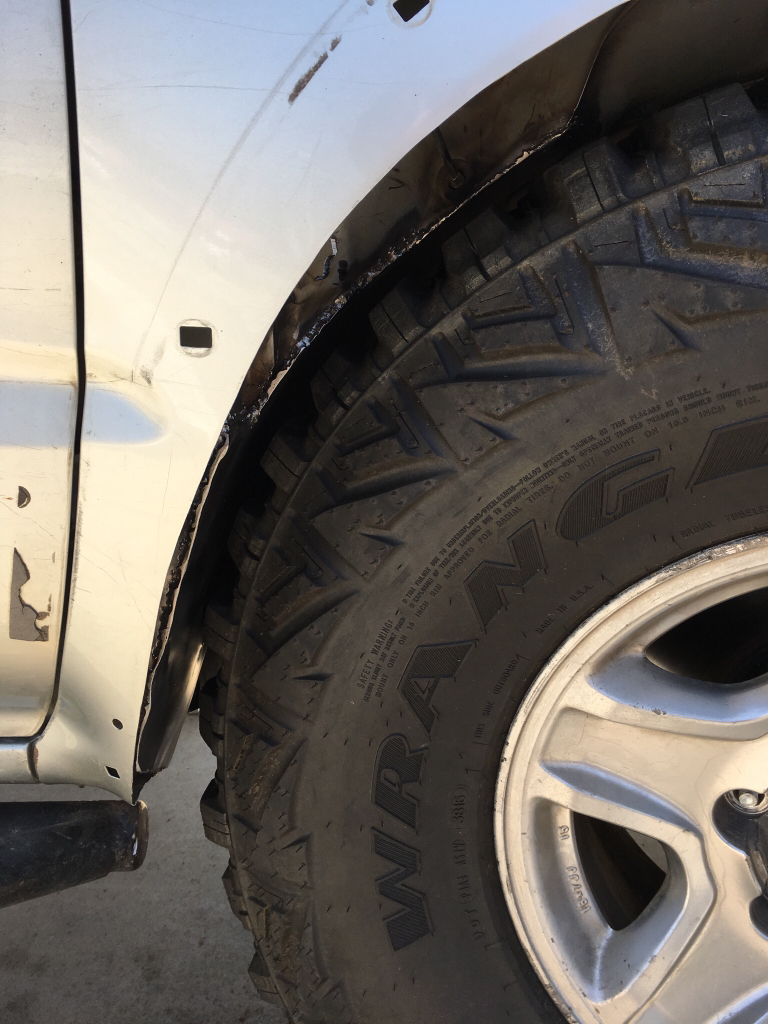
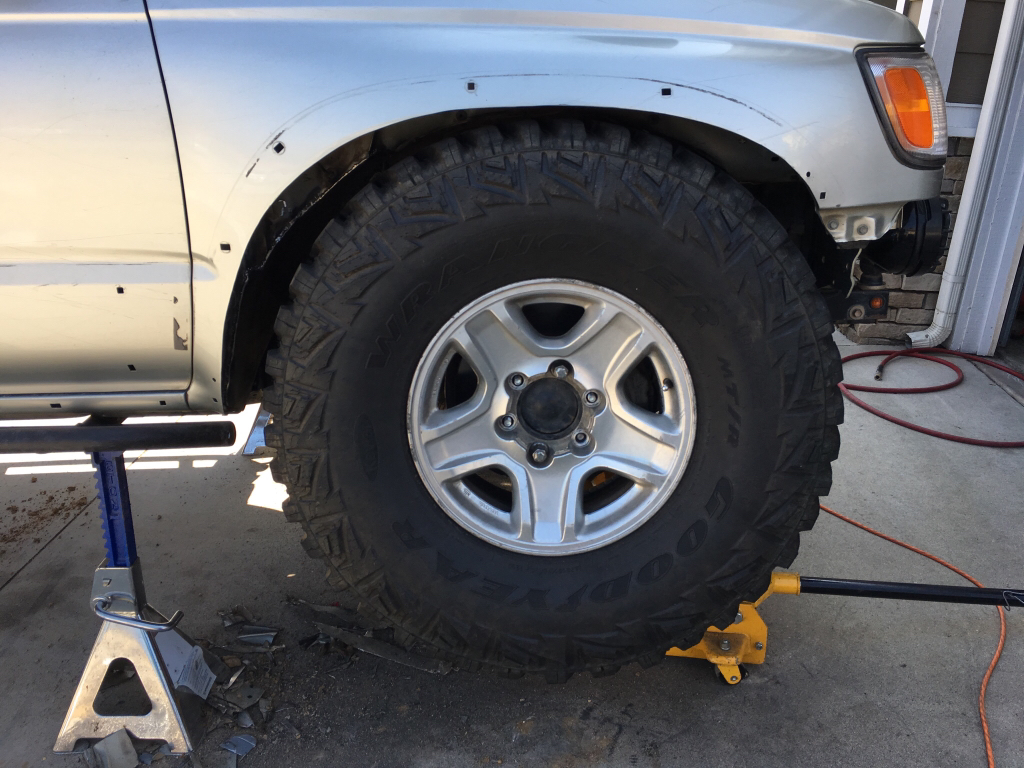
So I got the 35's mounted, fenders trimmed, and firewall tubbed. It was quite a bit of work but totally worth it.
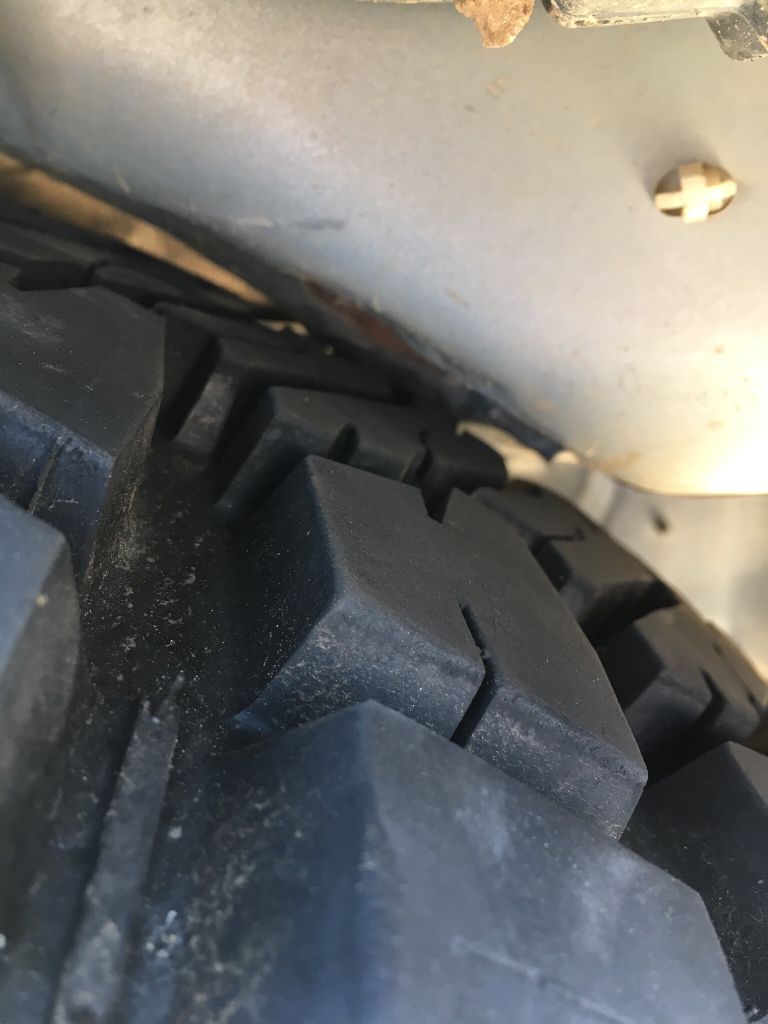
What I did was pull the fenders, struts and the wheelers front bump stops so that I can jack up the wheel to full bump and test fit everything. I then started trimming, and trimming and trimming. I actually had to trim more than I expected to clear at full bump and full lock. I used 18 gauge sheet metal for the patch pieces. Here is how much got cut. Be careful to not cut any of the wires in the cab!
8344a5650f210d098d49155db7b68c52.jpg

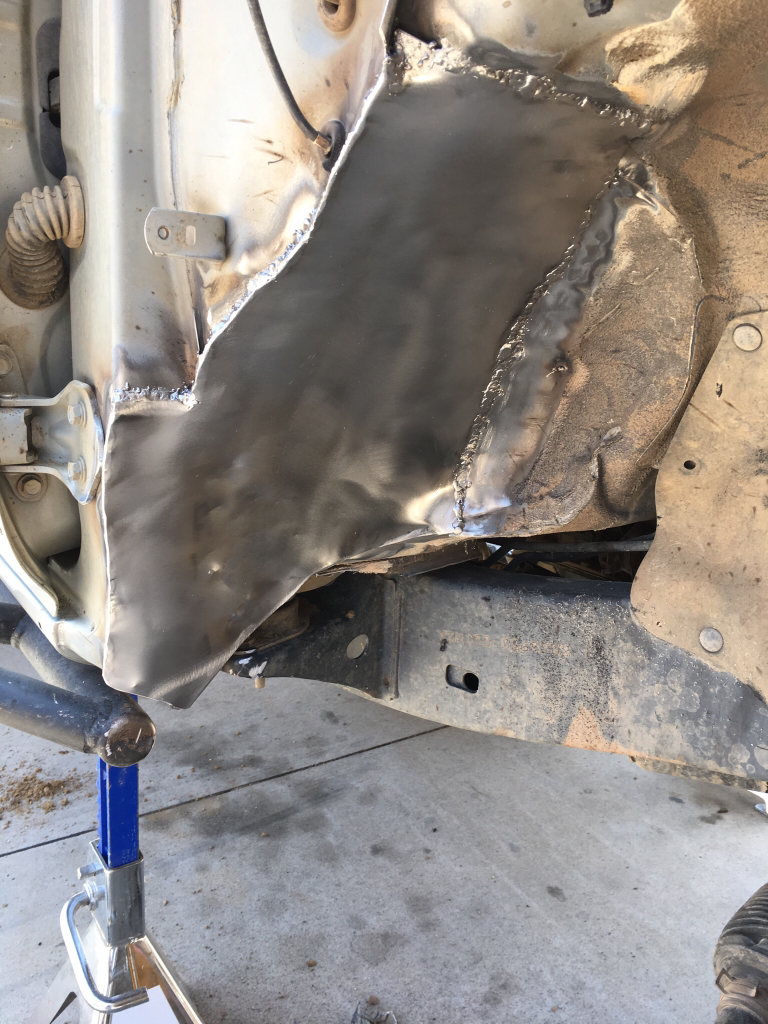
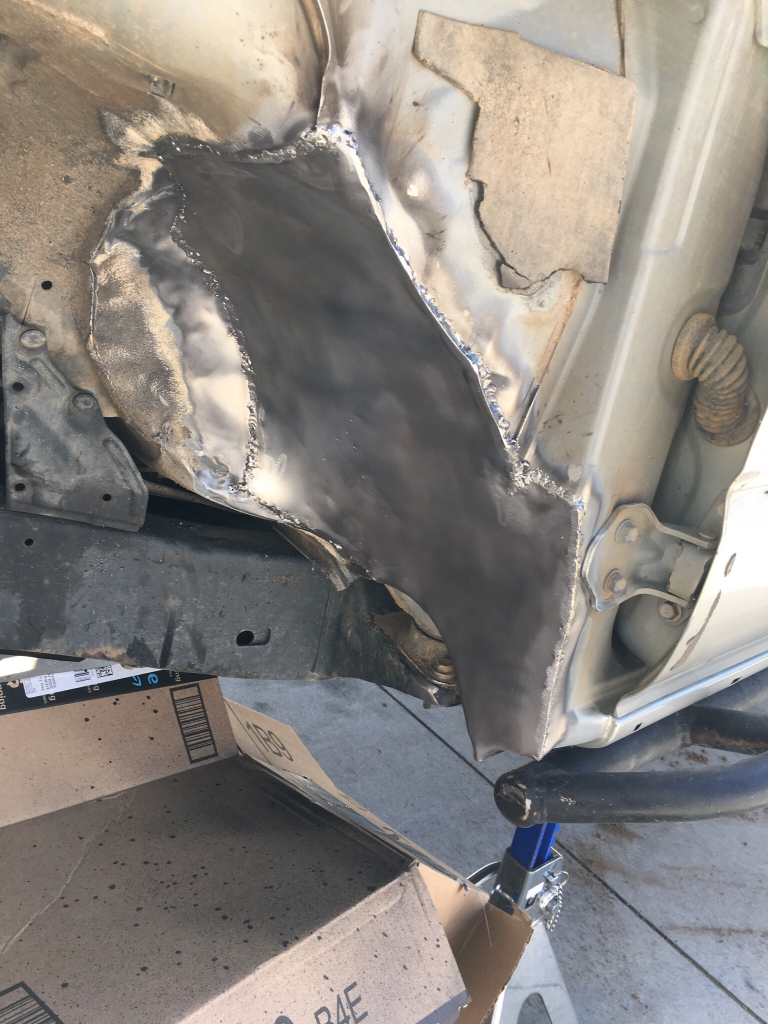
From there I started making the patches. I started with just a piece that was eyeballed a little larger than the hole. Then tacked it on in a few spots to get the shape and mark the spots that need to be trimmed some more. Once it was trimmed where it needed to be, it got welded on.
d472634bd2387bae51ca34923ecde76f.jpg

fe0b5461749ac312c5ecb0e8b5ae576c.jpg

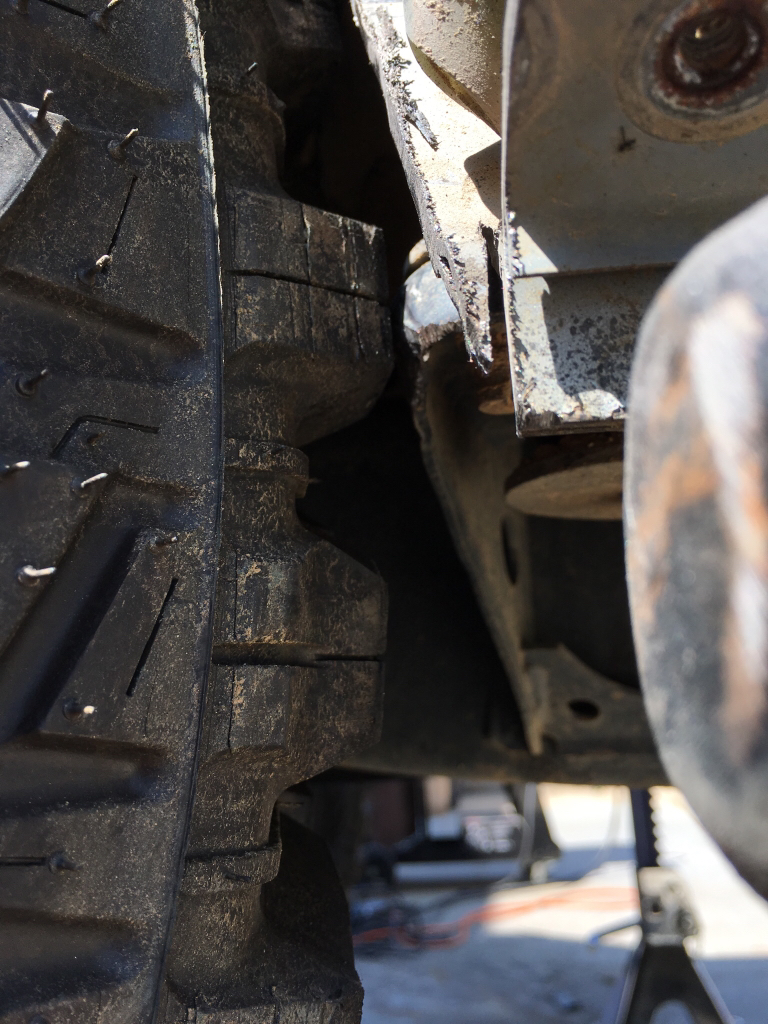
On the drivers side, the tire actually just barely rubbed the body mount, so I just hammered the mount in a little to clear. You can see how close it is. I doubt I'll be at full bump and full lock often, if ever, so I wasn't worried about having too much clearance in that spot. 1/4" should be fine.
d09c08c9966f262aa5ecf17051e2883e.jpg

After everything was welded and put back together, I spayed the areas with Rustoleum bed liner.
5d71c70801f76c894cab52dd72dce4c0.jpg

9154c98bf1cc32aae2e534ab9c52f645.jpg

I still need to make room in the front of the wheel well where the battery and intake is at but I'll have to save that for next weekend.
Full bump.
4c406f0b77161f53588313ade82b58ba.jpg

5afc14984fe87234613f4e25a2658769.jpg

bae27e2062b7e7a6e10cd80687c219ea.jpg

Tires rub on the front quite a bit. Definitely needs to be taken care of quickly.
e1c97708a13a976458bcc3437a13eef5.jpg
 
How much did you end up taking out? I'm thinking of going 287/75R17. The tire I want if I go that way will be 33.8". I don't mind beating the crap out of the fenders with I BFH but I'd rather not get into any sheet metal work right now.
 
So I got the 35's mounted, fenders trimmed, and firewall tubbed. It was quite a bit of work but totally worth it.
What I did was pull the fenders, struts and the wheelers front bump stops so that I can jack up the wheel to full bump and test fit everything. I then started trimming, and trimming and trimming. I actually had to trim more than I expected to clear at full bump and full lock. I used 18 gauge sheet metal for the patch pieces. Here is how much got cut. Be careful to not cut any of the wires in the cab!
8344a5650f210d098d49155db7b68c52.jpg

From there I started making the patches. I started with just a piece that was eyeballed a little larger than the hole. Then tacked it on in a few spots to get the shape and mark the spots that need to be trimmed some more. Once it was trimmed where it needed to be, it got welded on.
d472634bd2387bae51ca34923ecde76f.jpg

fe0b5461749ac312c5ecb0e8b5ae576c.jpg

On the drivers side, the tire actually just barely rubbed the body mount, so I just hammered the mount in a little to clear. You can see how close it is. I doubt I'll be at full bump and full lock often, if ever, so I wasn't worried about having too much clearance in that spot. 1/4" should be fine.
d09c08c9966f262aa5ecf17051e2883e.jpg

After everything was welded and put back together, I spayed the areas with Rustoleum bed liner.
5d71c70801f76c894cab52dd72dce4c0.jpg

9154c98bf1cc32aae2e534ab9c52f645.jpg

I still need to make room in the front of the wheel well where the battery and intake is at but I'll have to save that for next weekend.
Full bump.
4c406f0b77161f53588313ade82b58ba.jpg

5afc14984fe87234613f4e25a2658769.jpg

bae27e2062b7e7a6e10cd80687c219ea.jpg

Tires rub on the front quite a bit. Definitely needs to be taken care of quickly.

e1c97708a13a976458bcc3437a13eef5.jpg
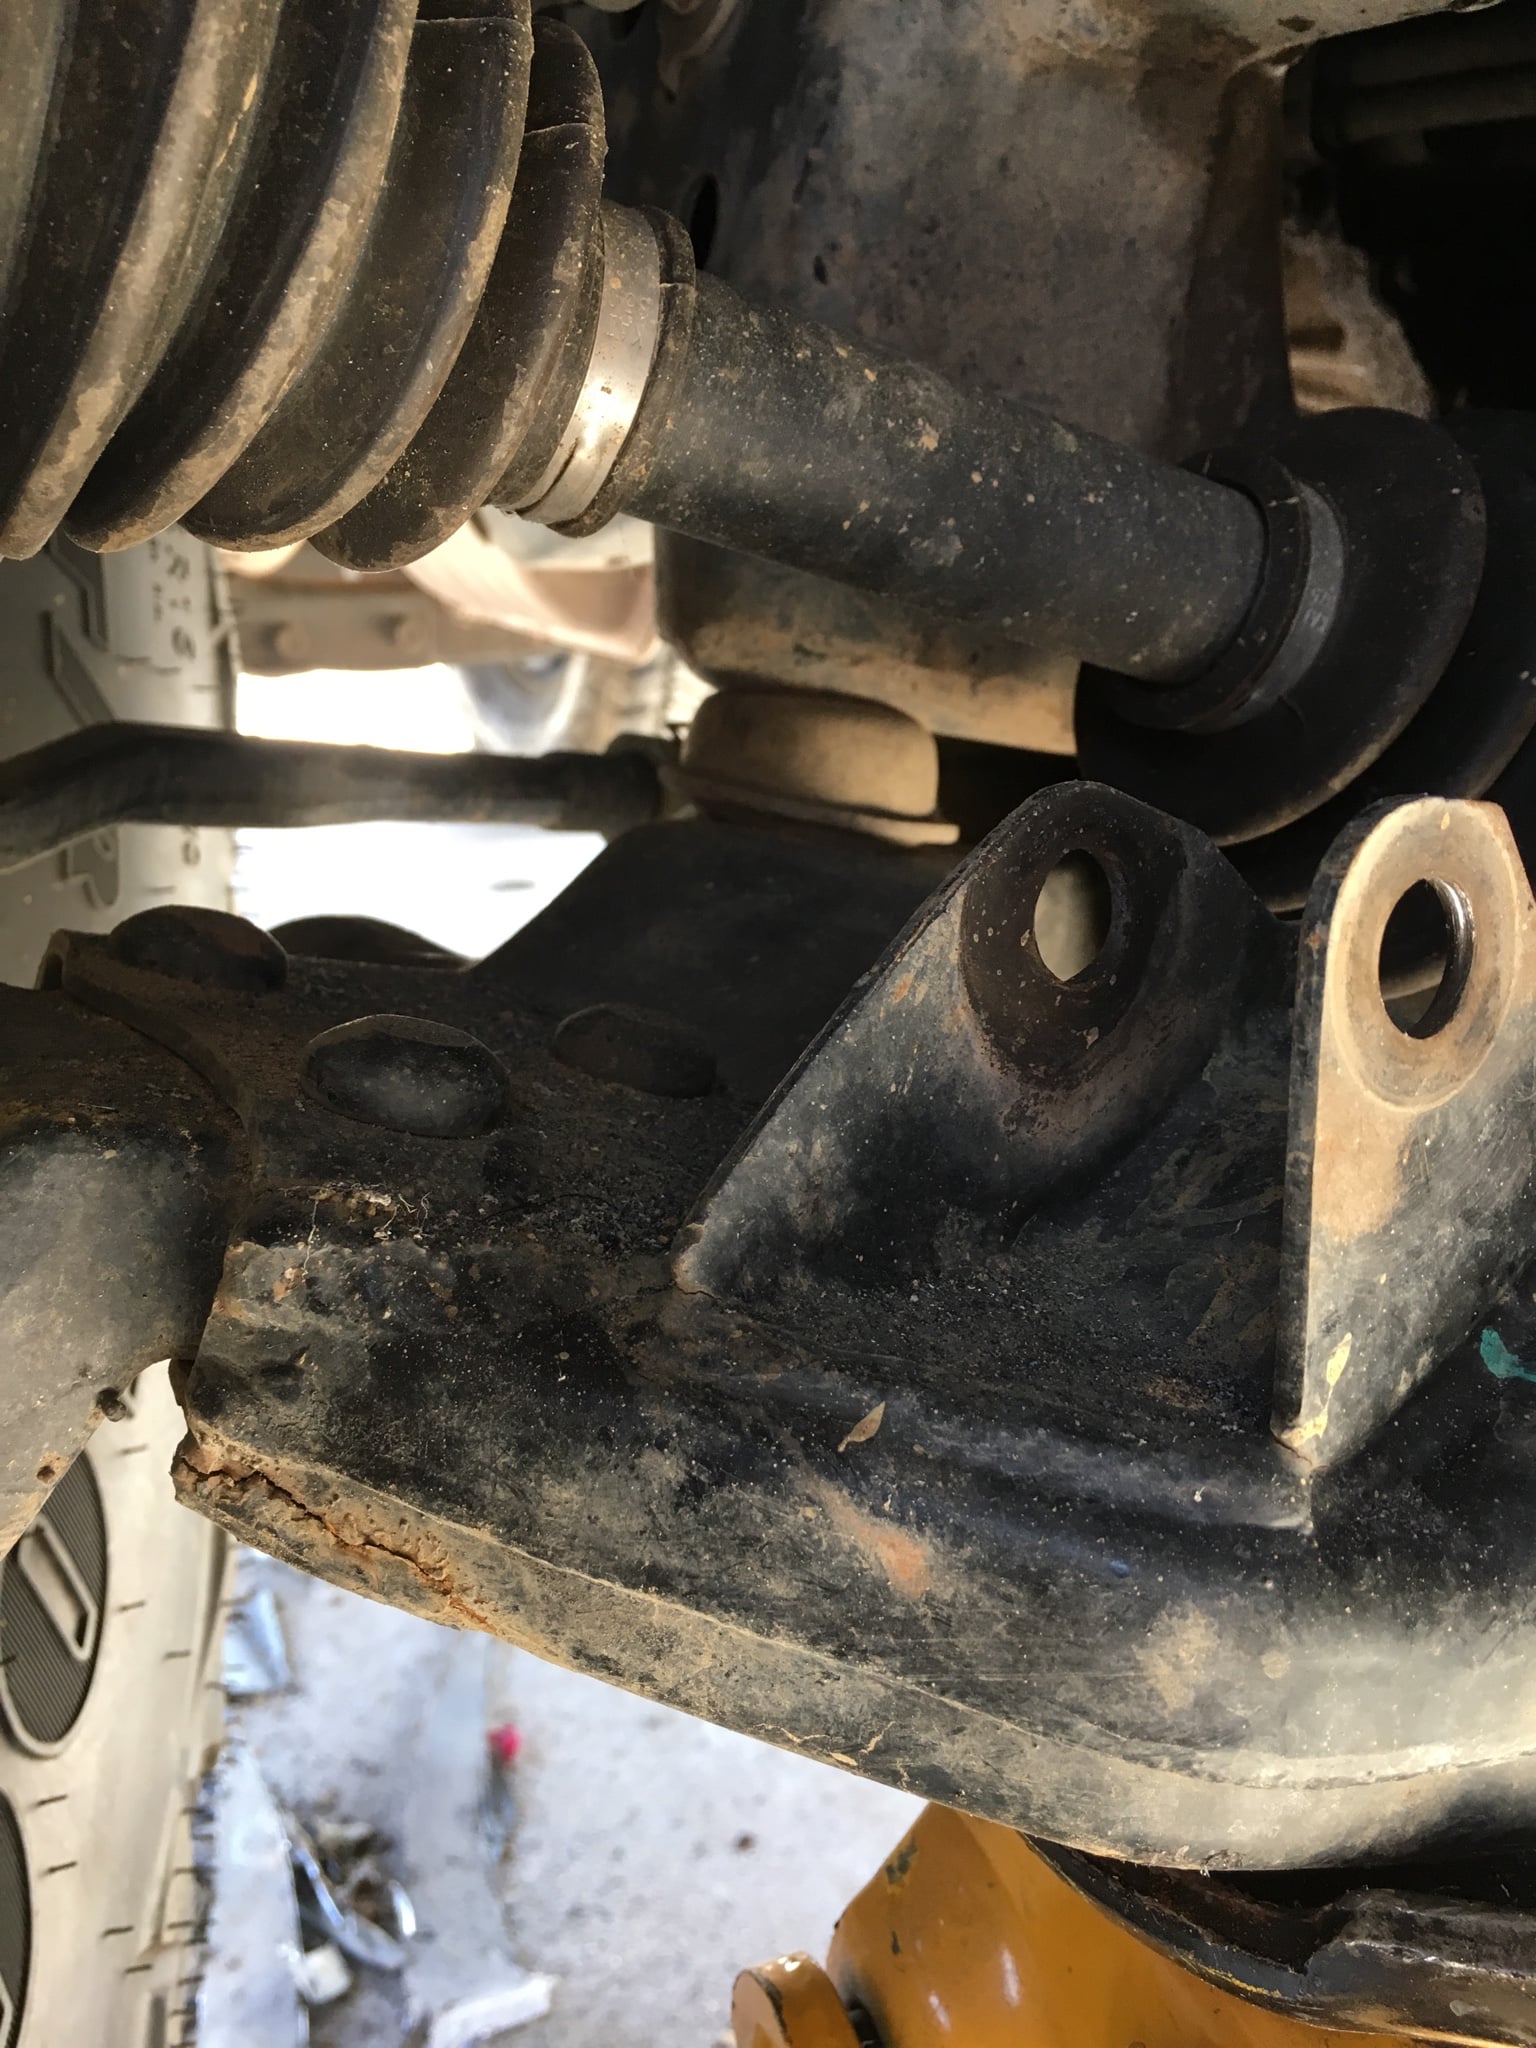
Damn that's a big hole! Seeing posts like this actually scares me because I've been building mine to take 35s. Then I remember not everyone puts the body lifts or UCA in and things lime that.....

Sent from my SM-G920I using Tapatalk
 
Lol. Good eye. I think that's just paint flaking off with surface rust under it. Had me looking at it as well.

Sent from my SM-G920I using Tapatalk

Its a crack. I remember a few pages back when it cracked along with some other stuff he ground it down and welded it back together but looks like it cracked again
 
How much did you end up taking out? I'm thinking of going 287/75R17. The tire I want if I go that way will be 33.8". I don't mind beating the crap out of the fenders with I BFH but I'd rather not get into any sheet metal work right now.


Not sure exactly how much I took out since I beat the hell out of it with a BFH a few years back when I went to 33's. It's kind of hard to tell but at least 2" from the very bottom of the firewall. Not sure if you'll be able to get away with 285/75R17 without sheet metal work or a body lift.

Is your control arm cracked ?

Not exactly sure. So the story behind that is that a few months back, I cracked the LCA in a few spots and also the shock tower in a few spots. I ended up welding it all back together but not sure if the crack itself came back or just the paint is cracking. It looked like the paint but I didn't spend too much time inspecting it. I'll probably just pick up another control arm instead of chasing down another crack.
 
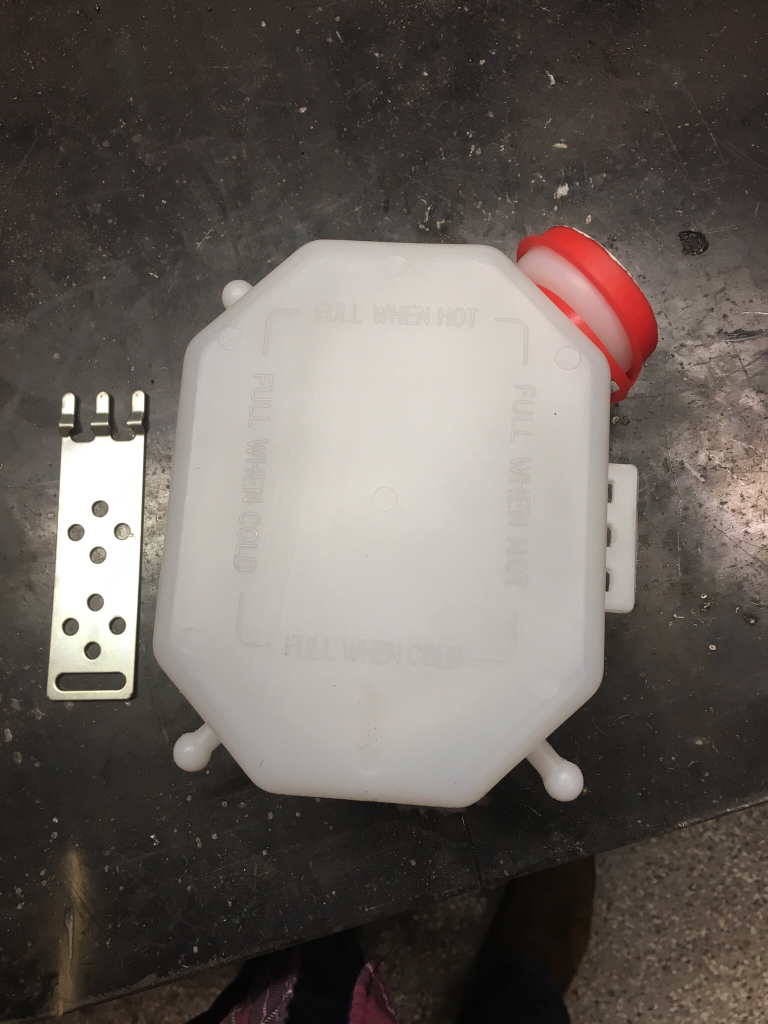
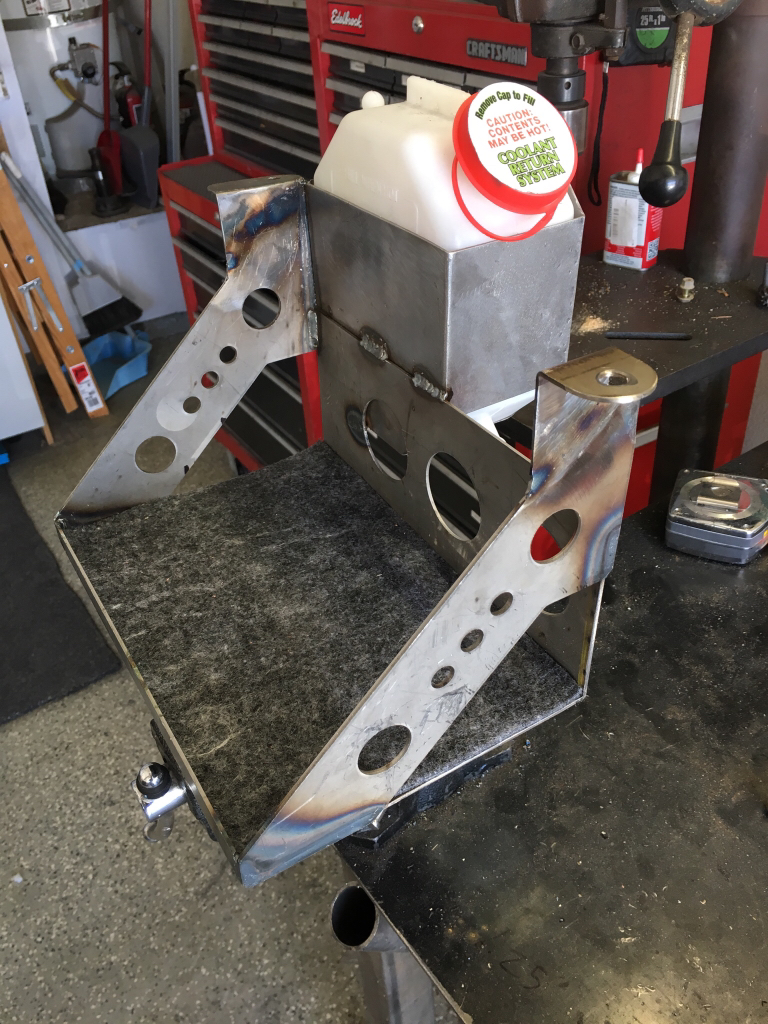
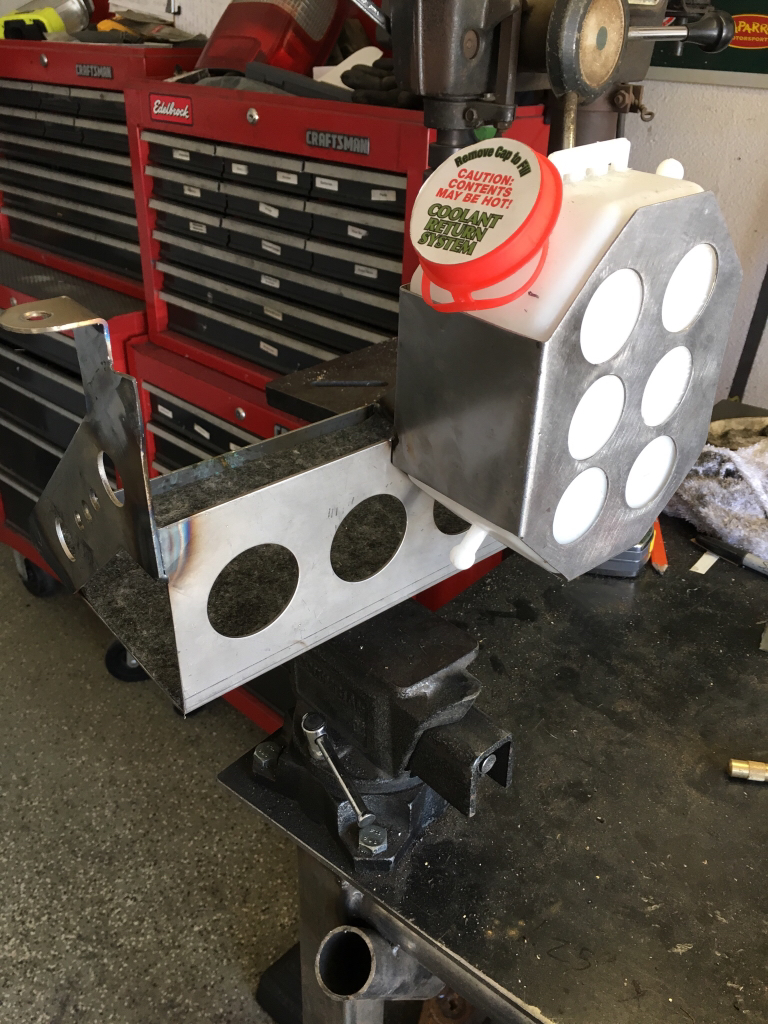
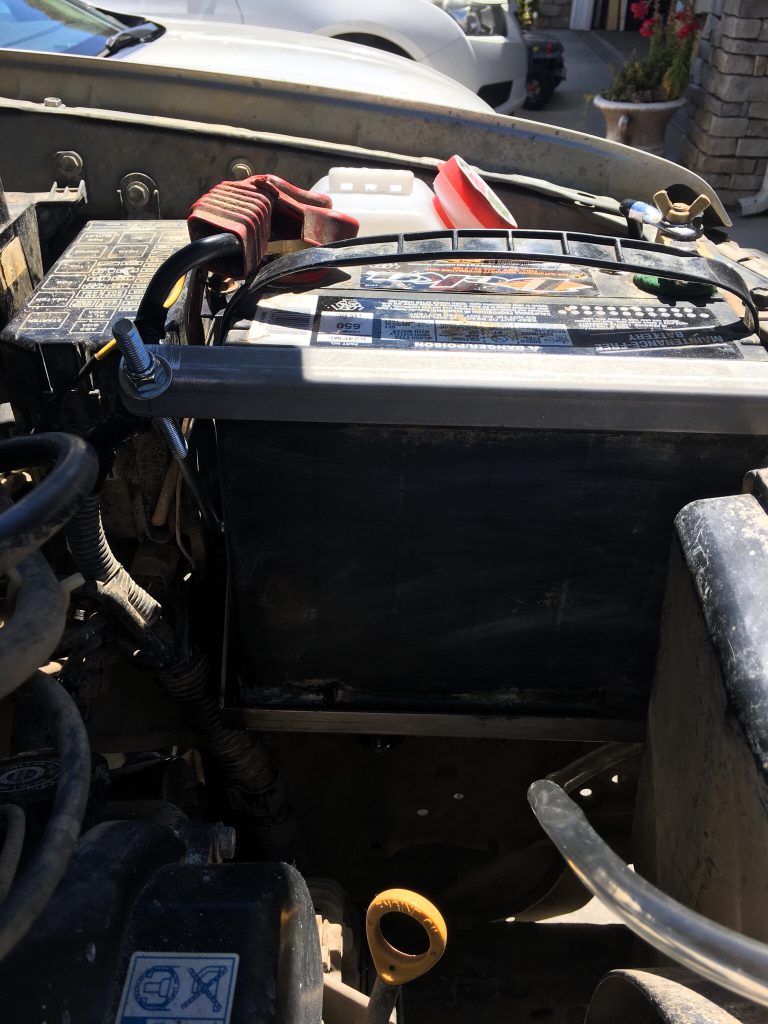
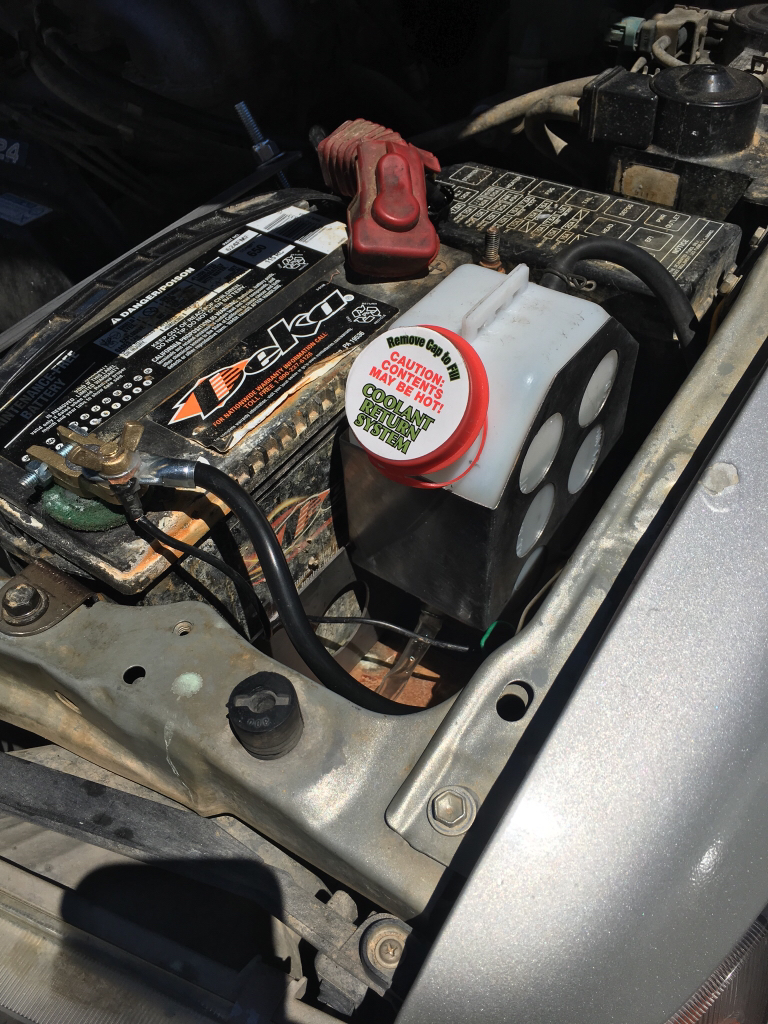
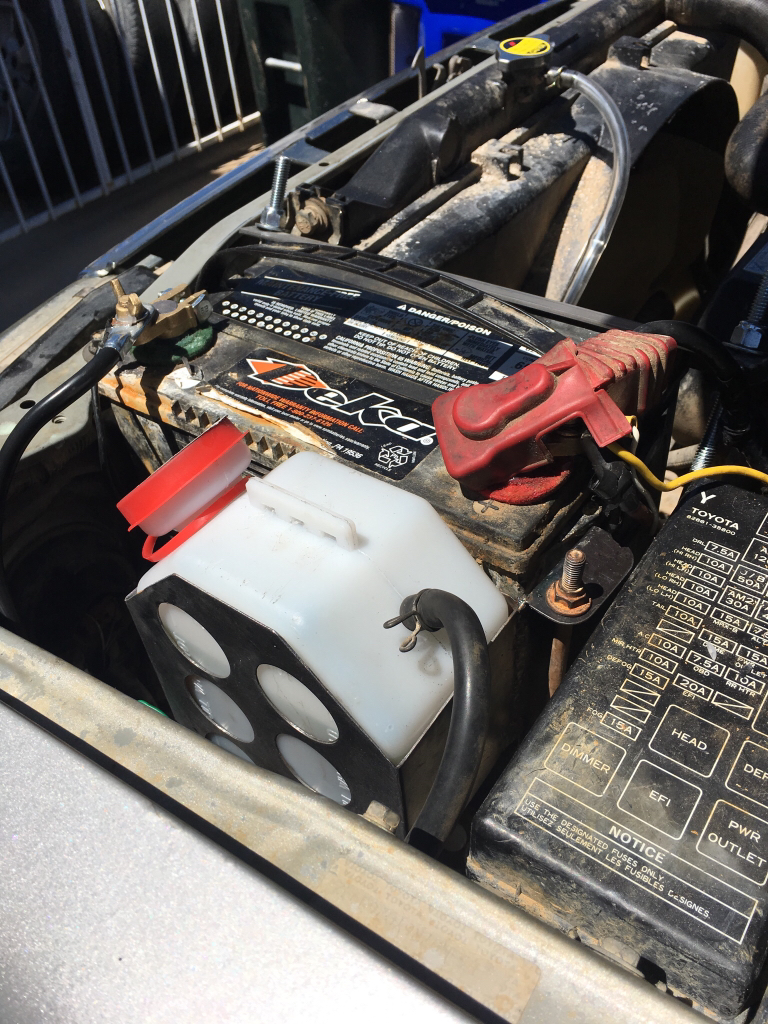
I needed to do something about the battery so I can finish tubbing the wheel wells. It rubs this area and the passenger side by the intake box. So I rotated the battery 90° and moved the Radiator Overflow Tank. Here is what I came up with. I bought a battery tray a while back for like $20 but needed to modify it to fit correctly. I went to O'Reilly's and picked up this universal coolant tank. I used the stock mounts for the battery tray plus I added another mount underneath for more support. I used a battery tray mat to keep the battery off the bare metal and absorb any acid that comes off the battery.
560893ee579f5cf514de92dcf3501d58.jpg

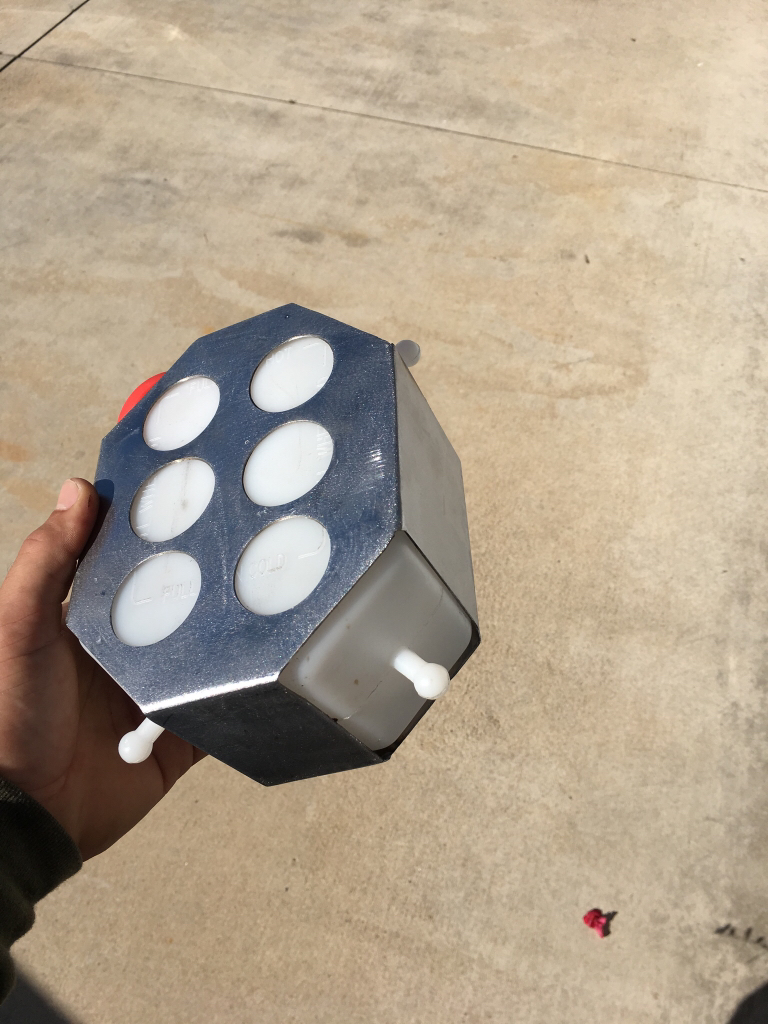
Made this box to hold the tank.
7b6ecf5231c2061cfca424f2f72d5dd7.jpg

Mounted coolant tank to the battery tray.
5324b20b9325546ba83f45f2aacd07c1.jpg
d80539d7ed40b70b6b5dca800ff90f53.jpg

82db57c0443383a649ef127e9bd74e0d.jpg

81e153ce69d2eea36f64e394fa8ba284.jpg
db3e6a0414098f5e21e1d7d046f533ad.jpg

I still need to move the ADD Vacuum Canister next to the coolant tank. Next is modifying the passenger side and finish tubbing the wheel wells.
 
Last edited:
Nice job on the fenderwell tub. I love the new battery box/coolant overflow setup you made.

Coming together nicely.
 

Members online

Forum statistics

Threads
278,312
Messages
3,554,087
Members
248,016
Latest member
Advally Service

Trending content

Back
Top