Atchcraft's Fab/Adventure Thread

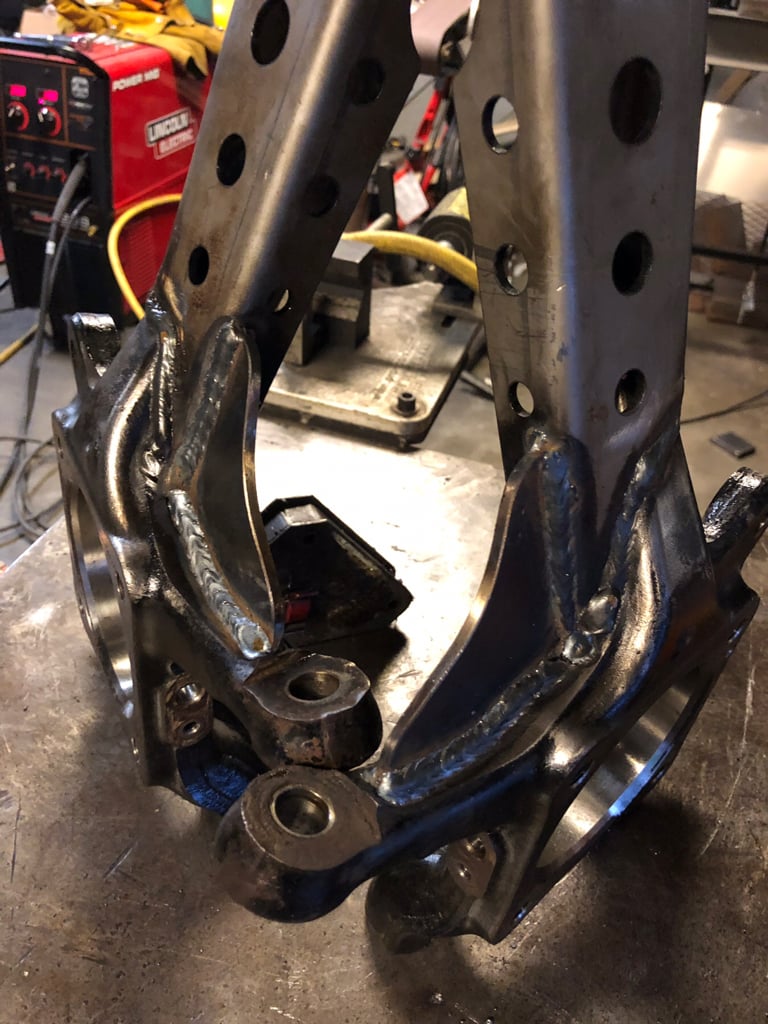
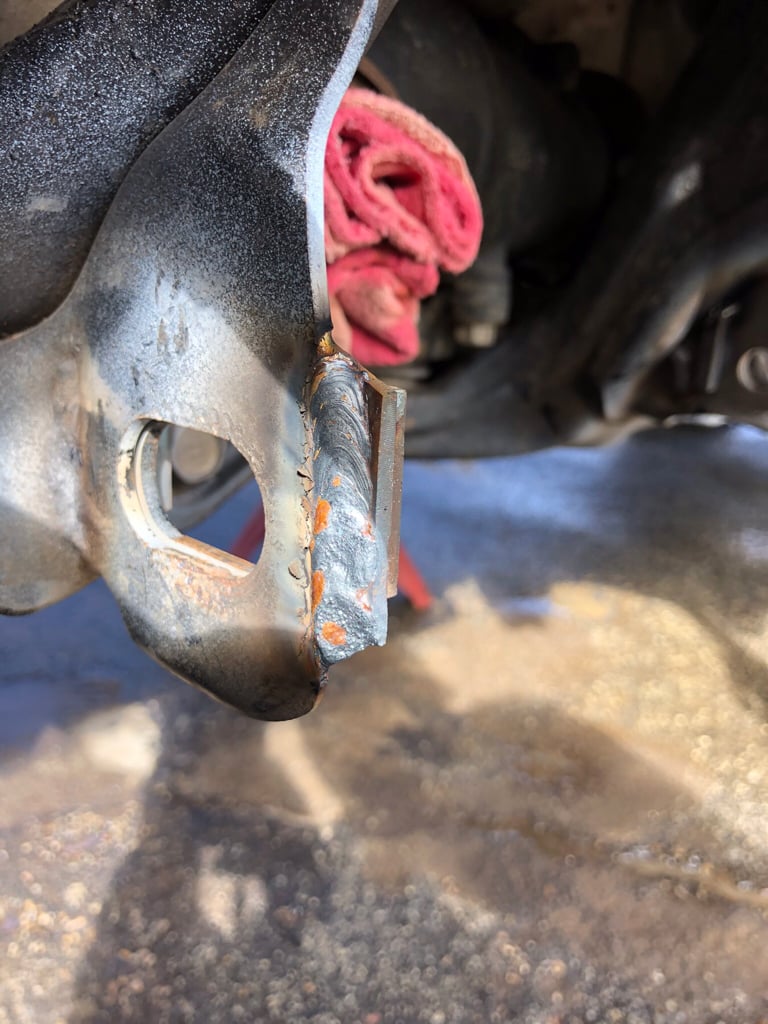
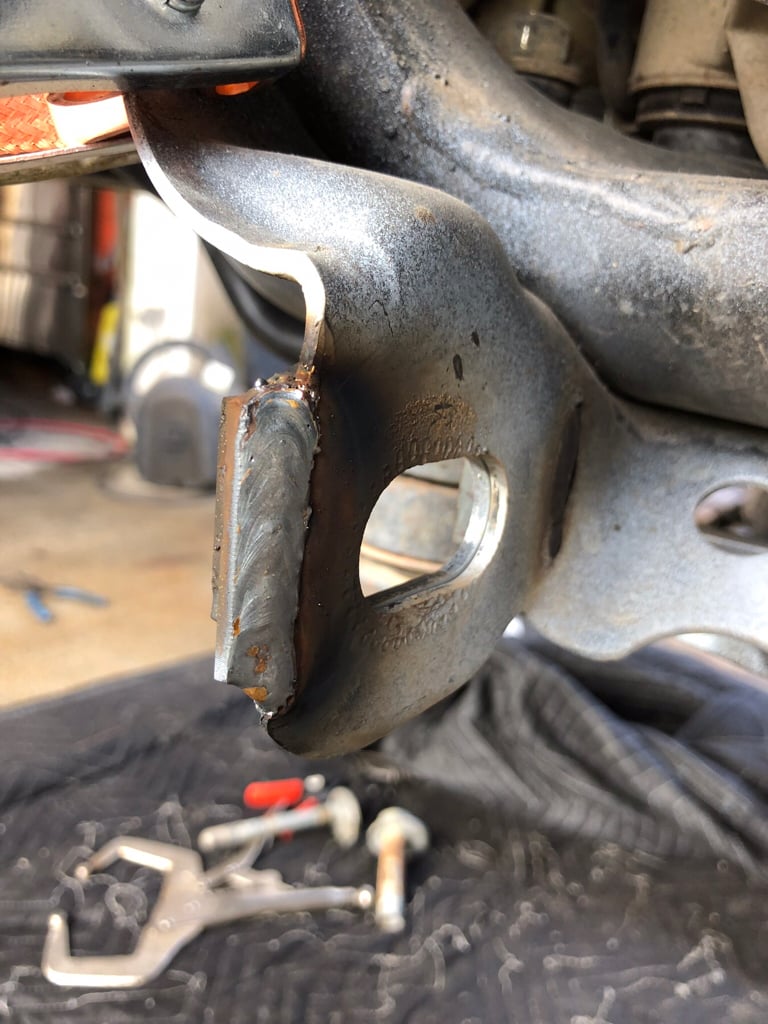
x2 nice welds.

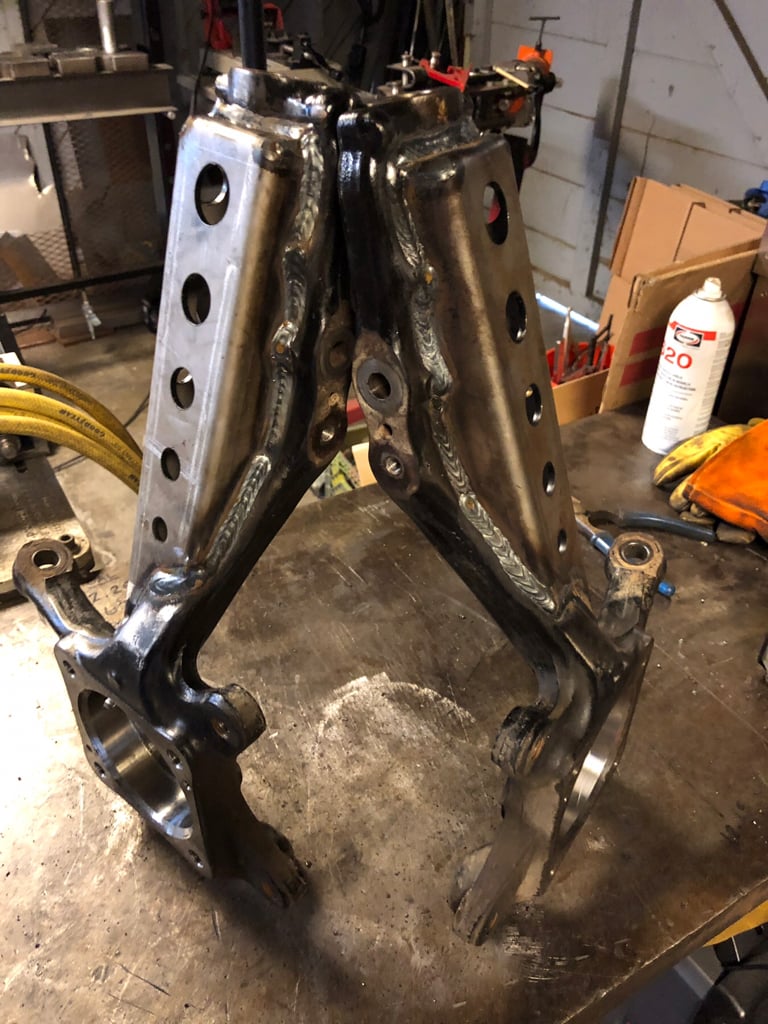
did you pre heat the spindles before welding the gusset? they're cast right? just wondering since people seem to shy away from welding to cast.

Thank you.

No, I didn’t preheat. They should be forged steel and actually pretty easy to weld, you just need to control your heat to prevent warping. I think people associate any “cast” part with the qualities of cast iron, which is pretty tricky and requires a lot pre and post heating with very slow cooling to prevent cracking. I’ll weld anything I can get my hands on, but I’m no expert by any stretch.
 
Last edited:
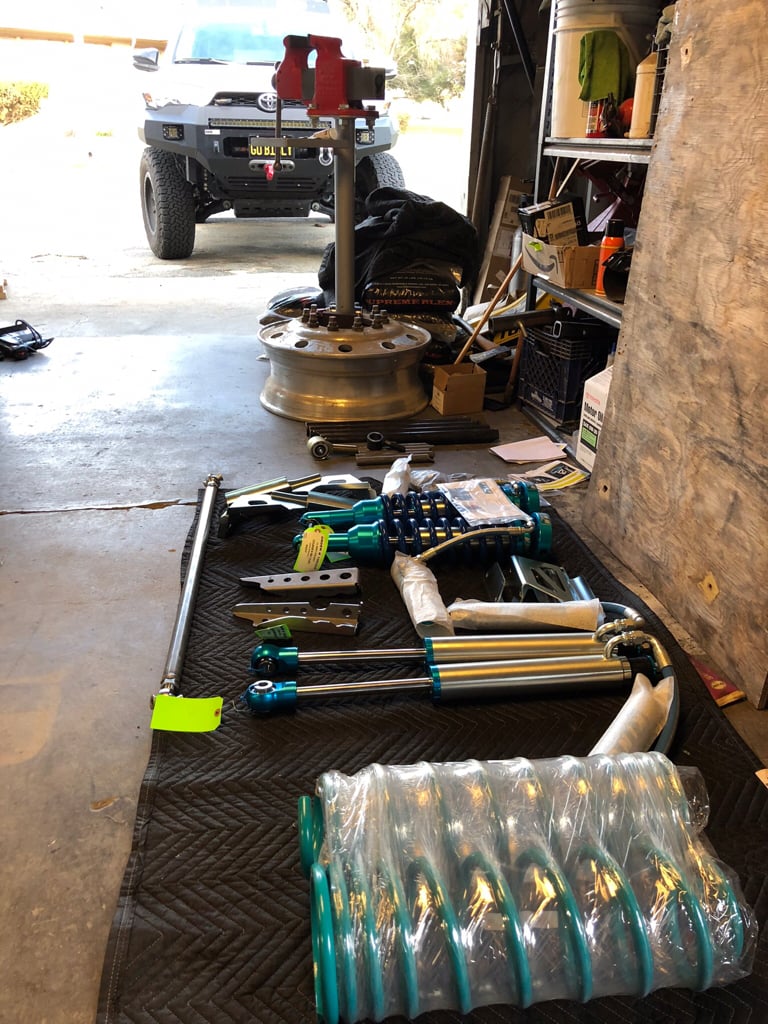
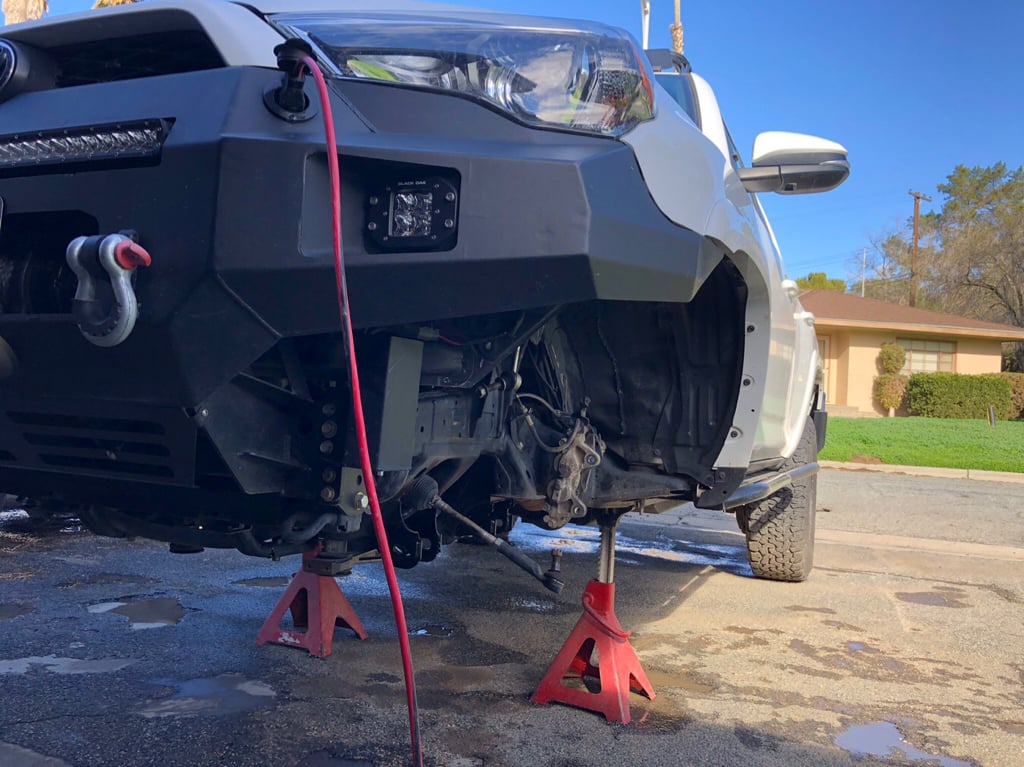
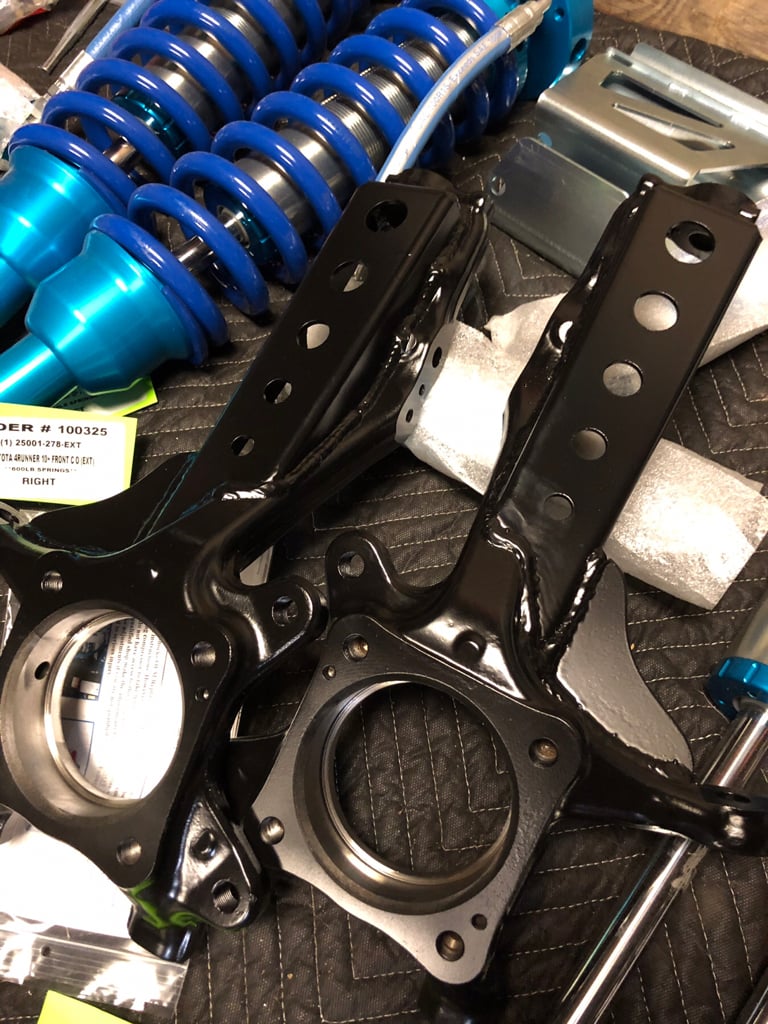
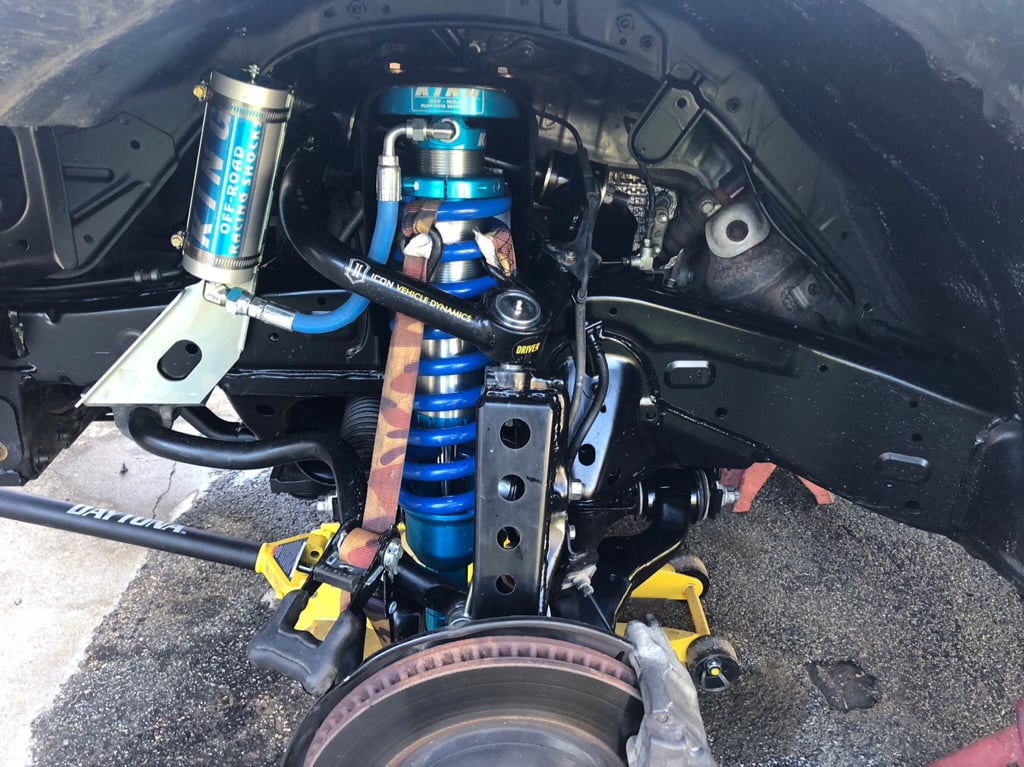
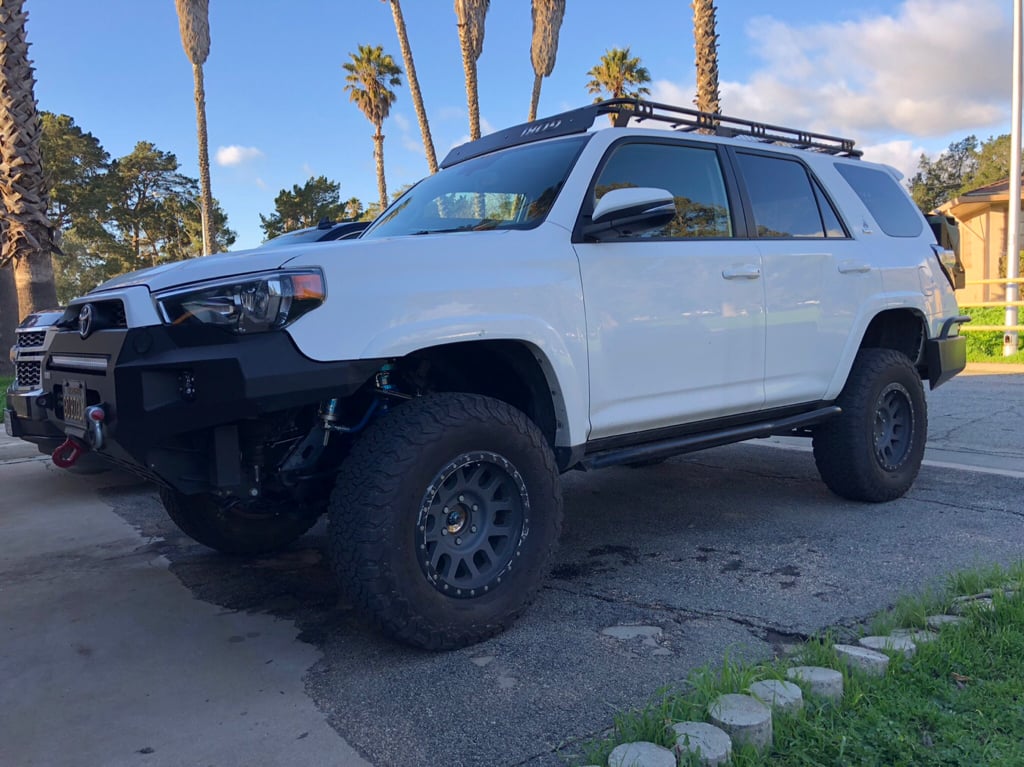
Quite a few months ago, I decided that it was time to upgrade my suspension. I have the obligatory Icon stage 2 that was definitely due for for a rebuild. It was a great kit before I added a metric f@ck ton of weight to the truck and I use it quite a bit differently than I originally thought I would. So, now is a great time to just upgrade.

I could have picked a better day to start the latest project, but it had to happen despite the rain.

Here’s the list of players:
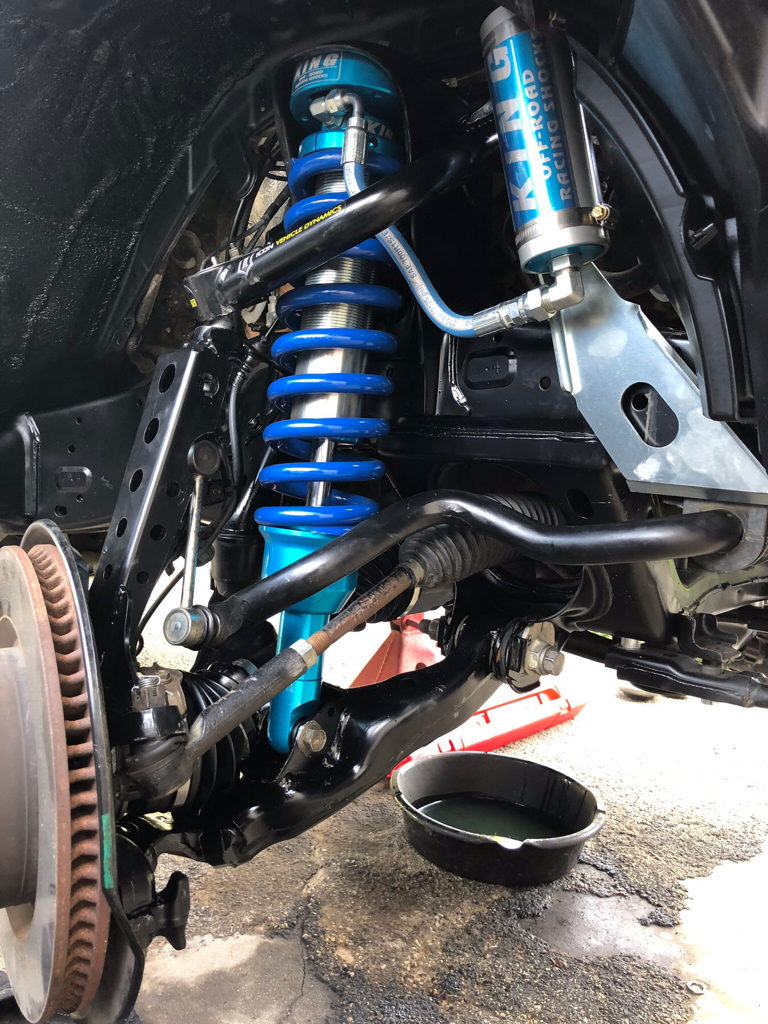
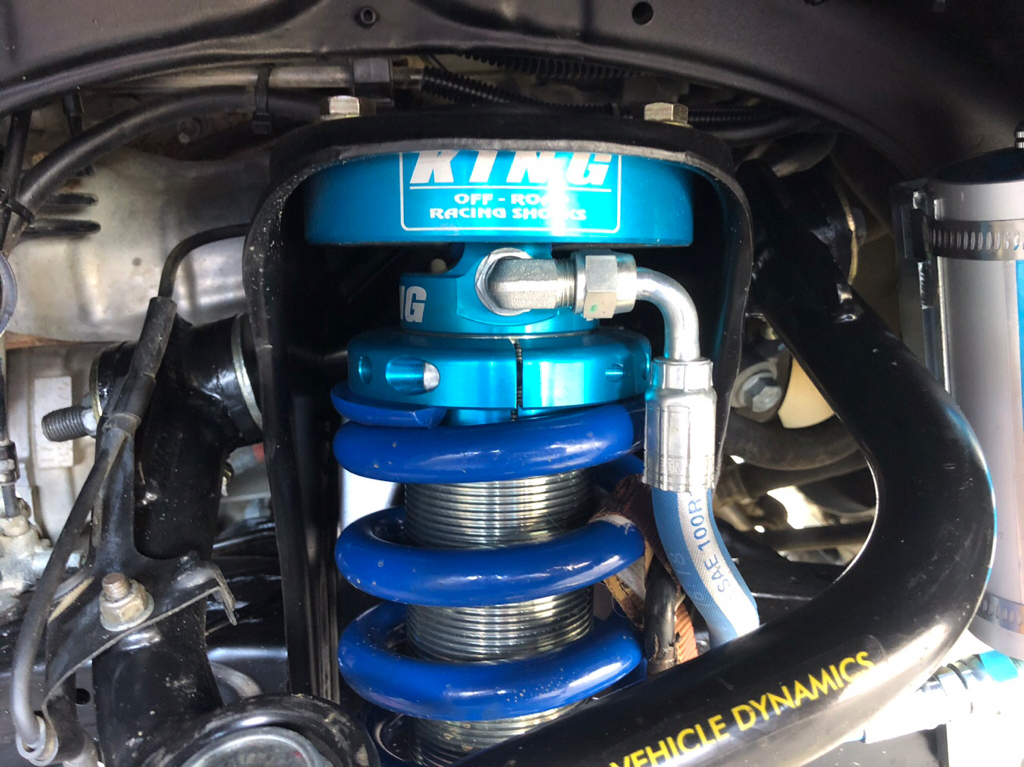
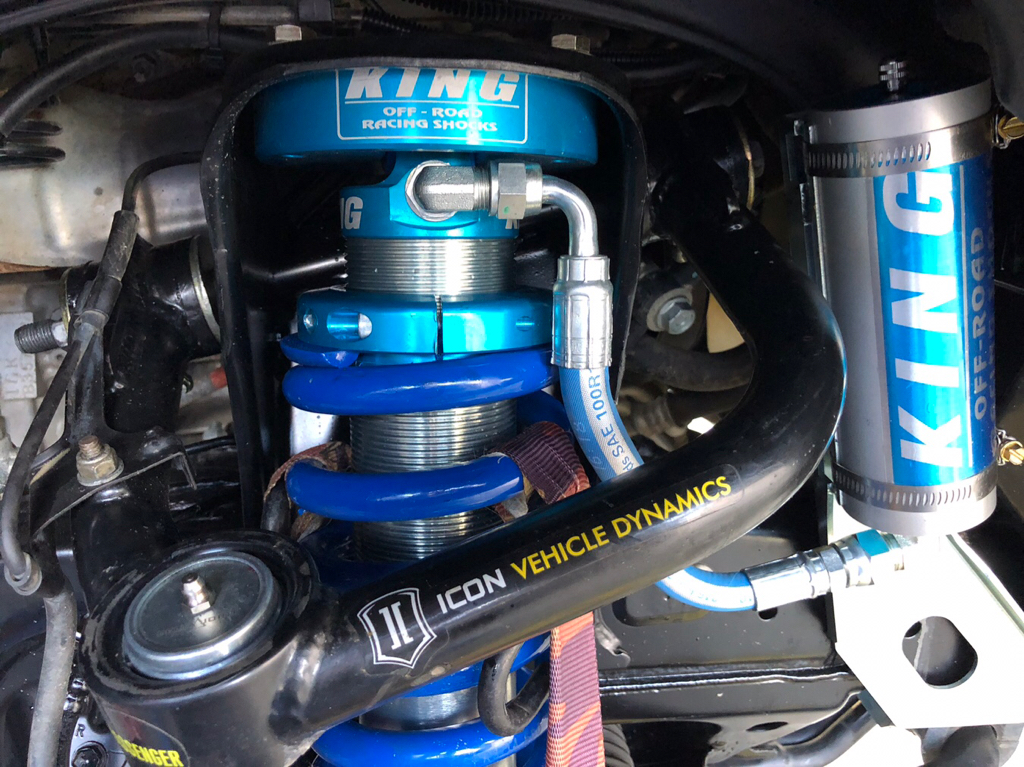
- Kings (Ben @ Filthy Motorsports)
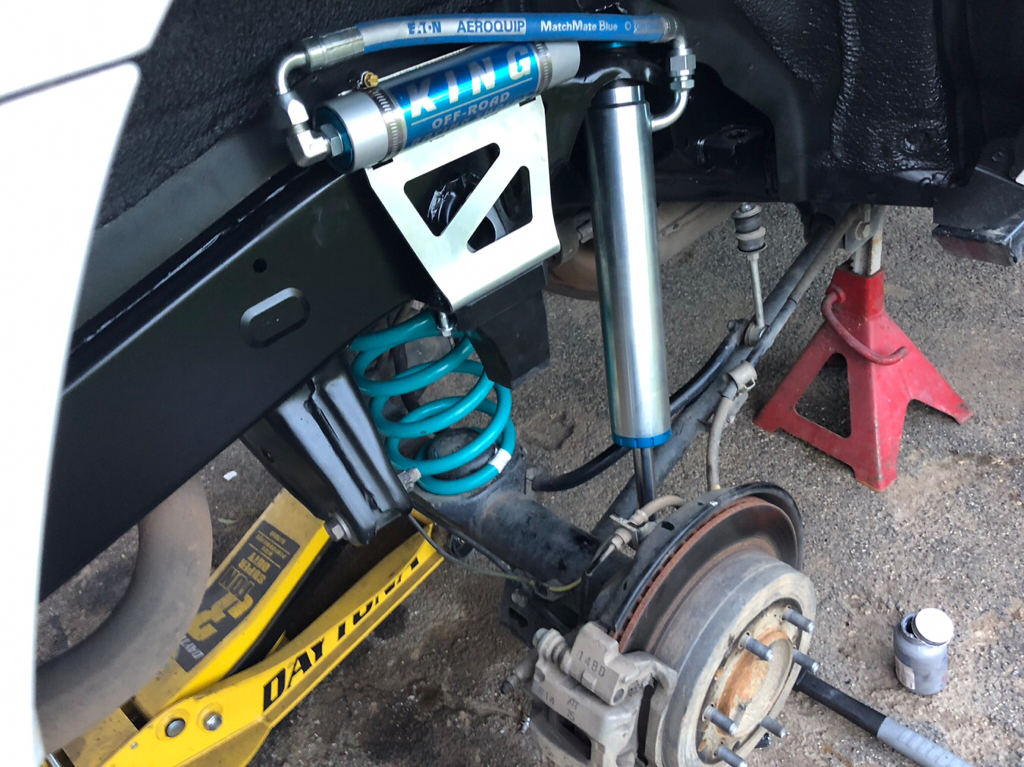
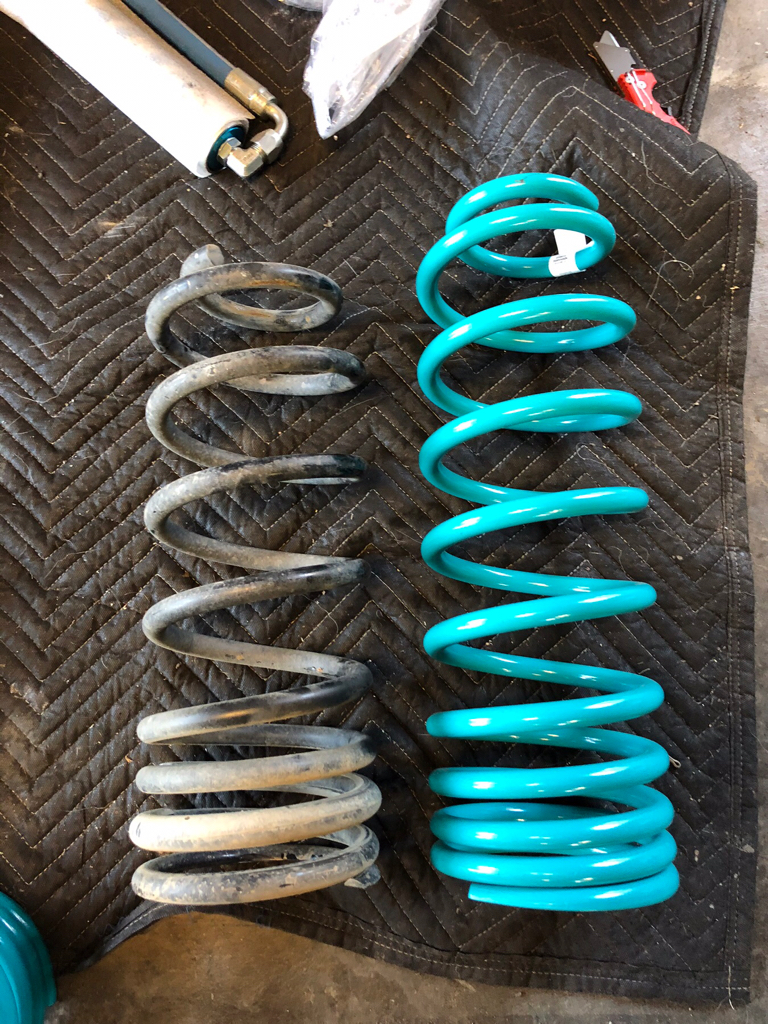
- Dobinsons CS-701v rear springs
- Icon UCA’s (I rebuilt the old and added Delta joints)
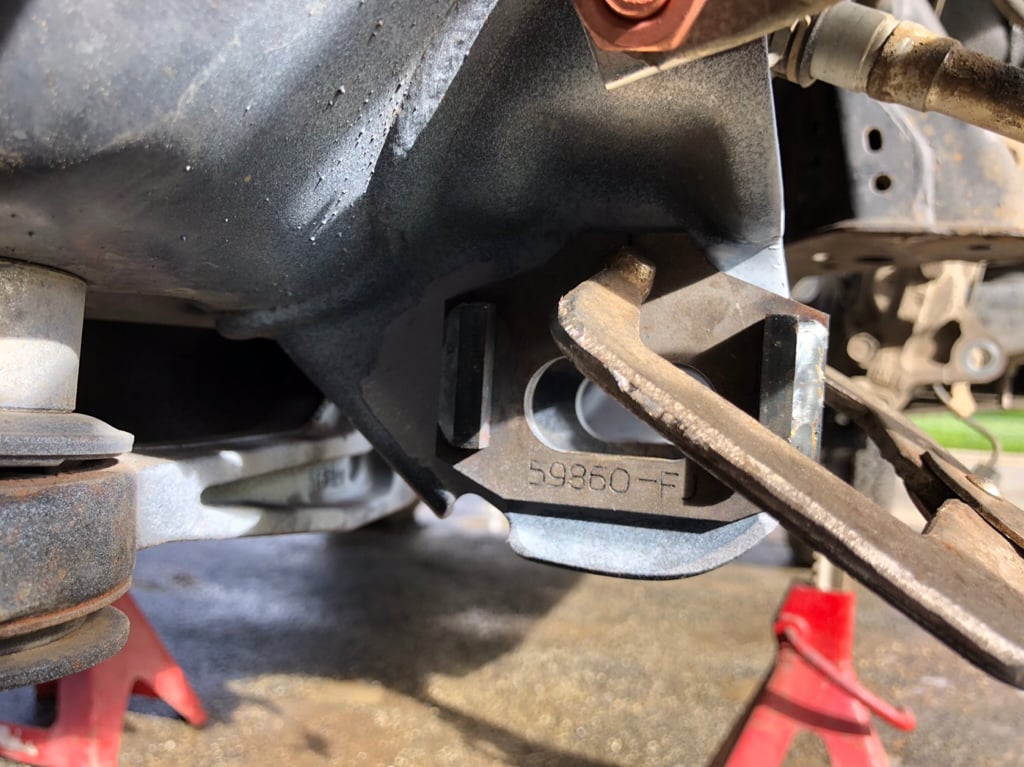
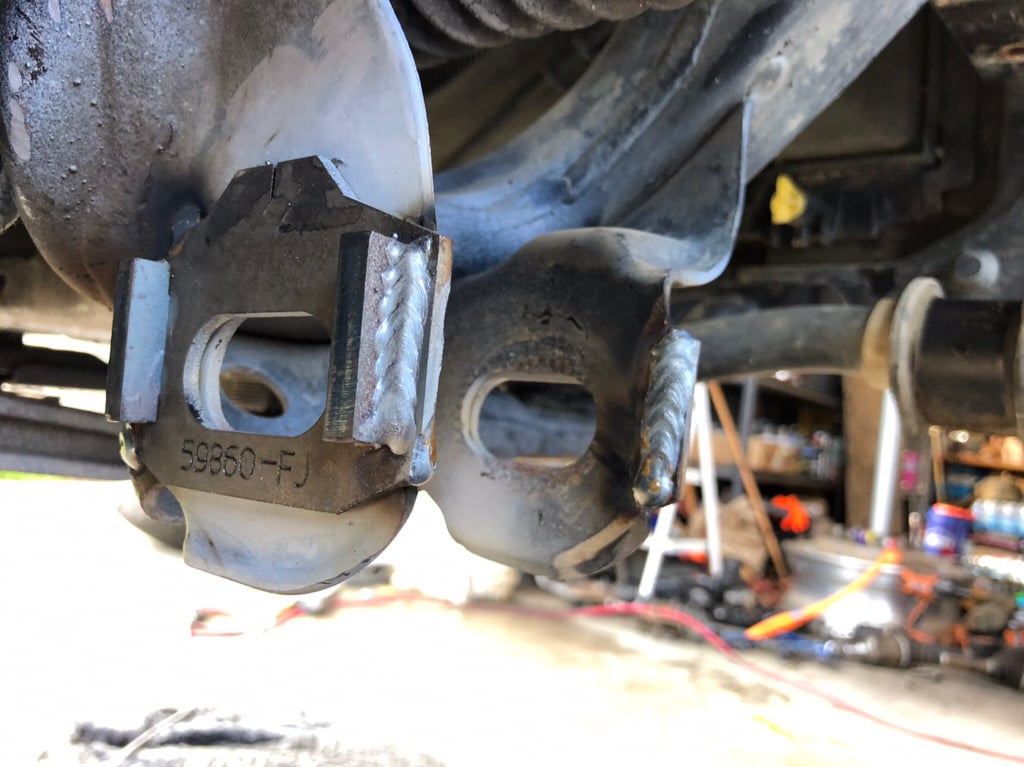
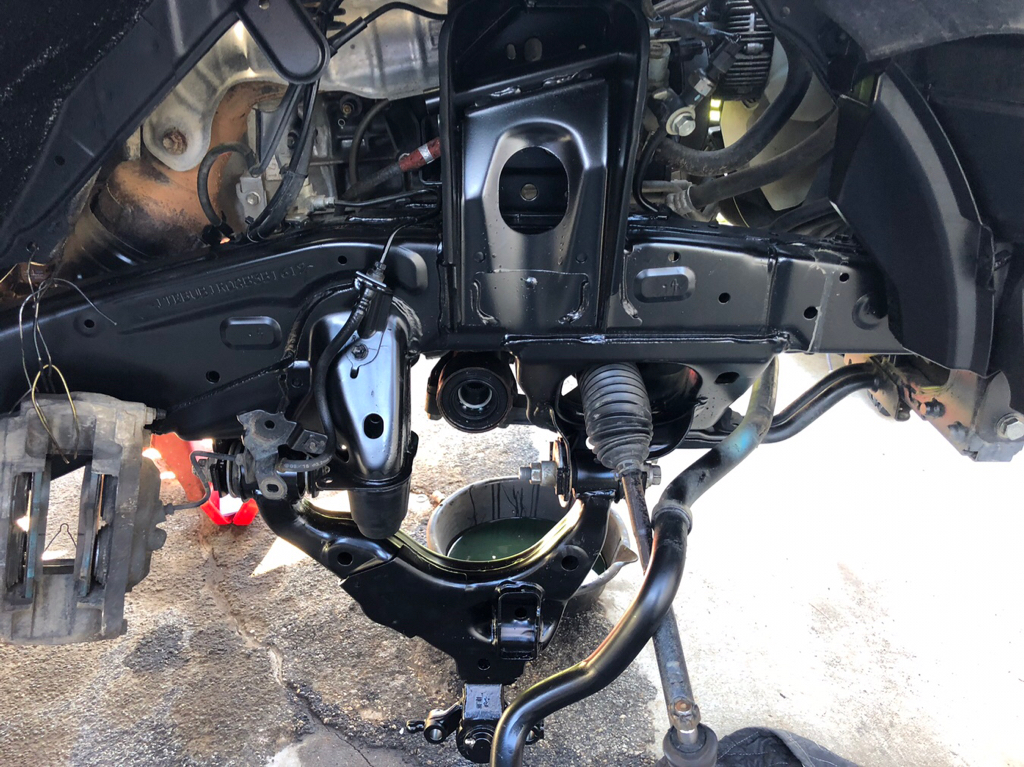
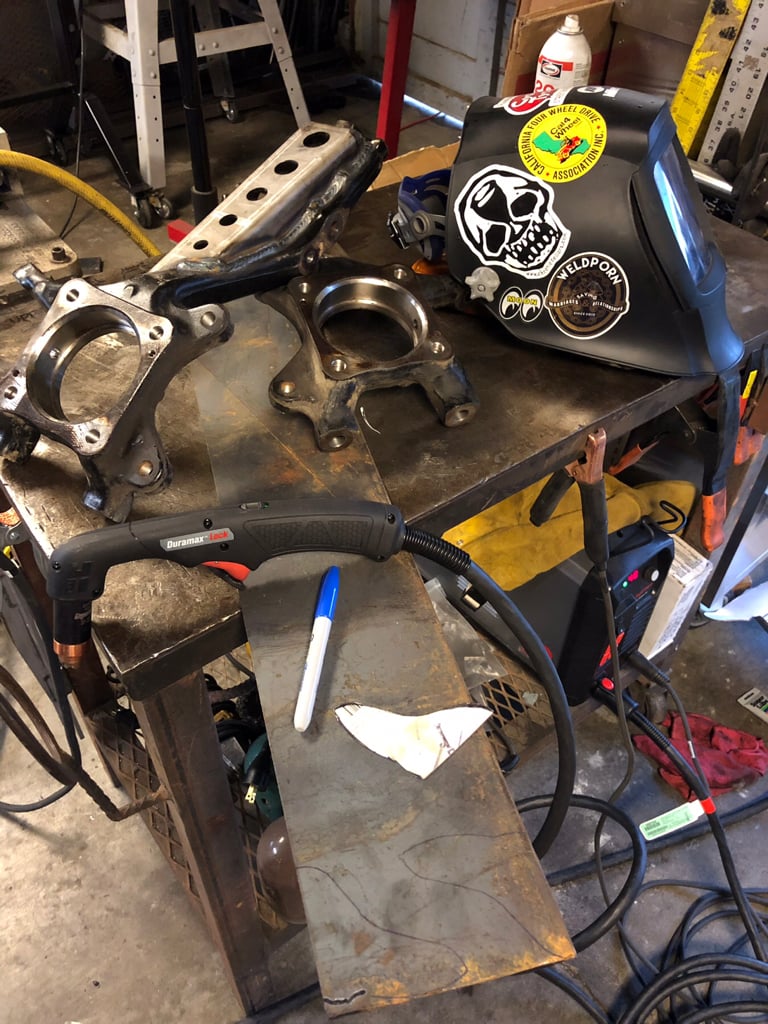
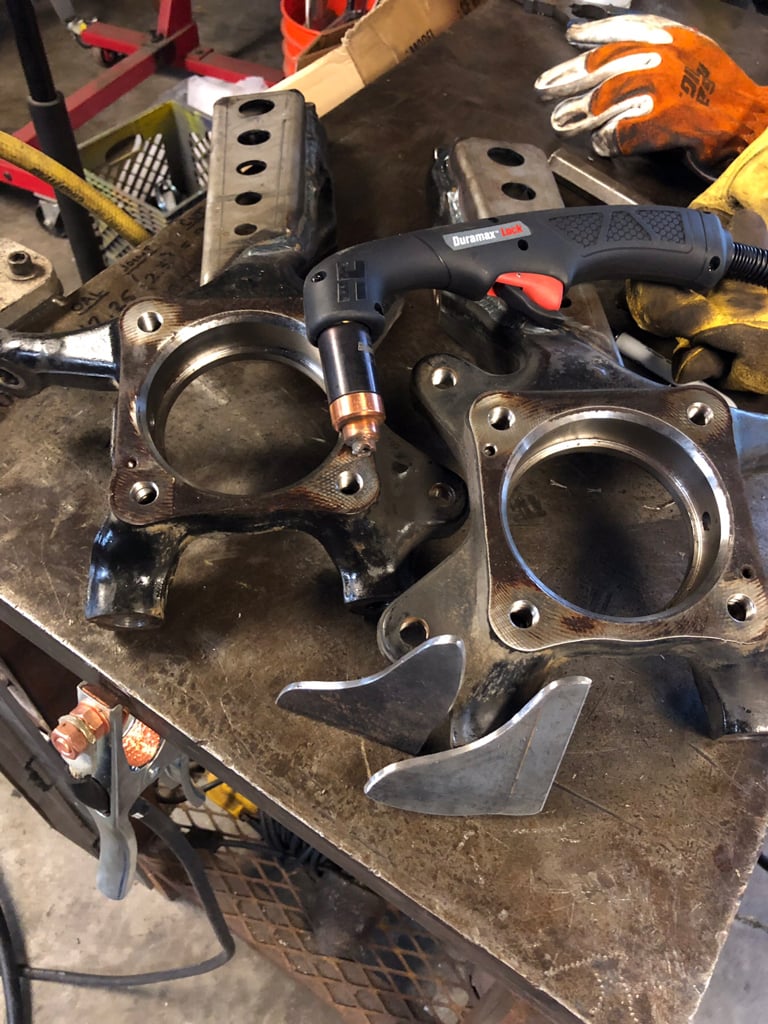
- Allpro spindle gussets (I fabbed and added the steering arm gusset)
- TC cam tab gussets
- homemade rear links
- Braided brake lines
- [MENTION=146407]Plastics guy[/MENTION] bump stops (front and rear)
- misc. seals and whatnot

d0db0b965ae80dd7a6252e5c6e1b23f9.jpg


I had every intention of running TC long travel and settling up for 35’s, but after a lot of thought, I decided that I’m just not going to do that. Instead, for the price that I was going to pay, I bought some much needed, new tools!

(Save for pic)

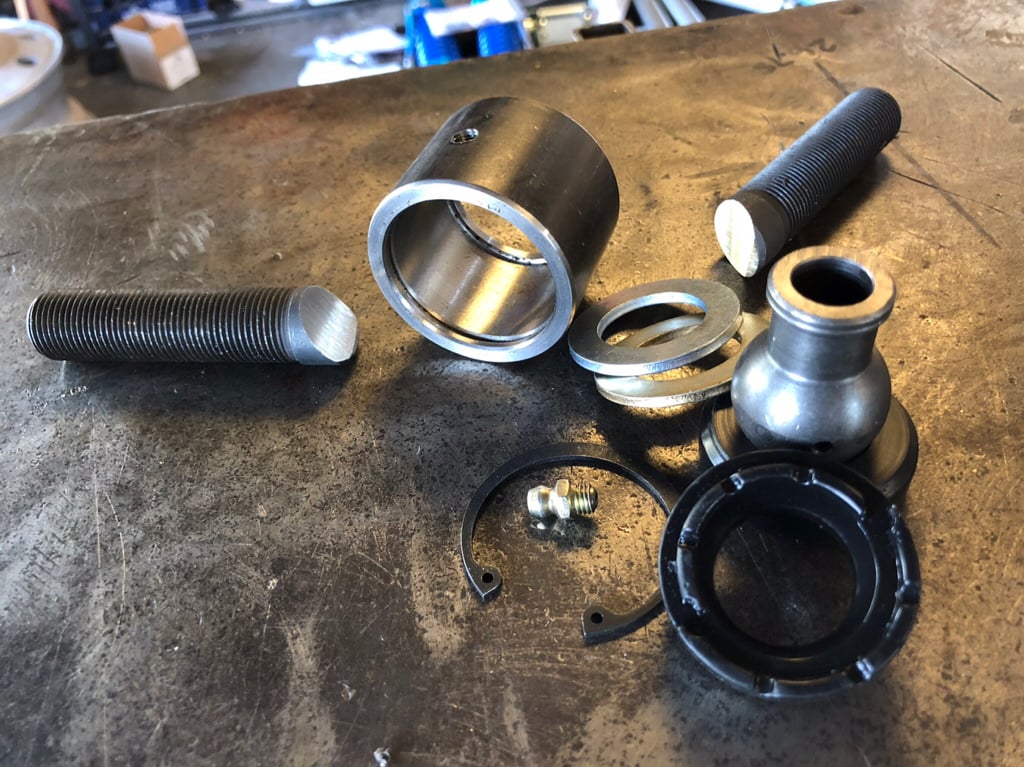
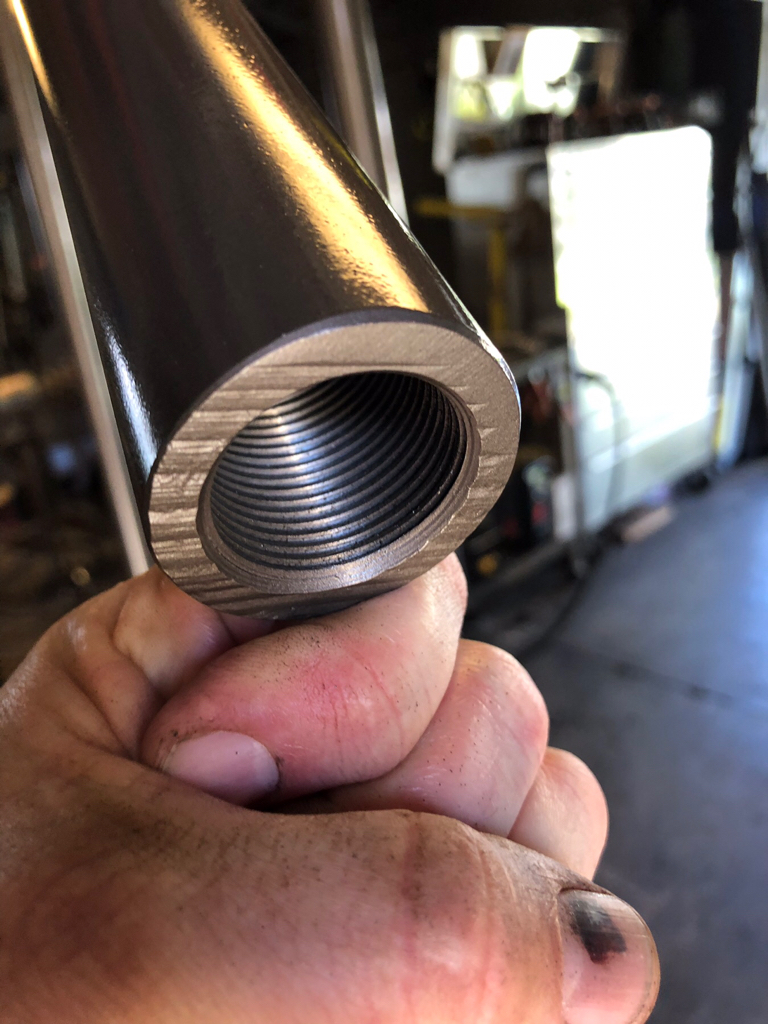
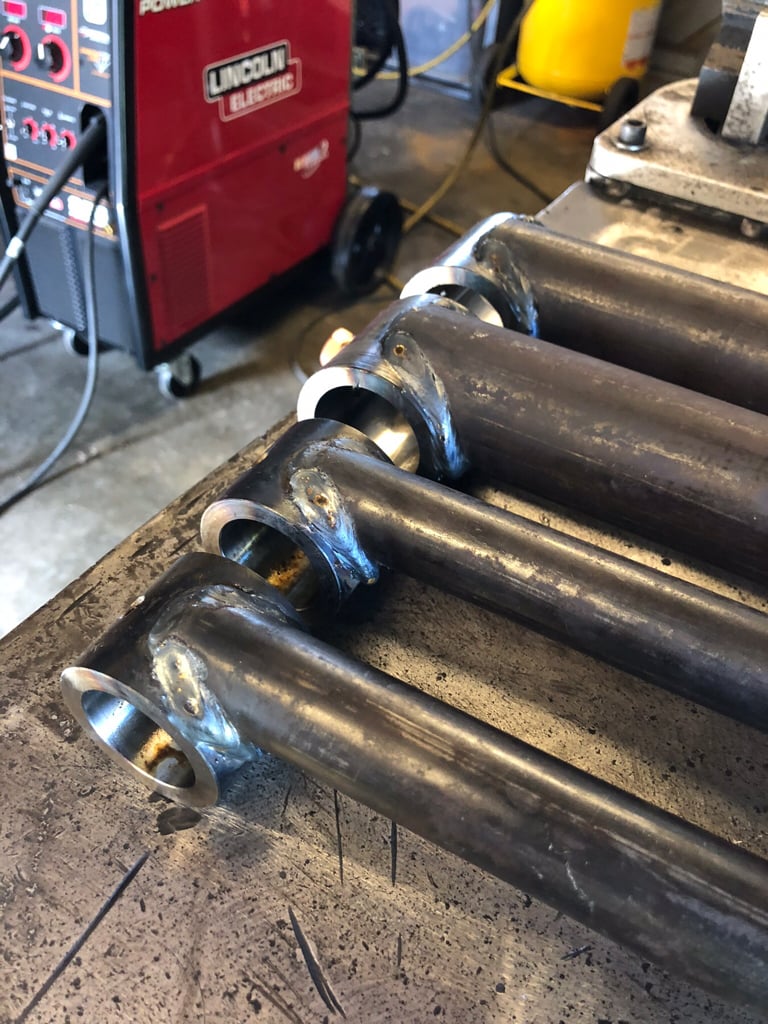
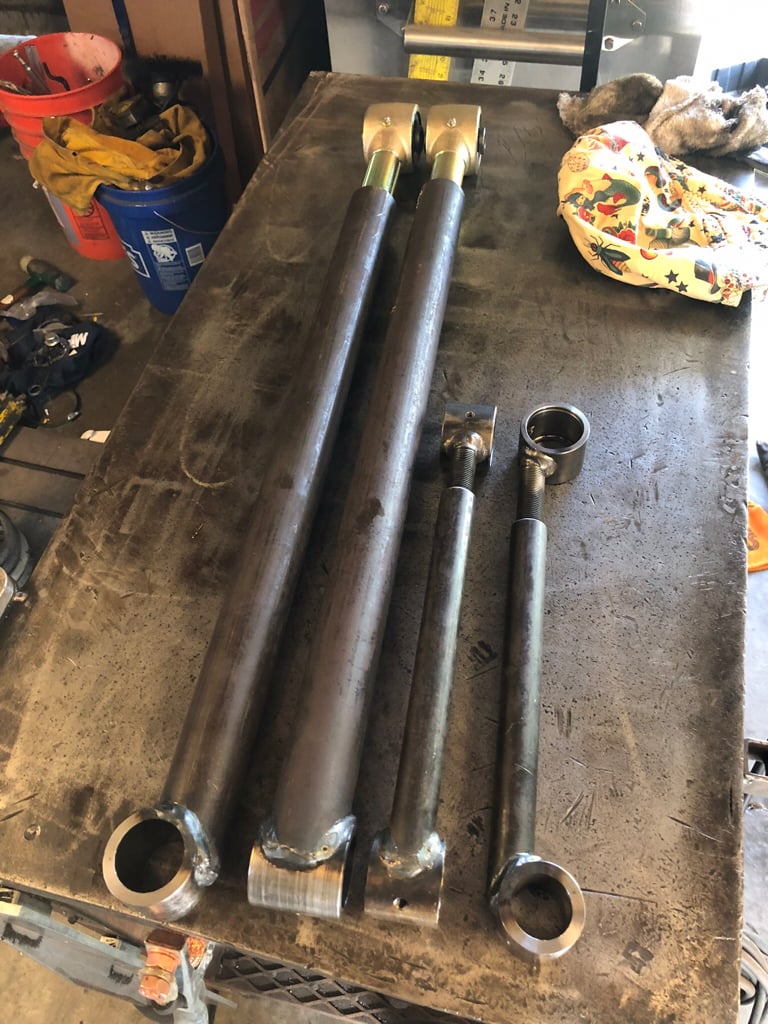
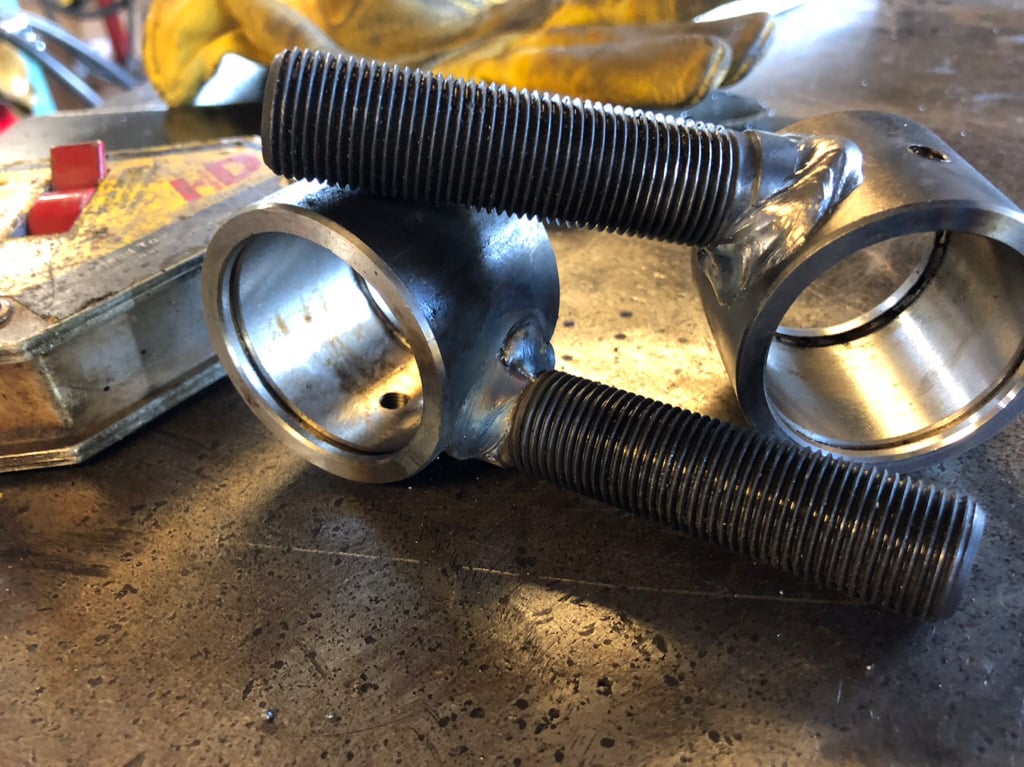
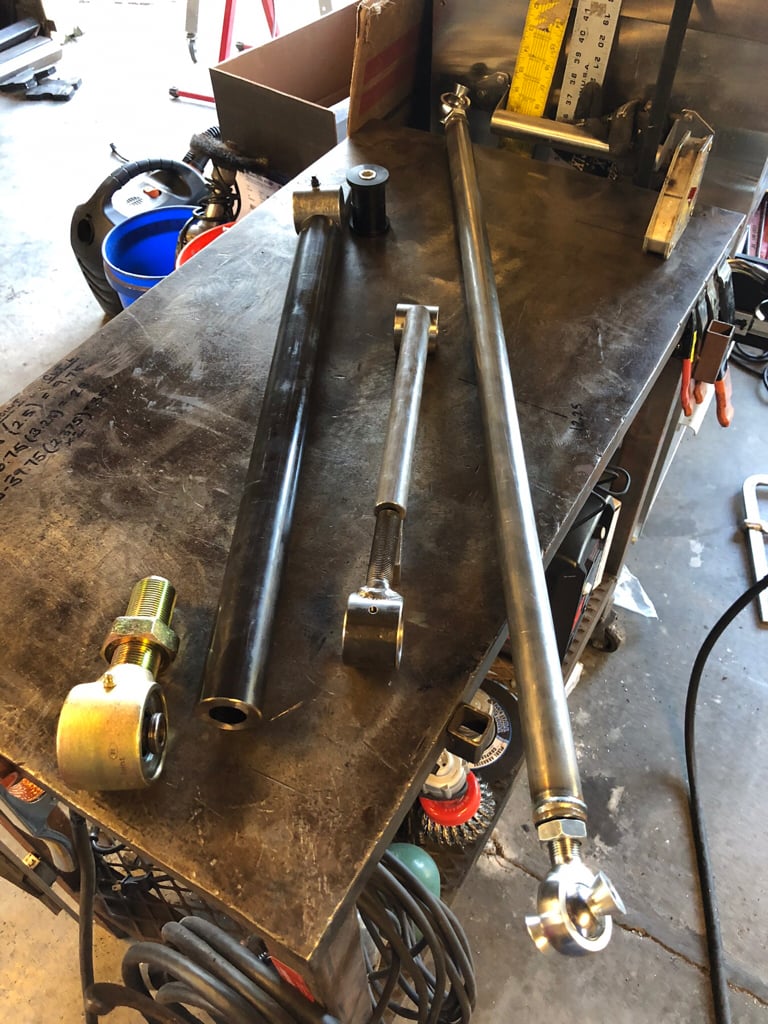
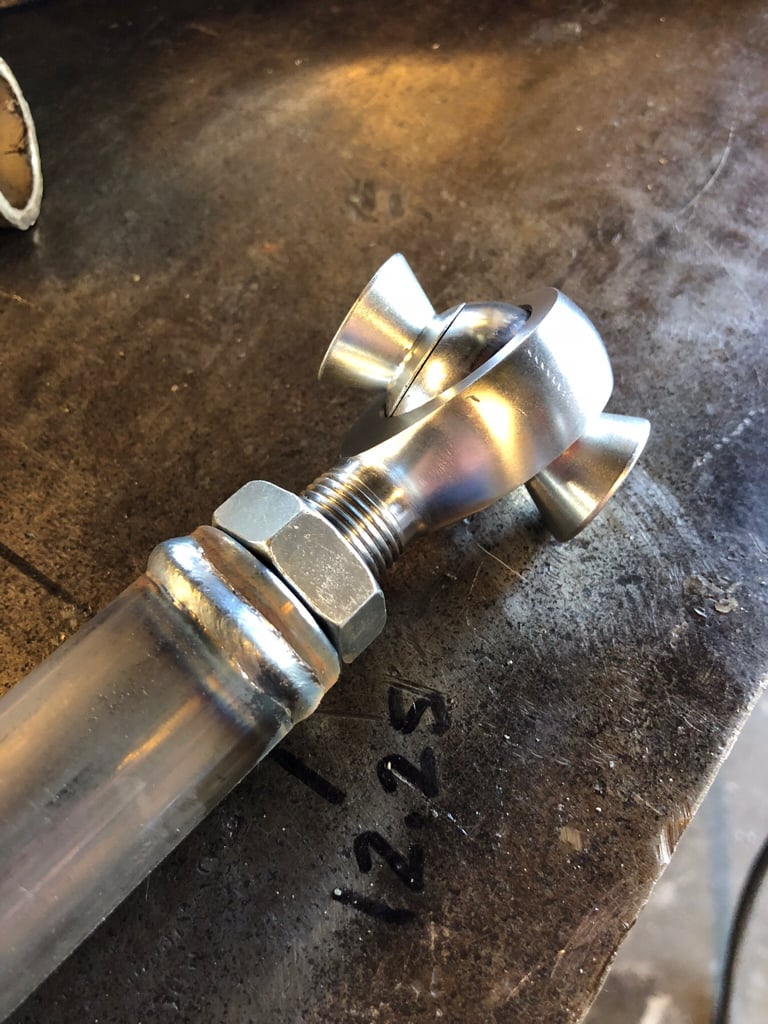
Part of this project is going to be building my own rear links. It isn’t really about saving money, parts and steel are spendy. It’s about building my own stuff. Here’s what I have so far: I used bushings and Johnny Joints for both the upper and lowers. The lower link is 1.75 x .375 wall... really heavy tubing. I’m tapping the joint end @ 1.25 - 12tpi. For the uppers, I used 1.0 x .250 and I off-set both ends. At the joint end, I used a builder Johnny Joint and welded a weldable stud that is made for doing exactly this (no, it’s not a bolt). Once the tubes are back for being tapped, I’ll post better pics.

806f966d74827b32d0f51719beb64acd.jpg


f14b1ce4d8c9b2ceb44a643c2fa5e44a.jpg


4880c7060ed959330178fc0b22001873.jpg


The panhard bar is pretty standard 1.25 x .120 with some heims.

c6f716149688184e078e2d5513943d86.jpg


Like I said earlier, I got up this morning to rip into the truck. As luck would have it, rain was in for forecast. So, being in a bit of a hurry, I didn’t get a before pic of the old suspension. I’m pretty sure that you could use your imagination and one of the million pics on here of an old, Icon stage 2. What I do have is my spindle gussets.

34c0efd1e28287abb1613477d4fe77d0.jpg


I decided that while I was at it, I’d fab a small gusset for the steering arms as well.

62045a10e8472d18ac7156d15209896c.jpg


45b25c1d2d87a18d8d2260f2f7acd7d0.jpg


b618dc48d9713bd37f11edc3b4599822.jpg


Sent from my iPad using Tapatalk

Shoot me a message about the those addition uppers you were building.
 
I got a little bit done today, but not as much as I’d have liked. Gods honest truth, I’m spoiled and I don’t like working in the rain anymore. But, progress is progress.

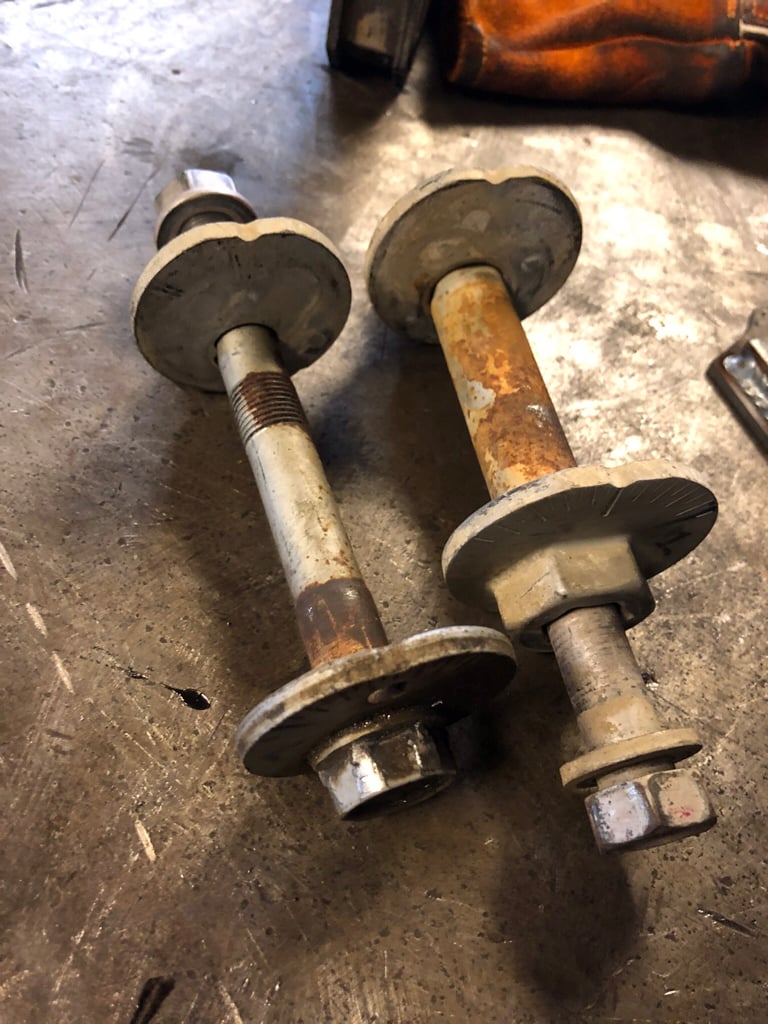
I was able to remove the LCA’s between sprinkles. I come from a solid axle world, so this isn’t really something I’ve done a lot, especially on a Toyota 4Runner. I hit the first cam bolt without issue. It’s a bolt, with the nut incorporated into the rear cam. Looking at the condition of that one and I knew that the rest were going to be cake. Moving to the rear bolt, I put the impact on the head, thinking that it was going to be the same configuration... no joy. “No worries, I’ll just grab the BIG impact”, which immediately rounded the head of the bolt. Now, understand that there was a time in my life where I fed my family turning a wrench. I used that experience, along with the immediate feeling of shame, to deduce that I was doing it wrong. Turns out that the rear is not like the front and it’s most likely done this way to facilitate removal with the axle being in. Lesson learned.

Anyone have a suggestion on a good brand of cam bolt? Factory, Moog, ?

32b573a4be721b47ea41f36944e33aac.jpg


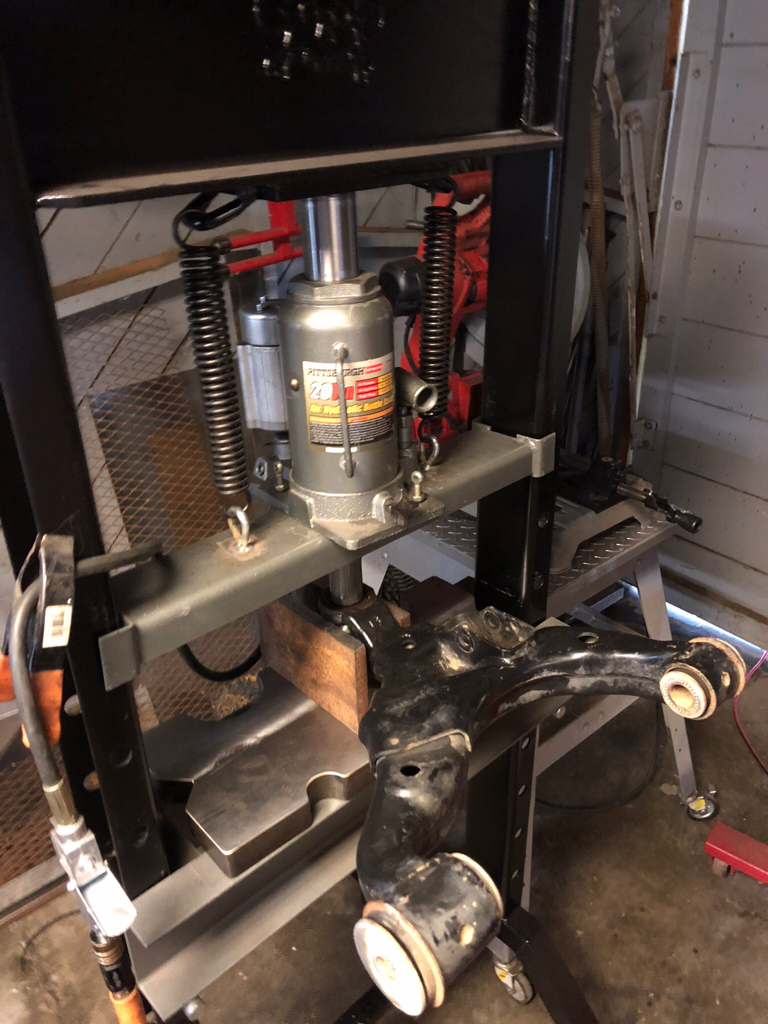
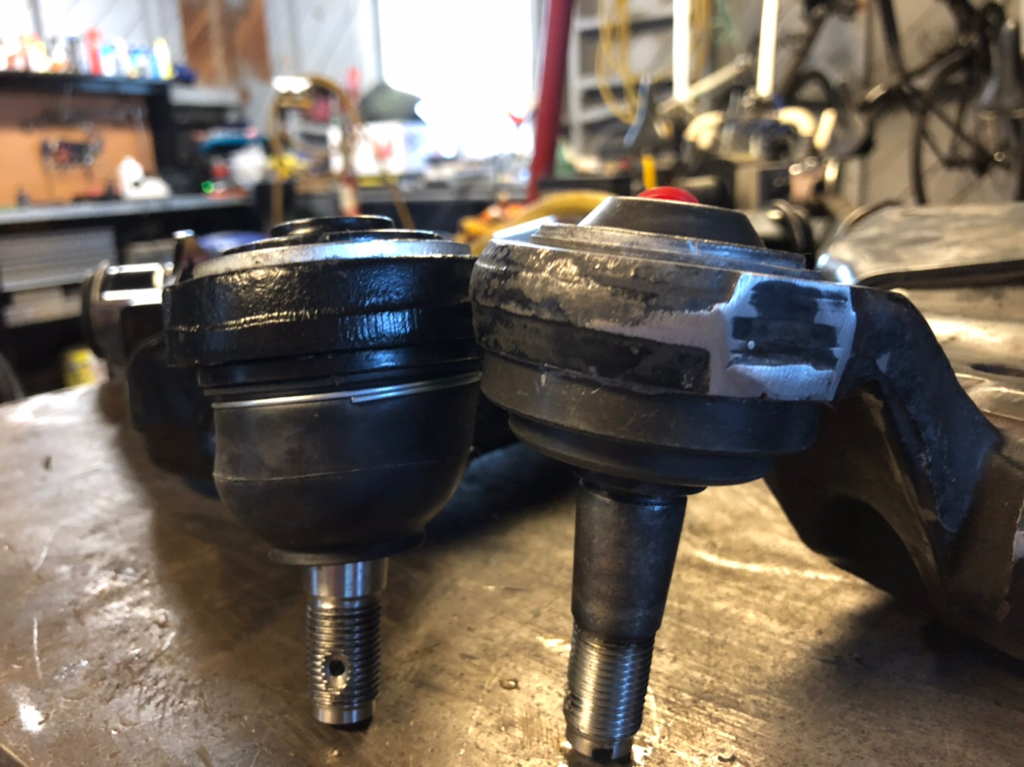
Next, I moved on to pressing the ball joints out. I honestly thought it was going to be a little more easy going than it was. It’s not that I don’t have tooling or the knowledge to do it, but there really isn’t a lot of meat around the ball joint to catch hold of anything. The first one went with just a little heat and a very jenkey setup of stacked steel. There’s really something to be said about putting several thousand tons of pressure on a stack of potential projectiles, aimed directly at your nether region.

81650a67e719044294376cf6414cb1fb.jpg


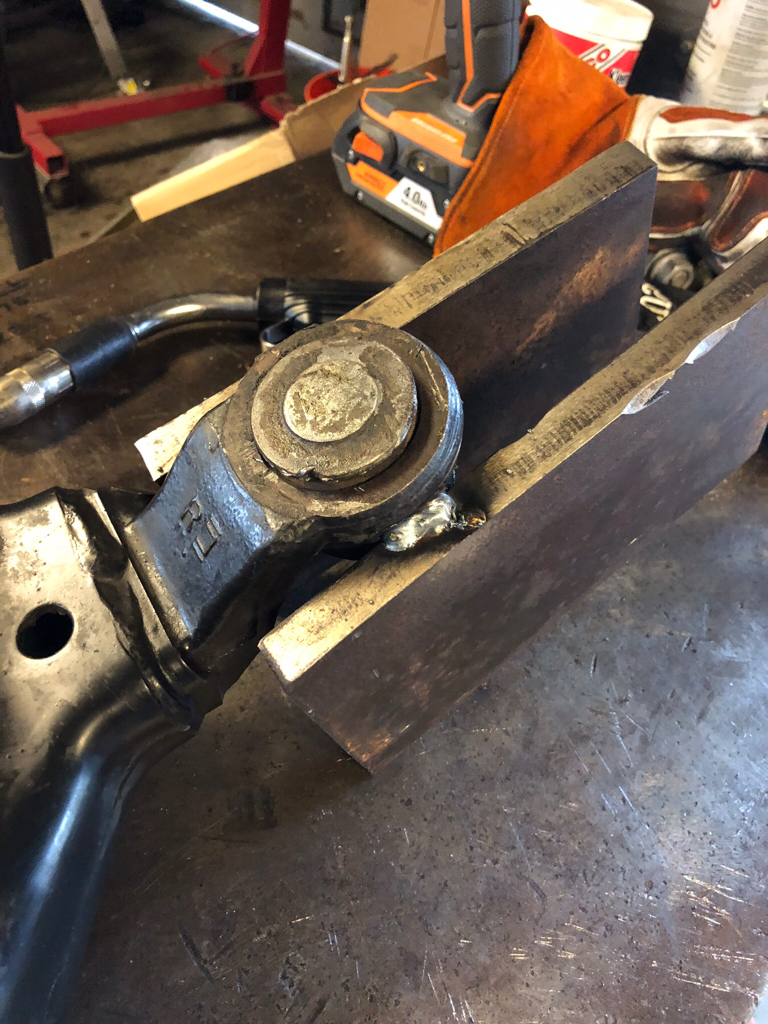
The second arm didn’t go willingly. After screwing with it for a bit, I decided not to take anymore crap and just broke out the welder. If I’m going to keep these LCA’s, then there will be provisions welded to them for this.

54620e5aa6d61339dd25f3b475938747.jpg


The bushings on the LCA’s do not look bad at all. But, while I’m in there, I’d love to change them and I’d prefer a better option than OEM. As far as I know, no one makes a poly bushing for these yet, am I right on this. I’d honestly love any suggestions.

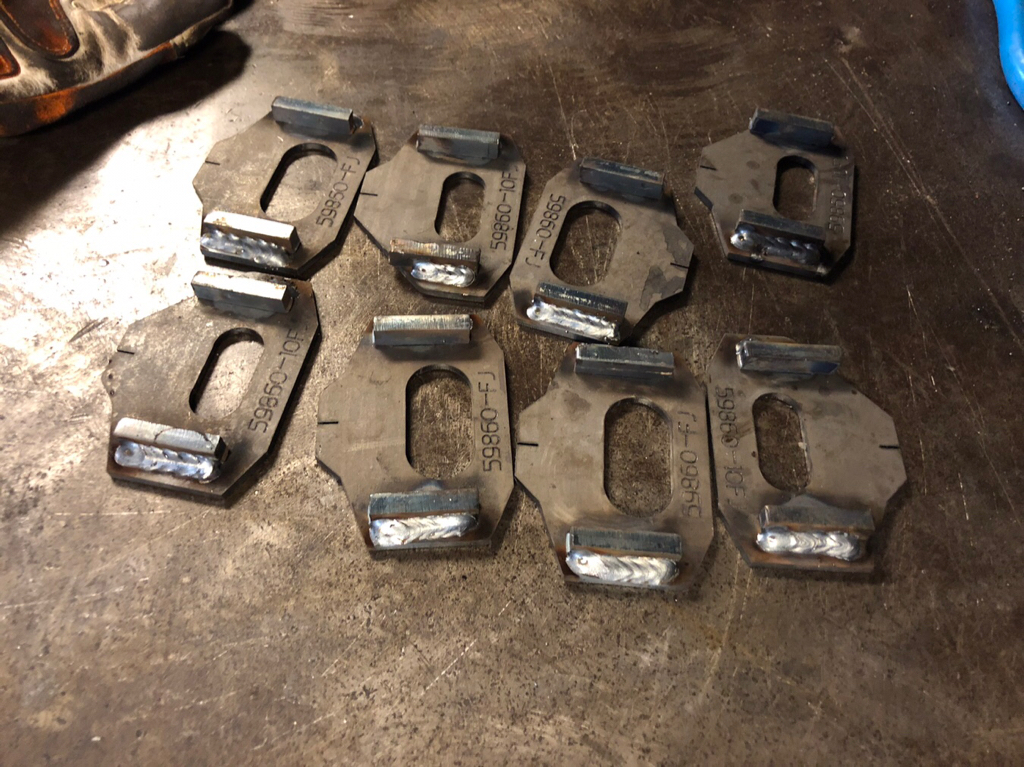
With the cam bolts out I welded up the tabs on the TC cam gussets. They all fit nicely, without any messing around.

08caf6c1f98dde8d7d2e98b9014c3d0e.jpg


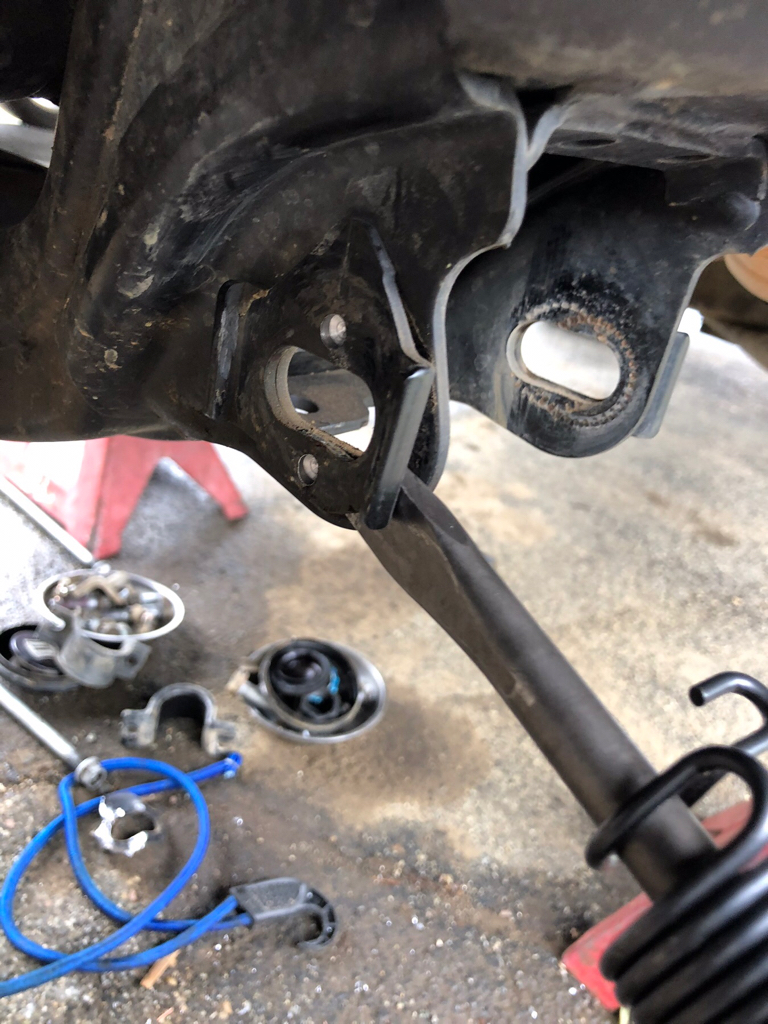
At this point I was trying to make the most of this rainy day. So, I figured I’d see how removing the OEM gussets was going to go. I was originally going to use the plasma cutter to gouge the spot welds. But, what’s on there is really, really thin. About 30 seconds with a drill and I was able to beat them off. Wait... never Mind. All-in-all it took maybe 10 minutes.

cc2c0117de1e302cde66971b9c1b58ab.jpg


I really wanted to get them on, but lying in standing water while welding isn’t happening.


Sent from my iPad using Tapatalk
 
Other's can clarify if I am wrong, but I think the ball joint in the LCA's is not serviceable...meaning trying to find a OEM replacement or aftermarket joint that fits is going to be difficult. Seems like most just replace the whole LCA if they have a damaged joint.
 
IMO you should do Delrin bushings. Less deflection then poly, "self lubricating" although every arm i've seen with Delrin they have grease zerks. Drill and tap to add grease zerks is simple enough.

ran delrin bushings on my Titan LCA's and it was fantastic.

this thread is awesome; constantly seeing guys post complaints about how they screwed up a bolt and need the dealer to fix it gets old.
 
Other's can clarify if I am wrong, but I think the ball joint in the LCA's is not serviceable...meaning trying to find a OEM replacement or aftermarket joint that fits is going to be difficult. Seems like most just replace the whole LCA if they have a damaged joint.

I’m slowly finding this out. It’s weird, because they sell a replacement ball joint. My was all that bad, I just figured I’d do it all while I was in there. Since I’ve done all that, and while waiting for the new ball joint to show up, I’ve found quite a few write ups on it. Hindsight is most definitely 20/20. I’m going to see if it will work...
 
IMO you should do Delrin bushings. Less deflection then poly, "self lubricating" although every arm i've seen with Delrin they have grease zerks. Drill and tap to add grease zerks is simple enough.

ran delrin bushings on my Titan LCA's and it was fantastic.

this thread is awesome; constantly seeing guys post complaints about how they screwed up a bolt and need the dealer to fix it gets old.

That’s exactly what I’m looking for. Even poly, but I can’t seem to find them that say they are for the 5th gen. Would you happen to know of any?

If I don’t find anything for the OEM arm, and the ballpoint thing ends up being a bust, maybe I’ll just find an old set and make my own...
 
That’s exactly what I’m looking for. Even poly, but I can’t seem to find them that say they are for the 5th gen. Would you happen to know of any?

If I don’t find anything for the OEM arm, and the ballpoint thing ends up being a bust, maybe I’ll just find an old set and make my own...

Performance Lower Control Arms | DK-814904 – Dirt King Fabrication

wonder how close the bushings in these arms are to OEM size. If they use the same camber bolts, ID should be the same, width is the same as the mounts don't change, the only question is OD as DK might be using a thicker wall material to house the bushings?

[email protected] Nick and Dustin are super helpful
 
Performance Lower Control Arms | DK-814904 – Dirt King Fabrication

wonder how close the bushings in these arms are to OEM size. If they use the same camber bolts, ID should be the same, width is the same as the mounts don't change, the only question is OD as DK might be using a thicker wall material to house the bushings?

[email protected] Nick and Dustin are super helpful

I’d love to have something like that, but I think I’m going to stay OEM to save some $. I’m a little disappointed that The stock arm aren’t made to be serviceable. Thanks for that info, I think I Will call them and see how that derlin will work with what I have.

Gotta admit, Just talking about this is kind of getting me fired up to just build a set. I know it sounds crazy? But to copy the geometry of a pair that I have in hand... stand by on that one.
 
I’d love to have something like that, but I think I’m going to stay OEM to save some $. I’m a little disappointed that The stock arm aren’t made to be serviceable. Thanks for that info, I think I Will call them and see how that derlin will work with what I have.

Gotta admit, Just talking about this is kind of getting me fired up to just build a set. I know it sounds crazy? But to copy the geometry of a pair that I have in hand... stand by on that one.

yea i just showed the link for the Delrin purpose. copying the OEM arms would be doable; improving on the OEM geometry is probably where you'd need programs to run the suspension at full bump/droop. But if you just want better joints, bushings that actually articulate, limit strap tabs, bump stop plates ***Tab for bypass:car: then thats something id love to see updates on.
 
Alright, a Saturday with a break in the rain! I got the ground dried up enough to make lying on the ground a little more fun.

35d699b226999019bf2466d1d900d53b.jpg


These took very little fitting and took little time to weld up. In fact, the wind is what took so long. I had to time my beads between gusts. Besides that, and not being very good at out of position welding, it wasn’t that bad.

8ac31645b65dc5bd4c9d6cdfcdb038c8.jpg


Here’s a bead that didn’t get enough gas. It’s not bad enough to gouge out and redo, but you can see the effect of wind.

4ebce07c8544deb473b9223f97dcdbcc.jpg


A bead at the front and back is all I did.

abf985b990ffc581283200c7f098e848.jpg


c02a77ba132c336d64301245f41e75c9.jpg


Did a little paining too. BTW, ace hardware “rust stop” satin black is pretty damn close to a factory frame black.

c56aac4944489a39a4ec83838de548c3.jpg


Between having horrible luck with parts shipping this week, and a surprise visit from my mother-in-law, I didn’t get nearly as much done as planned. I have been obsessing about LCA’s though. I’m not spending $1500-2000 on an aftermarket set and I don’t like the lack of bushing options for OEM. I put new ball joints in last week and had to trim a little bit of the forged end to get it to work. I started to second guess the amount I trimmed, thinking that I’d made them a little weaker than what I should have. At that point, I decided that I was going to build my own set. So, I ordered a set of Moog’s to put in while I decide how to build mine. When I got the Moog’s, I noticed that the forged area around the BJ is actually thinner than what I already have, by about 1/8”, even after my trim.

85b83438f25ba4012baef9ca6ff35000.jpg


So, I’m going to do one of 2 things. I’m going to take my OEM arms and add delrin or poly bushings, then add gusseting around the BJ, and other areas. Or, I’m going to make them from scratch with DOM tubing and a uniball... not sure yet. I’d love to use a uniball, but I also like the longevity of a ball joint. Thanks for the link, [MENTION=137195]honda250xtitan[/MENTION] I found a lot of nice builder parts through them and Camburg.


Sent from my iPad using Tapatalk
 
Last edited:
Late entry:
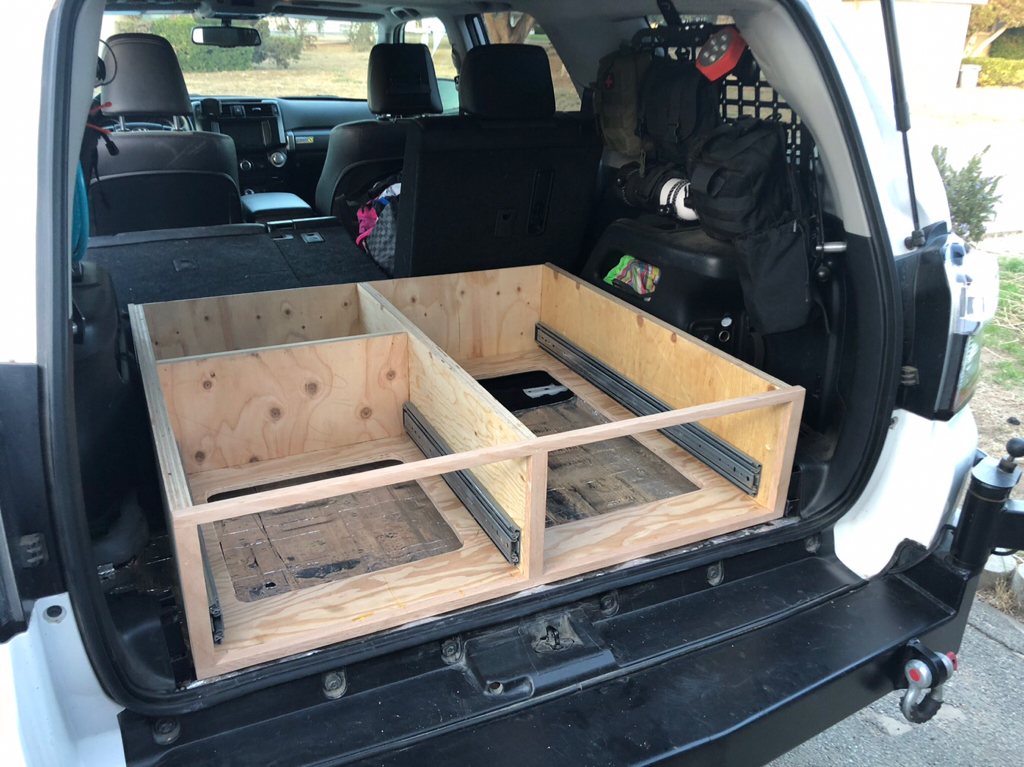
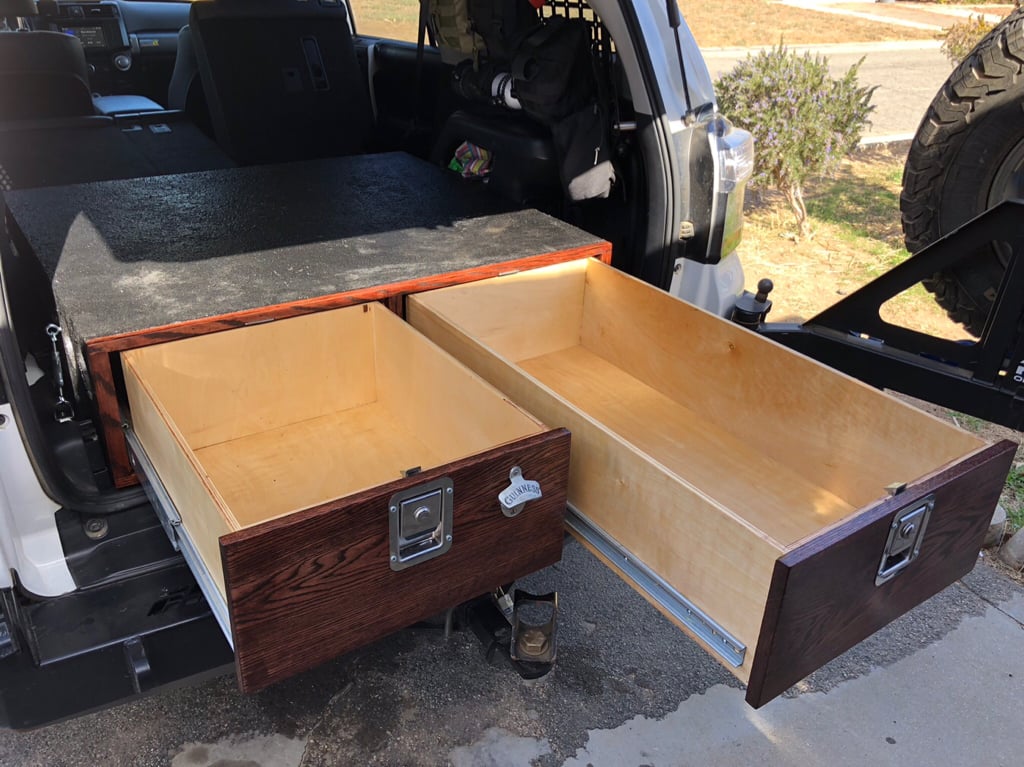
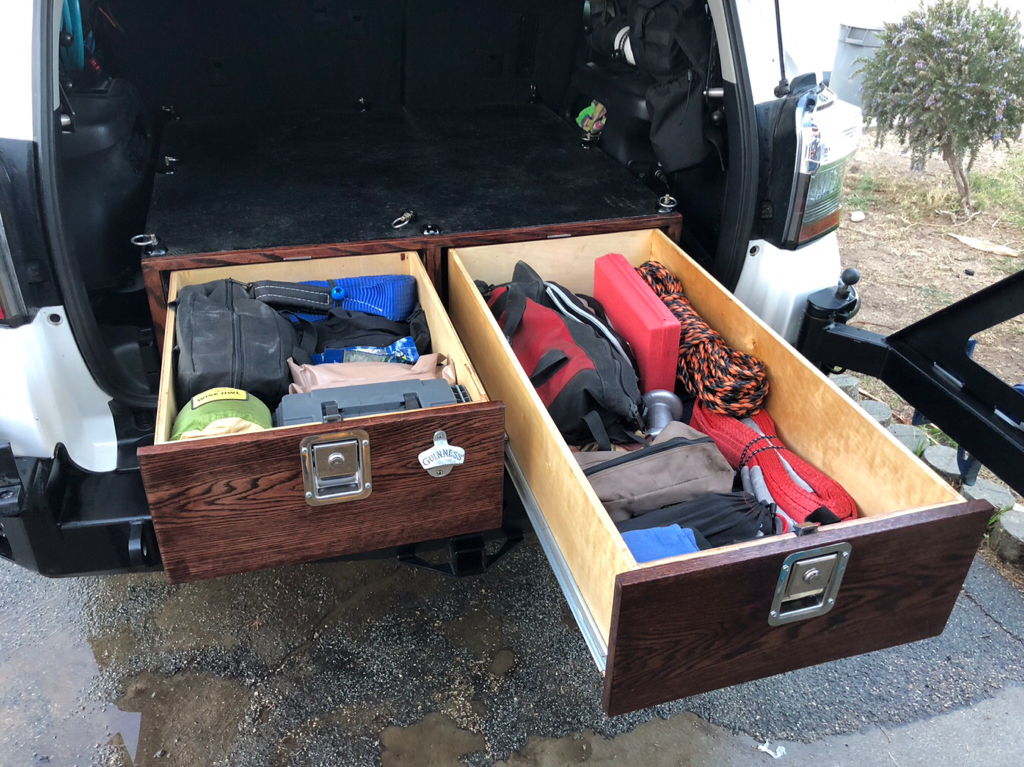
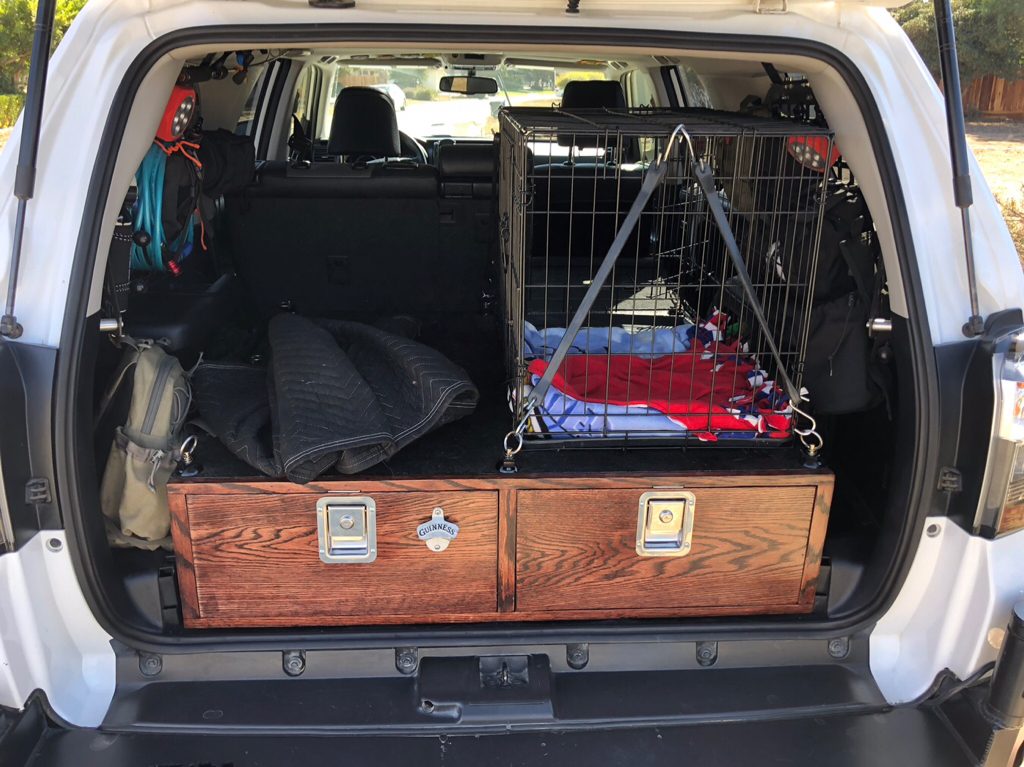
A few months ago, I was able to finish my cargo drawers. Another project that took me far too long. I don’t have a lot of pics of the actual build on this, because I had to have most of the box cut by a friend. It not that I can’t cut wood, I just don’t have the tools to do what I wanted to do. I figure I’d post this, not as a “how I built my drawers”, but just to show my subwoofer placement, that I’m kind of proud of. I started with a 3rd row SR5. I was going to trade out my 3rd row for 2nd row stuff, but the deal fell through and I decided to make it work.

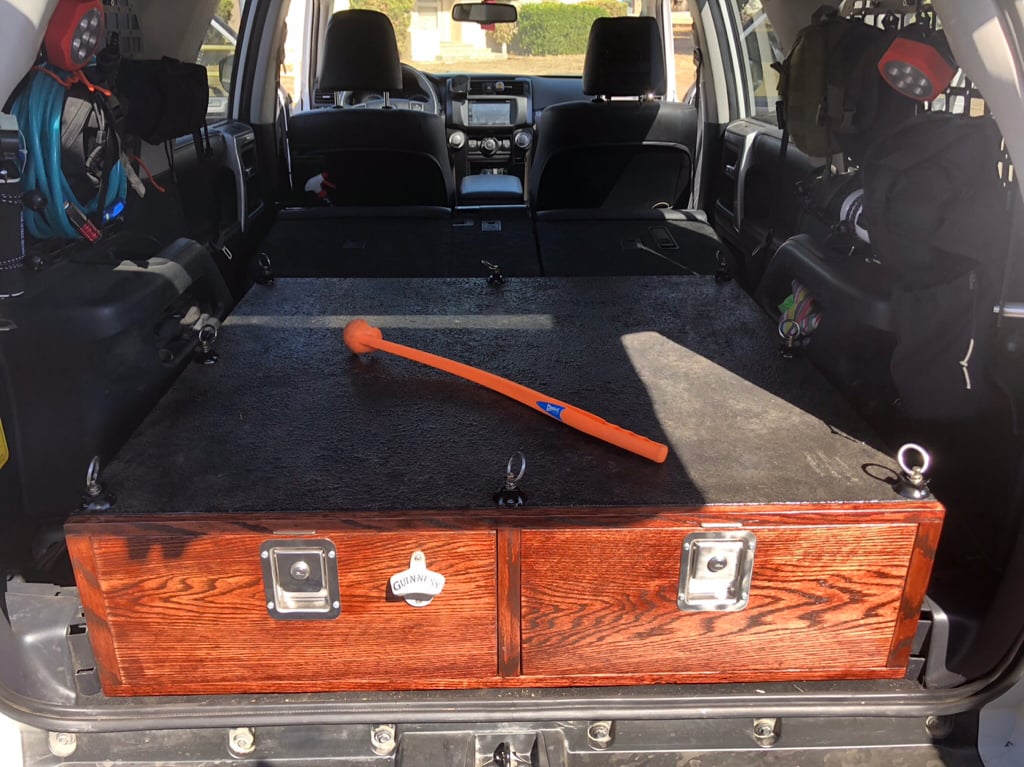
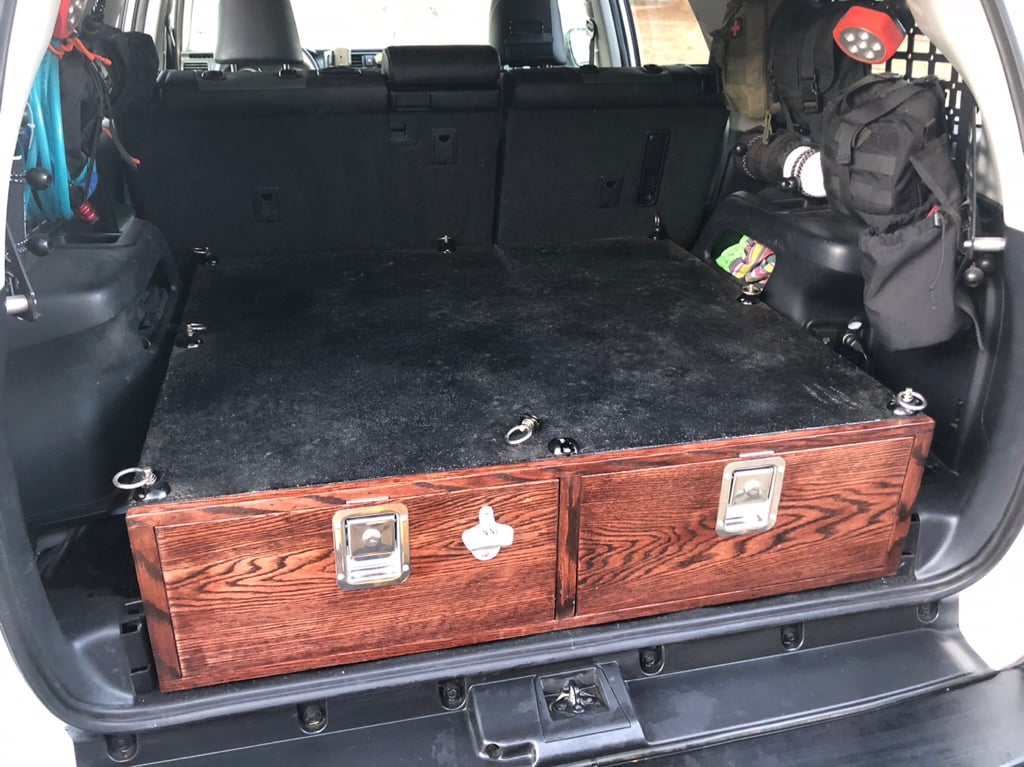
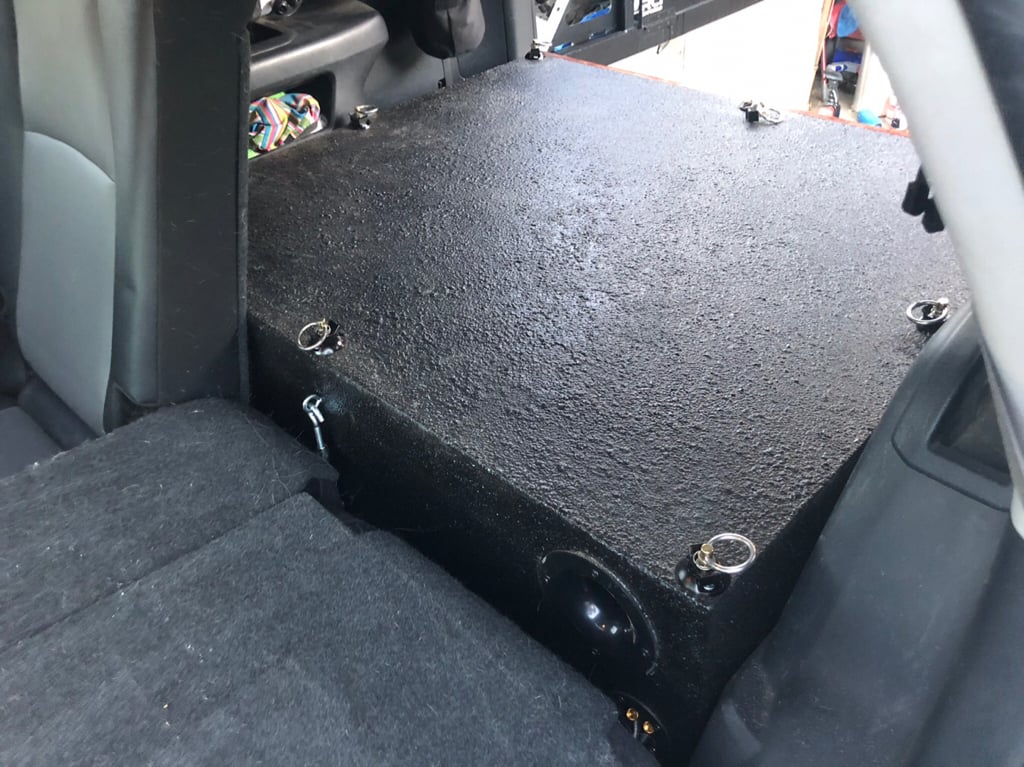
The box is 11” x 42” x 37”. With the 2rd row, on a 3rd row 4Runner, the box is nearly level for a sleeping platform. It’s actually way better that a 2 row, 2nd row, IMO.

ffe8ebcb0d687c9955f651e59622e8e2.jpg


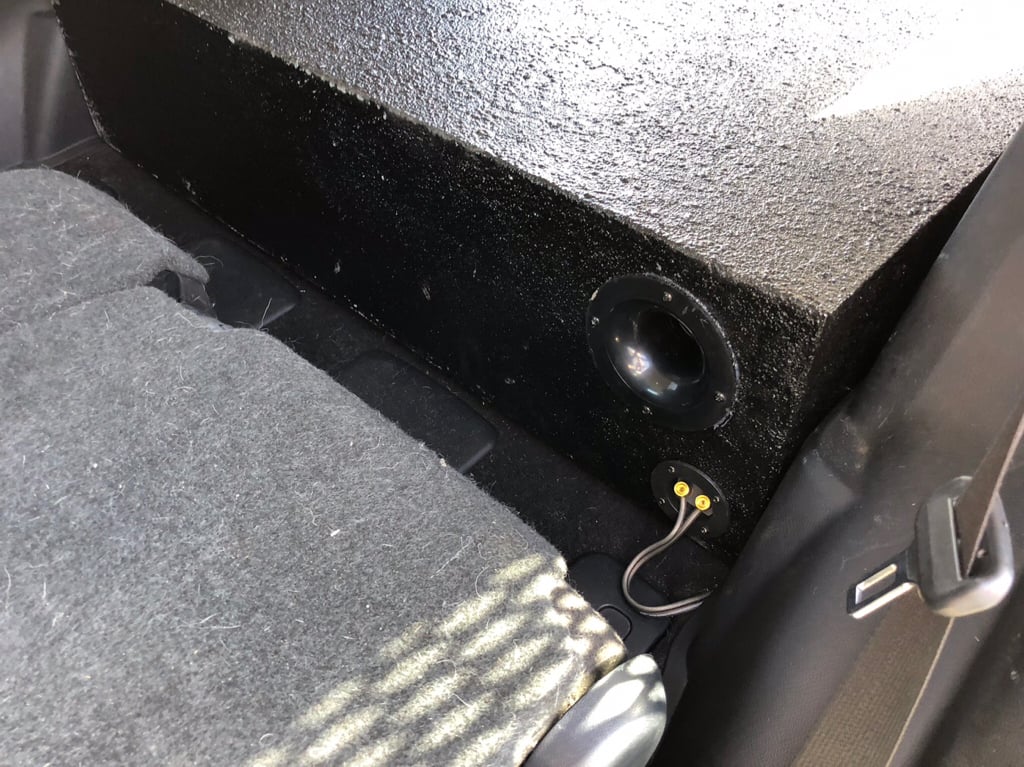
If you notice the box in the front, driver corner, that’s a 1.35 CI sob box. It houses a 10”, down firing sub. The sides are made from 1” ply. That’s way overkill and not in my plan. The person I had cut the wood, “did me a solid” by “hooking me up” with something that would hold a baby elephant. I ended up drilling 5” lightening holes to keep the weight down.

The right drawer is 36”, the left is 22”. I used 500# drawer slides, because I’d seen them used a lot in drawer builds. If you happen to be reading this and think, “ya, 500# drawer slides!” Then I’d like to tell you that they are stupid heavy and way overkill, IMO. Half that would have worked. I faced the front in oak and coated the body with Herculiner.

93435bf24be925f159336cc3b1dd672a.jpg


Here is the subwoofer port. I really wish I had better detail pics of this. I get impatient during a build and don’t stop to take pics. I typically regret it later.

11654c1821fd86a0f1e7fcf6c887a06e.jpg


I added turnbuckles to hold it down and aircraft style tie-downs. So far, I love this thing. No more loose crap stuffed everywhere and I have a great sleep platform and a hidden sub.

839c1dfa0e316241f52fd37e6ad82cb3.jpg


0fdf9d64bf7f8db4acf72a72403f9323.jpg


d530903e7bc99b52a7a2ca30f9e40eb8.jpg


9248626dcf57ee14a780fcf7cf27a403.jpg


5594a5334e053808fb18243560f8aa8d.jpg


8f1c3d25f77cdfcb0d8e8ef8b960c8f5.jpg


Sent from my iPad using Tapatalk
 
Last edited:
With some good weather and a nice, leisurely 3 day weekend, I got plenty done. With everything pretty much prepped and ready, the front end went pretty quick. You can see the Duro bump stop in there.

af1605a790aef4e23f4cdf246be09d50.jpg


Installation has been covered many, many times in here. So, here’s the finished product. I kept the sway far, converted to Icon Delta joints and replaced pretty much everything. New Toyota CV axles as well. I destroyed one last year and had to replace it with an auto parts axle that is no where near as good. I’ll end up with one origin axle that will become my spare.

01fdc8fb976805877de9a4ff9d19d6a7.jpg


Moving on to the rear, I’d planned on having my links done. But, that didn’t work out. So, I went ahead and pulled the Icon overland springs and threw in the Dobinsons C59-701’s.

4238be919acc577579d264beef0e4a6e.jpg


I say “threw in the Dobinsons...” like it was no big deal. Being truthful, by this time of the day I was freakin tired and starting to rush. If you look closely at the “plastics guy” duro bump stop, you’ll see that the rear bolt is completely exposed. That’s because when I tightened it, it exploded. Like I said, when I rush I break stuff, it’s just the way it is. On the other side of the truck, I had the power of hindsight. While I was tightening that one, I could almost hear it start to crack. I liked these while they were in a pile of new parts, but now I’m not so sure. Most bumps will have some steel around the mounting points, but these are all plastic. There will be more on this later, for sure.

a9375fd467401c78ba98c82a9c98f455.jpg


With it finally on all fours, with 600# springs at zero preload, it sat pretty low in the front, especially with the new rear springs. I knew that the front was going to be low no matter what, so I desired to Get them a little closer before my first alignment.

1366d9f61956b261f859038651c6b2ab.jpg


I’m used to Icon coilovers and have always adjusted them on the truck. I was afraid that I was going to have to remove these, based on what I’ve read. With them on the truck, you can’t really get spring compressors in there, so I used ratchet straps to the LCA. That worked great and was actually a piece of cake.

1ad16b6d91bffda10ae470bca241c3a5.jpg


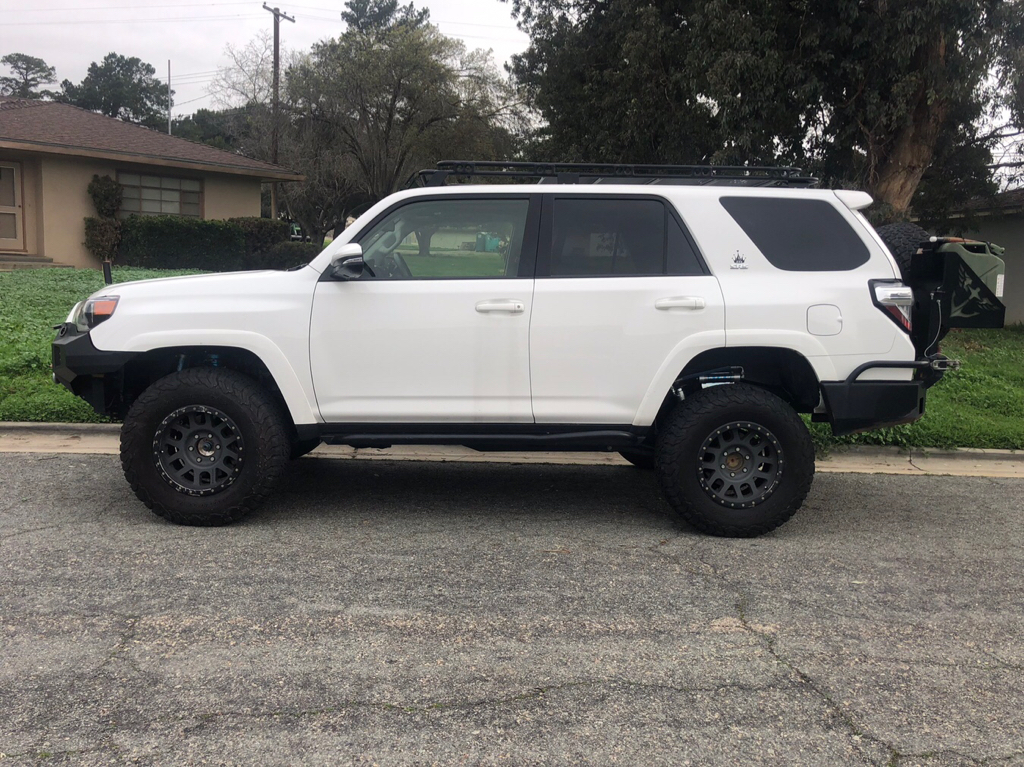
Measuring from the fender to the hub center, I started with about 21 1/2” (Left) and 21 3/4” (right). I put 8 turns on the left and 7 on the right for about 23.5 “.

16897bfabd6102aa663e70ee3d09478c.jpg


717d424b133e5a230b1975379f2c8945.jpg


Ben, at Filthy Motorsports, who has been awesome to work with, suggested that the max measurement should be 22.5, for best ride quality. I know I’m over that, so I’m debating on taking a few turns out or just leaving it to see how it settles. I know that I’m going to be a bit high In the rear with those springs without full weight in it. Any suggestions form anyone running a similar setup would be greatly appreciated.

It sits much better now. At this point, I’m dangerously close to being ready for a snow trip!

8c122e9116b7adac4f6e0128a0954f34.jpg


Sent from my iPad using Tapatalk
 
Last edited:
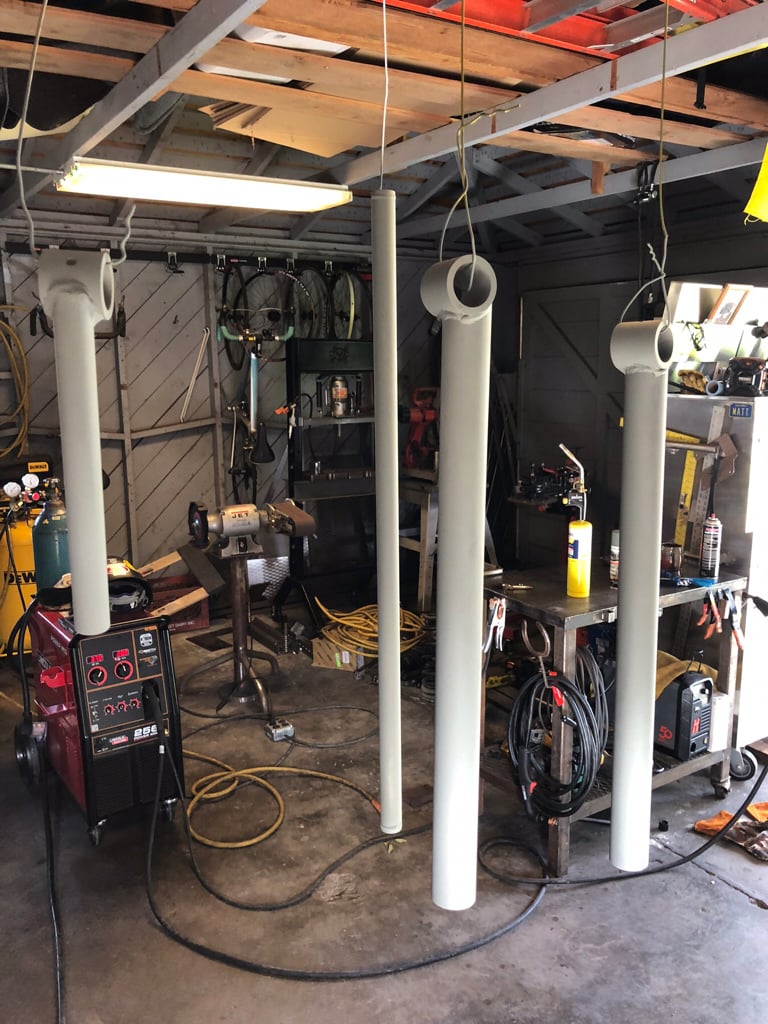
Making some progress on sorting out my suspension. I got my link tubes back from my buddy. He was able to thread them for the Johnny Joints. I love to have a lathe! #shopgoals. So, today I was able to get the bushings welded on and get a coat of paint on them, before i have to break away and go shopping...

These things are chunky!

a4f90b7a689f1d0f28bf10b834a9f08d.jpg


906d0c667f4b16d0f6dd875ec1ce795b.jpg


f4453a617cae06c56f3981f91399e62d.jpg


18cd1e5a49383009f2b23287d9590c8d.jpg


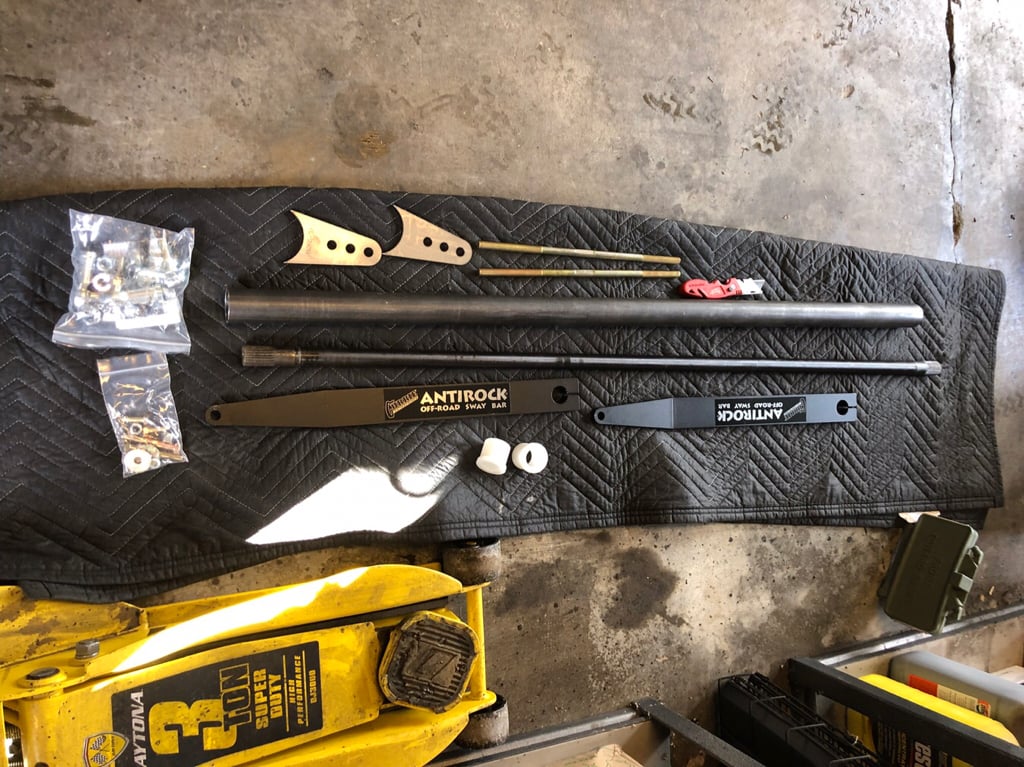
While I was painting, the FedEx guy showed up with another project to tackle. It’s a generic kit that I picked up from Summit. I have a general idea of where it’s going, but I think I’m going to wait until I ditch the CBI bumper, to do it the way that I want it. I was able to take a look at [MENTION=113049]rochmpr[/MENTION] ‘s 4x4Labs rear bumper, which is closer to what I’m looking for. The CBI has been fine, but I drag it on everything. If I’m being totally honest, the main reason I want to ditch it and build my own is, well... because I want to.

d0feea266f8c41a318c6586b162ca72c.jpg


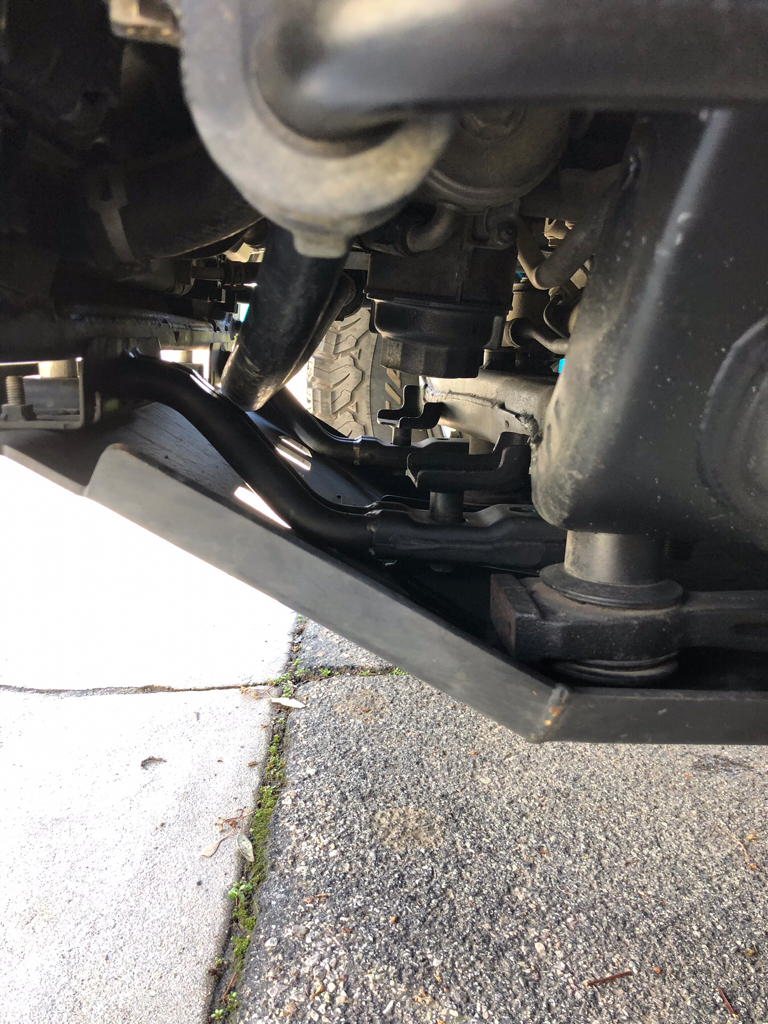
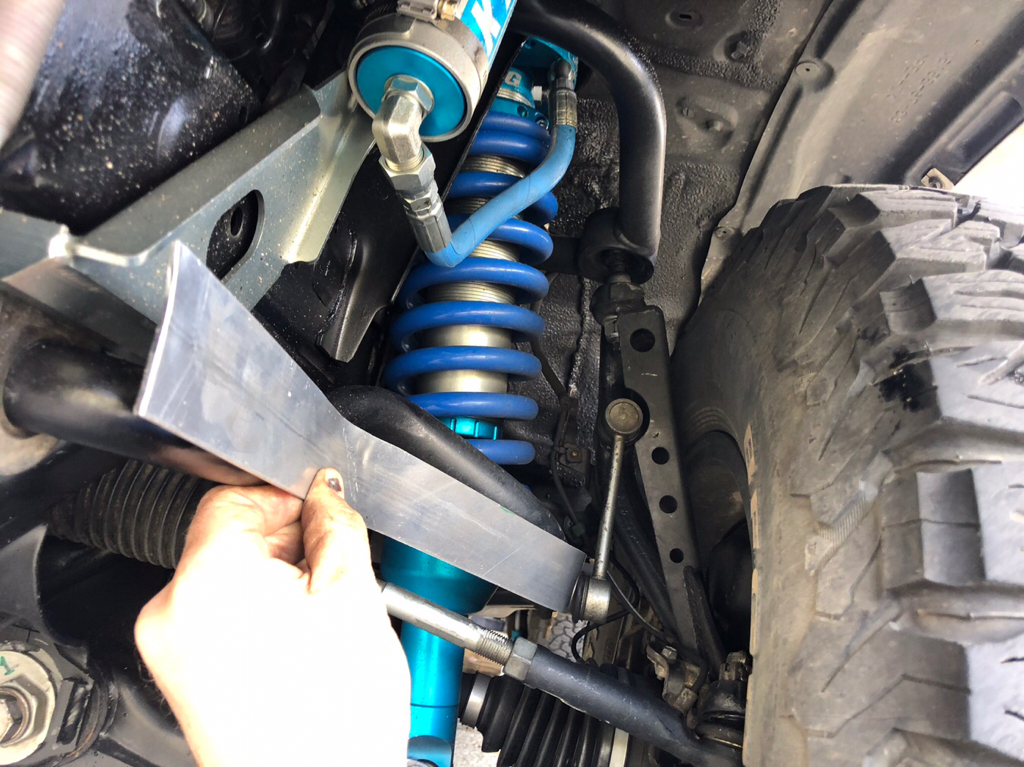
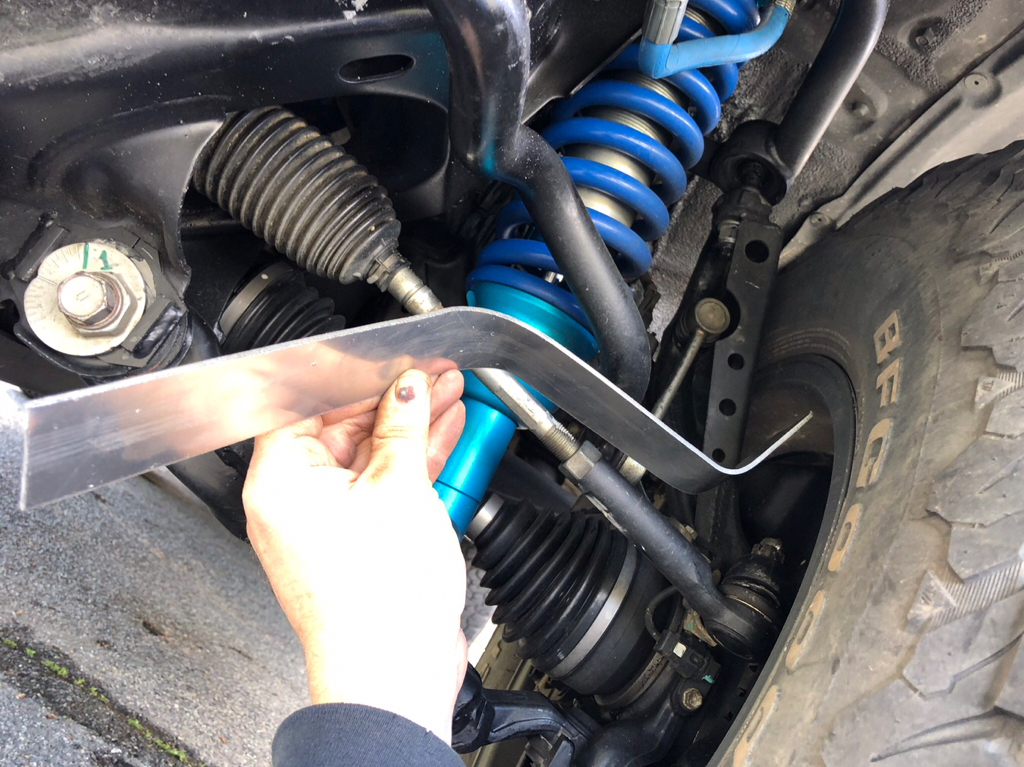
As if I didn’t have enough going on, and even before this sway bar arrived, I had a idea about how to use one in the front. Anyone ever seen one on a 4runner? Well, today the thought became a plan...

0bfe0246ae3b76219c0911fc0b588940.jpg


b6970236c31a9305cbedc0f4825e1665.jpg


d9f30ec00496d0313b6ba83f3eec540d.jpg


Sent from my iPad using Tapatalk
 
Making some progress on sorting out my suspension. I got my link tubes back from my buddy. He was able to thread them for the Johnny Joints. I love to have a lathe! #shopgoals. So, today I was able to get the bushings welded on and get a coat of paint on them, before i have to break away and go shopping...

These things are chunky!

a4f90b7a689f1d0f28bf10b834a9f08d.jpg


906d0c667f4b16d0f6dd875ec1ce795b.jpg


f4453a617cae06c56f3981f91399e62d.jpg


18cd1e5a49383009f2b23287d9590c8d.jpg


While I was painting, the FedEx guy showed up with another project to tackle. It’s a generic kit that I picked up from Summit. I have a general idea of where it’s going, but I think I’m going to wait until I ditch the CBI bumper, to do it the way that I want it. I was able to take a look at [MENTION=113049]rochmpr[/MENTION] ‘s 4x4Labs rear bumper, which is closer to what I’m looking for. The CBI has been fine, but I drag it on everything. If I’m being totally honest, the main reason I want to ditch it and build my own is, well... because I want to.

d0feea266f8c41a318c6586b162ca72c.jpg


As if I didn’t have enough going on, and even before this sway bar arrived, I had a idea about how to use one in the front. Anyone ever seen one on a 4runner? Well, today the thought became a plan...

0bfe0246ae3b76219c0911fc0b588940.jpg


b6970236c31a9305cbedc0f4825e1665.jpg


d9f30ec00496d0313b6ba83f3eec540d.jpg


Sent from my iPad using Tapatalk
Nice work. I'll need to shoot you my eye to eye dims for the uppers.
 
Thanks! Have you turned your pinion up? If so, I’d like to see where they measure. Stock should be about 12.25. The links that I made have a lot of adjustability.
Yeah, when I put in the double card an shaft, I had to make several turns out on the uppers.
 

Members online

Forum statistics

Threads
278,309
Messages
3,554,075
Members
248,016
Latest member
Advally Service

Trending content

Back
Top