Atomic6's build, history, maintenance, whatever-you-want-to-call-it thread

Nice intro man. Now screw the 4runner and get to work on that Camaro. I helped a buddy restore a 69 SS in the early 90's. One of the top 5 muscle cars for sure.

I hear ya! Just waiting on a little more cash flow (i.e. employment) and the Camaro will get some love. I've never been a fan of the looks of the '69... the 67/68 is where it's at! :cool:


The rust looks like a nightmare! Props for staying on top of it! Sweet Build so far!

The worst part about the rust on the floorboards is that's where the fuel lines run along the frame. It was nerve-racking to cut and weld on the floor to say the least!
 
Do you have more info?

I'm curious as to what harness was used, as well as what ballasts/bulbs you put in there? I used the exact same components as you, using an Amazon H4 to H1 bixenon adapter harness and a Xentec 55w HID kit and could not get rid of the light flicker. I've since gone back to my factory headlights until I figure out what components I want to buy.

I went the "cheap HID" route and bought everything from Amazon. With new TYC glass headlight assemblies, I spent $112 at the time.

H4 Bi-Xenon (Hi/Lo) wiring harness: http://a.co/aOIFT2q
2.5" Mini HID bi-xenon projector lens H1: http://a.co/8ebEkiz
35W HID xenon H1 bulbs- 5000K: http://a.co/io6O4e3

TYC Left headlight assembly: http://a.co/9azo7s7
TYC Right headlight assembly: http://a.co/aslBtZr

I've never had an issue with light flicker with my set up. I absolutely love these lights and have no reason to upgrade to "better" components. Like many retrofits I've seen, these ones don't look like huge bug eyes too. :shocked:

It's very simple to install, as the harness plugs directly into one of the OE headlight plugs (you do have to run one power and a ground too). The hardest part of the retrofit was adjusting the light pattern, but that's only because I was being extremely picky about it.
 
I went the "cheap HID" route and bought everything from Amazon. With new TYC glass headlight assemblies, I spent $112 at the time.

H4 Bi-Xenon (Hi/Lo) wiring harness: http://a.co/aOIFT2q
2.5" Mini HID bi-xenon projector lens H1: http://a.co/8ebEkiz
35W HID xenon H1 bulbs- 5000K: http://a.co/io6O4e3

TYC Left headlight assembly: http://a.co/9azo7s7
TYC Right headlight assembly: http://a.co/aslBtZr

I've never had an issue with light flicker with my set up. I absolutely love these lights and have no reason to upgrade to "better" components. Like many retrofits I've seen, these ones don't look like huge bug eyes too. :shocked:

It's very simple to install, as the harness plugs directly into one of the OE headlight plugs (you do have to run one power and a ground too). The hardest part of the retrofit was adjusting the light pattern, but that's only because I was being extremely picky about it.

If I use my existing headlight assembly, this is a very affordable option!
 
April, 2017
...

And I tinted my clear parking lenses orange to change things up. They were looking pretty faded next to the 99+ headlights.


...

[/URL]


....and we're up-to-date! For now :eyebrows:

Nice! I too painted my corners amber about 3-4 months ago — I like them better this way personally.


Nice! I too painted my corners amber about 3-4 months ago — I like them better this way personally.

:thumb3:

Looks like we used the same Tamiya paint too. Did you use a clear coat on top? After a few days, I found they were very "flat" looking, so I sprayed a few coats of gloss clear over them.
 
:thumb3:

Looks like we used the same Tamiya paint too. Did you use a clear coat on top? After a few days, I found they were very "flat" looking, so I sprayed a few coats of gloss clear over them.

No clear coat or any special prep, but I didn't use the Tamiya spray paint — I used the Tamiya liquid acrylic paint.

I just cleaned them well with some Sprayway window cleaner and then used the foam brush to paint them.

Used maybe 2–3 coats and tried to keep the brush direction and pressure consistent so there weren't any obvious streaks.

I have unlimited truck washes and since I put on a lot of miles, I run my truck through the wash maybe 2–3 times a week. So that's about 30–40 washes so far and this is how they look currently (it's cloudy where I'm at today but you can see they still shine).


April, 2017: 244,647 miles

For the past few weeks I've been cleaning, painting, rebooting, and regreasing my OEM CV axles. It took a bit longer than expected because I had to order different clamps since I performed the "boot extension mod" and I broke one of the larger inner CV clamps. Well, today, I finally had a chance to swap both worn out axles with these refurbished ones.

I used the OE boot/grease service kits as seen in the first pic. I took the time to sand the surface rust and apply rust converter, rust encapsulator, and a black top coat. Now the only suspension/drivetrain part that looks good are my CVs! :redface:

Big shout out to Tim [MENTION=120071]mtbtim[/MENTION] and Sean [MENTION=102606]infamousRNR[/MENTION], without their Timmy the Toolman Youtube series and the CV reboot video, I would have never had the confidence rebuilding these. It turns out, it's super easy!


Cleaned and degreased. You can see the piece of the old boot that stays on the axle for the extended boot. They have to be removed to install the new boots, then slide back on and clamped in place:


Painted and assembled:


Install:


Once I get replacements for the old CVs, I'll have some trail spares. Lifetime warranties rock! :rockon:
 
Last edited:
Nice work on the truck man! I can relate to the rust issues up here... that being said... I think I've pretty much nulled mine, by greasing my undercarriage and spraying oil where I can.

So far... no holes in the floor or frame... that I know of... makes it a pain to work on sometimes... but at least she's not rotten.

Keep up the good work... hope to see more posts from you soon! I'm sub'd!
 
May 27th, 2017

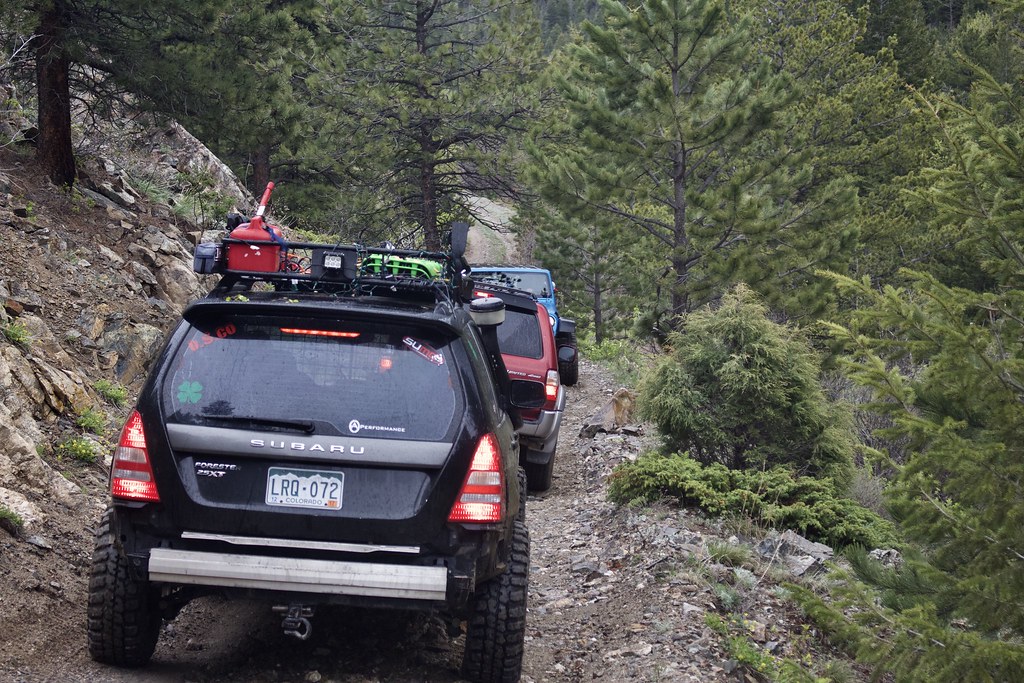
Just a few pictures from a quick trail run I did with the Venture Overland Facebook group. We met up in Nederland, CO in the morning for a "Coffee on the Mountain" meet and greet, then a few of us decided to hit an easy trail in the area: Switzerland Trail.

At the trailhead realizing none of us have the same comms. I have a Ham radio, but no CB (yet) and the three lead trucks only had CB.


[MENTION=149376]AJvan64[/MENTION] wheels his stock rig harder than most lifted and locked rigs!


Quick detour up part of Pennsylvania Gulch


Overall it was a great day with an awesome group of people. I'm really excited to get back out there and see what Colorado has to offer!
 
Last edited:
Stock for the time being, [MENTION=115770]Atomic6[/MENTION] [emoji12]


Sent from my iPhone using Tapatalk
 
June 3rd, 2017

AJ and I hit up the Yankee Hill network of trails last weekend. We did Central City to Yankee Hill, but didn't run the actual hill.

It was another fun beginner trail with a little bit of moderate stuff (for us noobs) thrown in. I have some videos that I'll be posting in the next few days/weeks. Edit: video is at Post 38


The master and his brew:


Last edited:
Looks like it was a beautiful day. I've never ran Yankee when there's no snow, looks totally different!
 
Beautiful truck!

How do those 883s ride with the ARB bumper? I currently am running 881s and 890s and want to add an ARB bumper but I'm not sure if I want to replace the 881s with 883s or just go up a notch on the 5100s and keep the 881s.
 
Looks like it was a beautiful day. I've never ran Yankee when there's no snow, looks totally different!
Yeah, it was a perfect day! I really want to do some snow wheeling when the season comes.

Beautiful truck!

How do those 883s ride with the ARB bumper? I currently am running 881s and 890s and want to add an ARB bumper but I'm not sure if I want to replace the 881s with 883s or just go up a notch on the 5100s and keep the 881s.
The 883s ride pretty high and harsh even with the ARB. If I were to do struts all over again I would get some 881s first and see how it is, but I have some DR COs in the garage just waiting to be installed. In your case, I'd stick to what you have and check after installing the ARB.


Nice thread! I have to say you MIL must be WAAAAAYYYYY cooler than mine.
She IS really cool! Since I've dated my wife since I was 15, my MIL has always been like a second mother to me anyways.
 
June 9-11th, 2017

No major update on the 4Runner, but we did a 500 mile road trip and she performed flawlessly. We drove from Denver to Grand Junction, up and over the rockies, with no issues at all. With the larger aluminum radiator, the coolant temp was rock solid. Trans temp fluctuated depending on the grade, but with the O/D off, the temp dropped significantly.

We went to GJ to volunteer at the Special Olympics state summer games, but it was also a great excuse to get my wife to camp for her first time. Since it was our first time in Colorado, we decided to reserve a camping spot in the Colorado National Monument instead of finding a dispersed spot. This was pretty cool because the site is at the top of the canyons overlooking valley. Next time, we’ll find a place off the beaten path because we hated the RV-site life. The running water and flush toilets weren’t bad though!


We slept in the truck on an air mattress which worked out great. You can see the vent screens I had in the rear windows below. Those, plus a fan, were a godsend in the 96* heat!


Last edited:
Finally threw together a quick edit of the run [MENTION=149376]AJvan64[/MENTION] and I did a few weeks ago. It's not very good, but I wasn't concerned about getting the best shots since we were the only ones to spot each other and it was our first time on this trail.

 
Ugh... that was a mess. Finally moved all my photos off of sh*tbucket and onto Flickr...

July 15th, 2017
Another outing with the Venture Overland crew. This time we ran Slaughterhouse Gulch in Bailey, CO. It's an easy-to-moderate trail that can be done in a stock rig. We had a stock 4th gen with us that had no trouble whatsoever. I tried every "harder" section with no issues. There was only one section that I probably shouldn't have done without sliders. It was very rutted out and the spotter wasn't the best with the line chosen, but it ended up being fine with no damage to the truck.

We did have a run-in with some uninvited guests that didn't want to share the trail. We kept our distance and let them do their thing :lmao:


<iframe src="https://player.vimeo.com/video/226175044" width="640" height="360" frameborder="0" webkitallowfullscreen mozallowfullscreen allowfullscreen></iframe>
from <a href="https://vimeo.com/user13565362">Tim Wietlispach</a> on <a href="https://vimeo.com">Vimeo</a>.</p>


<iframe src="https://player.vimeo.com/video/226175293" width="640" height="360" frameborder="0" webkitallowfullscreen mozallowfullscreen allowfullscreen></iframe>
from <a href="https://vimeo.com/user13565362">Tim Wietlispach</a> on <a href="https://vimeo.com">Vimeo</a>.</p>


Last edited:

Members online

Forum statistics

Threads
278,316
Messages
3,554,121
Members
248,016
Latest member
Advally Service

Trending content

Back
Top