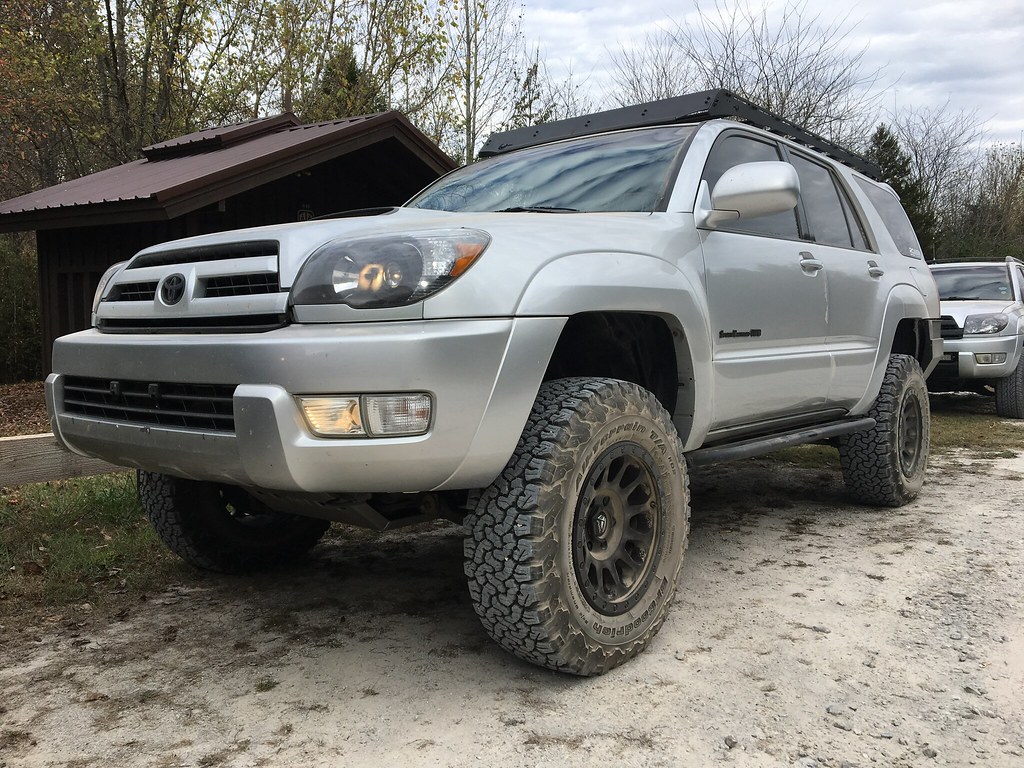
Awesomesauce0528 Build Thread

[MENTION=119480]awesomesauce0528[/MENTION] looking good, ridge graps compared to KO2's, thoughts? I know diff sizes etc.

Ridge graps are a little louder, and I suspect it will get louder with more miles and they seem to have a little bit more grip in the rain, dirt and mud as well. I personally like the look of the sidewalls on the ridge graps better too and they seem to be just a tad stiffer than the KO2s which I can tell in the corners. KO2s were great tires while I had them though. I upgraded mainly for a bigger and more aggressive tire.
 
Ridge graps are a little louder, and I suspect it will get louder with more miles and they seem to have a little bit more grip in the rain, dirt and mud as well. I personally like the look of the sidewalls on the ridge graps better too and they seem to be just a tad stiffer than the KO2s which I can tell in the corners. KO2s were great tires while I had them though. I upgraded mainly for a bigger and more aggressive tire.
I'm looking to do this exact upgrade soon. KO2 275/70r17 to 285/75r17 ridge graps. Thanks for the comparison!

Sent from my SM-N920V using Tapatalk
 
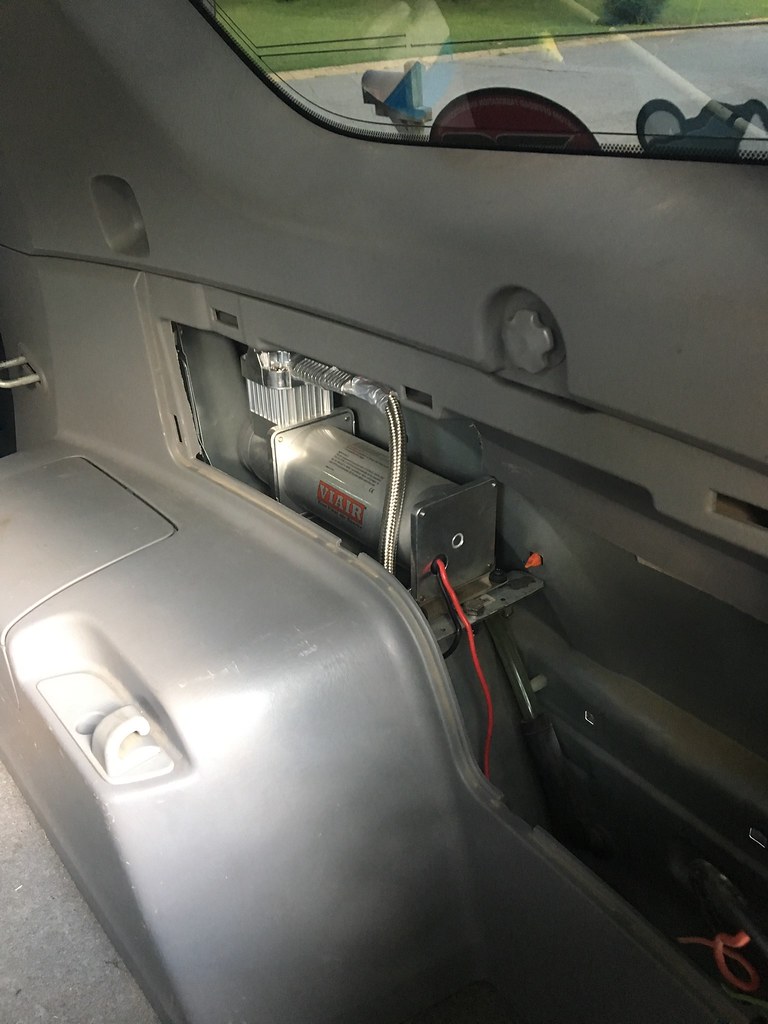
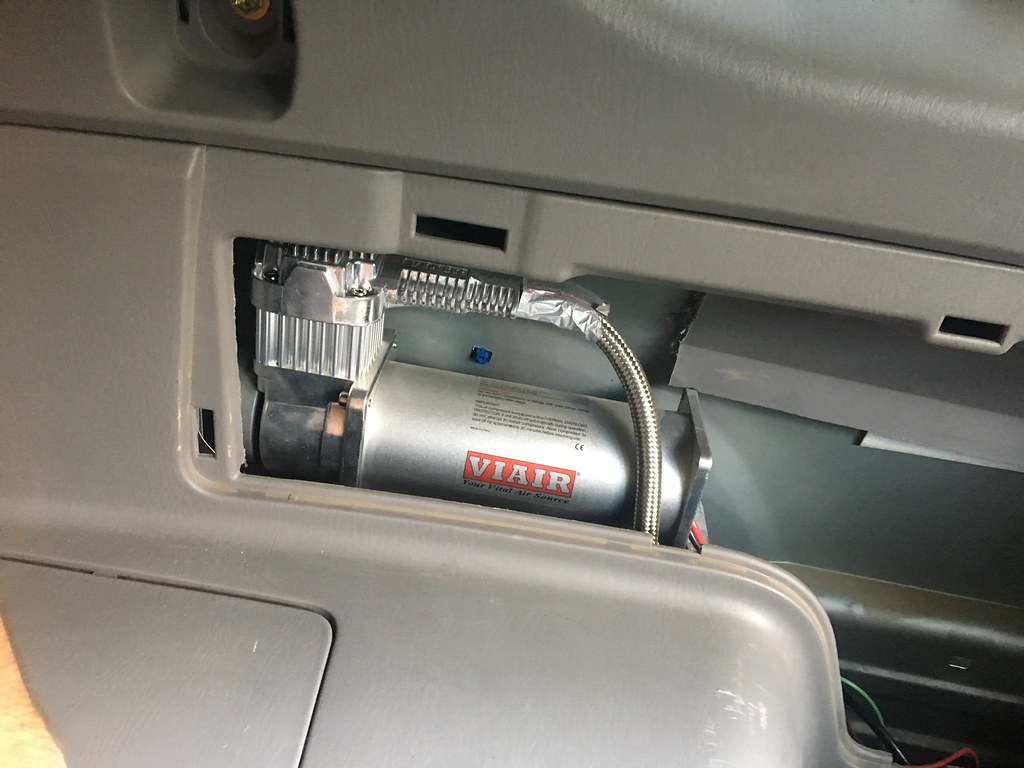
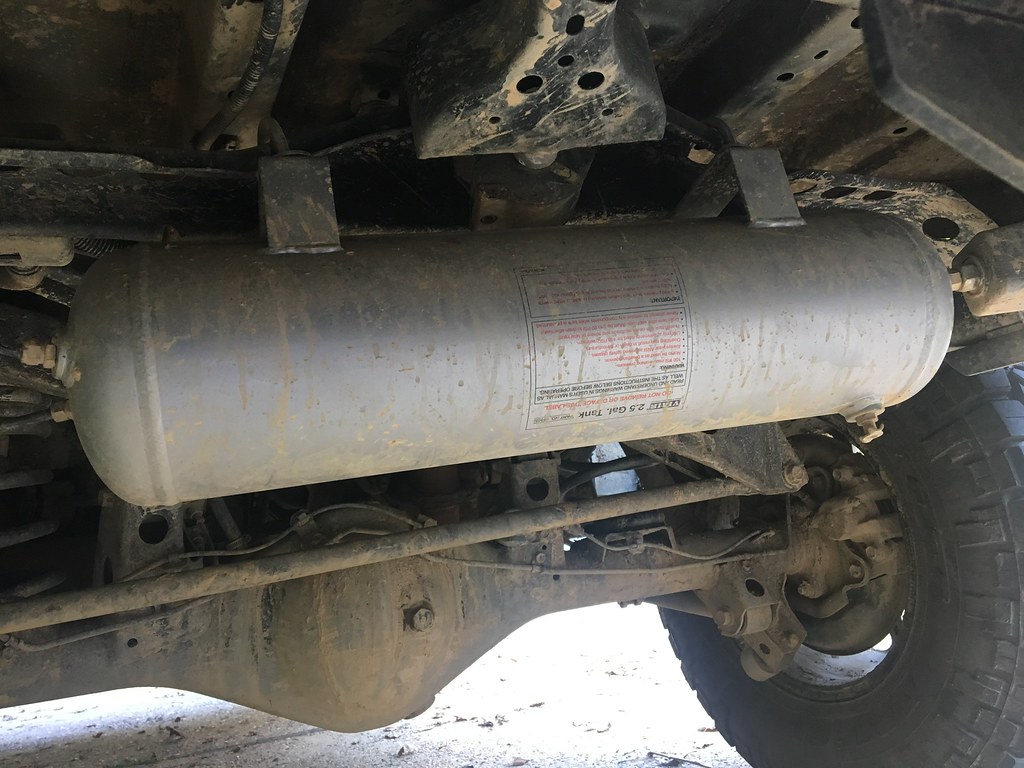
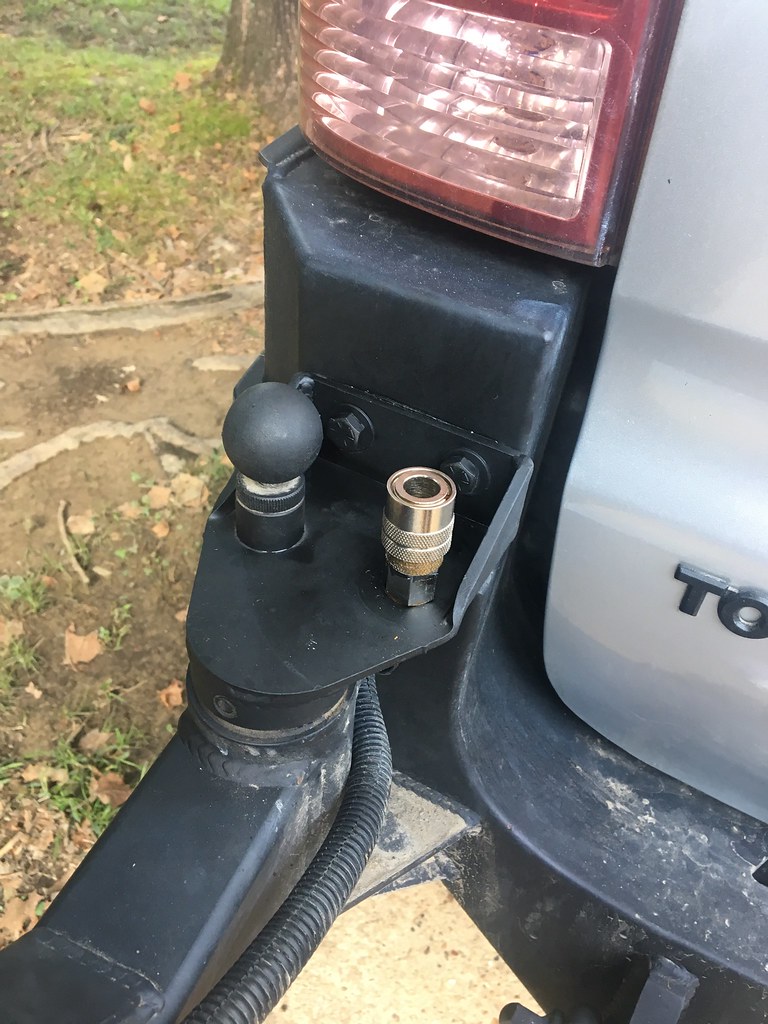
I bought a Viair Air system a while back on a 4wheelparts sale. It has the Viair 450c compressor which is a constant duty compressor and a 2.5 gallon tank. Just got around to installing it this past week. I have the compressor mounted in the back in one of the storage compartments, along with the switch. The tank is mounted underneath in the spare tire area. I used some u-bolts to go over the brace that holds up the spare tire.


I went out to the Ouachitas earlier this week to go fishing at Lake Winona and aired down to test out my new OBA sytem. The compressor is able to fill the tank to 150psi in about 3 minutes which is what I expected. I aired down to 18psi and using the system I was able to air up to 38psi in about 10-15 minutes. It is hard for the compressor to keep up with me filling up the tires, so after every tire I let it fill back up most of the way
Was this worth the upgrade? I have a Viaair now but the H model. It takes me about 15 min to air up my smaller tires 275/70r17 now but will be upgrading to the 34" tires so curious what you think. Everyone gets the dual ARB but I have a hard time with the price. So I like the tank idea.

Sent from my SM-N920V using Tapatalk
 
Was this worth the upgrade? I have a Viaair now but the H model. It takes me about 15 min to air up my smaller tires 275/70r17 now but will be upgrading to the 34" tires so curious what you think. Everyone gets the dual ARB but I have a hard time with the price. So I like the tank idea.

Sent from my SM-N920V using Tapatalk

I'm not sure how much faster the tank makes filling up because I've never filled up with just the compressor, but I will say that the tank can't keep up with me filling the tires and once the tank is low, fill speed is significantly slower. That being said, I believe the tank is a great idea and definitely helps in airing up. Right now, the switch for the compressor is located in the back next to the tank, but I am in the process of making a switch panel and plan on relocating the switch to the new panel in the front which will allow me to turn the compressor on before I get to where I want to air up allowing the tank to be filling while I'm getting there, which I believe will make airing up a few minutes faster just because the tank will be filled up when I get there and don't have to wait a little before starting to air up. All in all, I'm glad I have the tank.
 
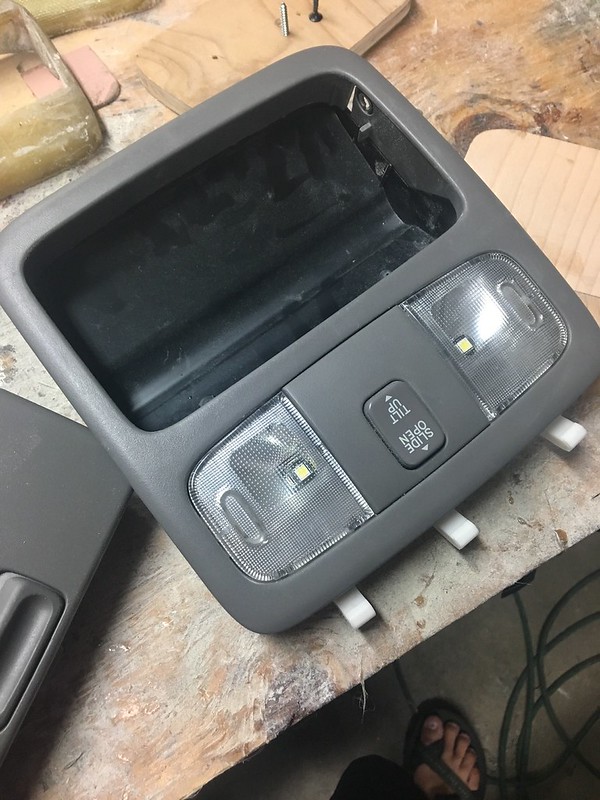
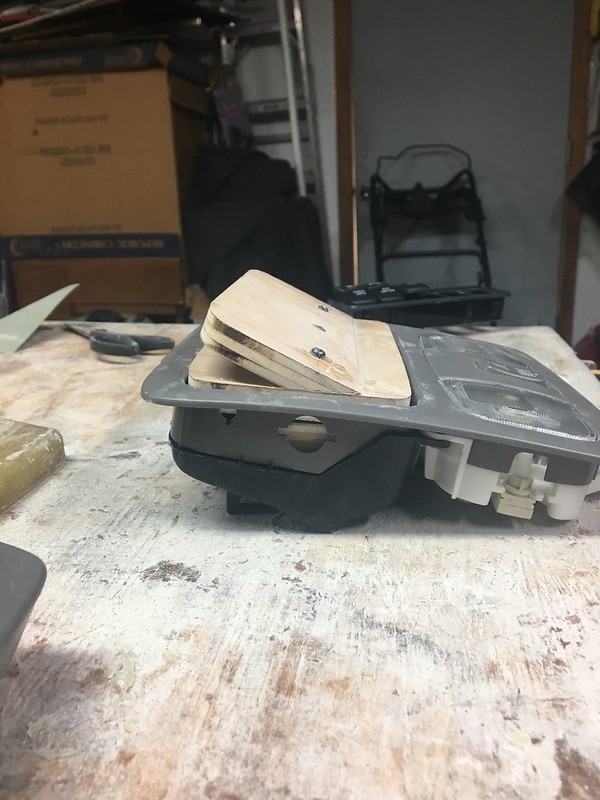
I've added some lights to my rig and each light needs a switch so I decided to make a switch panel in the overhead sunglasses holder compartment. I'm going to try and do somewhat of a write up on this since I haven't seen anything much like what I'm doing. So first thing I did was take out the overhead panel and then take the sunglasses holder out of it.

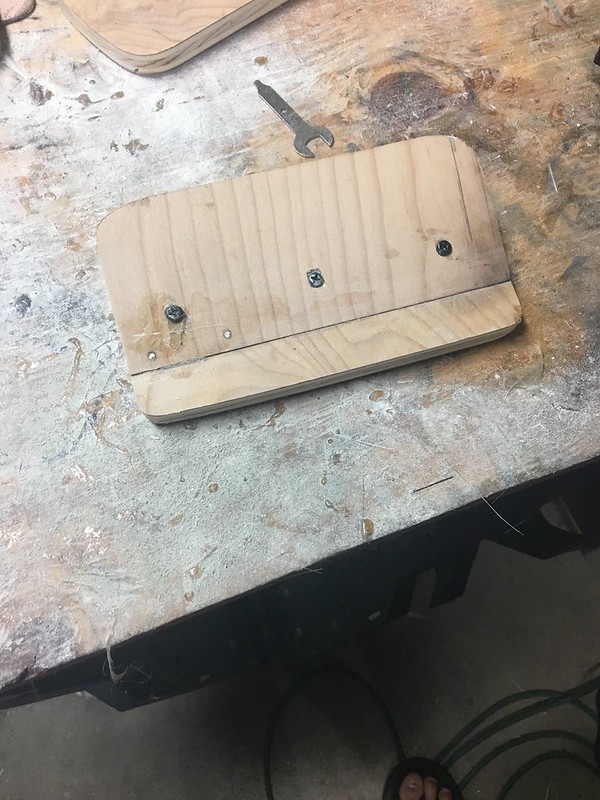
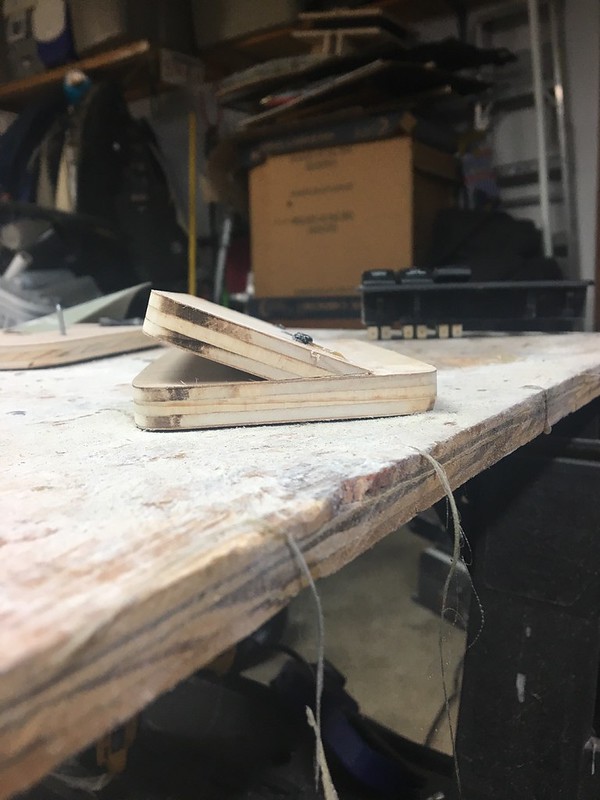
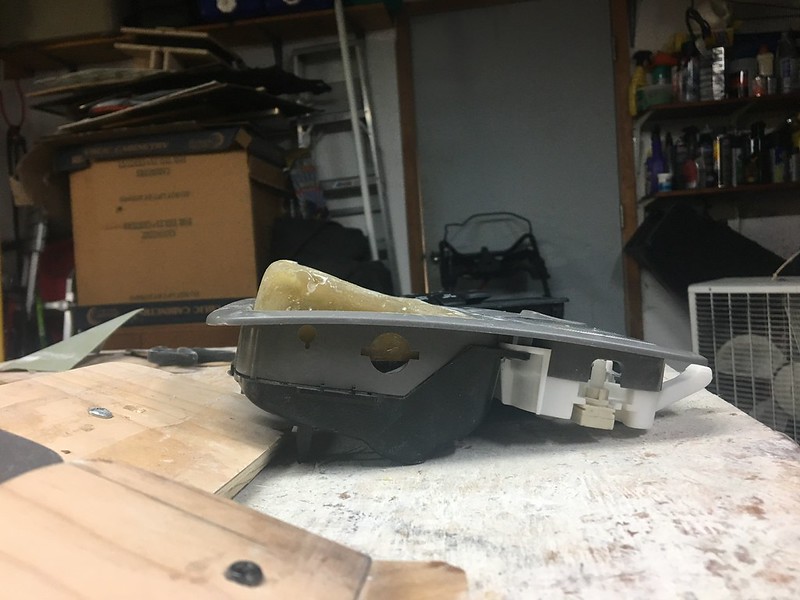
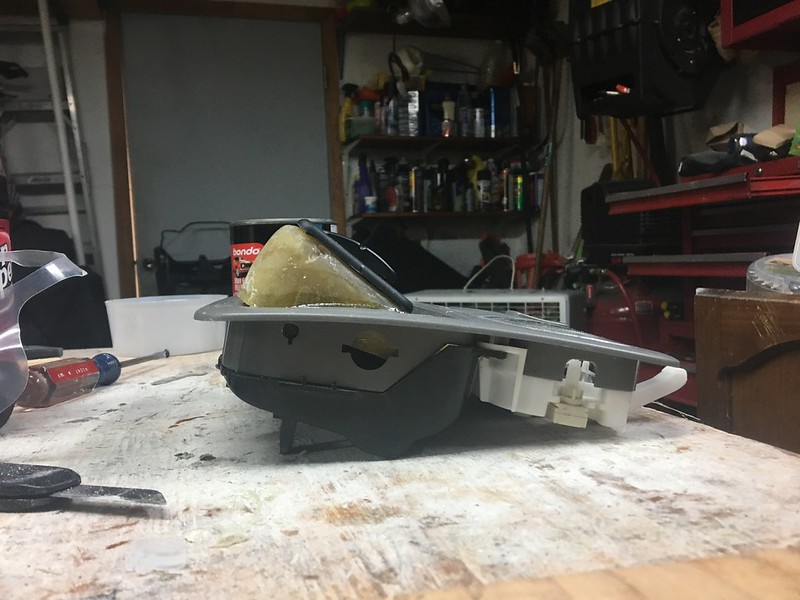
Then I traced the outline of the holder onto a piece of wood I had laying around to make the base for my mold. I knew I wanted the switch panel to be angled slightly so I could see the switches so then I traced the 6 switch panel I bought from OTTATRW onto another piece of wood then sanded down one corner to the angle I liked and screwed the two pieces together. It looked a little something like this. I didn't want the panel to cover the rear view mirror so its not a huge angle.


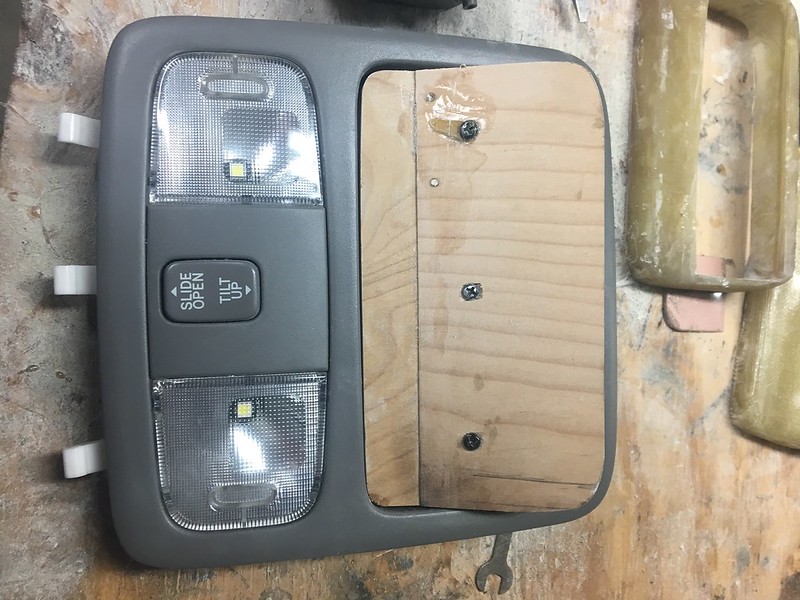
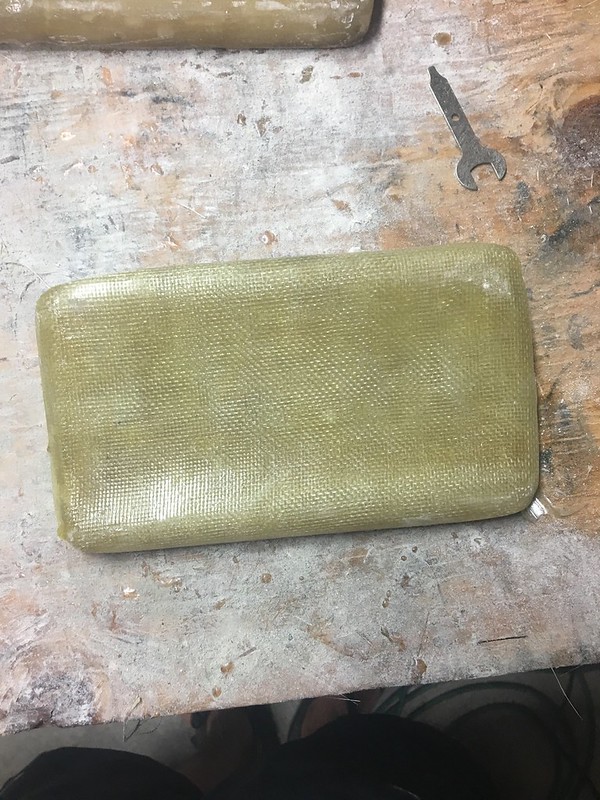
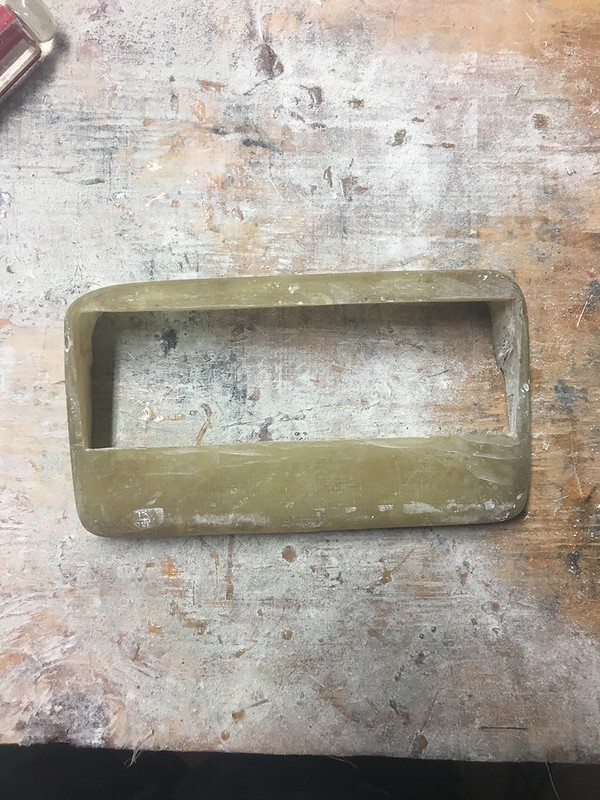
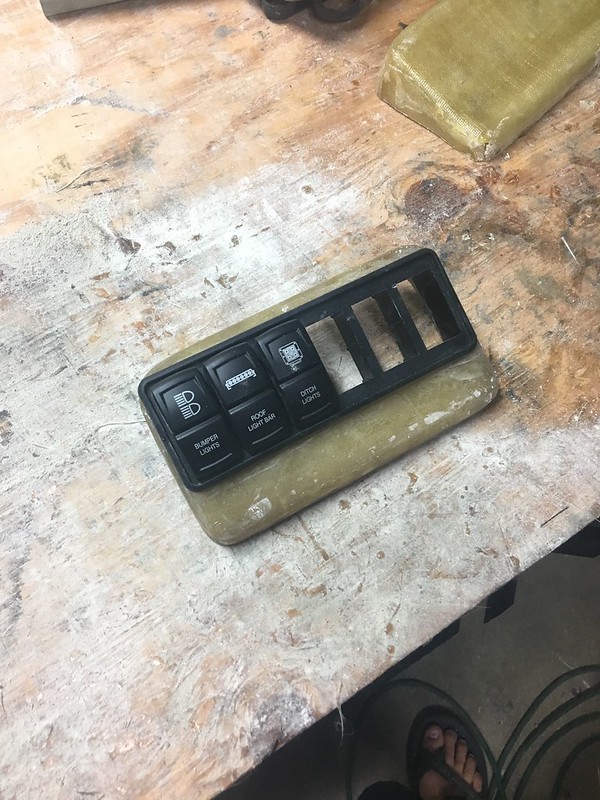
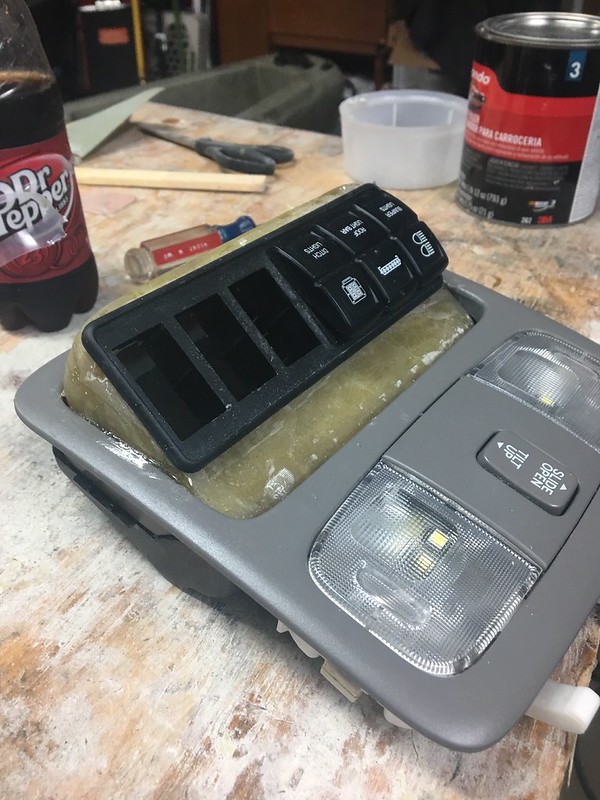
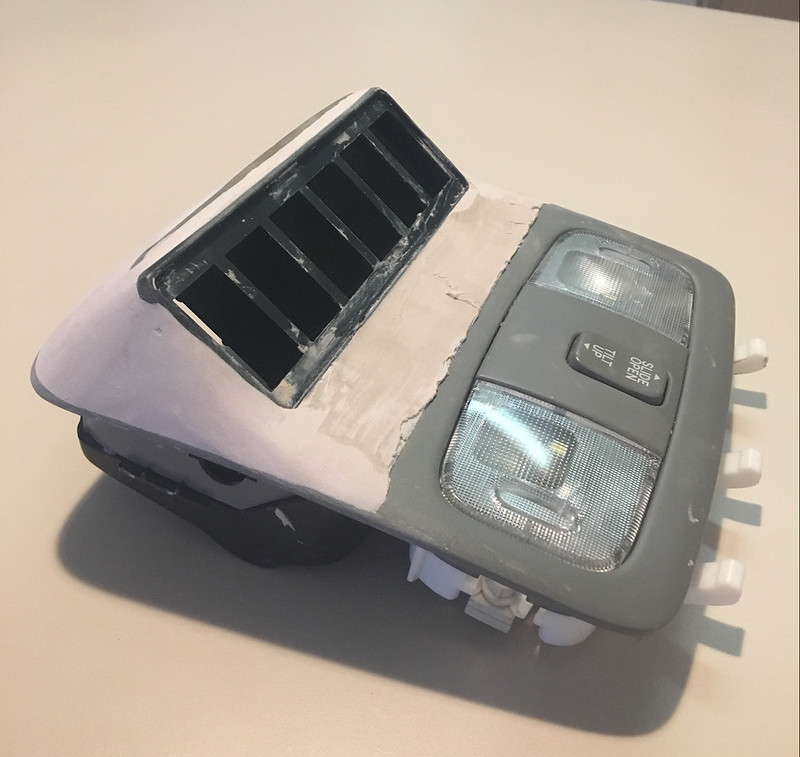
After that, I tried to form some kydex to that mold I had made and that didn't work out so I ended up using fiberglass. I wrapped wax paper around the mold so the fiberglass wouldn't stick to it. The first attempt with the fiberglass was too large, but I was able to sand it down to where it would fit. It was too thin though and I ended up cracking it trying to get it in perfectly. So I tried again but with a different approach. I put a layer of fiberglass cloth over the mold, and once it dried I sanded it a little bit and then put a layer of fiberglass mat on top to so the corners would be smooth. After that had dried, I pulled it off of the mold and so the fiberglass would not be too thin, I put two layers of fiberglass on the inside. It worked like a charm and I was able to sand it down and get it right while still having the strength. After that, I cut the hole for the switch panel to fit. The fiberglass looked like this after I was done.


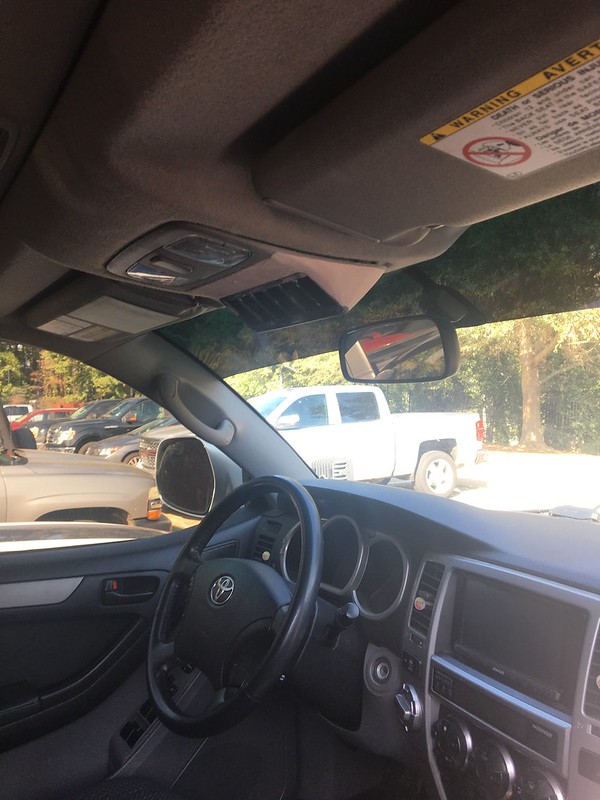
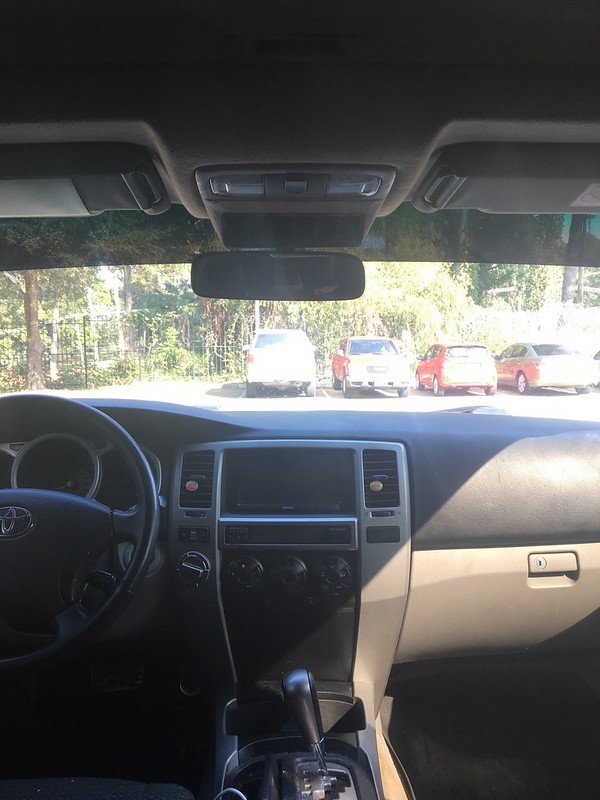
After putting the overhead console back in and playing with the panel for a bit, I realized that my rear view mirror could move more than I thought so I was able to angle it more than what I had originally anticipated. After figuring that out and playing with it some more I got it to where I liked it. It's not covering any of the mirror, but a little bit of it can be seen in the rear view mirror. I marked it, then glued it in place.


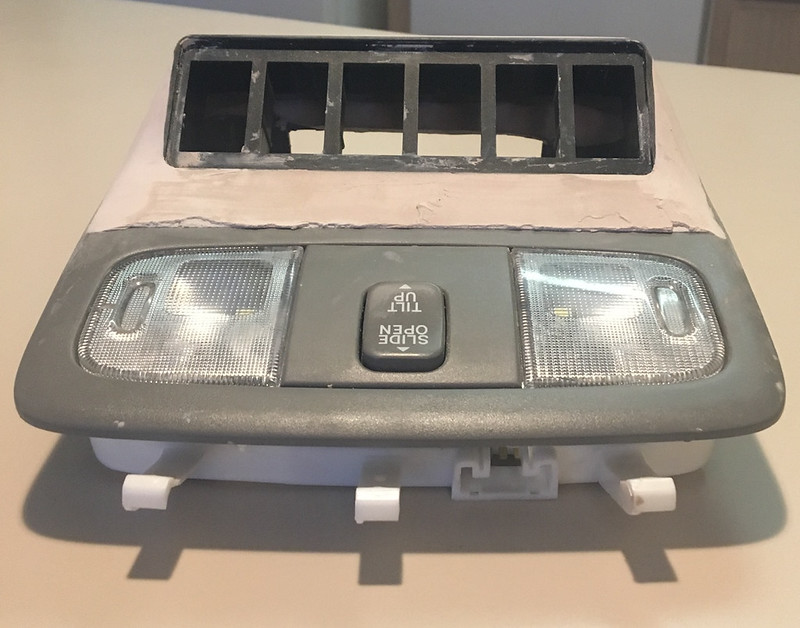
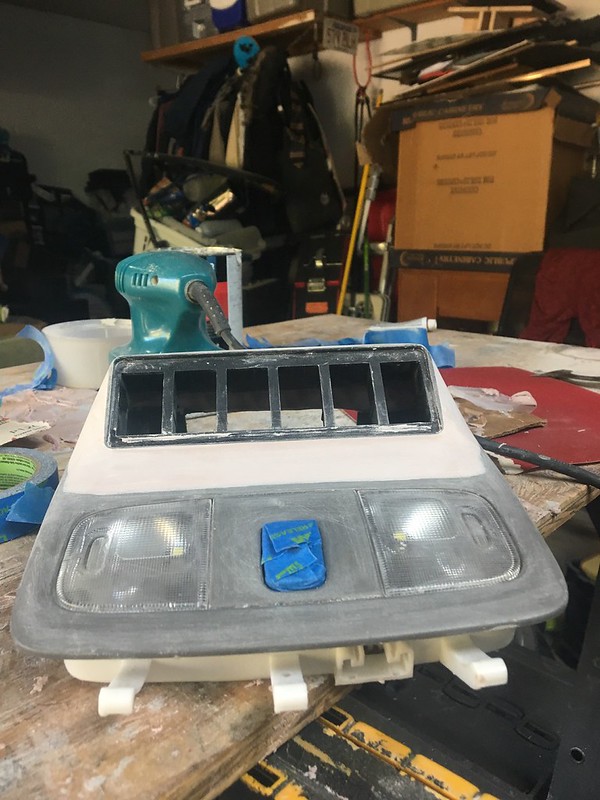
I've started to bondo it so that it's seamless with the overhead but haven't finished. So far I think it looks pretty good. That's all I have been able to do so far, but I plan on finishing it up later this week.


Last edited:
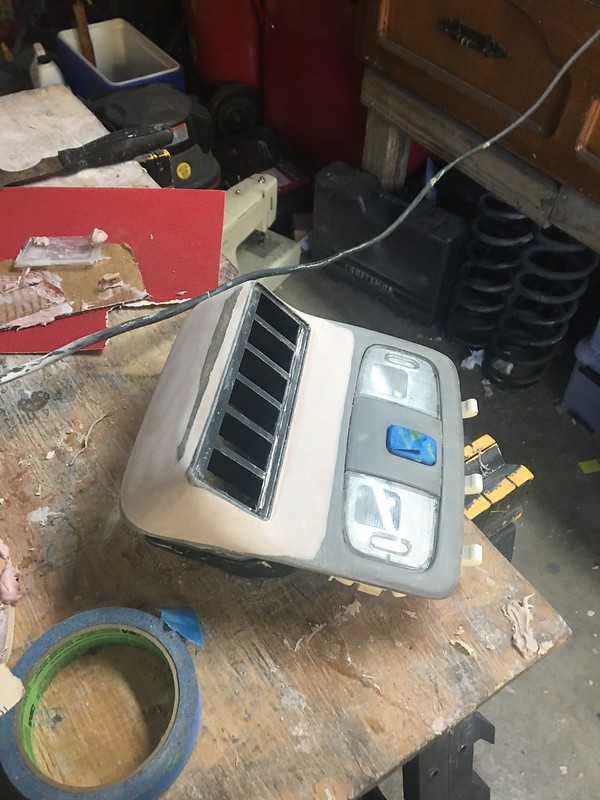
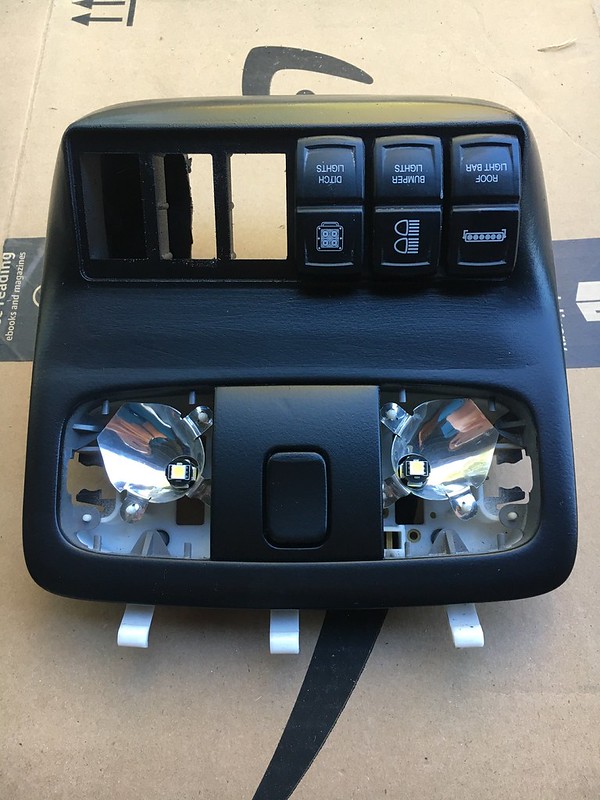
Well I got it all sanded down last weekend and tried painting it. The painting didn't go too well. I couldn't find a paint to match the rest of the interior and thought it wouldn't bother me much so I just got the one that I thought was the closest match. It ended up bothering me enough that I stripped all the paint off. I'm going to try and find some paint that will match it to the rest of the interior, but don't know how well that will work out. Looks a little something like this at the moment.

 
Last edited:
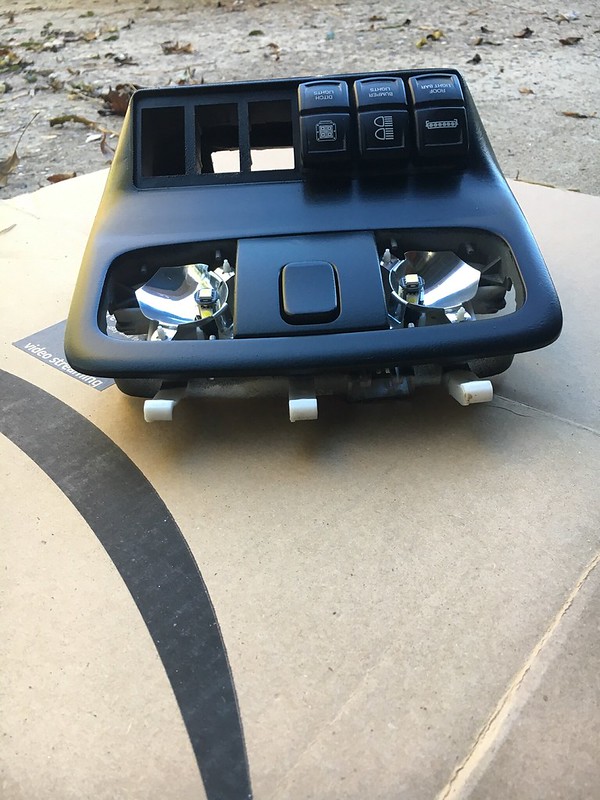
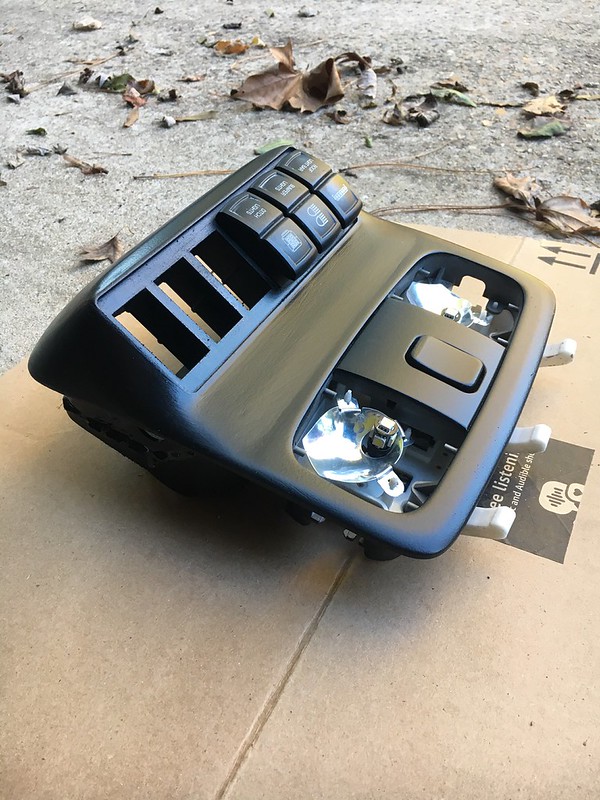
Got tired of looking up to see the two tone overhead so I ended doing some quick and easy plasti dip. Should be easy enough to pull off if I ever find a good paint to match the rest of the interior. For now, this is what it looks like.


Last edited:
Got tired up looking up to see the two tone overhead so I ended doing some quick and easy plasti dip. Should be easy enough to pull off if I ever find a good paint to match the rest of the interior. For now, this is what it looks like.


I dig your switch pod you built. I did something similar.
uAz4BS5.jpg

hxNdniM.jpg


I found paint that is damn near spot on to factory. I will take a pic of the can and post it up tomorrow.
 
A little update while I’m here. I finished my satoshi grille and installed it. Definitely looks better than I thought it would. Also currently in the process of making my own relay box with a Bussman relay box to clean up the wiring mess under the hood. Will add pictures of the grille later this week but the relay box won’t be done for a bit as I am quite busy right now.
 
nice work!

Amazing build buddy. Our builds have quite a few similarities. I will be looking to add a few of the things you've done to your rig in the near future and may need to pick your brain at some point. I'm currently running superflex coils in the rear. When I add a rear swing out bumper I was looking to upgrade to metaltech coils for the same reasons you mentioned (L and R springs, able to handle the load...etc). Did you need lower links or a panhard bar? How about bump stop extensions? I will definitely do the extended brake lines. I'm currently running fox 2.0 VS series that are made for 1-3" of lift, and was hoping on not having to upgrade shocks as well.

I'll be following your build as it progresses.

Cheers
 
Amazing build buddy. Our builds have quite a few similarities. I will be looking to add a few of the things you've done to your rig in the near future and may need to pick your brain at some point. I'm currently running superflex coils in the rear. When I add a rear swing out bumper I was looking to upgrade to metaltech coils for the same reasons you mentioned (L and R springs, able to handle the load...etc). Did you need lower links or a panhard bar? How about bump stop extensions? I will definitely do the extended brake lines. I'm currently running fox 2.0 VS series that are made for 1-3" of lift, and was hoping on not having to upgrade shocks as well.

I'll be following your build as it progresses.

Cheers

Sorry I'm just now seeing this, I've been busy. I just bought some extended rear sway bar links and plan to install them next weekend. I don't have bumpstop extensions but I do probably need some so I will buy them eventually. The bilstein shocks that I currently have on the rear are fine and have worked this long so I imagine yours will be fine, but mine are about to be replaced with some fox 2.5 shocks that I found a great deal on so I couldn't turn it down. If you have any more questions, I'm glad to answer them!
 

Members online

Forum statistics

Threads
278,312
Messages
3,554,089
Members
248,016
Latest member
Advally Service

Trending content

Back
Top