davester00
New member
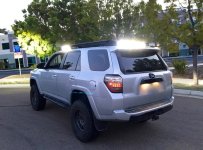
Baja Spy Rack Install 2.0 (hidden wires). Rack game on fleek!
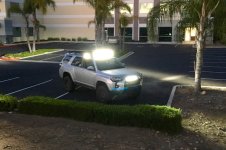
Purchased this Baja Spy rack in Jan from the GB Ramon put on. Mounted it on just to be able to use it. Took it off to add illumination thus the 2.0.
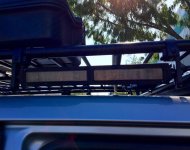
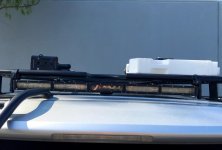
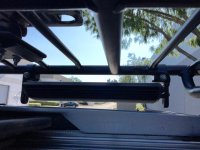
I really like the end result as I am going for a clean , grey scale, low-key look. That is why I opted for the folding functionality of the Spy rack and put the single row bars between the rack and the roof of the vehicle.
After some feedback from Arknabbit my neighbor ex-ricer now pro-am drone racing pilot and bouncing off some ideas off wild_turkey.I grew the balls to remove the rack and drill it to hide all the wiring for a super clean install.
Finally got around to getting all my lights:
40 " Dual Row 4D 7W front
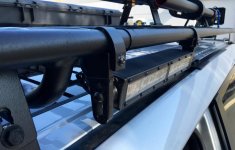
2x 12" Single Row 4D 7W sides
31" Single Row 4D 7W rear
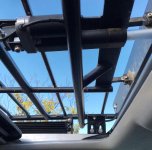
It was a pain in the ass to get the wires to curve inside the 90 degree bends of the rack. After drilling holes I used a Hornady 5.56mm FMJBT 55 grain projectile taped to fishing line as a wire lead. I lifted the rack so that gravity will take the weighted lead to it's final exit hole. Once I saw the lead come thru I used it to pull a 16 AWG lead wire , then the actual wire.
The 40" light bar and actuator wires ran down the drilled A-pillar mounts then the drivers side rain gutter (4 total).
2 side lights pos. wires were consolidated. Ground wires for the sides and rear lights were also consolidated (3 total), then thru A-pillar mounts, rain gutters and the connectors for the lights and actuator were joined in both sides of the windshield valance.
The 40" bar was wired to a separate relay 80A relay. Sides, rear and grill were wired to a Cooper Bussman fusebox.
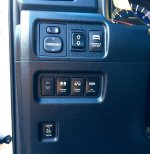
I used overpriced AOB switches wired to a fuse tap then separate 3A mini ATM fuse holders were used for each of the switches.
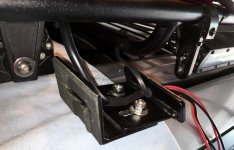
For the drilling I used a corded drill with Norseman drill bits (borrowed from work), dremel to debur the holes before the grommets were installed. Black silicone was then used to cover the grommets and wires to create a somewhat water resistant seal.
Anti-theft (AT) hardware was purchased from Marshalls industrial supply. For extra security black shoe goo was placed over the AT hardware that was installed on the light bars and their mounts.
After all I don't regret doing this install as it is super clean compared to what I think I would have done without drilling. Hopefully this is the end of these time consuming tasks.
Hope this work will stand the test of time, who know how long it will be before some little punk-azz tries to throw shade and take off with one of my lights.
Purchased this Baja Spy rack in Jan from the GB Ramon put on. Mounted it on just to be able to use it. Took it off to add illumination thus the 2.0.
I really like the end result as I am going for a clean , grey scale, low-key look. That is why I opted for the folding functionality of the Spy rack and put the single row bars between the rack and the roof of the vehicle.
After some feedback from Arknabbit my neighbor ex-ricer now pro-am drone racing pilot and bouncing off some ideas off wild_turkey.I grew the balls to remove the rack and drill it to hide all the wiring for a super clean install.
Finally got around to getting all my lights:
40 " Dual Row 4D 7W front
2x 12" Single Row 4D 7W sides
31" Single Row 4D 7W rear
It was a pain in the ass to get the wires to curve inside the 90 degree bends of the rack. After drilling holes I used a Hornady 5.56mm FMJBT 55 grain projectile taped to fishing line as a wire lead. I lifted the rack so that gravity will take the weighted lead to it's final exit hole. Once I saw the lead come thru I used it to pull a 16 AWG lead wire , then the actual wire.
The 40" light bar and actuator wires ran down the drilled A-pillar mounts then the drivers side rain gutter (4 total).
2 side lights pos. wires were consolidated. Ground wires for the sides and rear lights were also consolidated (3 total), then thru A-pillar mounts, rain gutters and the connectors for the lights and actuator were joined in both sides of the windshield valance.
The 40" bar was wired to a separate relay 80A relay. Sides, rear and grill were wired to a Cooper Bussman fusebox.
I used overpriced AOB switches wired to a fuse tap then separate 3A mini ATM fuse holders were used for each of the switches.
For the drilling I used a corded drill with Norseman drill bits (borrowed from work), dremel to debur the holes before the grommets were installed. Black silicone was then used to cover the grommets and wires to create a somewhat water resistant seal.
Anti-theft (AT) hardware was purchased from Marshalls industrial supply. For extra security black shoe goo was placed over the AT hardware that was installed on the light bars and their mounts.
After all I don't regret doing this install as it is super clean compared to what I think I would have done without drilling. Hopefully this is the end of these time consuming tasks.
Hope this work will stand the test of time, who know how long it will be before some little punk-azz tries to throw shade and take off with one of my lights.
Attachments
Last edited: