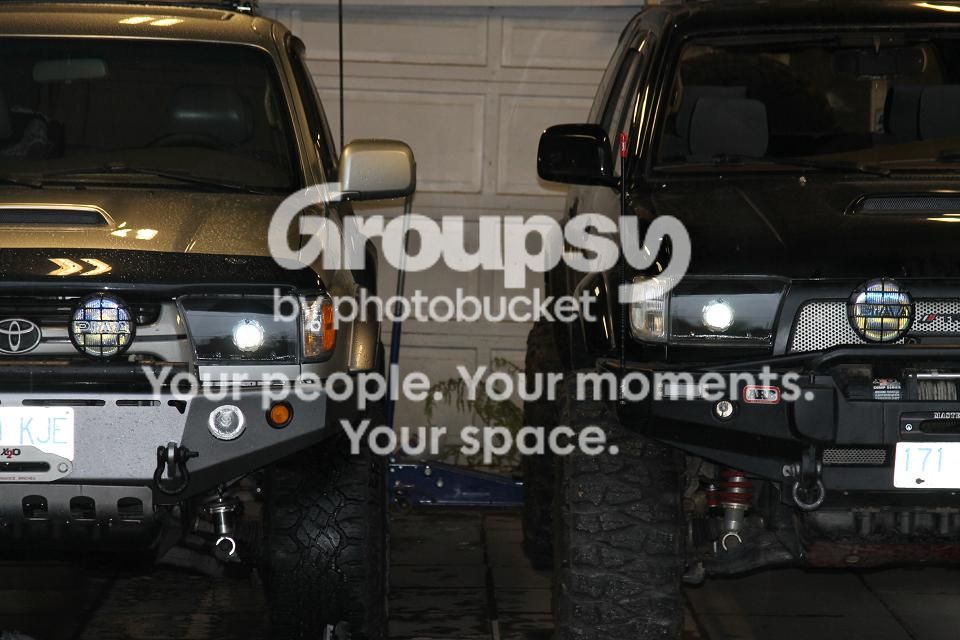
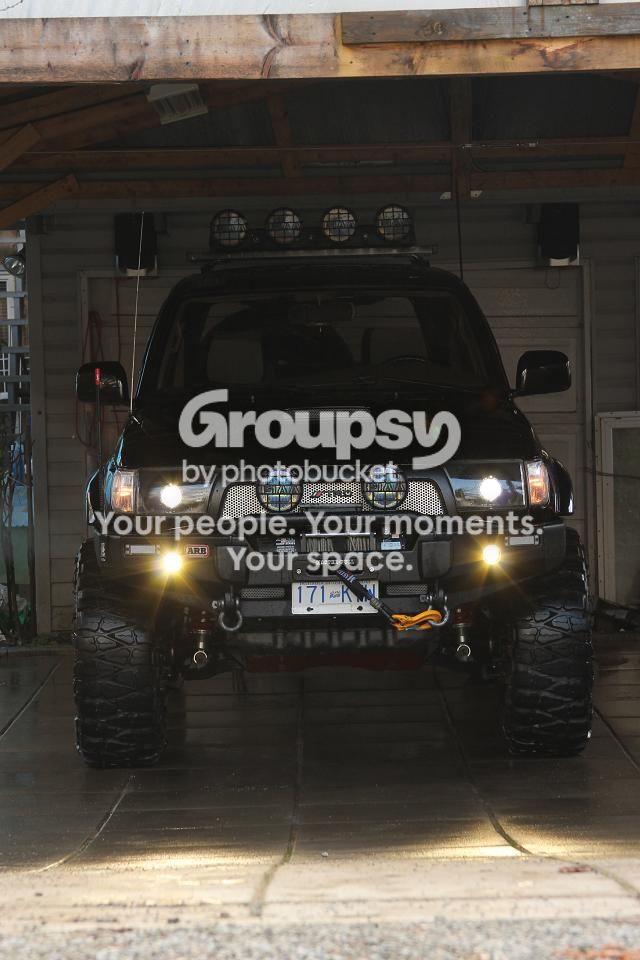
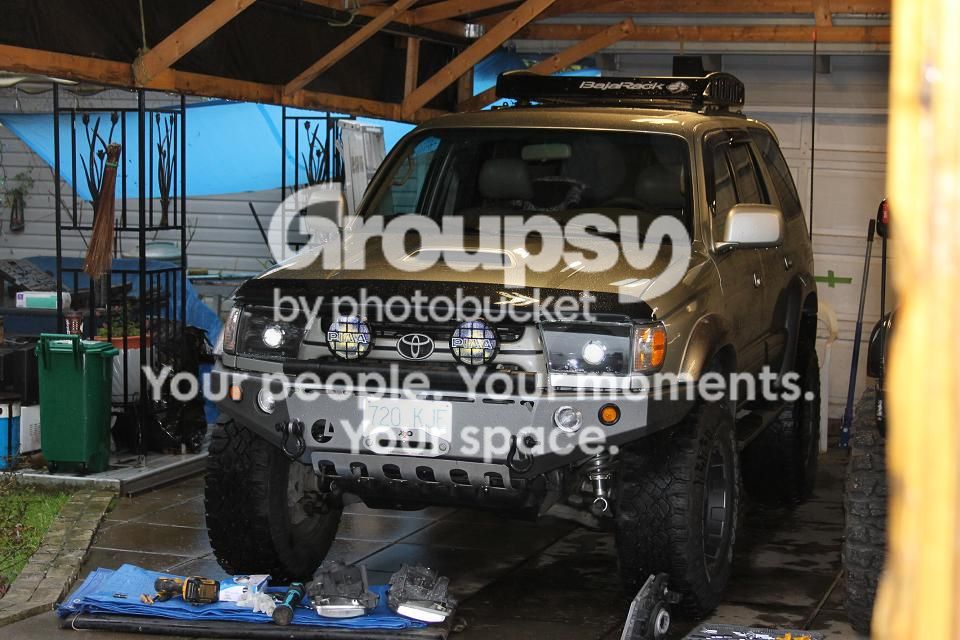
Blcktpgsr's '97 transformation

yeah.... wait!! no yeah still as beautiful as i last remember :bravo:
My fav 3rd gen by far man :snacker:

:bluejump: Cool man I'm flattered!


haha cool, came to see some pictures of your ride trying to convince my self on buying Nitto mud grapples, and you just updated ! do you mind telling me how many Miles/KM's youve rolled on those Nittos and what are your opinions on Wear ?? That is my only concern with that tire....

To my approximation, I have about 1800k's on mine..As far as wear goes I can easily conclude that they wear very efficiently. When I had the 33 MG's, I rolled about 8-10000ks on them, with lots of pavement pounding trips, even a trip to California and back.

From the moment I put them on til after 10000k's after, they had evenly worn down 1/8" and no more......rotating them religiously contributed heavily to that fact I should add...I firmly believe that I can get atleast 50ks on them easy.
 
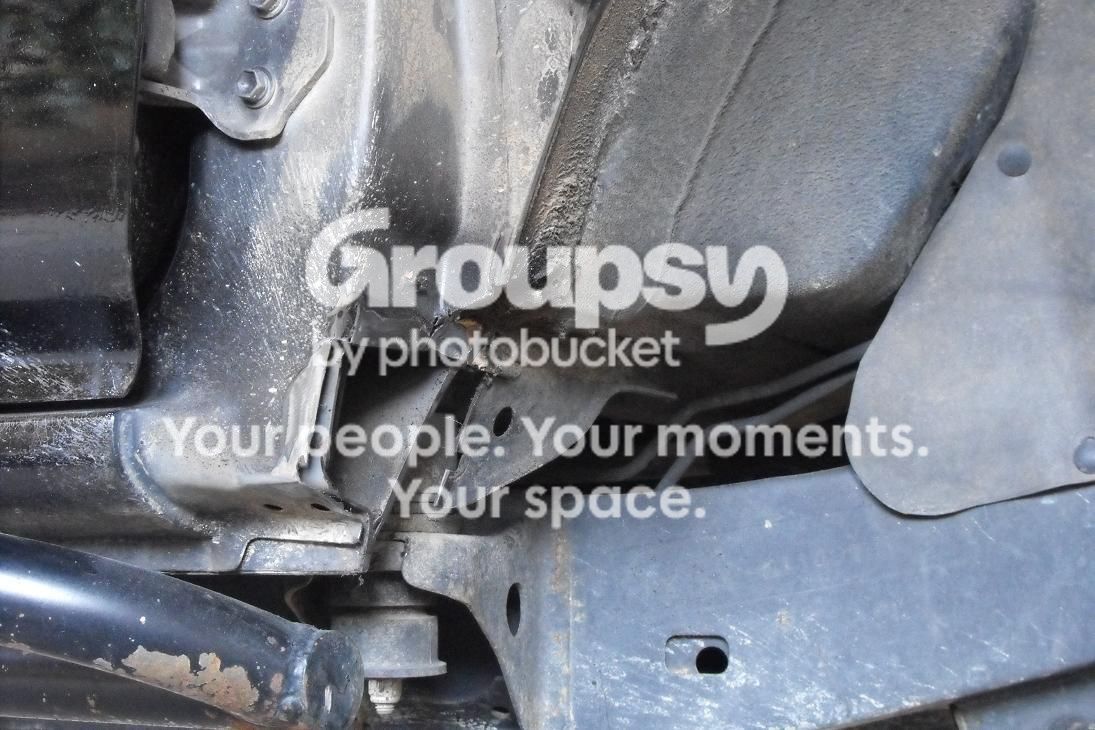
I went at cutting and welding and finishing off the drivers side before I could remember taking photos so,
let's forward to the passenger side. Basically, I knew at this point how much I needed to
trim away so I didn't bother removing the coilover here and just replicated from the drivers side.

12-9.jpg~original


hey blcktpgsr did you just have to cut that part of the panel off in the front to clear the 35s when offroading or do you still rub and what else did you do?
 
Last edited:
hey blcktpgsr did you just have to cut that part of the panel off in the front to clear the 35s when offroading or do you still rub and what else did you do?

You got it. I capped them off with a lighter gauge sheet metal, and at the same time trimmed part of the fender flares where the tires would rub.

It was easy to figure out where you need to cut/trim and that's by removing the strut assembly, if you want even the front end links. Then mount the tires, jack it up and articulate it side to side all the way to full lock....trim accordingly.

Since installing the Camburg UCA's, the wheels moved backwards after allignment, and thereby hitting my sliders slightly when turned. I had to cut, weld and cap the sliders abit shorter to avoid the tires from rubbing. I'm gonna have to take it back to a better shop to get atleast a +3 caster..The steering wheel is abit wiggly at high speeds especially when cornering.

THe only rubbing I have is at the drivers side with the tire hitting the frame at full lock..Offroad I have the rubbing eliminated.
 
You got it. I capped them off with a lighter gauge sheet metal, and at the same time trimmed part of the fender flares where the tires would rub.

It was easy to figure out where you need to cut/trim and that's by removing the strut assembly, if you want even the front end links. Then mount the tires, jack it up and articulate it side to side all the way to full lock....trim accordingly.

Since installing the Camburg UCA's, the wheels moved backwards after allignment, and thereby hitting my sliders slightly when turned. I had to cut, weld and cap the sliders abit shorter to avoid the tires from rubbing. I'm gonna have to take it back to a better shop to get atleast a +3 caster..The steering wheel is abit wiggly at high speeds especially when cornering.

THe only rubbing I have is at the drivers side with the tire hitting the frame at full lock..Offroad I have the rubbing eliminated.

thanks for getting back to me i apriciated it i just installed a set of 35/12.50r17 so i just wanted to know more from a more experienced person like you before i start doing anything. by the way you really have a sick ass runner man
 
you sir have a truly inspirational 4runner. i can but only hope to have my surf look as tough as yours. big thumbs up Yehaaa.. from down under.
 
you sir have a truly inspirational 4runner. i can but only hope to have my surf look as tough as yours. big thumbs up Yehaaa.. from down under.

Well as mine's a Surf copycat, I would say my 4Runner was, well...inspired by a Hilux Surf itself..such as a rig that you have.:guitar3:

Thanks for the kind words.

You owe us a pic or two of your Surf..
 
Long Overdue...

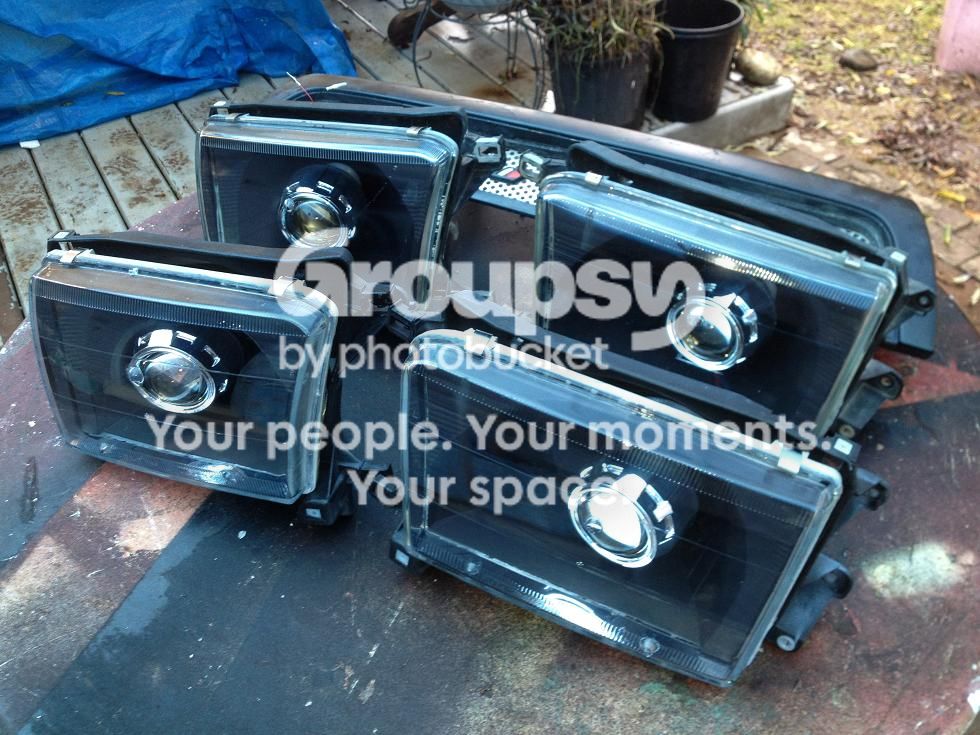
Just sharing the rest of the Projector retrofit project I started as of recently. I tried my best to document the process as they happened.

SCRunner12 being the last member who finished the retrofit gave me enough encouragement to finally dive in and tackle this project. Also credits go to members who chose to retrofit for additional inspiration. So in short, for the kit I went with the Morimoto Mini Stage III H1 from The Retrofit Source. .

Alrighty...Before removing the stock headlights off the 4Runner, I pre-marked my headlights aim projection onto a wall from a certain distance, then marked where the hotspots are using a painters tape for reference. THe aim on my stockers were well-adjusted as far as height is concerned so I know I have a good reference for the projectors once they're on.

I pre-heated the oven at 265* and let it bake at that setting while I insert one headlight in for a good 12 minutes. Afterwards, I took the headlight out and started prying the lens from the reflector using a small flat blade driver. I was relieved to see the glass lens starting to separate as I went around the casing..

Already feeling like I could tackle just about anything at this point in the process..lol feeling mighty proud:naughty:
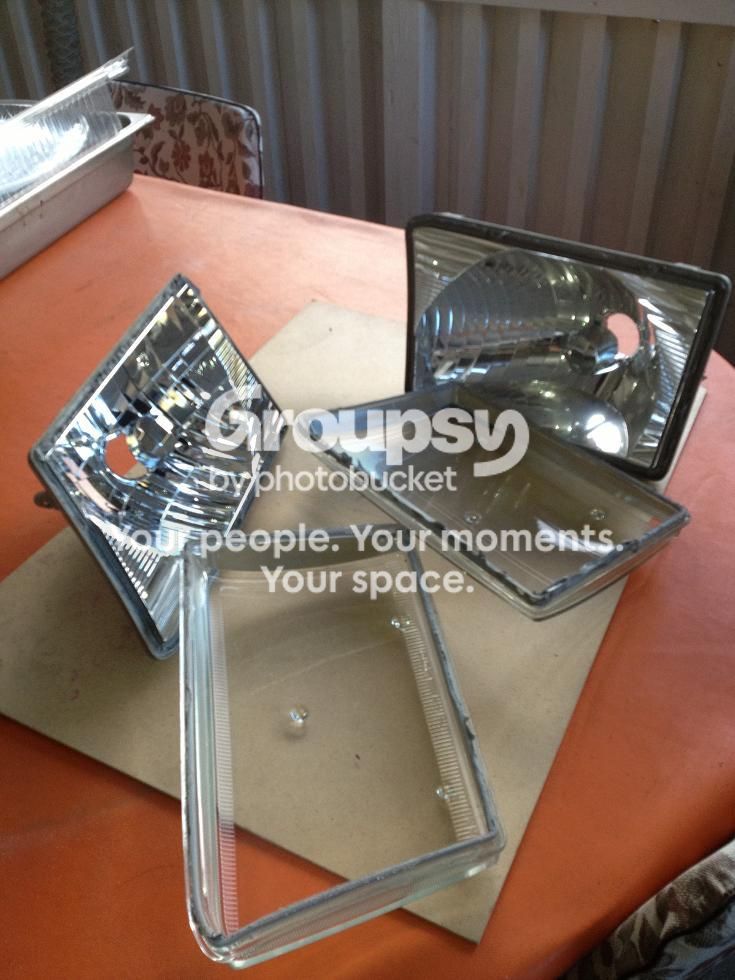

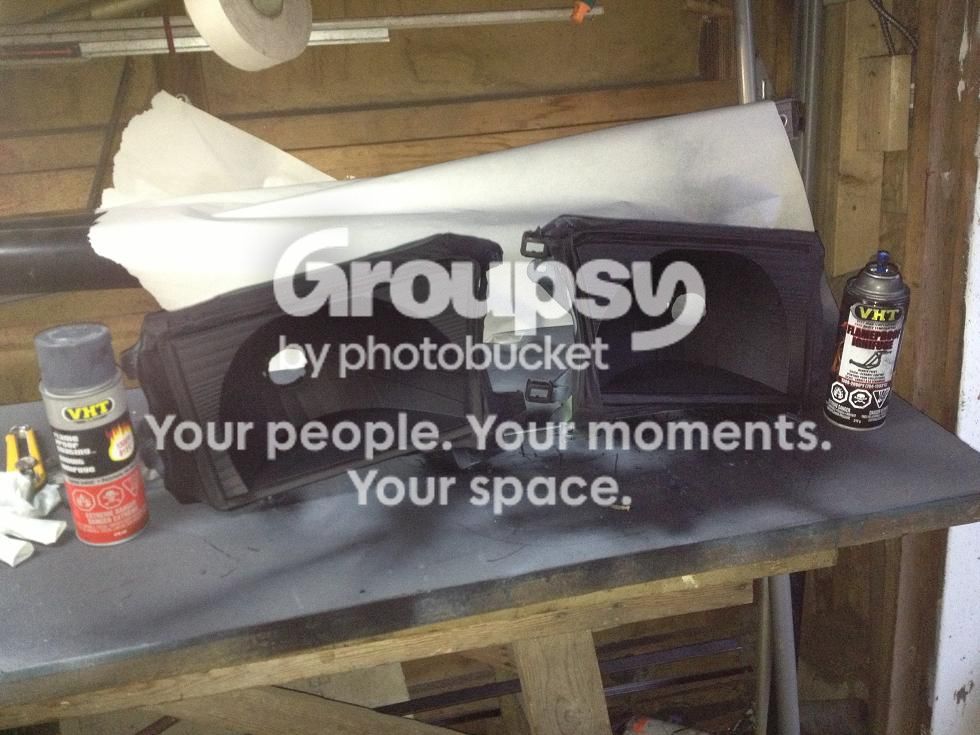
Here's the primed and flat black painted reflector bowls. Ofcourse this was done after lightly scuffing the good 'ol chrome off, taping the edges and dremelling(is that even a proper word?) out the 4 pieces of protruding plastic along the pre-existing holes in the bowl
77.jpg~original


While it isn't ideal to paint in a cold climate, I decided to power-dry between coats of paint applied. After all, even the instructions on the labels of the aerosol paints I used, indicated the use of an oven in between coats to fully bake the high heat paint...I really don't buy into it, I guess I just wanted to get the painting step over with. haha! By the way, I used VHT high heat primer & paint.

My oven substitute was to put the painted headlights in a closed box and then use my heat gun to replicate a convective heat transfer method found in.....well an oven!

Finally, the kit arrives, I wasted no time and installed the wiring harness in the engine bay ofcourse after inspecting everything in the package. And just like any other HID kits I've ever owned, its a cinch to install. You can definitely tell the quality of the harness from Morimoto.

When I turned the projector on for the first time, I noticed some strayed light leak from the back of the shrouds. And since I had no plans on incorporating other light effects like LEDS inside the shroud itself, I completely sealed any opening where usable light could potentially escape with an aluminum tape.
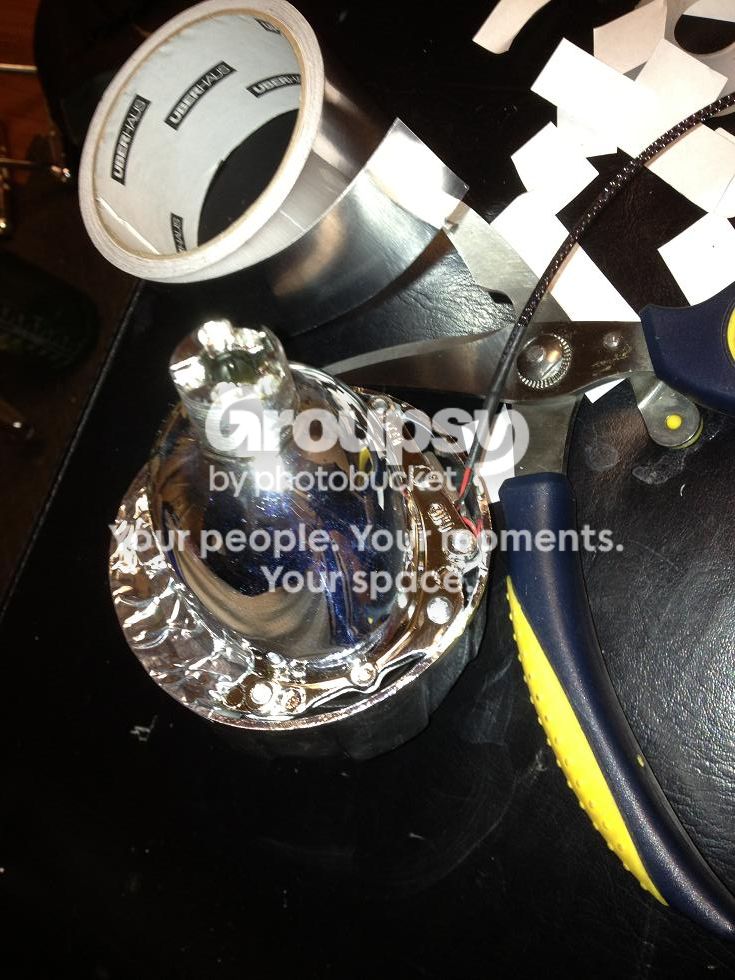
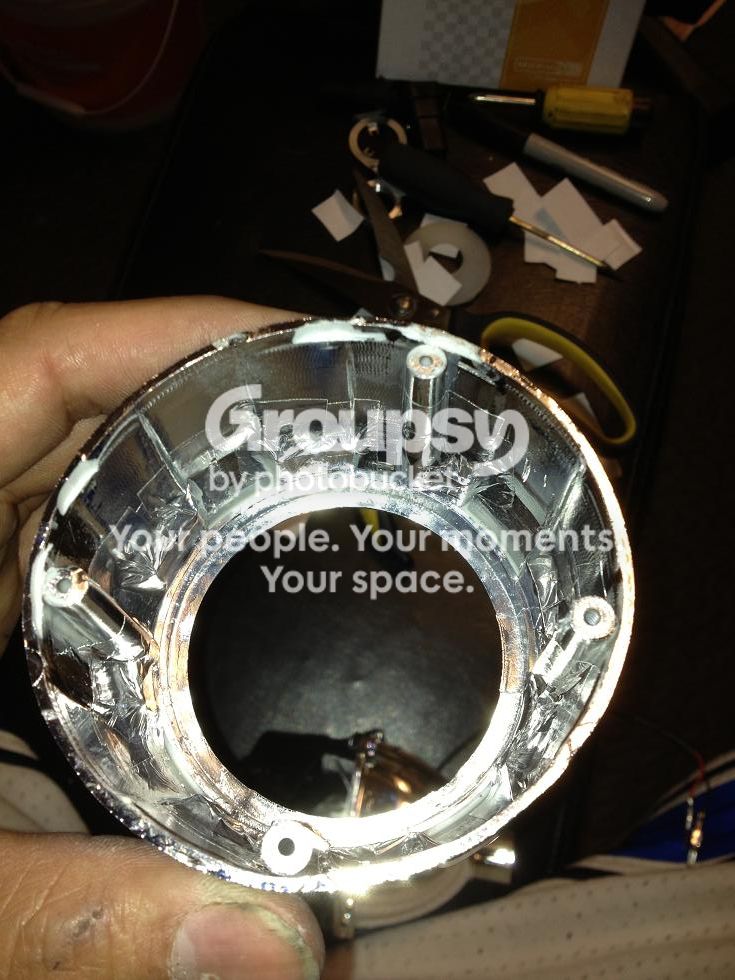


Almost there. I'm more than half way down to completion, I exclaimed. What could possibly go wrong when everythings falling into order the way things are rolling.

...........While chatting with my brother(Edwin) from California on the phone, and picture messaging him of the painted headlight/ projector, I once again like I already did earlier, decided to mock them up on the 4runner to showboat my accomplishment. On top of it, I went ahead and grabbed the glass lens and just laid it against the bowl, all the while confident that the re-sealing glue would hold it in place as I stare out of admiration from afar.

Well, the unimaginable had occured. 2 minutes later while I was 10ft away and on the phone, the glass lens fell under my close watch and met concrete. NOOOOOOOOO!:redbrick:

Found myself $90 poorer and was gonna be a week behind.. Lesson learned!
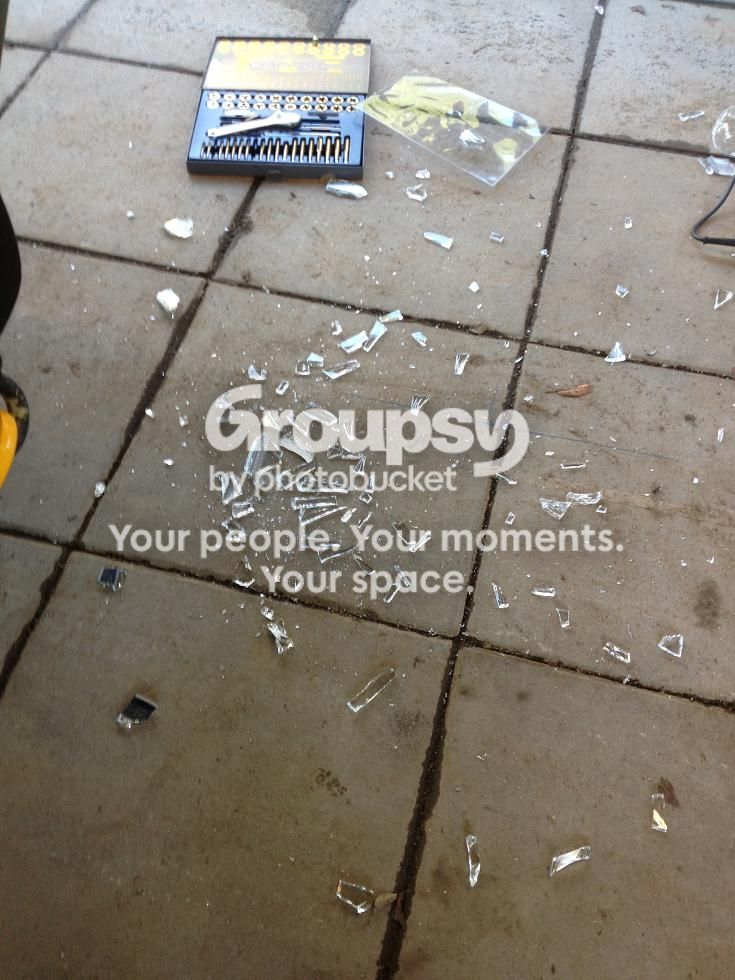

My project was at a screeching halt until the replacement headlight comes. Wait, I said my project, but I ordered 2 retrofit kits since now my brother also wanted one for his black 98. And so it goes that I finished his set first all baked up and sealed, while I impatiently awaits to get mine done.

Oh yeah, before re-sealing the headlights, I re-mounted them on the rig and did the necessary adjustments, more importanly the horizontal alignments off of both left and right projectors. Tighten the locking ring nut and onto the oven for re-sealing.
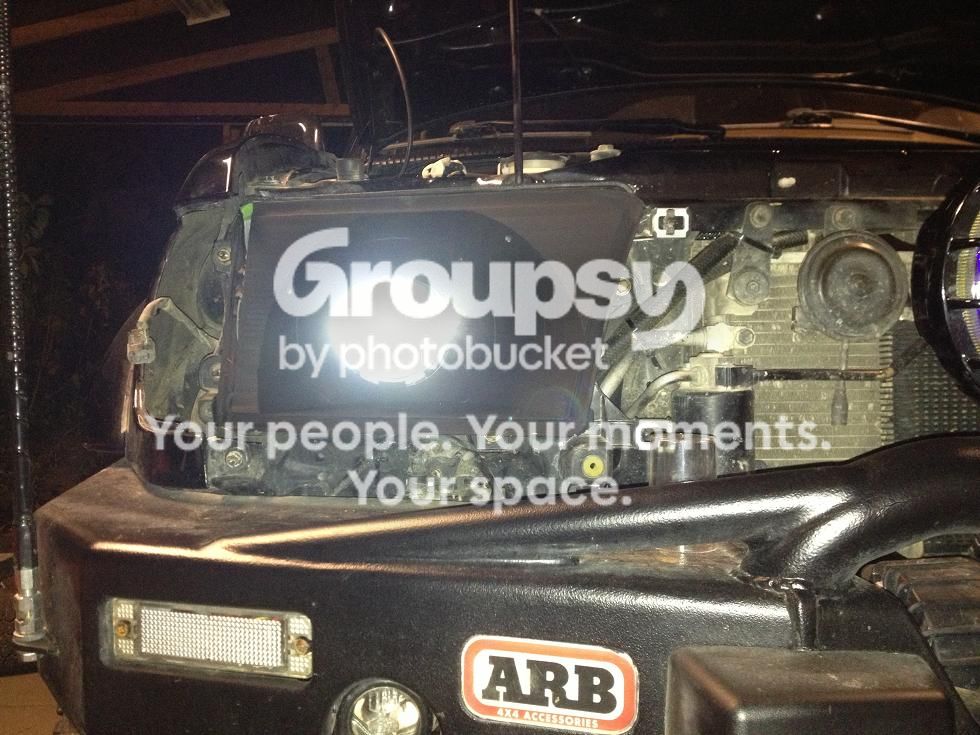

Green tape showing the marks that I needed to follow, off of the stock headlights beam marks.

Abit over-exposed shot. This was at about 10ft off the wall. Notice the narrow looking light output. This was due to the fact that the H1's have a foreground limiter built-in. Basically, another cut-off shield beneath that only lets light directly well in front of the vehicle. Foreground area not visible while driving is not illuminated. I kinda like that feature to be honest.


A week later, my replacement arrived and here they are both completed. Not bad for a noobie, i'd say!
38.jpg~original


Here's the extension of the first teaser photo I put up about a week or so ago in the 3Rd Gen Gallery section .

My brother Eric's 99 sporting my brother Edwin's retrofitted headlights.


One I posted earlier. I do appreciate the "likes" this pic garnered everyone.

 
Last edited:
Since trying on the headlights, Eric dedided to also update his stocks to a retrofit, and so did my other brother who also happens to own a black 99 SR5.
Two more sets I have to do within the next coming week. Hooray!

Shot in front of the bank. I just thought it was cool to see the rounded headlight and the cutoff at the same time.


More night shots


See the effect of the foreground limiters


At about 20 ft from the wall.


This was my attempt in blacking out the corners. Just as you would bake the headlights in the oven, you could do the same for the corners, except this time I used the box and heat gun method. It works perfectly. I tried 3 coats of Niteshades and here's the result.


We're having a family reunion this Christmas and and with that said, my sisters from Indiana and Seattle are coming over and so is my brother from California.
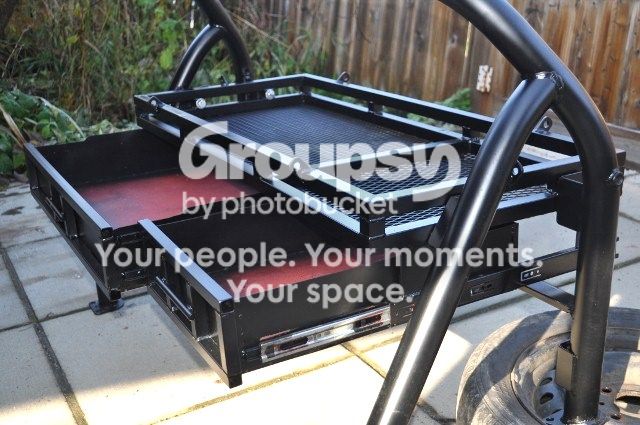
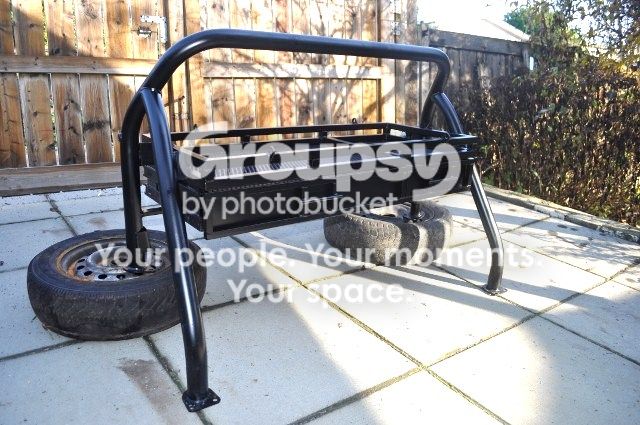
He also decided to do the 15'ish hour drive along with his family. I know he's ecstatic not only because of the reunion but for the projectors and the rollbar storage system he had requested i make for him. Thankfully I had a helping hand from my bro in building this one in no time.

This one's abit slimmer in design compared to mine since he has a pair of 10" subs that goes underneath it.
ROLLBAR6.jpg~original

ROLLBAR2.jpg~original


I promise to take pics with all 4 retrofitted 4runners together. We also plan on doing a winter wheeling trip altogether for the first time so. I promise you haven't seen the last of me...:biggrin2:

See ya for now!:cheers:
 
Last edited:

DESKTOP BACKGROUND!
(seriously if you have a HD version, I want it!)

Sweet updates man! Did you say you have 4 brothers all with 3rd gens?! I knew you had a couple but not that many! Holy moly dude.

Everyone is getting projectors lately I feel so uncool :(
 
Nice work!!!! Those came out amazing looking and I'm impressed you took on two at the same time. Did you get those XB35's in?


BTW, Rip stop slacking and join the club!
 
DESKTOP BACKGROUND!
(seriously if you have a HD version, I want it!)

Sweet updates man! Did you say you have 4 brothers all with 3rd gens?! I knew you had a couple but not that many! Holy moly dude.

Everyone is getting projectors lately I feel so uncool :(

Only the original sized pic..also ^that pic wasn't edited either.

Yeah you read that right, like i mentioned, one is driving from Cal and there's three of us here awaiting.

:lol: well gotta do what ya gotta do, and not to sound cliche' but you can do it if I could...seriously.

Thanks bud!
 
Nice work!!!! Those came out amazing looking and I'm impressed you took on two at the same time. Did you get those XB35's in?


BTW, Rip stop slacking and join the club!

Any year now! haha
I appreciate all the feedback you had on yours though, definitely gonna go big the first time :D
 
Nice work!!!! Those came out amazing looking and I'm impressed you took on two at the same time. Did you get those XB35's in?


BTW, Rip stop slacking and join the club!


Haha, taking on two simultaneously was abit much for a noob, I honestly had doubts i could even finish one. Two more to do!

No UPS is still in transit, hopefully they'll be in Washington by Friday.

Thanks alot!
 
Can I also be your brother? I want cool 4runner stuff that I don't have the skills to build, also. Your updates never let me down. That roll bar setup for your brother is awesome.
 
Can I also be your brother? I want cool 4runner stuff that I don't have the skills to build, also. Your updates never let me down. That roll bar setup for your brother is awesome.

:lol: I feel you man. But thanks for the nice sentiment.

He's gonna love that rollbar set up for sure.
 
Any year now! haha
I appreciate all the feedback you had on yours though, definitely gonna go big the first time :D

Yeah I'm going big on my new one for sure. Since I decided to do a new one I figured I might as well. There's nothing wrong with the Mini H1's and I've actually liked mine a lot more since I got the new ballasts. They are perfect for a timid retrofitter or someone who just wants better than stock. I highly recommend them.

Haha, taking on two simultaneously was abit much for a noob, I honestly had doubts i could even finish one. Two more to do!

No UPS is still in transit, hopefully they'll be in Washington by Friday.

Thanks alot!

Yeah one was more than enough for me. I'm anxious to hear your impressions of the differences in bulbs when they come in. I just got my retro package today and I'm definitely nervous to start it. The FX-R's are a lot more intimidating than the Mini's, but this round will go better I hope.

Thanks again for giving me a shout out on your build. It sounds dorky, but I feel honored.

Did you Nightshade the inside or the outside of the corner lights? They look good and that was what I was going to do if I didn't get my black corners. Nice work!
 

Members online

Forum statistics

Threads
278,312
Messages
3,554,083
Members
248,016
Latest member
Advally Service

Trending content

Back
Top