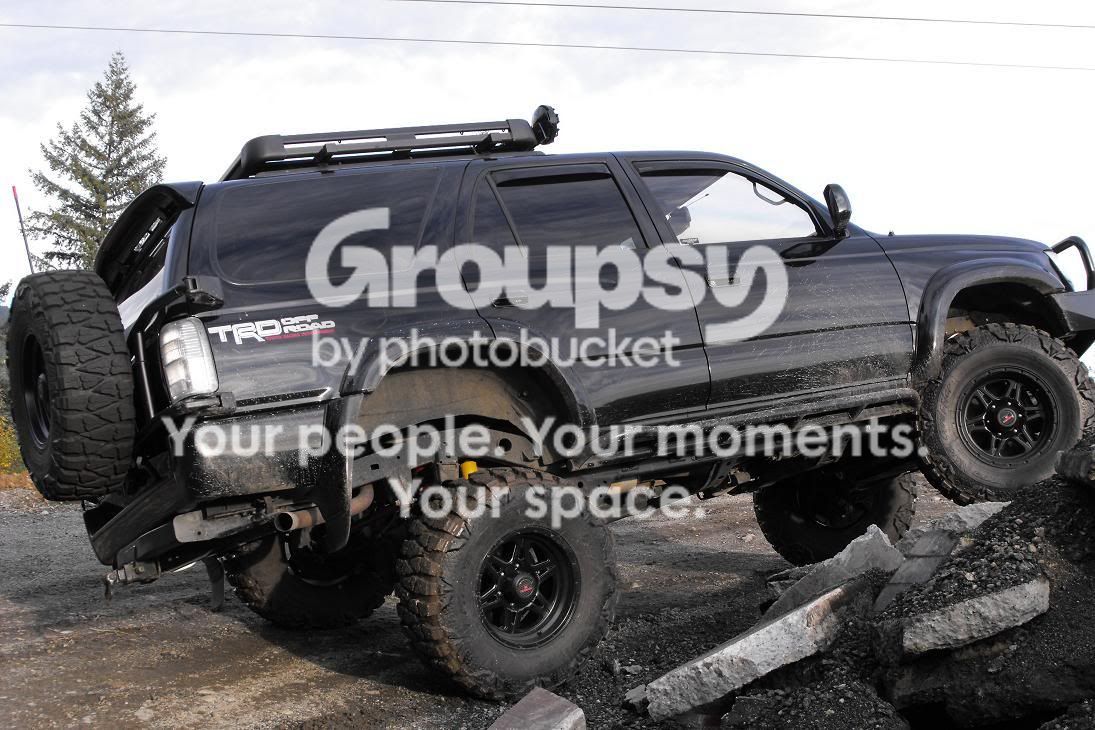
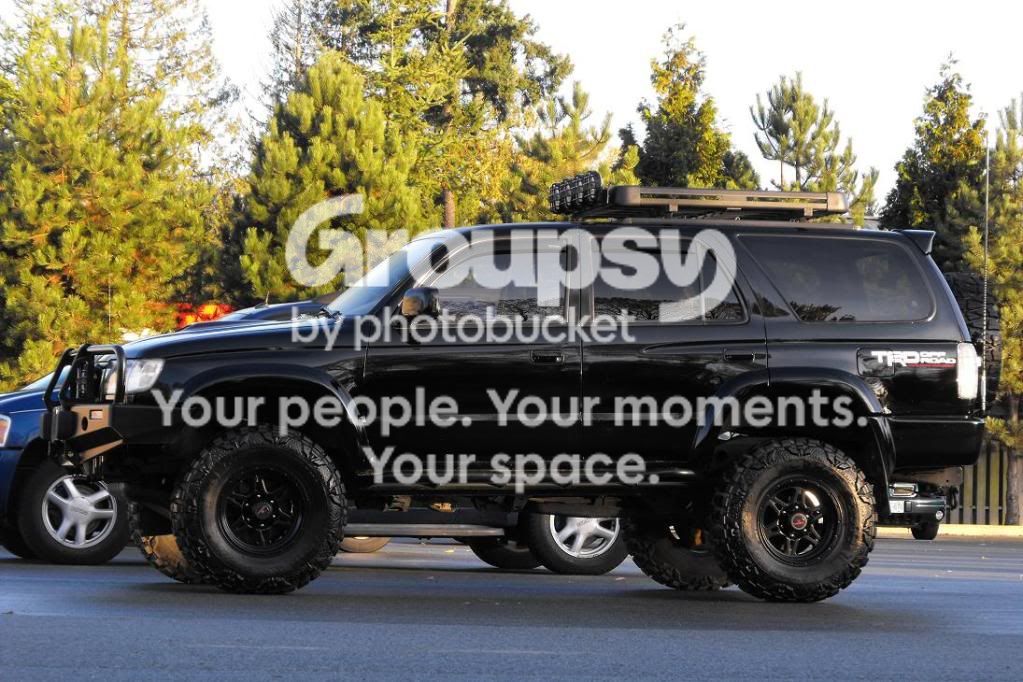
Blcktpgsr's '97 transformation

I want to know how you painted the LC springs red, and kept the color code marks looking exactly the same.....

You are one sneaky SOB. lol!
 
I want to know how you painted the LC springs red, and kept the color code marks looking exactly the same.....

You are one sneaky SOB. lol!

Haha,, that was easy. I actually didn't do too much prep on them as the original black was still in perfect condition. I just sprayed 'em with a good de-greaser, wiped and washed.

Before painting, I covered the color codes with masking tape. Using Rust Check's aerosol paint, I started painting the insides from top to bottom, then the outside in the same manner. Invert the coils to do the underside portions, and since the rust paint dries quickly, you can do multiple coats then let dry.....capiche? :fro:
 
Haha,, that was easy. I actually didn't do too much prep on them as the original black was still in perfect condition. I just sprayed 'em with a good de-greaser, wiped and washed.

Before painting, I covered the color codes with masking tape. Using Rust Check's aerosol paint, I started painting the insides from top to bottom, then the outside in the same manner. Invert the coils to do the underside portions, and since the rust paint dries quickly, you can do multiple coats then let dry.....capiche? :fro:

353esz.jpg
 
anything new???? at least some action shots or driveway shots at least !man i miss that thing!


SOLD!


kidding man, infact I've got something up my sleeve I wanna share...if only I can get past this stupid blue screen my desktop's recently been experiencing.:wtf:

I don't think anyone's done this one yet!
 
kidding man, infact I've got something up my sleeve I wanna share...if only I can get past this stupid blue screen my desktop's recently been experiencing.:wtf:

I don't think anyone's done this one yet!

You've certainly got my attention...
 
I've seen 4runner owners with stock rear bumpers finding it necessary to temporarily remove their side bumpers/mudflaps when wheeling, and for a reason....the length of the side bumper is enough to cause the tires to rub and grind when the suspension flexes, causing potential damage to the tires.

Yikes! I haven't gotten the worst of it yet but i did lose one hex head bolt holding the mudflap on one side and some small chunks off the tire. I needed a solution.

Aftermarket rear bumpers are made shorter due to this reason, save the tires and also allowing each wheel to travel further within the wells, especially with flexy coil systems.

My brother and I talked about it and came up with this...

I move the mudflaps backwards on the trail, move it back to it's original configuration after..Click on the pic below to play!


The process of how I did it..

Upper bumper mounting point to be removed


Now since I have mudflaps, all I needed was to re-position the new mounting points for the bumper which will still be hidden under it.

Here's a pic of the two new holes I made to the left of the cut line, see the existing bolt hole to the right?
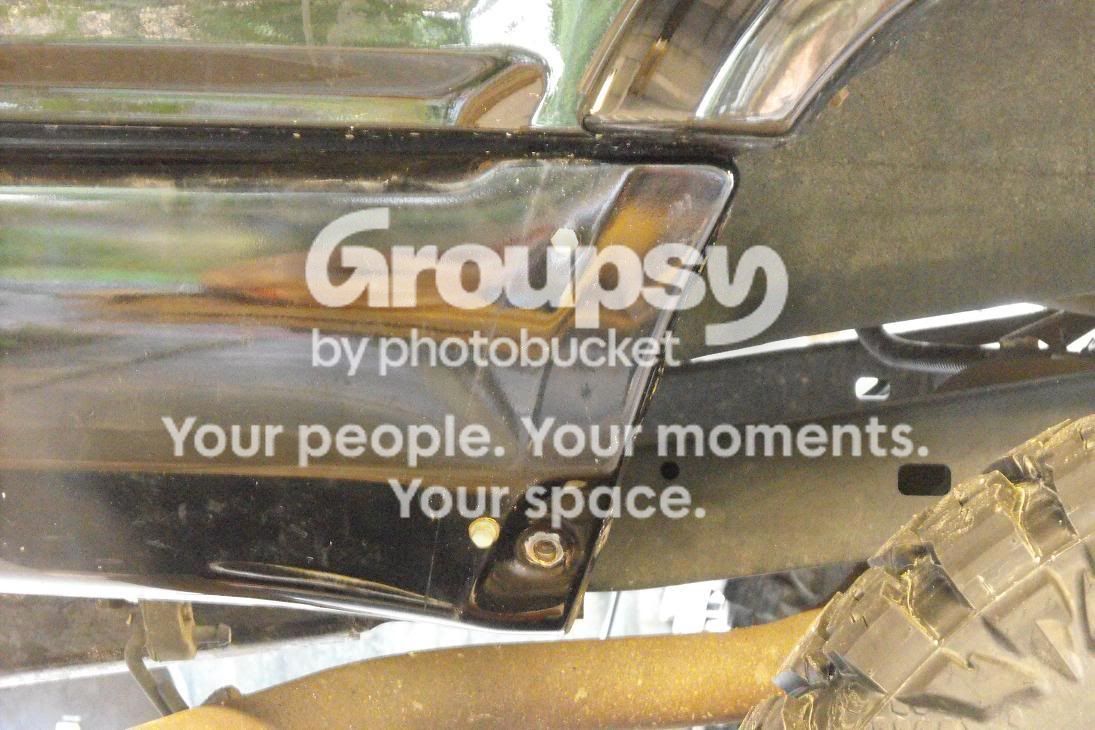

The new upper bolt is replaced by a longer one and requires a 1 1/4" spacer/sleeve between the actual bumper surface and the bracket, so when the bolt is tightened the bumper will not get crushed. The lower bolt needs a 1/4" spacer/sleeve only, remedied by using a typical nut.
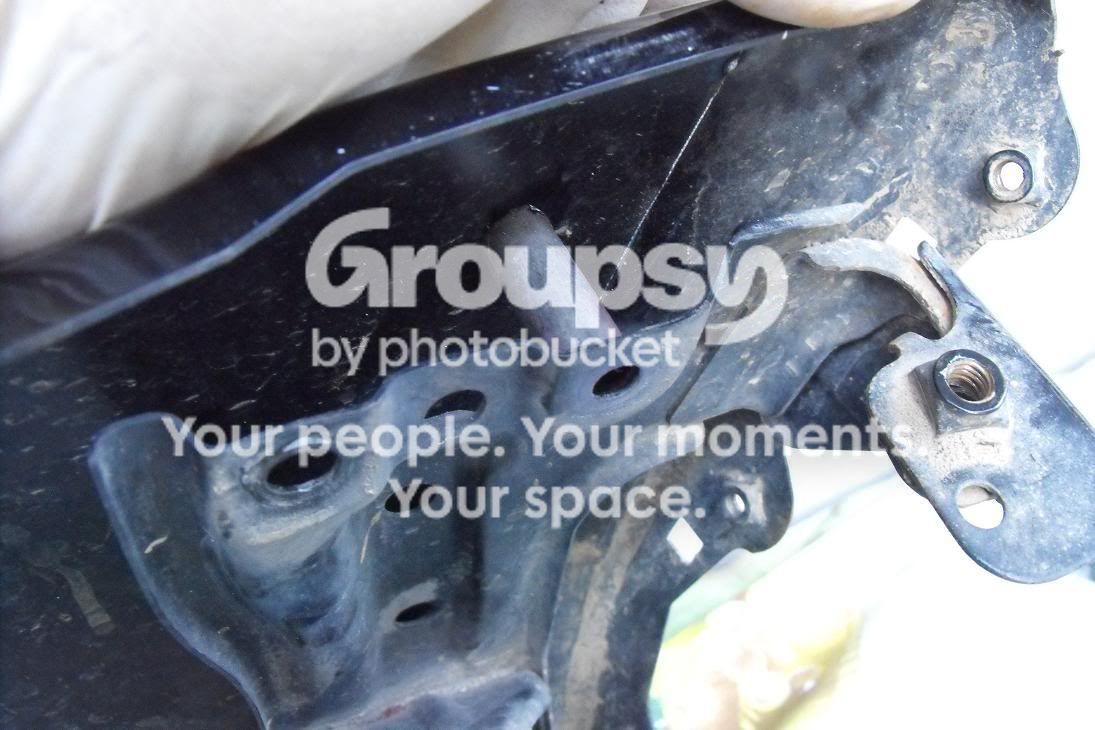

Here's the cut piece of the bumper bracket showing the welded in upper spacer and the lower nut mount. These are the new bolting points for the bumper.
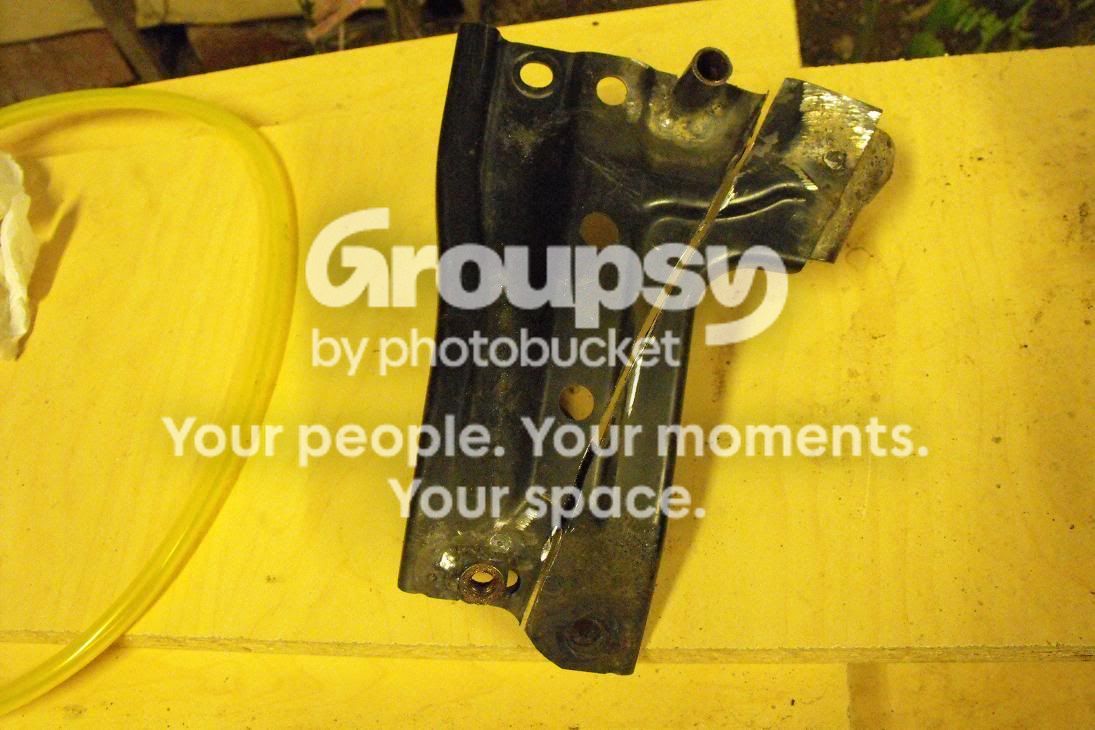

The shorter version bumper showing where the cut was made.


Fast forwarding to the welded capped tubings that acts as the rail guide for the mudflap mounting plate welded to a solid rod. The alignment and distance of the two tubing is paramount so the rod glides in and out of the railings without bind or resistance. Also notice the cut on the seam weld of about an inch for extra clearance. I made series of cuts then folded and re-welded the seam weld.
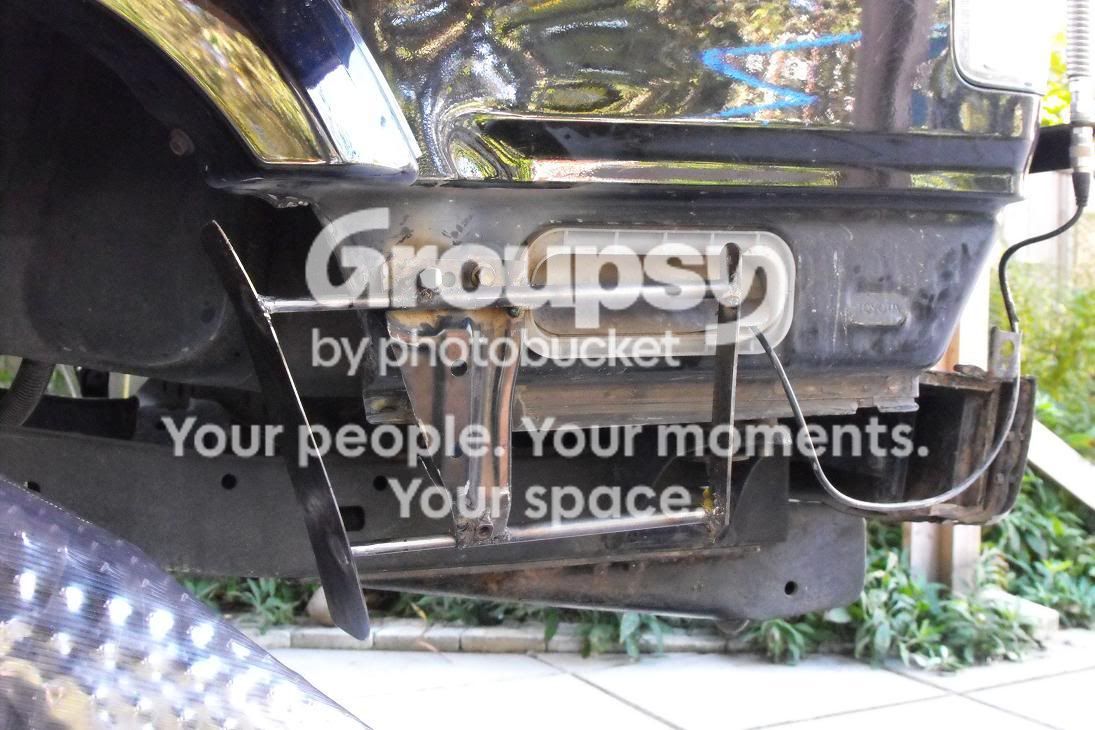

Sorry for the blurry pic, but here shows the bumper mounted covering the rail system. The only thing left is to screw on the mudflap to the plate. Everything was painted with black rust paint, filled the tubings and doused the glide rod with grease.


I found a mild embankment and tried out the mod i did. I always cringe at the sound of the tires rubbing hard on the mudflaps....not this time. I've eliminated it with more room to spare. I also noticed that my tires will actually stuff further in on the wheel wells upon inspection.

If you can see here, the mudflap was actually about a half inch off from being ligned up with the upper flare. The tire already went past where the mudflap would've already stopped it going further.
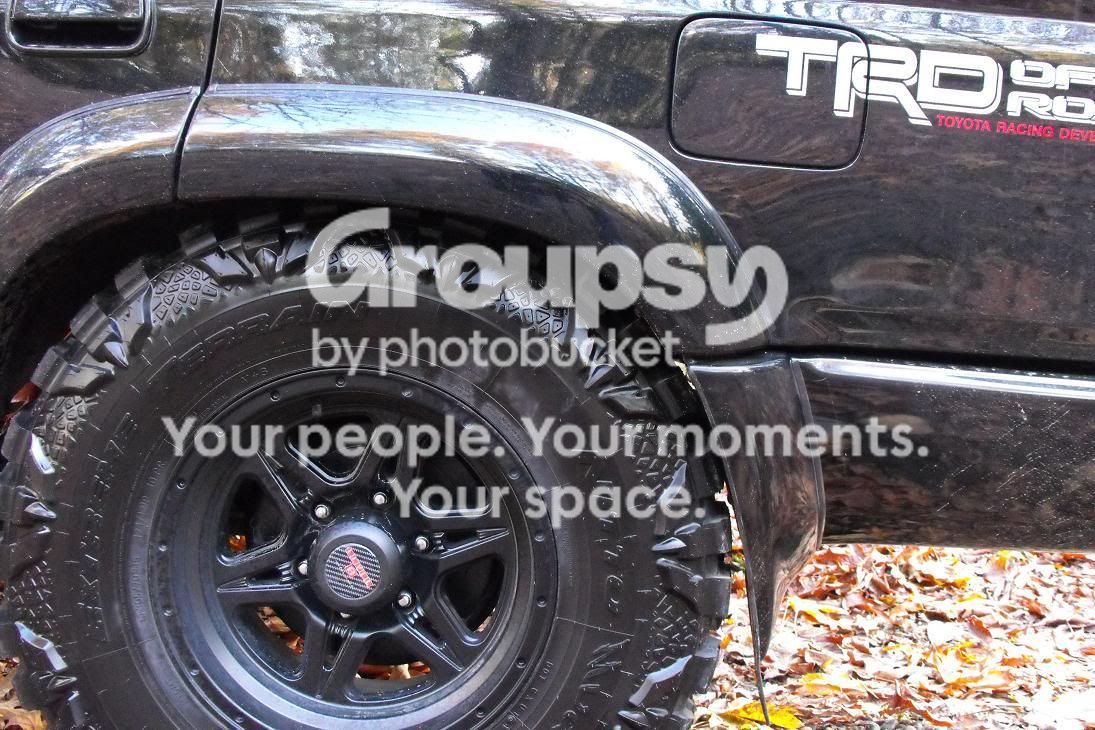

Same shot only I moved the mudflap backwards. I've got just another 1" of extra room to play with. Next time when I wheel, I'll push it to it's full potential and see how much further the tires go. But so far....I'm a happy modder!
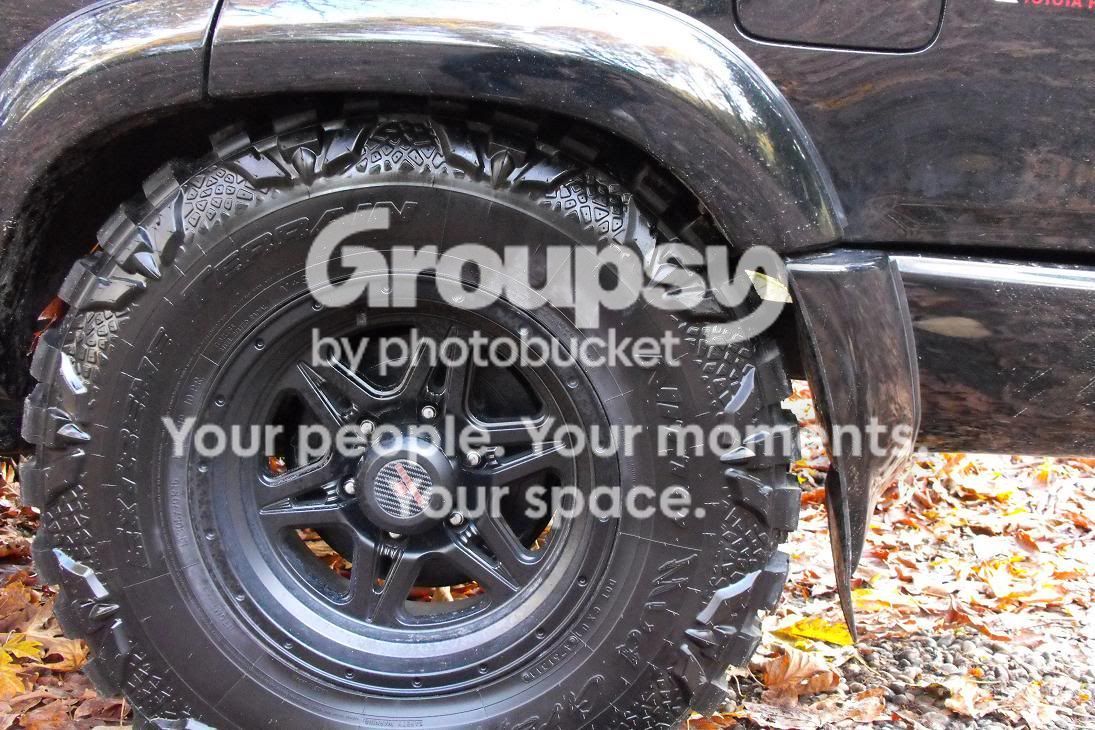
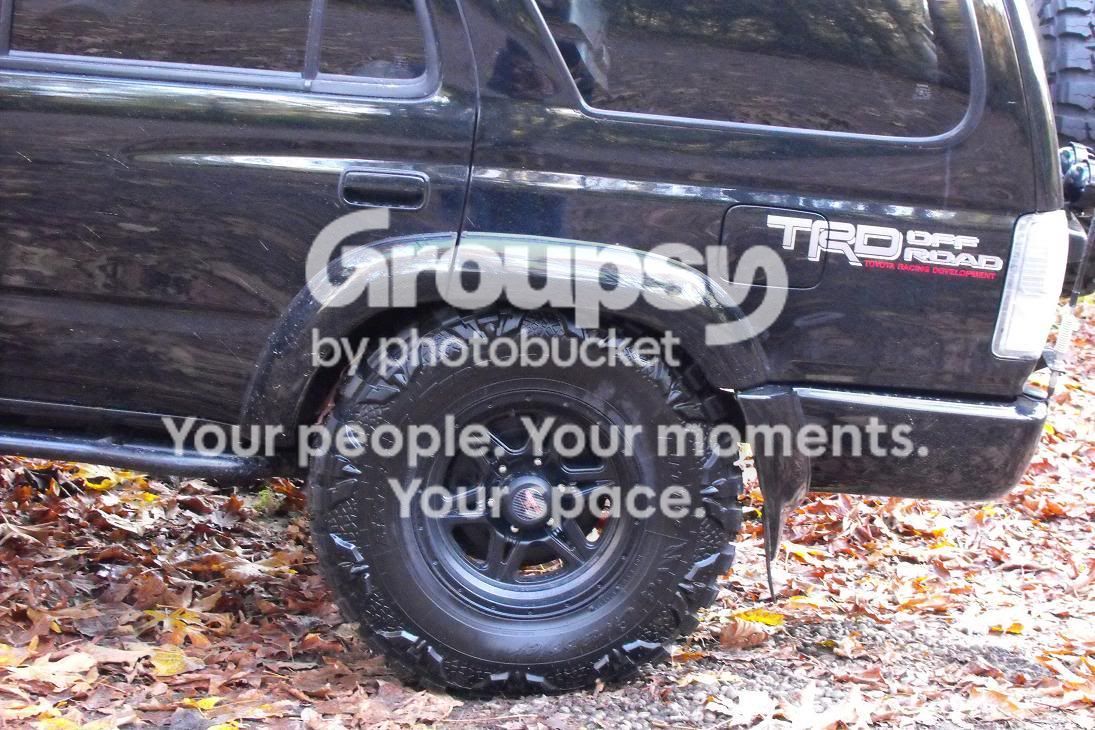

With the mudflap still ligned up with the flare and tire already rubbing.
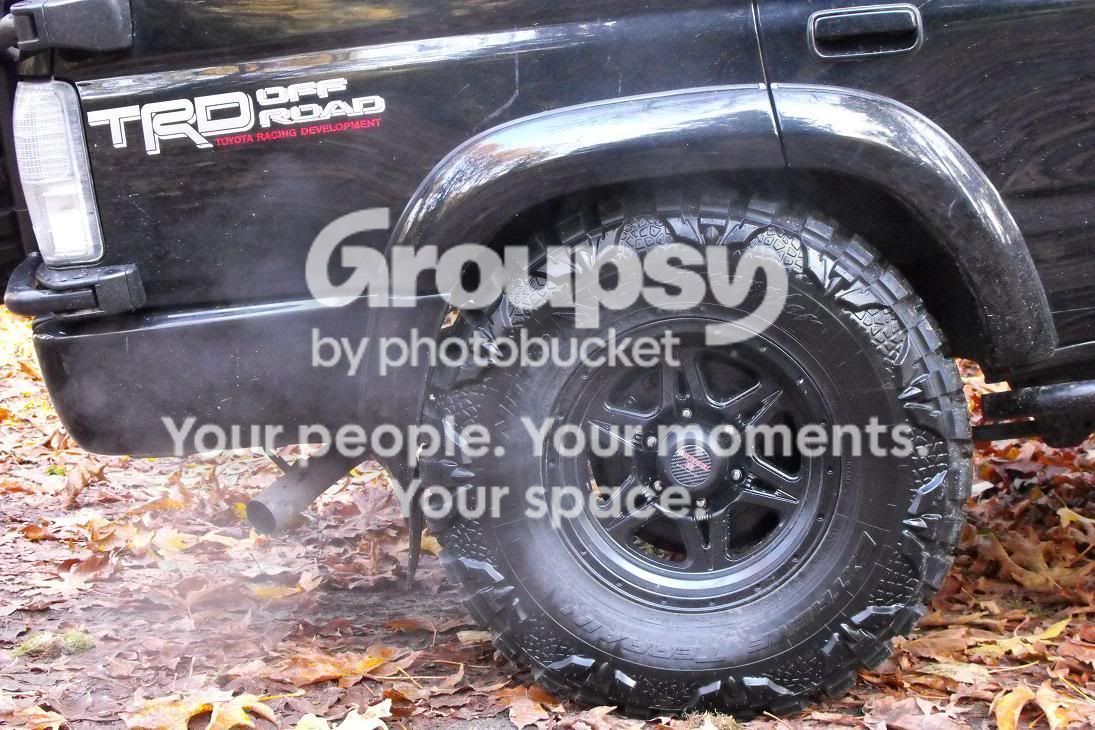

Same shot...
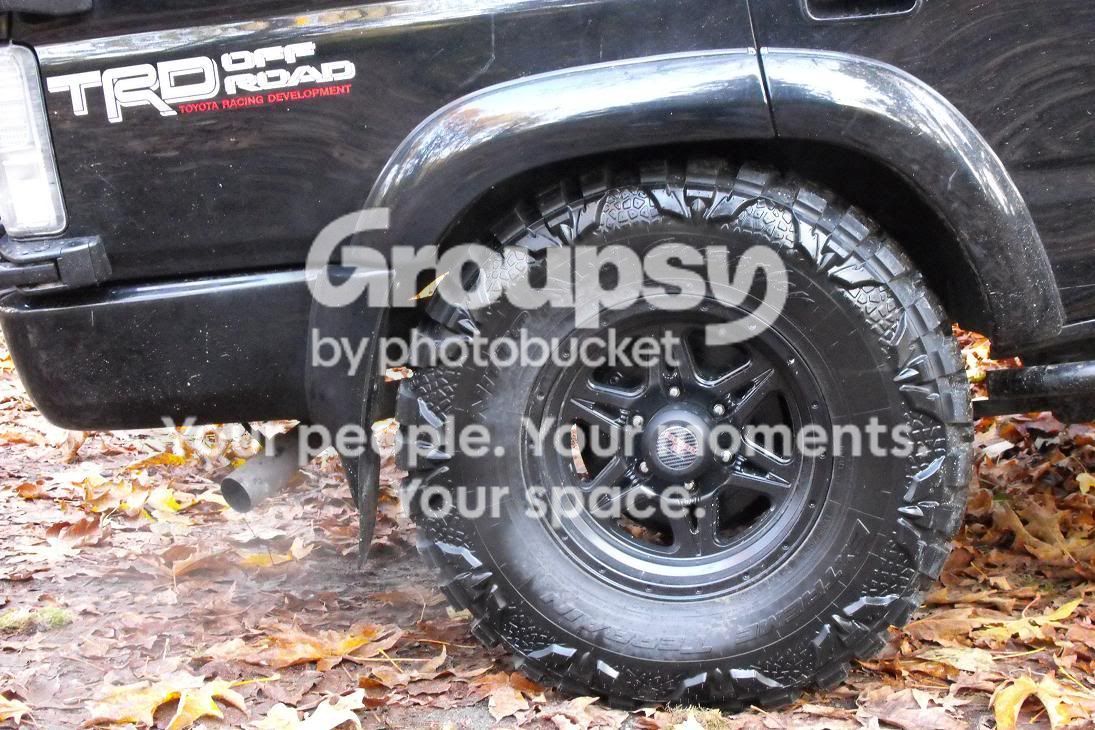

I wanted to get more satisfaction out of my built contraption and the result was just, well....Stuffed!

Here are some further test result photos:

I still have room behind the tire at this point.



As huge as an improvement this mod gives my truck off road. For me the ability to revert it to it's original configuration maintaining the stock form is equally just as important.

Best of both worlds I guess!!!!:bluejump:

Bonus shot
26.jpg~original
 
Last edited:
very useful mod right here..i'm pretty sure plenty of people are gunna use this. and thakns for the bonus shot..i needed one of those
 
Wow. I made the mistake of quickly glancing over the mod and at first I was like, "that's a totally useful mod, but I'd never do it because I couldn't live with the aesthetics being off". Then I saw that you built it so that you can mount them in both positions. This is ingenuity at its finest.
 
^Genius. All of this^.

Damn, I can't wait to wheel with this rig!

It's effective.


very useful mod right here..i'm pretty sure plenty of people are gunna use this. and thakns for the bonus shot..i needed one of those

Nothin especial about the bonus pic, I just wanted to take a snap of the truck after I detailed and sealed it, see what all the rave was about using Jetseal 109 paint sealant..I'm convinced!


Wow. I made the mistake of quickly glancing over the mod and at first I was like, "that's a totally useful mod, but I'd never do it because I couldn't live with the aesthetics being off". Then I saw that you built it so that you can mount them in both positions. This is ingenuity at its finest.

That is the point of the whole thing...Flexibility!

Thanks fellas.
 
Great job man! Wait till you see the new goodie my Runner' has...:zoom:
PS: I'm looking at heading down to your neck of the woods for the holidays...With my 4Runner.
 
You're nuts dude. I wouldn't be surprised if I logged on one day, saw an update on your thread, opened it up and saw that you'd created a mod that served you perfect sunny-side-up eggs with a side of bacon out of your door mirror... and that you did the passenger side too, in case you had your lady along.

That's seriously ingenious. Functional. Awesome. Great work as always.
 
Great job man! Wait till you see the new goodie my Runner' has...:zoom:
PS: I'm looking at heading down to your neck of the woods for the holidays...With my 4Runner.

Now what can you possibly surprise me with I ask? I may just end up copying it.....ha ha!


You're nuts dude. I wouldn't be surprised if I logged on one day, saw an update on your thread, opened it up and saw that you'd created a mod that served you perfect sunny-side-up eggs with a side of bacon out of your door mirror... and that you did the passenger side too, in case you had your lady along.

That's seriously ingenious. Functional. Awesome. Great work as always.

That's funny as heck....hmm? well, this one'll take heck of alot more than my brain can process but.....nothings impossible to positive thinkers or doers, right?

Just glad to contribute is all!

Again, thanks guys!
 
Paint me pink and call me a flying elephant.....never thought I'd see something like this! Not that you let me down, but once I realized what you were doing....I half expected you to motorize it so they would move at the press of a button. lol

That is a very awesome mod, and you get a big :bigok: for implementing it perfectly.
 

Members online

Forum statistics

Threads
278,312
Messages
3,554,083
Members
248,016
Latest member
Advally Service

Trending content

Back
Top