Blcktpgsr's '97 transformation

Nice dude! You make it really hard for any of us to try and keep up with the mods man! :)

HA! I just do what I can man, and just like most of us modders, I just started using a welder myself. I've still alot to learn but I'm sure getting the hang of things.

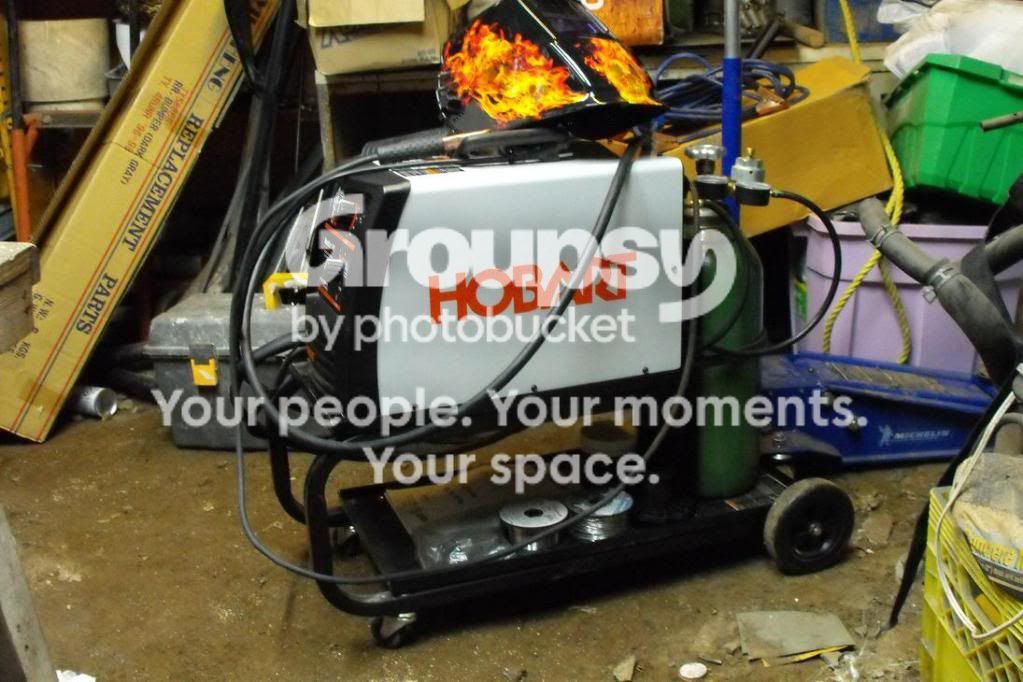
This are the newest addition by the way...Hobart Handler 140 and Lincoln Electric auto darkening helmet. I just got the welder just over a month ago but with the cold weather, I haven't really had the chance to fiddle with it that much..well except that one time I used it for the 1st Gen roll bars modified front legs and base. What a step up from the last flux core welder I used for my ARB, the rear bumper mod and my tire carrier...that's for sure.

2-10.jpg~original
 
Last edited:
OH you SOB!

You're just one step ahead of me right there. That welder will be one of my first major purchases in 2012. Congrats on the upgrade! I can't wait to see what you do with it.
 
Very nice! I'm using my buddies welder these days, he's storing it in my garage, as he doesn't have anywhere to keep it right now. His Mechanics tool box is also in my garage, but that's gonna be gone after Christmas Break, when he goes back to College.
 
OH you SOB!

You're just one step ahead of me right there. That welder will be one of my first major purchases in 2012. Congrats on the upgrade! I can't wait to see what you do with it.

:cheers: You know what they say....great minds think alike, ha ha! I'm sure I can come up with something sometime..


Very nice! I'm using my buddies welder these days, he's storing it in my garage, as he doesn't have anywhere to keep it right now. His Mechanics tool box is also in my garage, but that's gonna be gone after Christmas Break, when he goes back to College.

Take that opportunity to learn better weld techniques while you got it..When I borrowed my friends welder I did just that..

We'll get proficient at it with practice....and I intend to be better.


THANKS GUYS ALOT!
 
Beautiful rig

I'm new to T4R but normally work on my wife's DiscoII, gave me some great ideas for both. Nice tread!
 
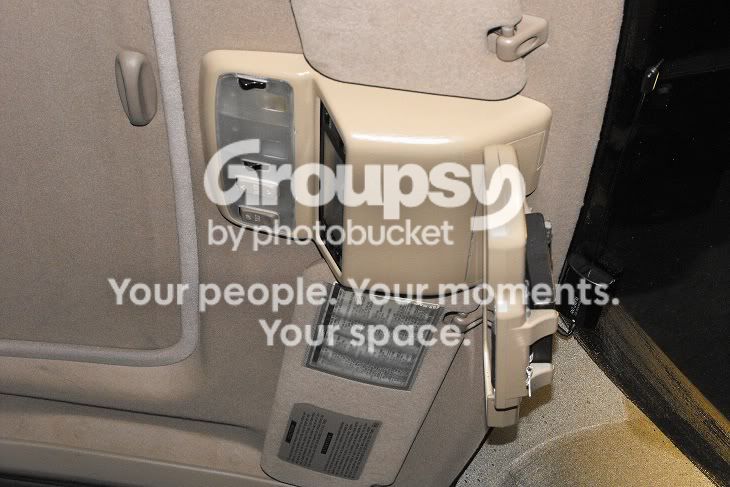
man..just went through the build thread again.. this thing rocks..also..your rear view mirror..is that an upgrade? looks like something from a newer car put in
 
man..just went through the build thread again.. this thing rocks..also..your rear view mirror..is that an upgrade? looks like something from a newer car put in

Had you with the bluetooth huh?..well almost!
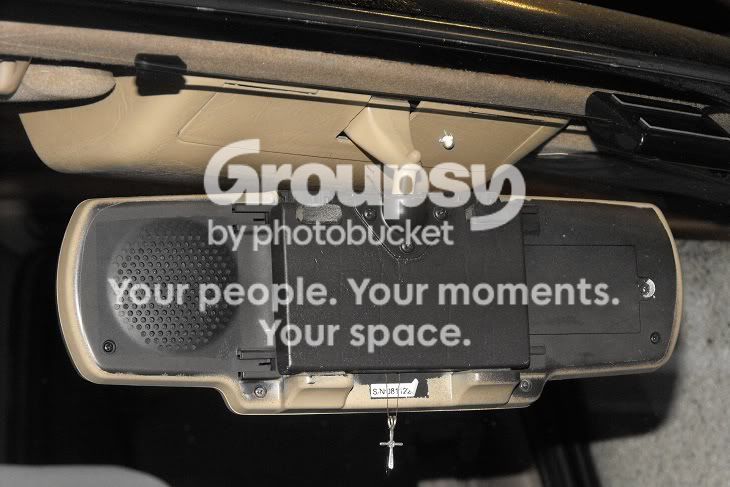
i bought the handsfree from Canadian Tire when the law was passed...oh 2 years ago. It only came in black and i wanted to integrate it better with the interior color as well as the color of the FMU, so I painted it too.

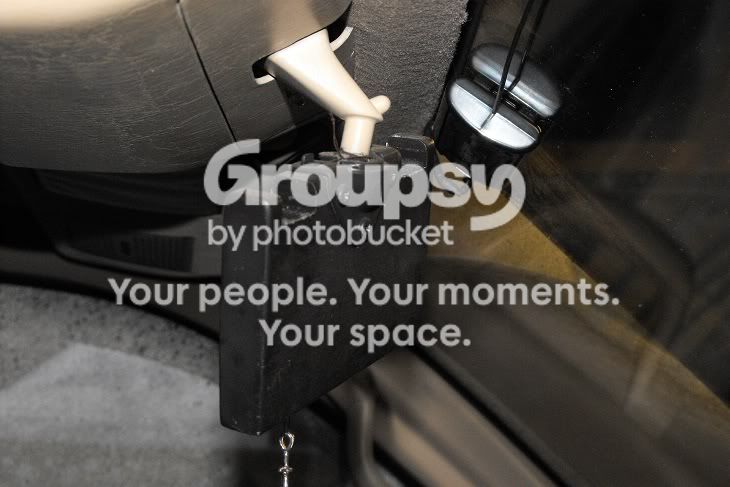
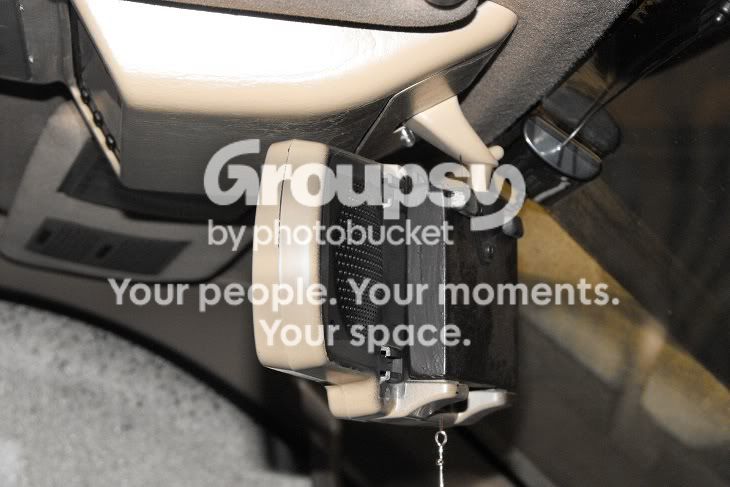
Originally, they clip onto the stock rear view mirror but why put a mirror on a mirror I thought. So I dismantled the original one and retain the articulating ball mechanism, re-used it and mounted it on a UHMW plastic block I found laying around which I also modified and shaped to fit the Bluetooth device to.

This handsfree is amazing in that since I bought it Christmas 2009, i only chraged it once then and never again...well not yet. It's made by Yada by the way.

This one didn't make it to the build and I didn't go into it with much detail, I figured it's such a trivial matter and no one would notice,lol....but you did so,
THANKS

Outside view
1-18.jpg~original


New UHMF block mount w/ arm & articulating ball from stock mirror
2-11.jpg~original


4-14.jpg~original


Profile
5-9.jpg~original
 
Last edited:
Sickest runner on this site for sure! Where abouts in the lower mainland are you located? I'm in South Surrey and just picked up a 97 SR5 5spd. It's stock except for 31" BFG A/T's, but I can't wait to start modding it. Do you have any recommendations for some good beginner spots to go wheeling?

And just curious, what sort of mpg's are you getting out of this beast?
 
Sickest runner on this site for sure! Where abouts in the lower mainland are you located? I'm in South Surrey and just picked up a 97 SR5 5spd. It's stock except for 31" BFG A/T's, but I can't wait to start modding it. Do you have any recommendations for some good beginner spots to go wheeling?

And just curious, what sort of mpg's are you getting out of this beast?

You can tackle the trails in Britannia Mines down the Sea to Sky highway, there's also a bunch of trails in the Mission area. I can't pinpoint a specific place but try and visit BC4x4, there are discussions of trails and places to go wheeeling in. Oh yeah have you tried Stave Lake?

I'm averaging 300k's per full tank highway driving down from 400-450 with all the added weight..I don't mind it since I mainly use the truck for weekend wheeling and occasional short trips here and there......really whenever I feel like showing off..:hiding:lol!

I'm from North Van by the way.
 
Last edited:
Sweet thanks. I'm planning on doing 33x10.5 KM2's and just enough lift to clear them so hopefully my mpg won't suffer too badly.

I keep hearing about Stave but haven't made it out there yet. I definite should, as theres next to nothing in my area.
 
Hey man, I put the clear corners on today. Put a few pictures in my thread, though the picture quality is bad. But I guess you would alread know what they look like on a black truck! I hope to get the bumper on this coming weekend if it warms up enough . . .
 
that's really funny I just posted in your build thread regarding the lights. Looks nice,,,kinda makes me miss them...lol
 
gosh man your rig looks absolutely perfect. and you still find ways to make it even cooler... its things like this that make me so addicted. love it, love it! i want some more :hungry:
 
gosh man your rig looks absolutely perfect. and you still find ways to make it even cooler... its things like this that make me so addicted. love it, love it! i want some more :hungry:

It's kinda hard doin' any mod on the truck in this blanketing cold weather but rest assured I'll keep updating this thread as I go.

Thanks for following up!
 
I've been getting PM's regarding what's involved in the installation of the tire carrier and since I'm guilty of not going into details behind the process, I just wanted to recap it and bring everyone up to date and hopefully shed some light on it. Now anyone who can clue me in on how I can insert this addition on page 9 where this should've been to start with? Me don't know!


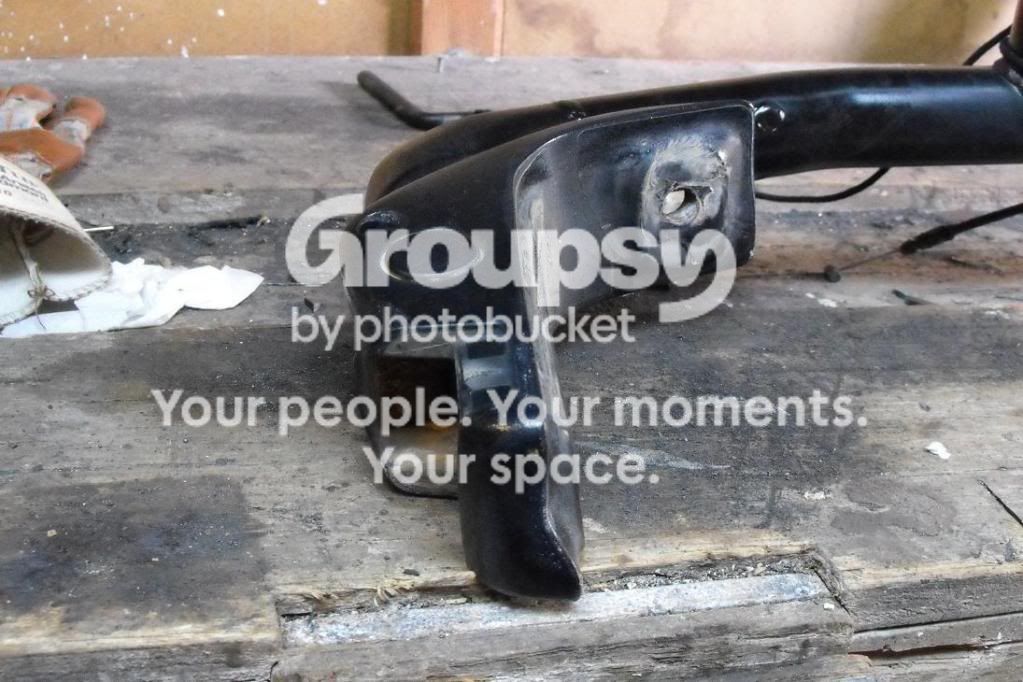
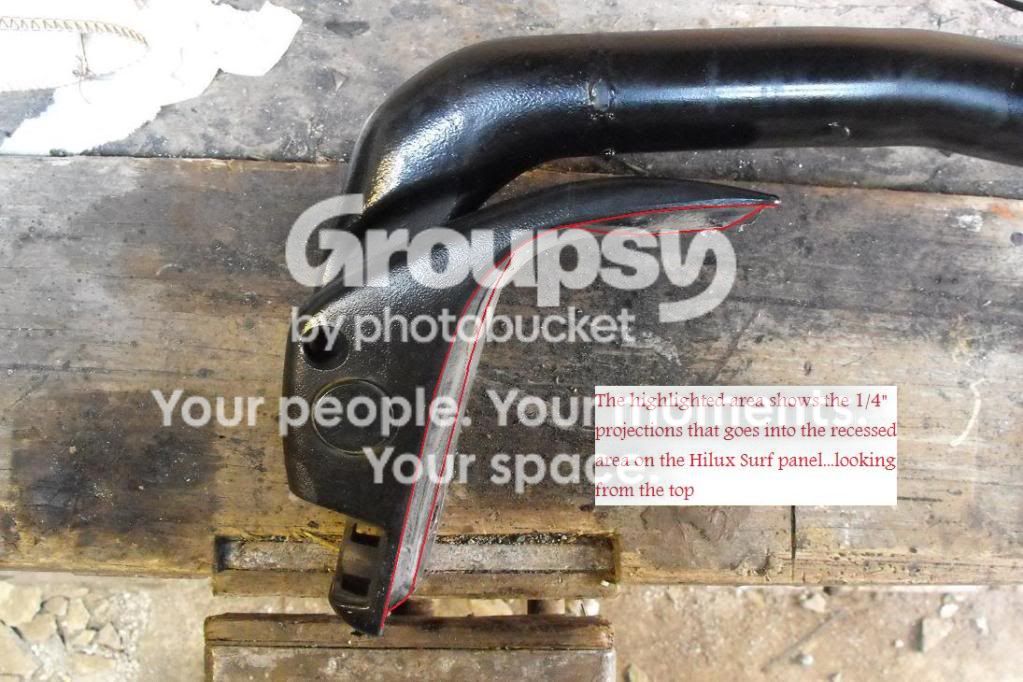
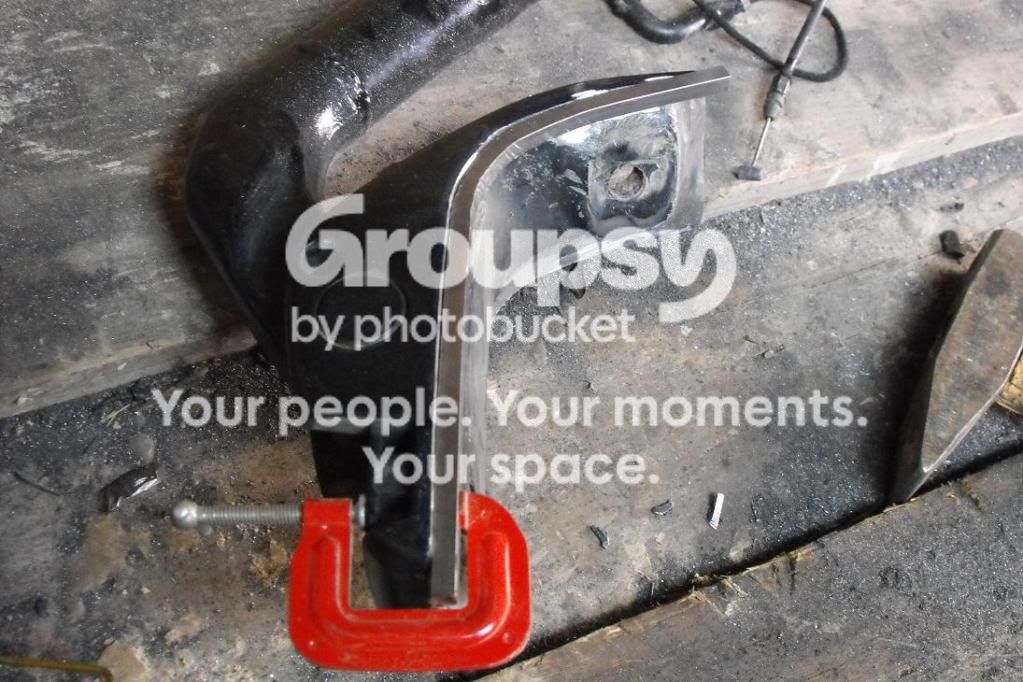
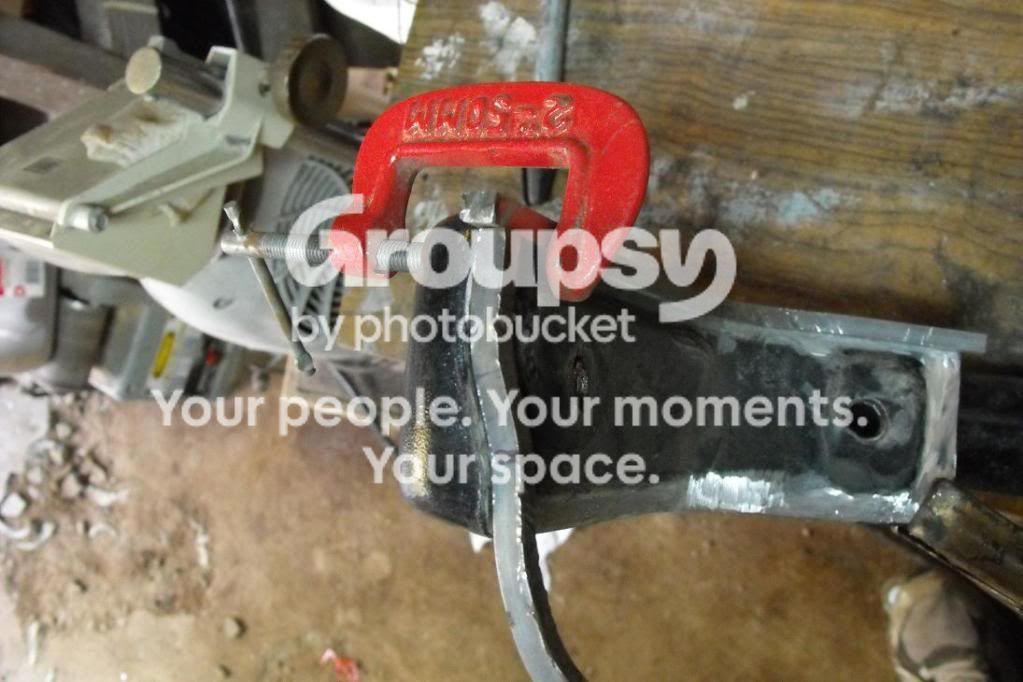
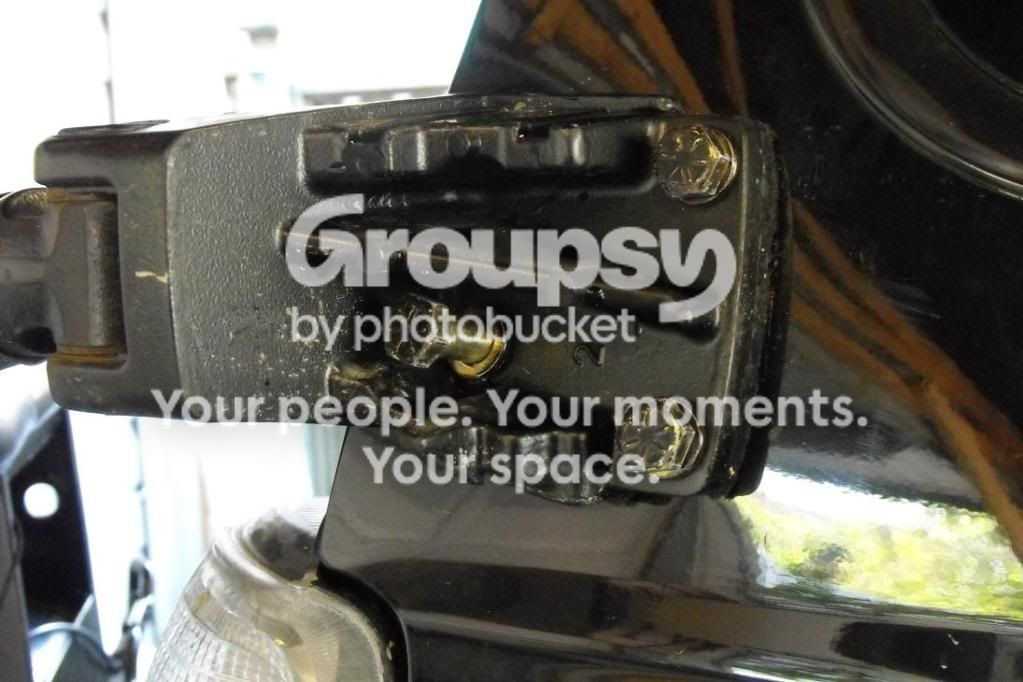
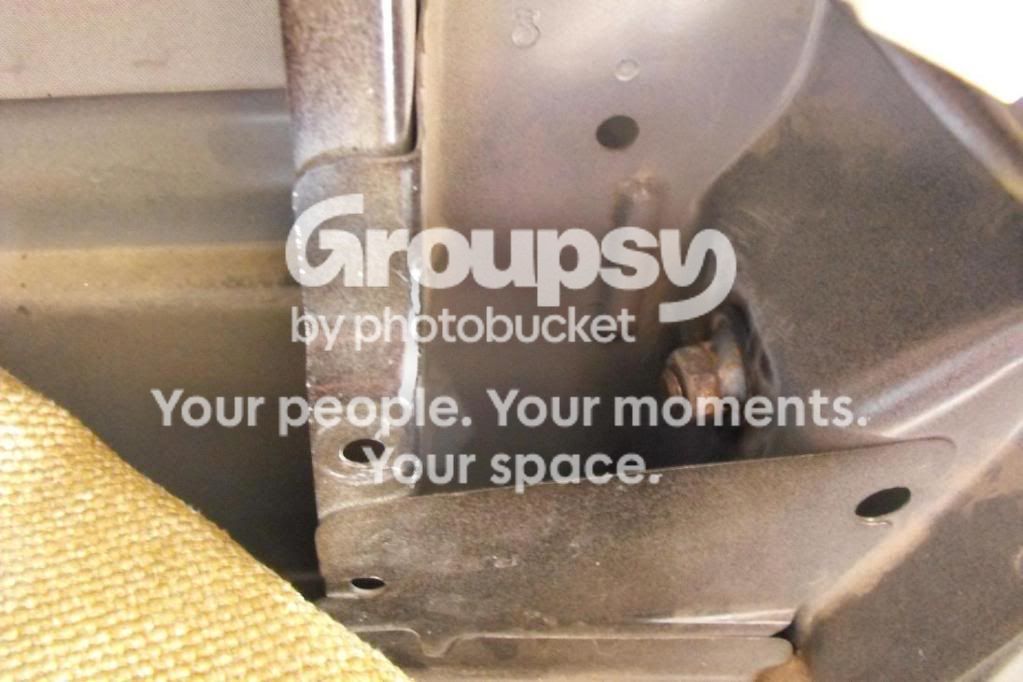
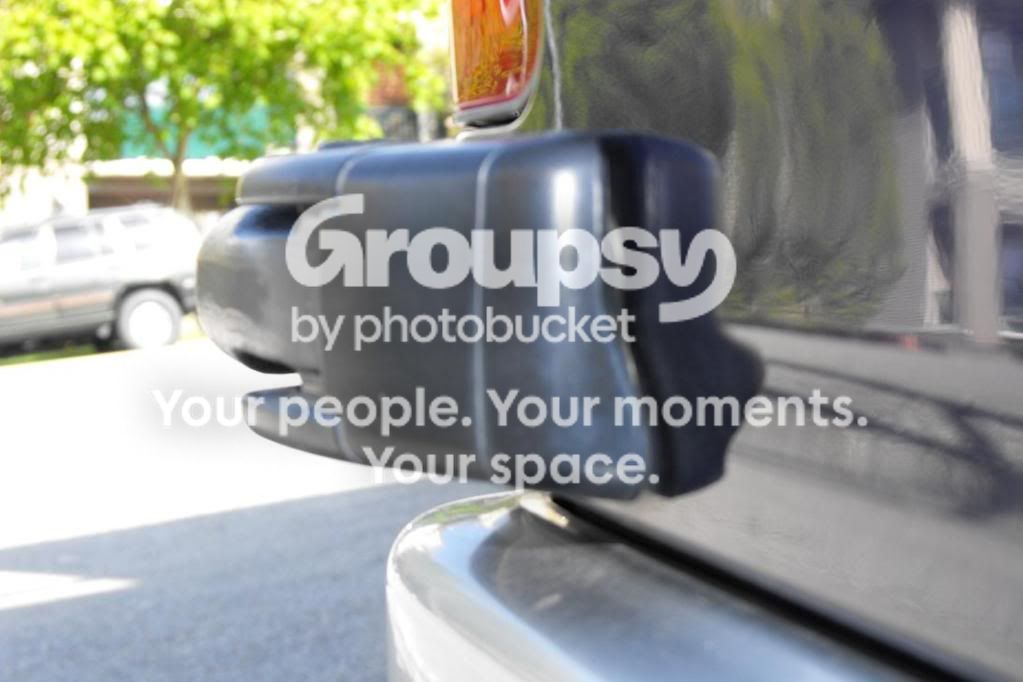
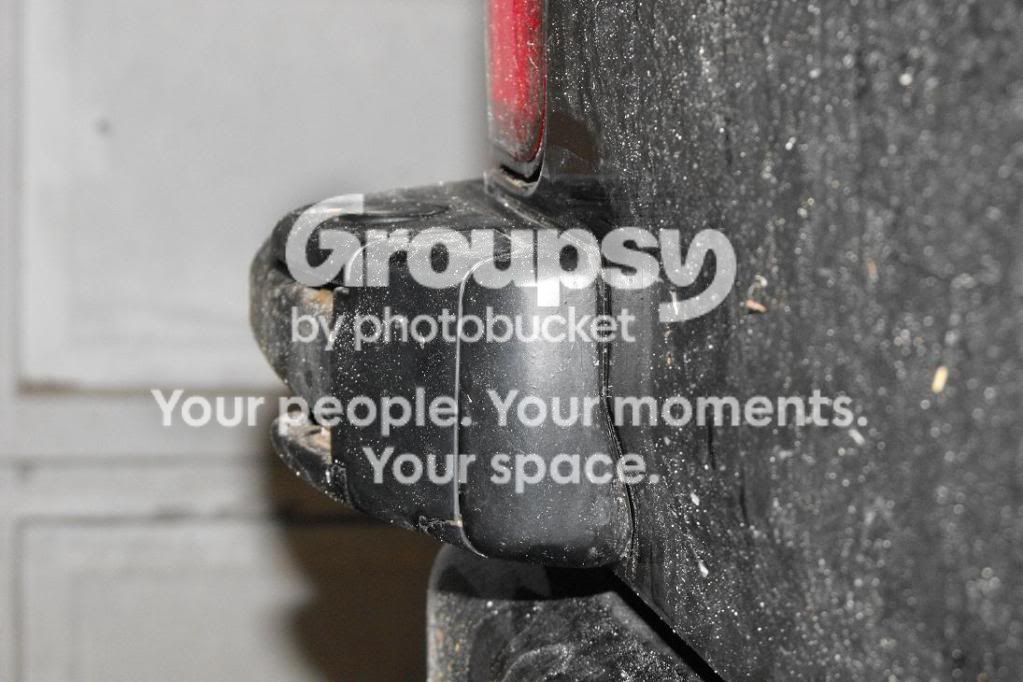
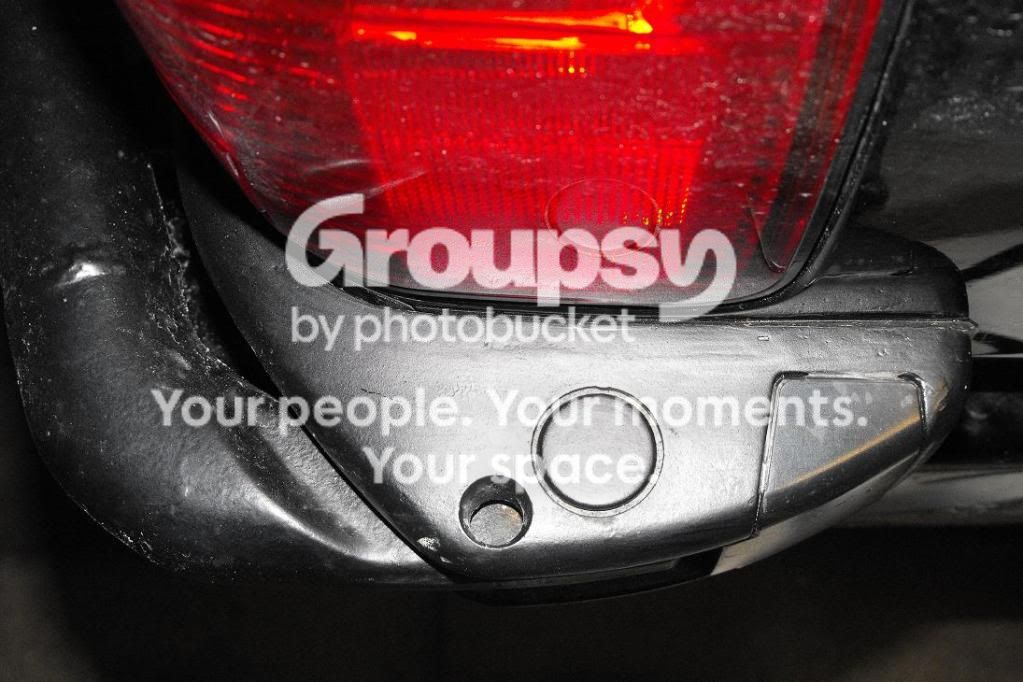
This is a shot of the lower hinge mount of the carrier that needed some modifying. See the projected areas on the middle? Without filling around the edges you will see a 1/4" gap when mounted on the body panel of the 4Runner.
4-13.jpg~original

5-1-1.jpg~original


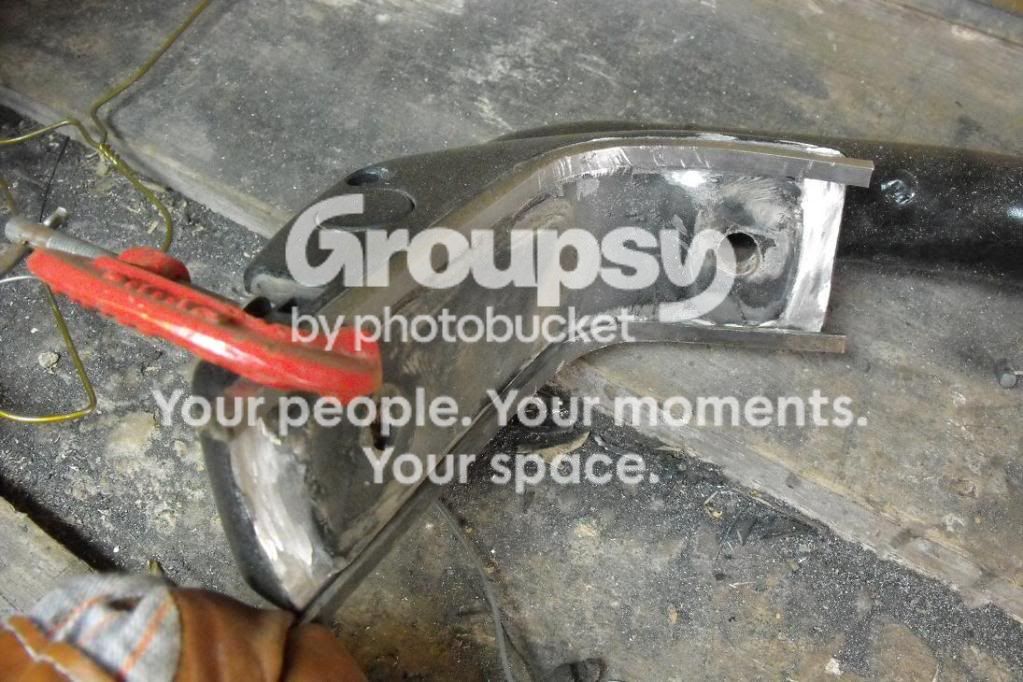
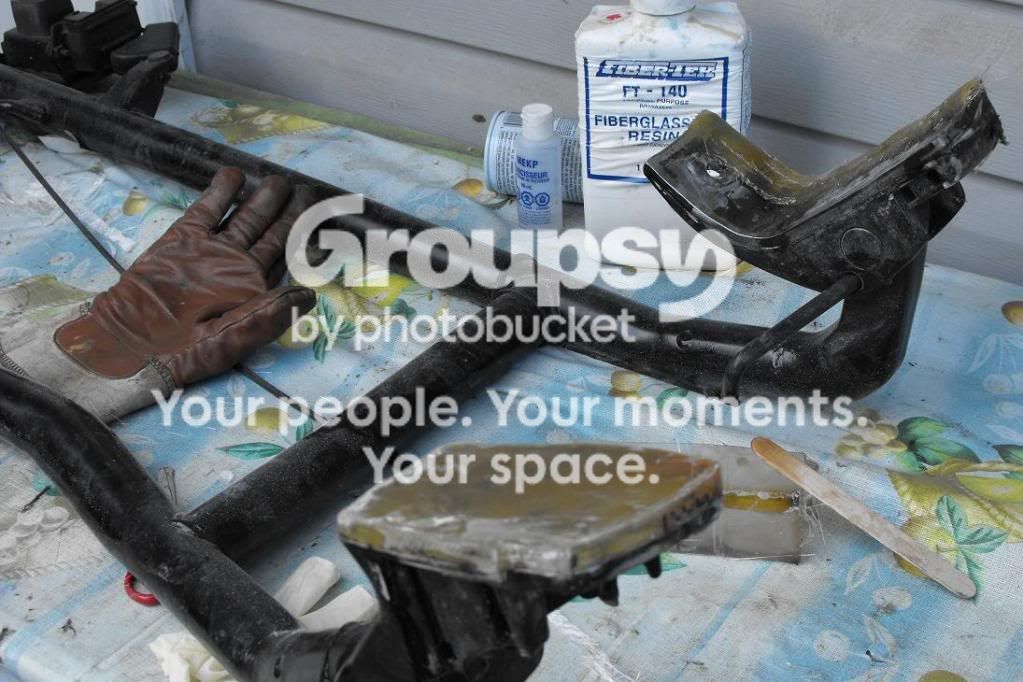
Now there are two ways to get this done. One is to weld a 1/4" metal rod around the hinge mount and level it flush with the projected area, or fill the surrounding area with fiberglass. If you're not that concerned about the way it would look with the 1/4" gap on the lower mount, then obviously this is a non-necessary step to bother with.

When I first did mine, I used the fiberglass method since I didn't have a welder then..and I wanted a more factory finish so I went ahead and did it.

1/4" rod to be welded around the perimeter, then later shaved to the right height in reference with the projected area. The back end for example required little less than 1/4" to be flush.
6-6.jpg~original

7-6.jpg~original

8-8.jpg~original


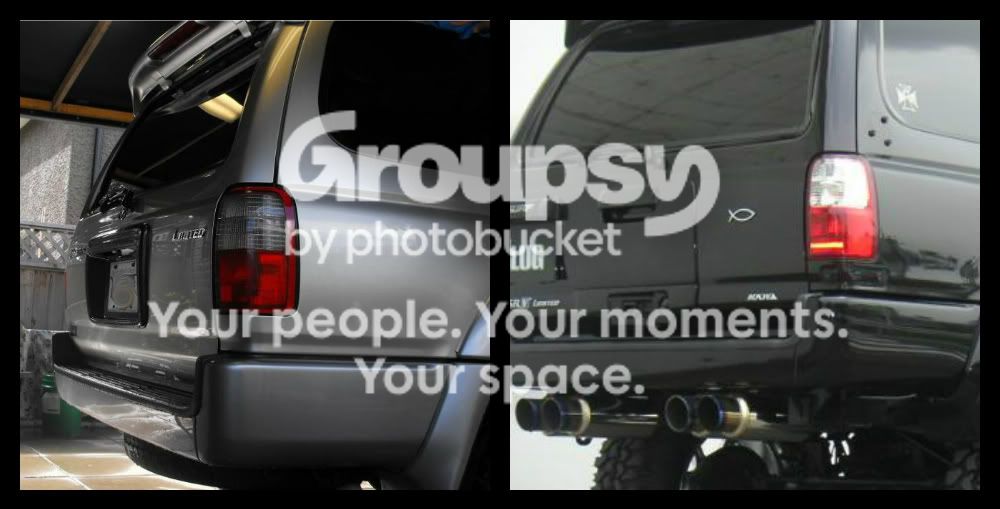
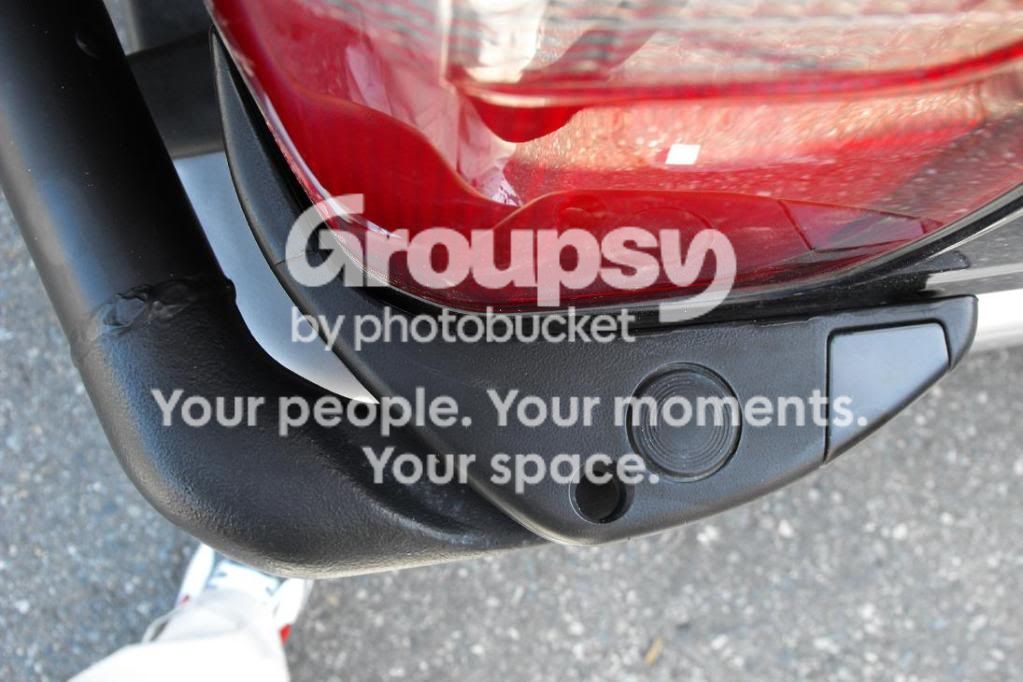
Compared to the 4Runner, the Hilux Surf has a recessed section below the taillight to accept the bottom hinge(pic below).
surf-2-1.jpg~original


I also added about 3/16" fiberglass on the top hinge surface area to counter the 1/4" difference due to the protruded part of the lower mount when mocked up to the 4Runner. This is not completely necessary since the difference is just minimal.
12-7.jpg~original


Now determining the holes to be made is easy but have a friend give a hand in this process. After all you cant afford to make a mistake at this point. First lock the tire carrier then mock up the hinge mounts in place and while a friend is holding them steady, grab your marker and mark the location of the 3holes up top and one hole on the side of the bottom mount. The bottom could get a bit tricky because while the tire carrier is in closed position, you can''t mark the location of the rear hole since the horizontal tubing is blocking it, so this will have to be done obviously while the carrier is open.

You can leave the rear of the bottom mount for last and drill your holes and insert your bolts temporarily up top and one in the bottom side just to assist in holding the carrier in place, while a friend is keeping the carrier open you can mark the bottom mount hole location easier.

Upper mount bolts
11-4.jpg~original


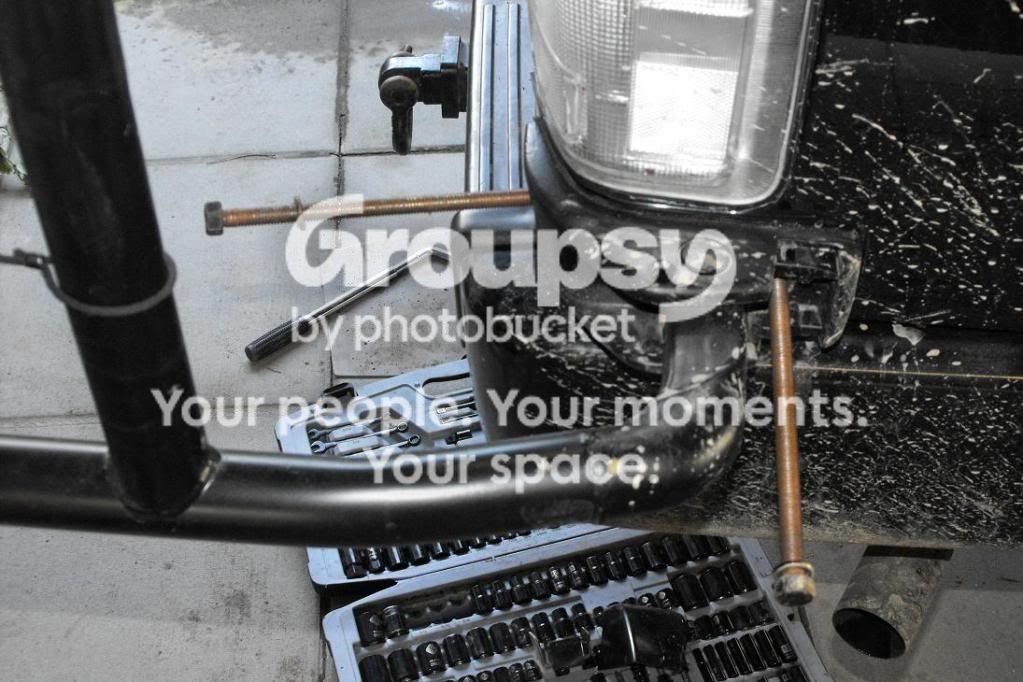
Lower bolts had to be atleast 6.5" long to get thru to the other side
1-20.jpg~original

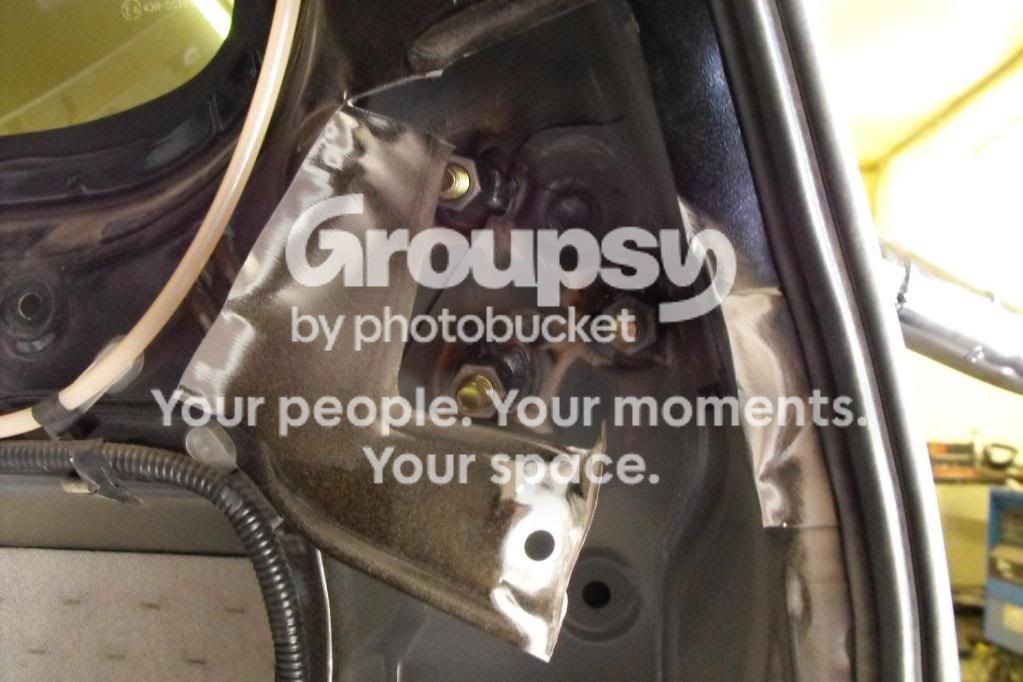
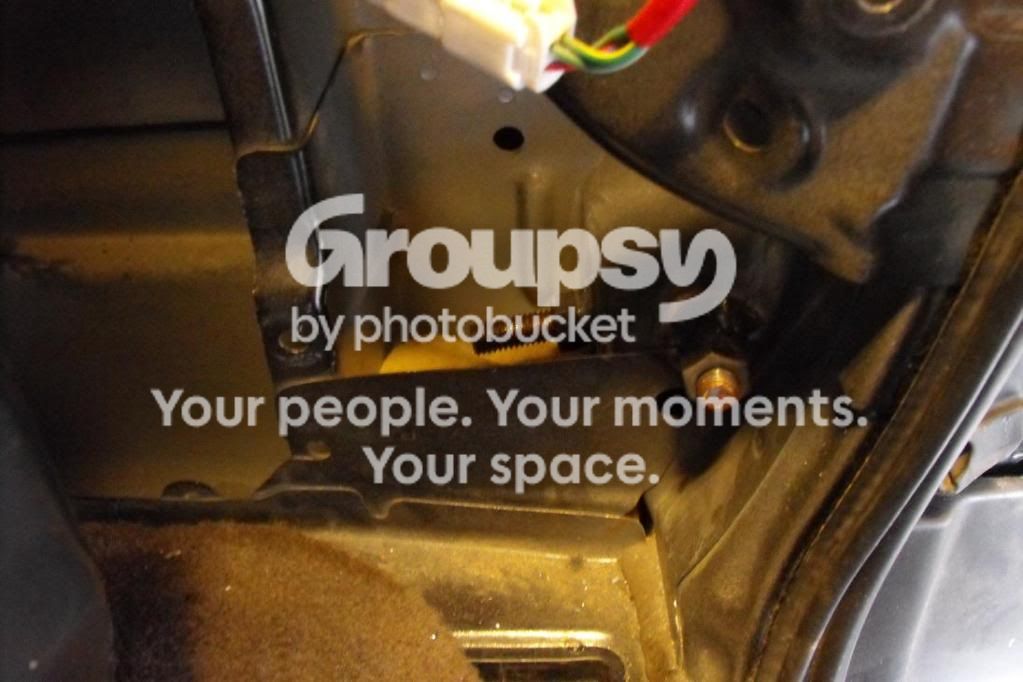
Inside the panel showing the upper 3 bolts
15-1.jpg~original


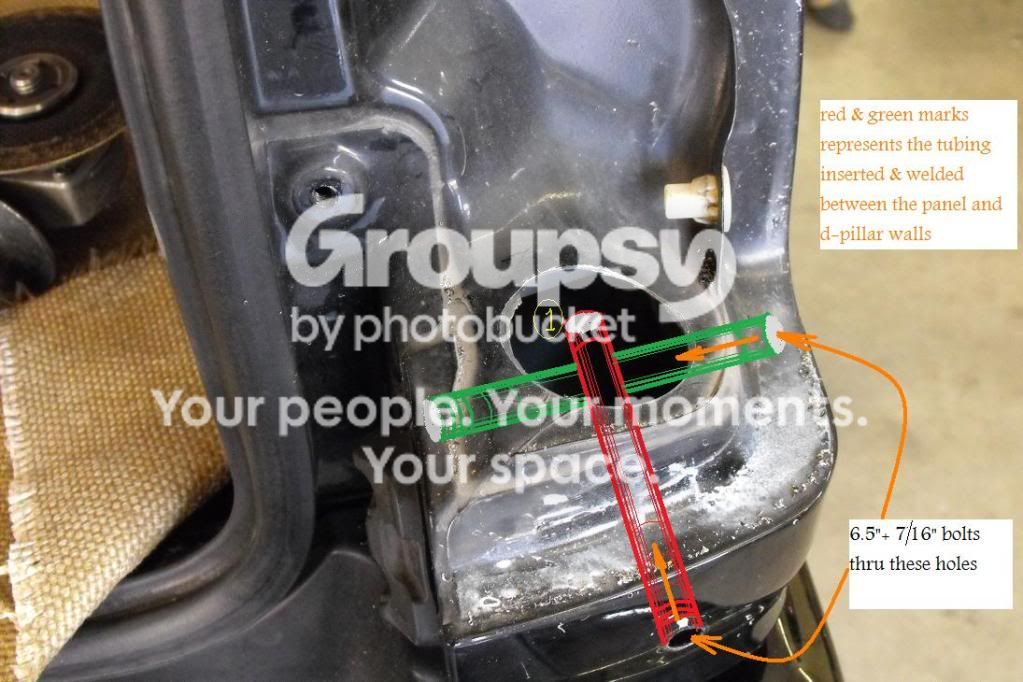
The picture below shows the taillight removed, a 2" diameter hole drilled on the base to gain access for inserting the 2 rigid wall tubings/sleeves that were later welded to tie in the body panel to the d-pillar walls. The two tubings/sleeves criss-cross one another one on top of the other. #1 encircled in yellow shows the end of the tubing at the d-pillar end...See 2nd photo for reference
redesigned00000000000.jpg~original


Other end of the rigid tubing/sleeve welded. See #1 encircled in yellow above
35.jpg~original


Photo showing the two longer lower bolts installed
9-3.jpg~original


Basically, reinforcing the tire carrier involves welding lengths of rigid tubings/sleeves in between the body panel and the d-pillar. The bolts used are inserted thru these sleeves so when the bolts are tightened, the body panel won't get crushed. These sleeves not only act as spacers but a guide to easily find the nut on the other end to thread into. Also nuts are welded at the ends of the mentioned sleeves then welded on the d-pillar itself, to ease the process of mounting the carrier without the use of both hands. I used 7/16" grade 8 bolts and nuts for the upper mount. As far as finding 6.5" + longer bolts in 7/16" size for the lower mount, I couldn't find one so I used a grade 8 rated redi-rod and cut the length I needed.

Here's are photos of the original Hilux Surf lower mount. There's atleast a good 1/8" of gap between the body panel and the actual hinge mount.
lowermount.jpg~original

lowrmountgap.jpg~original


Here's my version, notice the area on the top and the side is much larger due to the added metal rod around the mount compared to the original version. Now it sits flush against the body panel without a gap. I adhered a piece of thick plastic on the hinge surfaces just to better protect the paint. The same material Toyota used on the tire carrier... I'm sure a thin rubber material would work just as well.
Lower mount
33.jpg~original

36.jpg~original


Upper mount
34.jpg~original


Good luck!
 
Last edited:

Members online

No members online now.

Forum statistics

Threads
278,312
Messages
3,554,083
Members
248,016
Latest member
Advally Service

Trending content

Back
Top