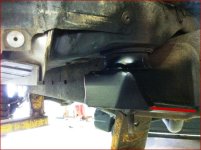
Body mount chop measurement

wfo9

New member
Trying to gather some intel before doing the BMC.

Could those with a body mount chop tell me this measurement on your setup (red line) from frame to end of leading edge.
 

Attachments

  • bmc3.jpg
    bmc3.jpg
    92.9 KB · Views: 1,513
Last edited:
Register to hide this ad
Trying to gather some intel before doing the BMC.

Could those with a body mount chop tell me this measurement on your setup (red line) from frame to end of leading edge.

Measurements? Just get in there is a sawzall blade and cut at an angle (45°) close to the rubber, make a second cut cutting off the excess, use 2" flat stock to plate back.
 
Measurements? Just get in there is a sawzall blade and cut at an angle (45°) close to the rubber, make a second cut cutting off the excess, use 2" flat stock to plate back.

Yea I can eye it... but I like to do things the easy way... I figured I would learn from what works vs cutting too much or too little.

Trust me, I can figure things out on my own. I just try to start with as many known/proven data points as possible.
 
I just got in there, eyeballed it and squeezed the trigger finger til there was no going back. 9" Torch blade installed upside down, gloves and safety glasses on and go. The hardest part is getting the blade to set a grove where you want it.

Besides, there's still replacement 4Runner's on the lot if it all goes bad!

 
Trying to gather some intel before doing the BMC.

Could those with a body mount chop tell me this measurement on your setup (red line) from frame to end of leading edge.

Just for shits & giggles, it's about 5½" on the front and 6½" on the back side.
 
Will do. Started last night with the angle grinder and quickly realized that was not the best choice for the initial cut. It was too late to go get a blade for the sawzall.

I thought about taking off the coil over and cycling the suspension with the tire on it to verify all the scrub angles.... but I'm lazy.
 
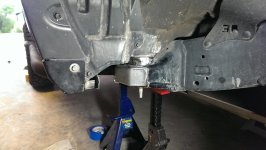
Got one side done. Ended up about 5.75 from the frame. Clears the 34s with plenty of room to spare when on the bump stops (I got un-lazy and decided to verify). It's just tack welded for now. Still need to do the other side and finish welding it tomorrow (If I can find some shielding gas).

Took quite a bit of time to fabricate the filler plate the way I wanted it. I forgot how much I love working with metal. Very time consuming, but very satisfying at the same time.
 

Attachments

  • bmc4.jpg
    bmc4.jpg
    132.8 KB · Views: 5,141

Members online

Forum statistics

Threads
278,312
Messages
3,554,089
Members
248,016
Latest member
Advally Service

Trending content

Back
Top