
You are using an out of date browser. It may not display this or other websites correctly.
You should upgrade or use an alternative browser.
You should upgrade or use an alternative browser.
Borfoo3's '15 TEP-KDSS 'no longer' mild build
- Thread starter borfoo3
- Start date


borfoo3
New member
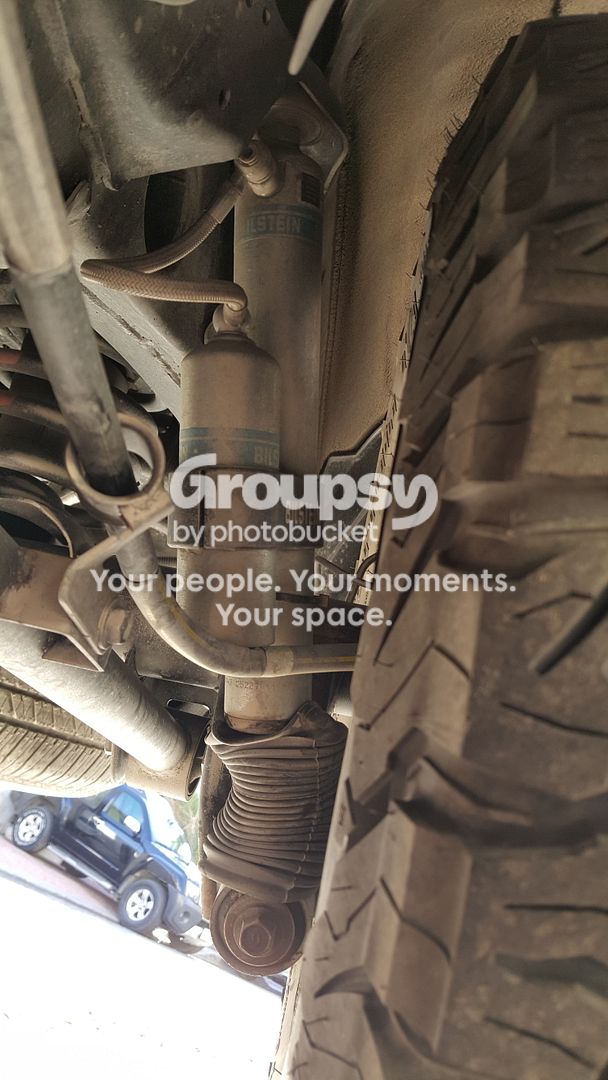
Not sure if you've taken your rig off road but I would be really careful with your reservoir placement. At full compression it looks like it could hit your emergency brake line.
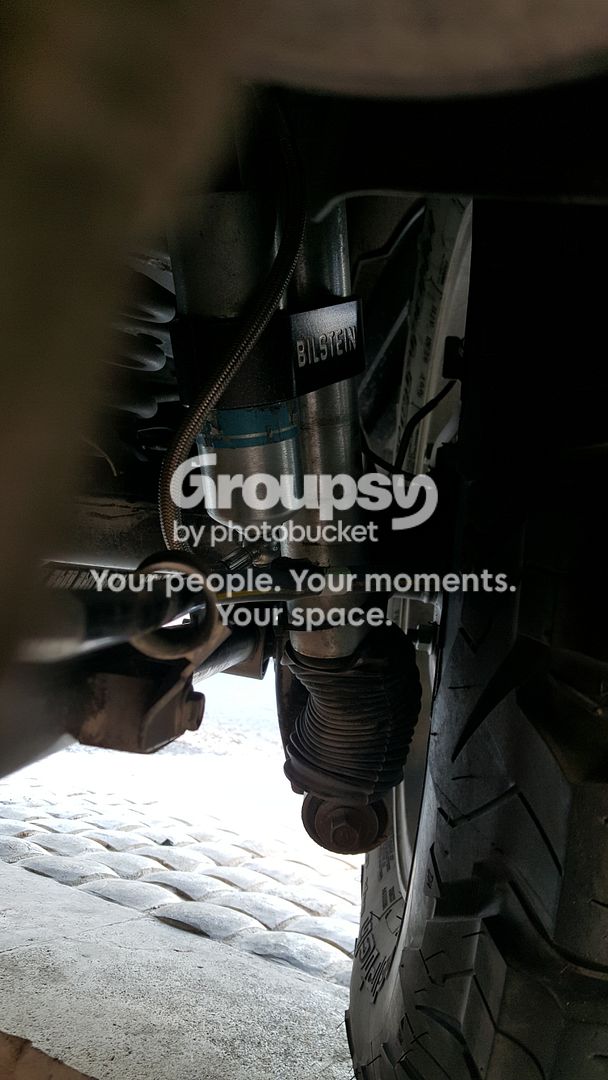
Good observation, and yes the reservoirs used to rub at full upswing.. actually dug into the rubber sheath of the brake line.. Might be a good excuse for switching to extended steel brake lines on the next job, which will include swapping the rear coils, rear SS bumper w/ tire carrier, and rear icon hydraulic bumpstops.
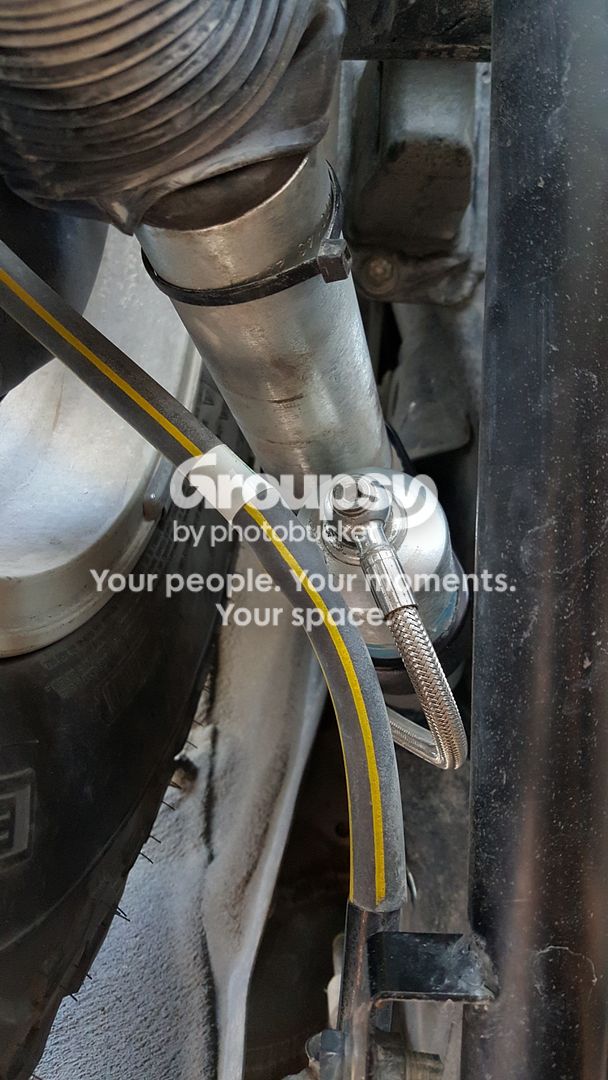
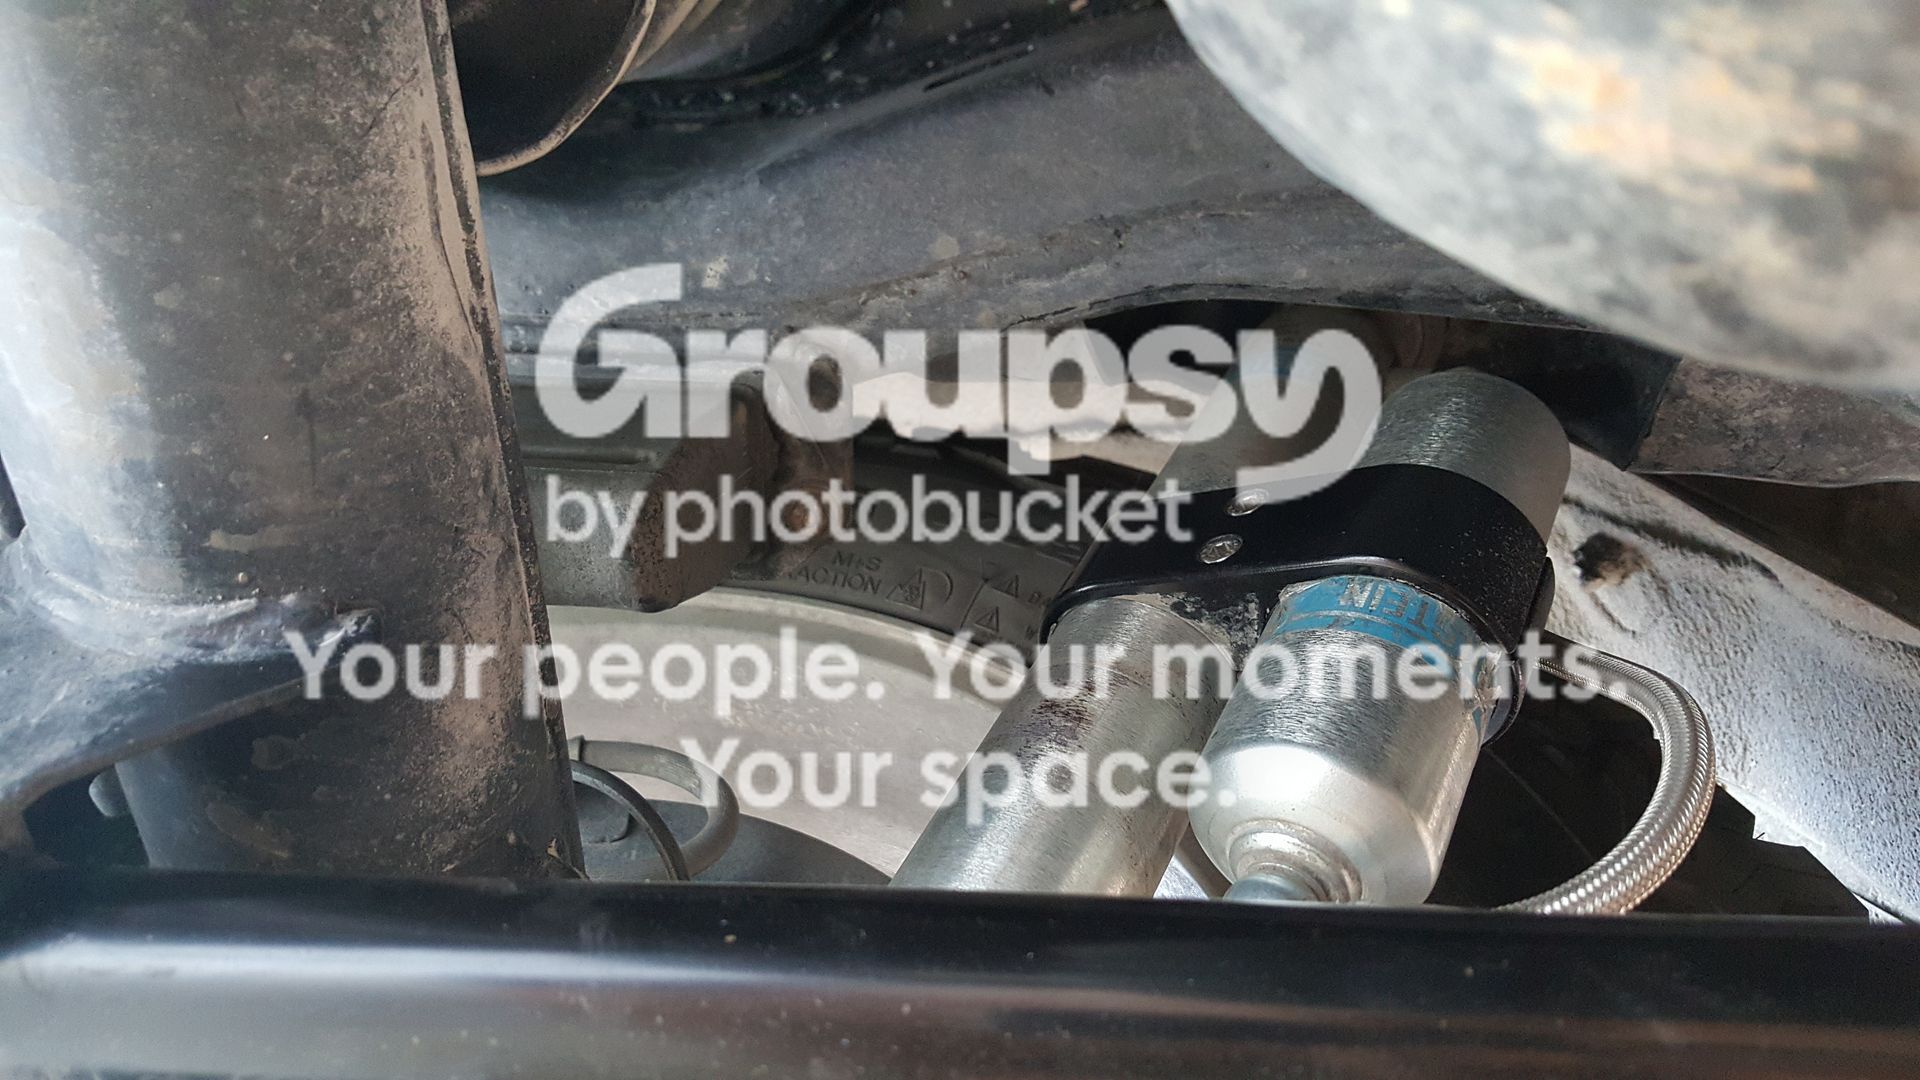
The easiest solution would have been to mount them somewhere high in the wheel well, but I ended up flipping them and rotating them inwards to avoid contact. So far it seems to work good.
Before pic:
Taken during uptravel, there's contact
After pics:
On uptravel, no contact
On uptravel still has enough room to go before contact
P.S. For those doing this as well, when moving the reservoirs higher on the shock body, keep in mind the top of the shock rubber mount flexes a bit during shock travel and if not given enough room between the rezzy and upper frame/ body there will be contact there as well.
Last edited:

jimster716
New member
Nice build with great photos, nice job!
borfoo3
New member
Nice build, I've got a set of TRD Pro front shocks on the way... How easy was the install with KDSS? I have a 2016 TEP in mag grey too.
Cheers, James
Sent from my iPad using Tapatalk
I got my shocks mounted at a local 4x4 shop, install went smooth and no issues with KDSS.. TRD Pro shocks are very similar to these so should be easy.
Its recommended to support the KDSS piston with a jack or something when loosening up the sway bars to avoid hanging all the weight on the piston. Not really sure if its mandatory, but better safe than sorry. I do recall it mentioned around here and maybe some pics on it as well.
borfoo3
New member
Sprint Booster install
edit: Sprint Booster has worked well for all 10 months of ownership, until its complete failure during an offroad trip on March 4th, 2017
So I bought myself some snake oil.. and surprisingly enjoying it!
In my opinion, throttle response in the 4Runner was just crap. Thought I'd get used to it, but not really. Shame because other than that I really love everything else about this truck.. Out of desperation I went ahead and ordered myself some $300 worth of plasticy snake oil called "Sprint Booster".
Why did I buy it? 3 reasons:
1- More than 1 user reported satisfaction with this solution.
2- I had someone coming down here from the US empty handed.. figured I'd help him solve that problem and save myself some shipping.
3- I know for a FACT the culprit here is NOT the engine being under-powered. Because our previous big, fat, heavy Land Cruiser 200 equipped with the EXACT SAME engine, Full-time 4WD, and a 5-spd under my same right foot had better throttle response!! Unless you flipped its switch to 'eco mode' then you might as well just walk there.. Heck it even had a 'power mode' switch besides the manual gear select on "S-mode" HINT HINT TOYOTA..... Anyways down to some observations:
PROS:
It does what it claims to do, brings the pedal back to life. Specifically at what I call the "Daily driving" pedal zone, below 2/3 throttle.
Easy to install, simple plug-in (even the tiny remote can be removed once you set your desired setting leaving traces of wiring around)
CONS:
Your $300 doesn't really "add" anything, more of a "fix" if sluggish throttle response is a "problem" for you.
Input at above ~60% throttle seems too sensitive. Bit too eager to downshift. Or this could just be me or the ECU not used to it.
Was it money well spent?
No. I'm of the opinion that Toyota should've given us an "eco mode off" instead of "eco lamp" off in the menu.. who cares if the lamp was on or off?? Anyways, just my 0.02.
Am I happy with my purchase?
YES. It's Aliiiiive! Drives like what I believe it should have coming off the assembly line. Can finally start enjoying driving it to work.
Install pics and Notes:
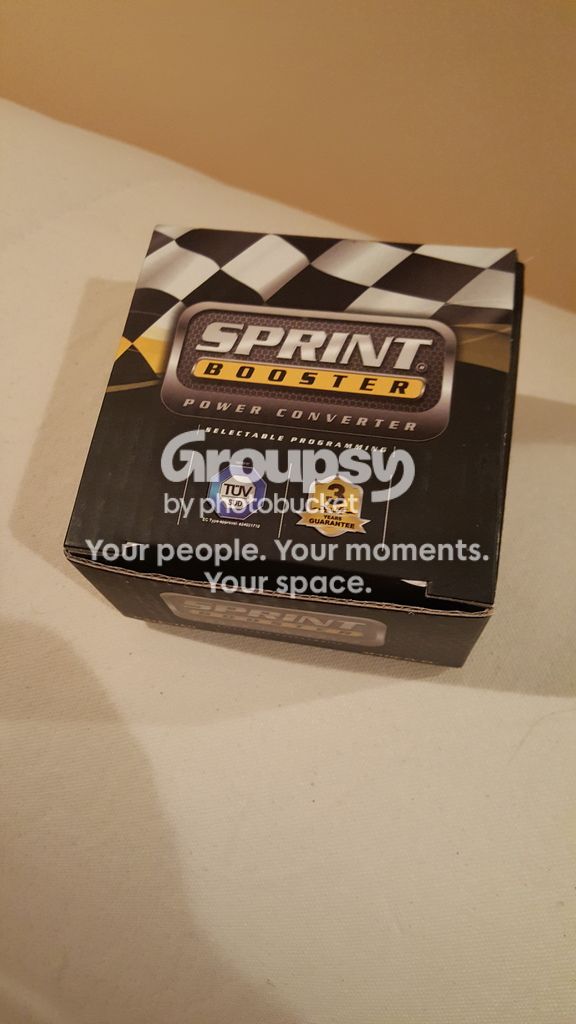
Box of snake oil:
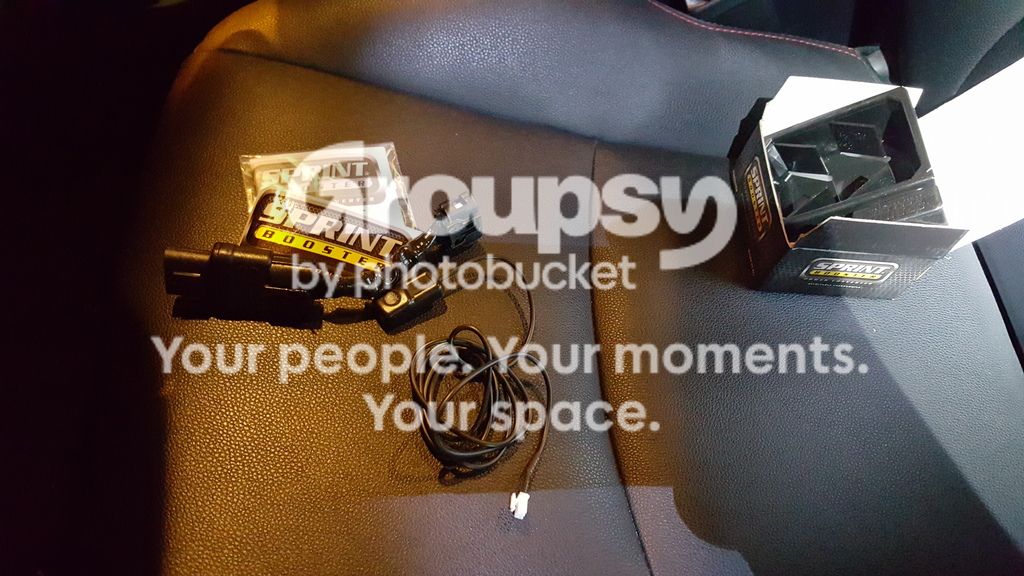
Snake oil, unboxed. Two most important bits are the short dongle with 2 connections, and the tiny remote with the long wire that connects to the dongle. 3 settings possible: Remote light off (stock response) Green Light: 1st setting up (What I'm running). Red Light: 2nd setting up (Most aggressive throttle response).
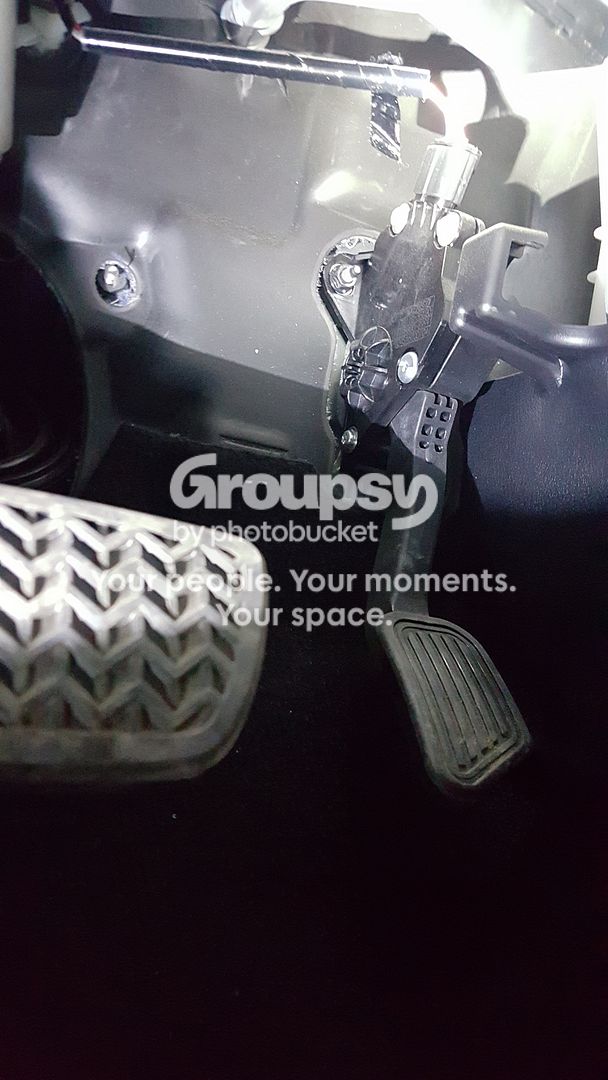
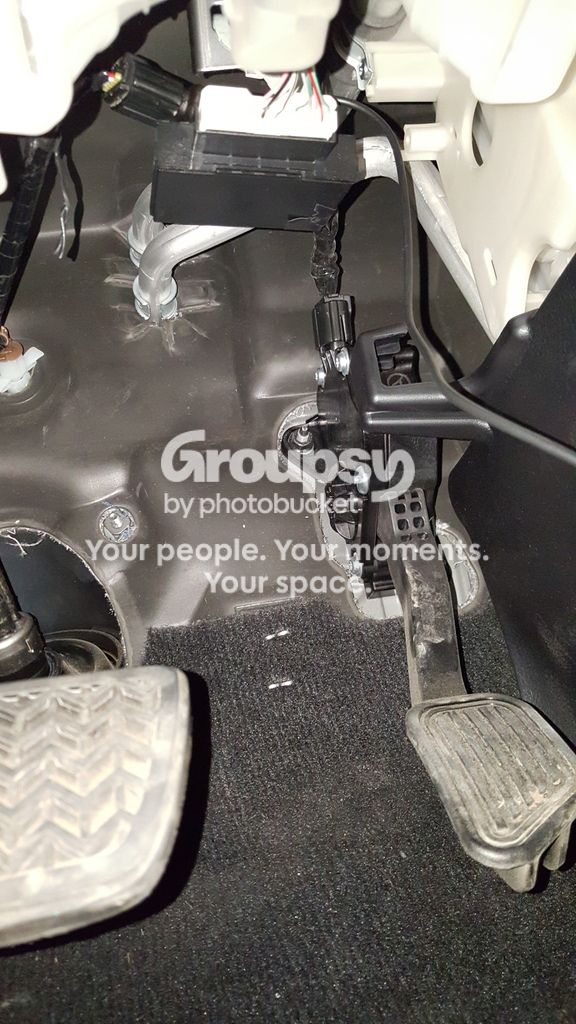
(pre-install) OEM throttle wire above the skinny pedal needs to be removed first:
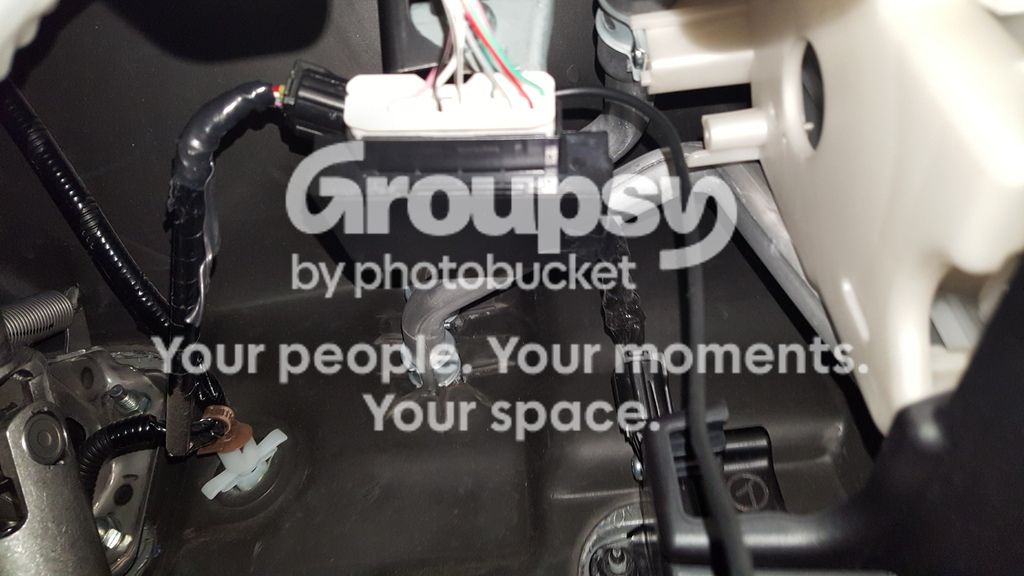
After install, routed the short Sprint Booster wiring and original throttle wire above the OBDII port connector. Note that the metal piping above does get hot and could burn exposed wires if it touches. Taped up the OEM wire for a bit more heat shielding before taping everything down to the OBDII port and away from the metal piping up top.
How it looks after assembly. Will come back in with a zip tie just in case the heat loosens up the tape. Tends to happen around here quite a bit.
edit: Sprint Booster has worked well for all 10 months of ownership, until its complete failure during an offroad trip on March 4th, 2017
So I bought myself some snake oil.. and surprisingly enjoying it!
In my opinion, throttle response in the 4Runner was just crap. Thought I'd get used to it, but not really. Shame because other than that I really love everything else about this truck.. Out of desperation I went ahead and ordered myself some $300 worth of plasticy snake oil called "Sprint Booster".
Why did I buy it? 3 reasons:
1- More than 1 user reported satisfaction with this solution.
2- I had someone coming down here from the US empty handed.. figured I'd help him solve that problem and save myself some shipping.
3- I know for a FACT the culprit here is NOT the engine being under-powered. Because our previous big, fat, heavy Land Cruiser 200 equipped with the EXACT SAME engine, Full-time 4WD, and a 5-spd under my same right foot had better throttle response!! Unless you flipped its switch to 'eco mode' then you might as well just walk there.. Heck it even had a 'power mode' switch besides the manual gear select on "S-mode" HINT HINT TOYOTA..... Anyways down to some observations:
PROS:
It does what it claims to do, brings the pedal back to life. Specifically at what I call the "Daily driving" pedal zone, below 2/3 throttle.
Easy to install, simple plug-in (even the tiny remote can be removed once you set your desired setting leaving traces of wiring around)
CONS:
Your $300 doesn't really "add" anything, more of a "fix" if sluggish throttle response is a "problem" for you.
Input at above ~60% throttle seems too sensitive. Bit too eager to downshift. Or this could just be me or the ECU not used to it.
Was it money well spent?
No. I'm of the opinion that Toyota should've given us an "eco mode off" instead of "eco lamp" off in the menu.. who cares if the lamp was on or off?? Anyways, just my 0.02.
Am I happy with my purchase?
YES. It's Aliiiiive! Drives like what I believe it should have coming off the assembly line. Can finally start enjoying driving it to work.
Install pics and Notes:
Box of snake oil:
Snake oil, unboxed. Two most important bits are the short dongle with 2 connections, and the tiny remote with the long wire that connects to the dongle. 3 settings possible: Remote light off (stock response) Green Light: 1st setting up (What I'm running). Red Light: 2nd setting up (Most aggressive throttle response).
(pre-install) OEM throttle wire above the skinny pedal needs to be removed first:
After install, routed the short Sprint Booster wiring and original throttle wire above the OBDII port connector. Note that the metal piping above does get hot and could burn exposed wires if it touches. Taped up the OEM wire for a bit more heat shielding before taping everything down to the OBDII port and away from the metal piping up top.
How it looks after assembly. Will come back in with a zip tie just in case the heat loosens up the tape. Tends to happen around here quite a bit.
Last edited:
2nd notch from the top or bottom of the instruction sheet?
When you say 2nd notch is that 2inch lift mark from the top or .5 inch lift mark from the bottom of the picture that comes with the shocks.
Rubbing was because the spacers positioned the tire out enough so that within its turn radius it would touch the bump on the mudguard and inner part of the front bumper.. took the spacer off today due to fit and safety issues (see update below).
Spacers went on with the lift originally, so nothing to compare to previously.. however, since they're off today I didn't notice any difference in driving behavior from with the spacer installed.
---- Update ----
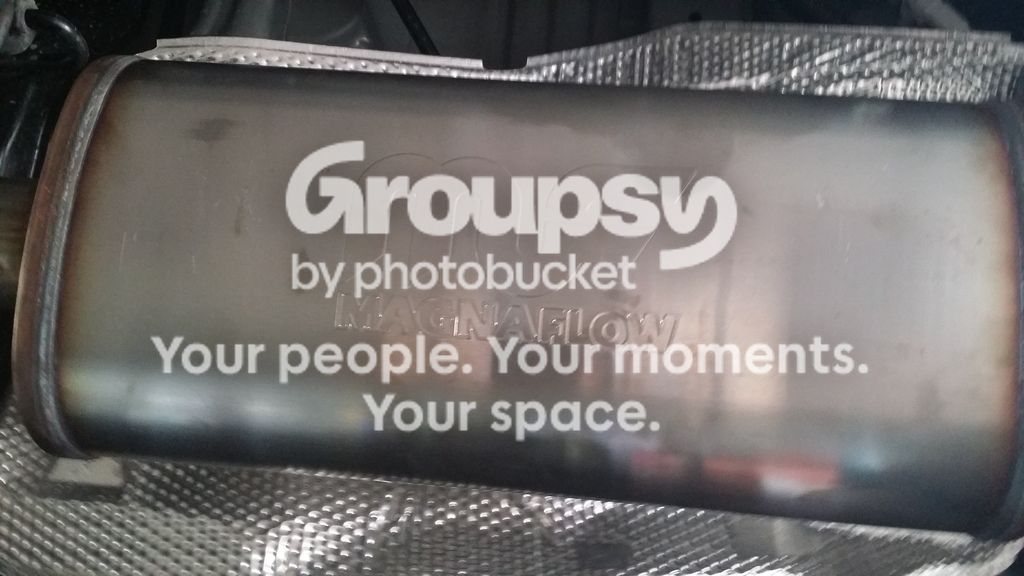
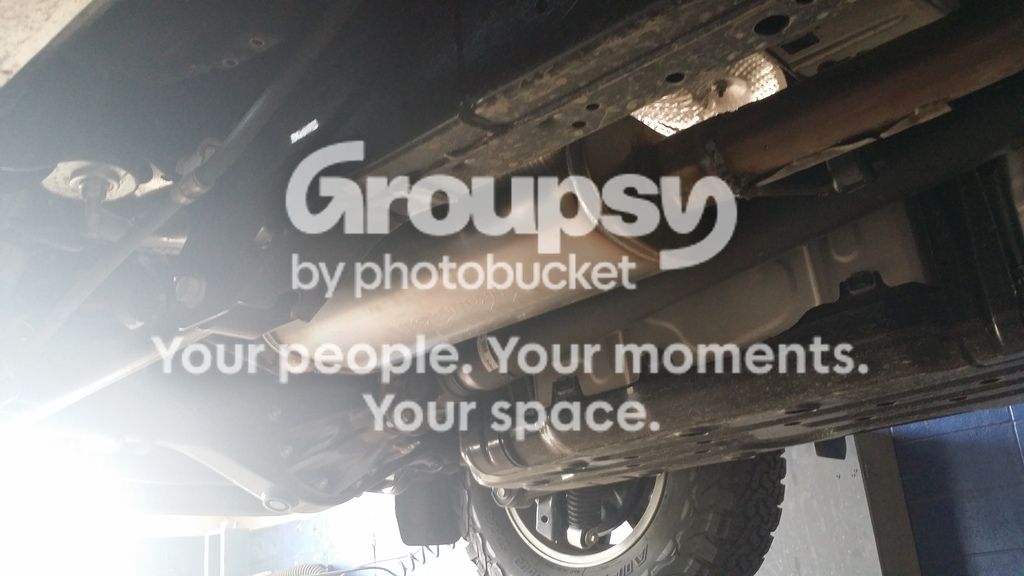
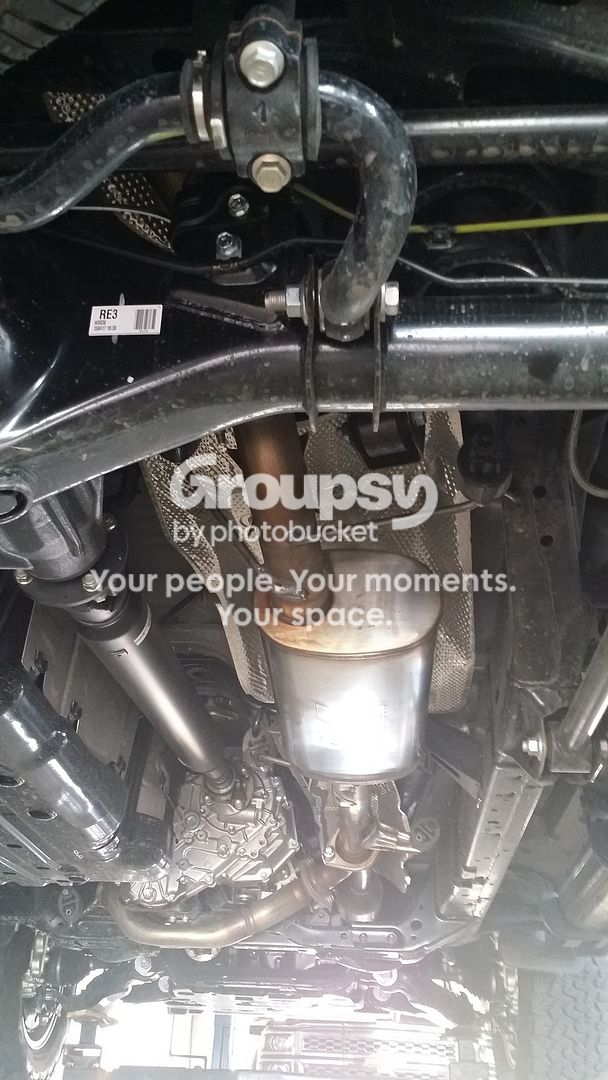
Installed the Magnaflow 18" (#12255) and man it sounds sweet! Nothing noticeable at ide, deep nice rumble at 1.5k RPM to 2.5k RPM and keeps sounding sweet WOT to redline without any raspiness!
You could go louder with a 14", might be a bit more raspy I would guess.. But I'm no muffler expert. IMO the 18" is the perfect balance of daily comfort (no droning) and smile-to-gas-pedal entertainment.
Also got an alignment done.. turned out it really needed one. So you guys were right. [MENTION=125788]msp[/MENTION] [MENTION=103267]Saker[/MENTION] [MENTION=81322]barryhiram[/MENTION]
Numbers before alignment (or could have been after 1st round, guy was bad with paperwork):
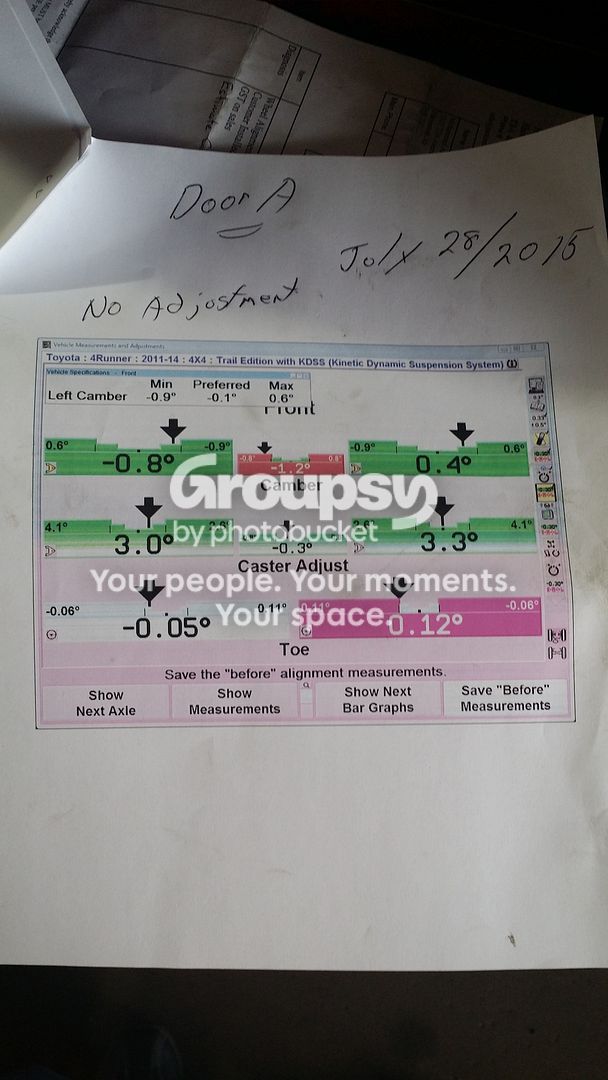
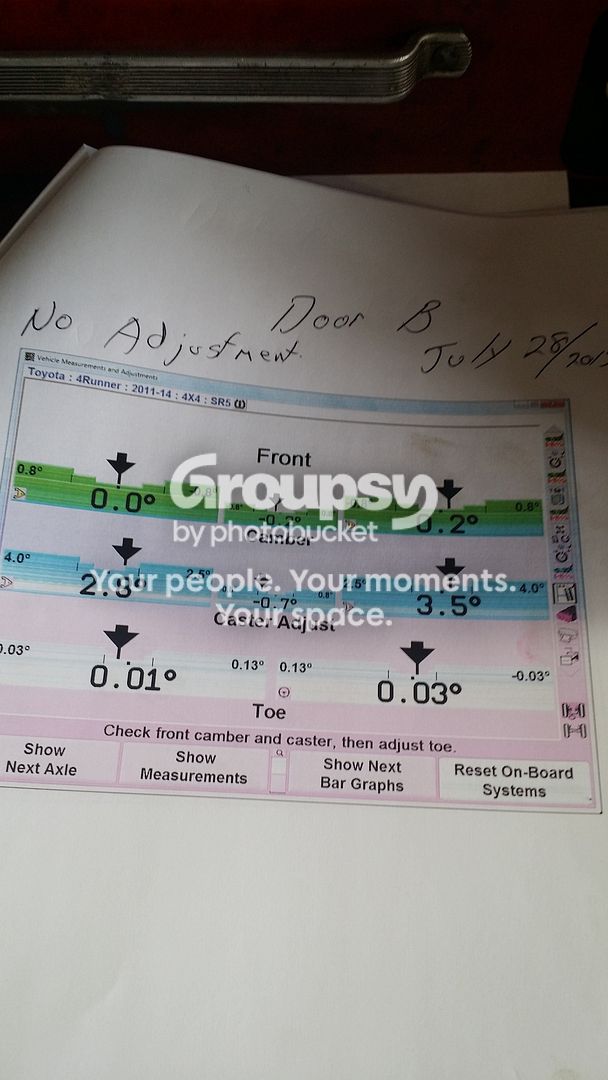
Numbers after 1st alignment:
Also did a tire balance while I was there and saw this with the front spacers!
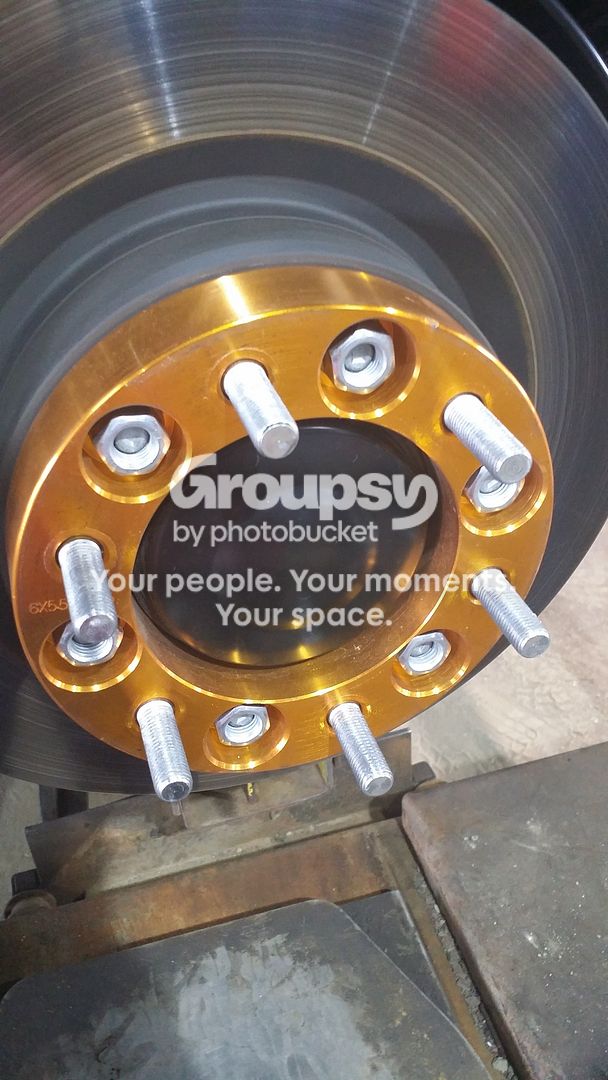
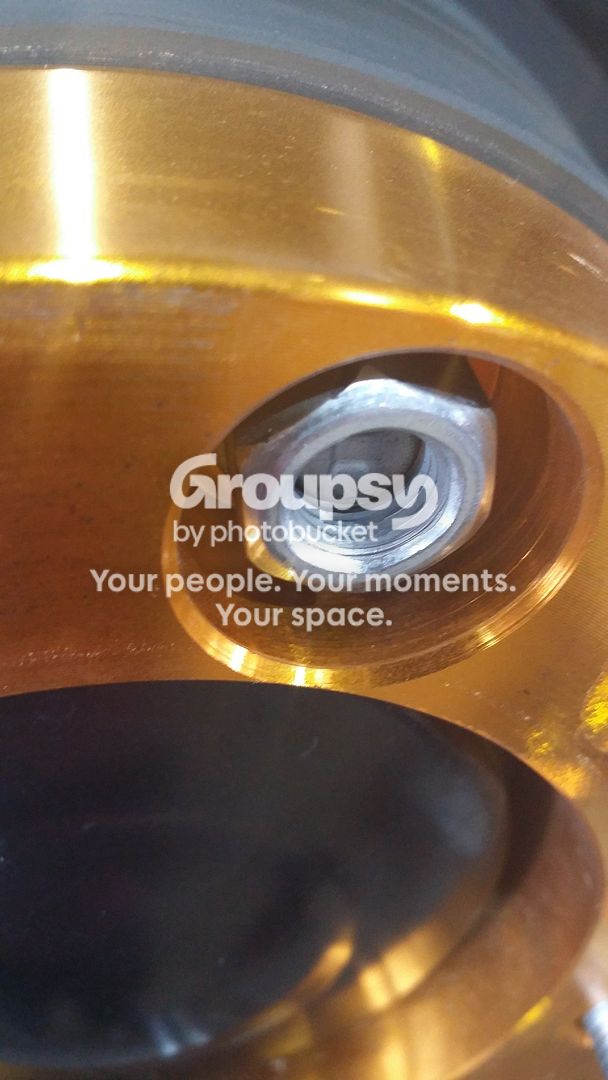
Yep got lucky nothing came off... Those nuts were literally holding on to just a few threads of the OEM studs!! A reminder on why its good to keep an eye on the install work rather than dropping off your car at a (supposedly reputable) garage and having faith that someone else will do a good job for you.. And the value of a truly honest shop. Irony is I even took it back for re-torqueing but was busy chatting with the shop owner on LED's and didn't actually see them working on the spacers. However, rears were on fine as the OEM studs in the back were a bit longer than the front.
My mistake, fooled twice, lesson learned.
I've taken the spacers off and returned to the original garage that sold/ installed it for me for a full refund. Don't think they'll be seeing me around anytime soon.
After the original alignment (with spacers) everything was in spec but not perfect.. maxed out on the passenger tire camber adjustment bolt. Took it for the ride home and realized it tends to steer left on the road
After removing spacers, a complete re-alignment was done and I've asked him set it to go a bit more towards the right to compensate the left turn tendency. This is the best they could do with stock UCA's:
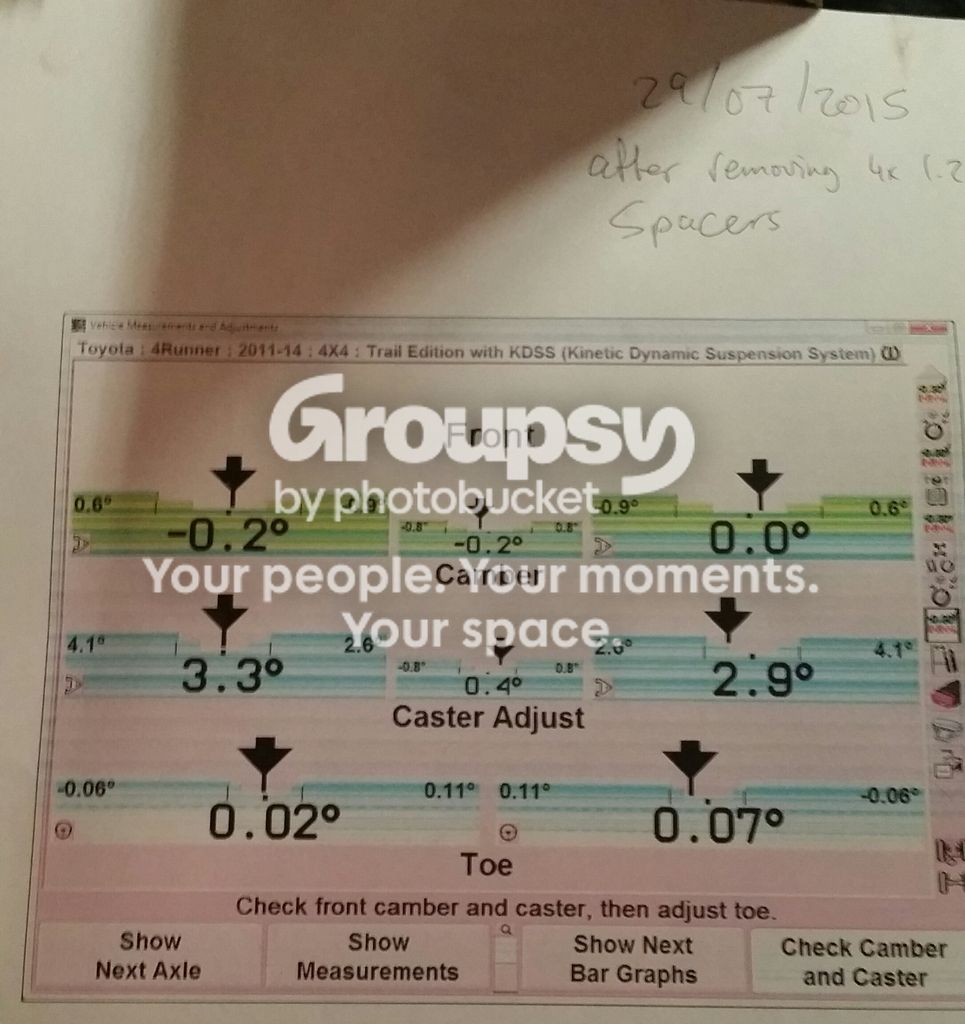
Also drives much better on the highway now, and I blamed the poor KO2s thinking it was their fault for the shaky ride! You would think the dealership would balance the tires they installed upon delivery of a brand new 4Runner.. Ahh well, end of the day it's my fault for assuming too much I guess.
Anyways, it drives super nice now. Still has a verrrryyy slight pull to left when steering wheel is centered. Alignment guy says that's the best he can do and this time I was there all 6 hours watching him try. Also no signs of tire rub obviously as I'm back to stock hubs with the spacers gone.
I'm happy with the setup and drive now, but definitely learned 3 things:
1- 6112/5160 on 2nd notch is at the limit of what stock UCA's can handle for alignments sake.
2- Aftermarket UCA's the way to go for easier adjustment, and definitely a must for higher lift setups
3- Finding a quality shop is more important than finding quality parts! (unless your good enough to do a fine job yourself)
When you say 2nd notch is that 2inch lift mark from the top or .5 inch lift mark from the bottom of the picture that comes with the shocks.
borfoo3
New member
When you say 2nd notch is that 2inch lift mark from the top or .5 inch lift mark from the bottom of the picture that comes with the shocks.
2nd from below, which is actually more than .5 inch lift
borfoo3
New member
A few more goodies fresh from the cargo terminal:
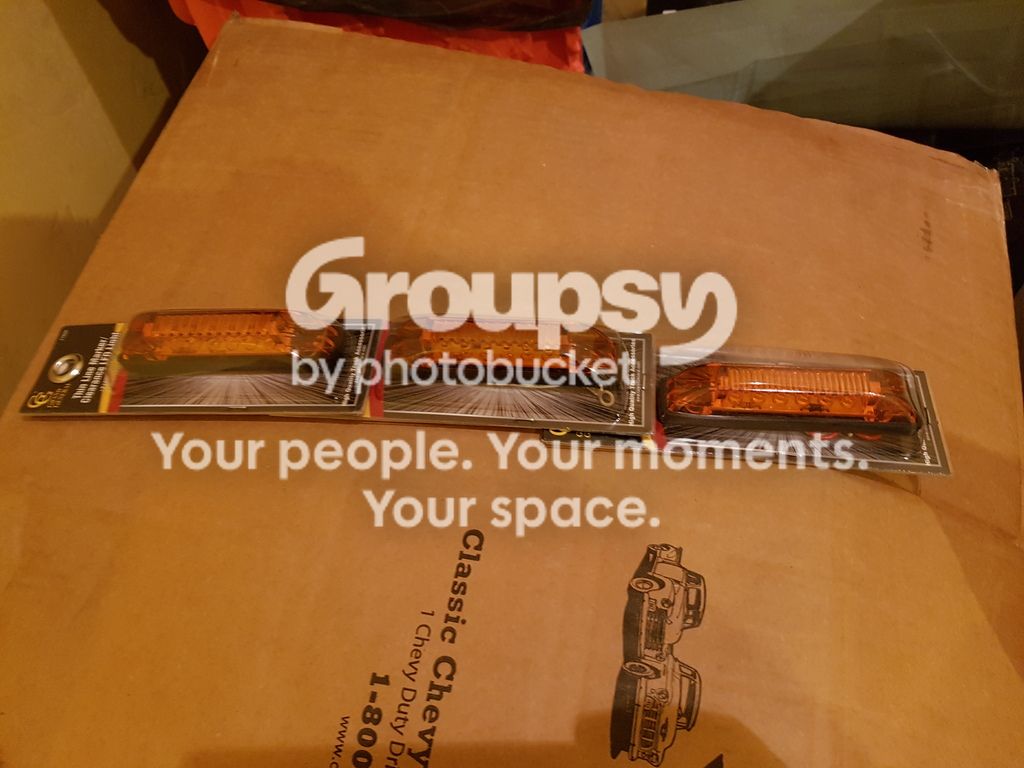
front yellow LEDs from Amazon
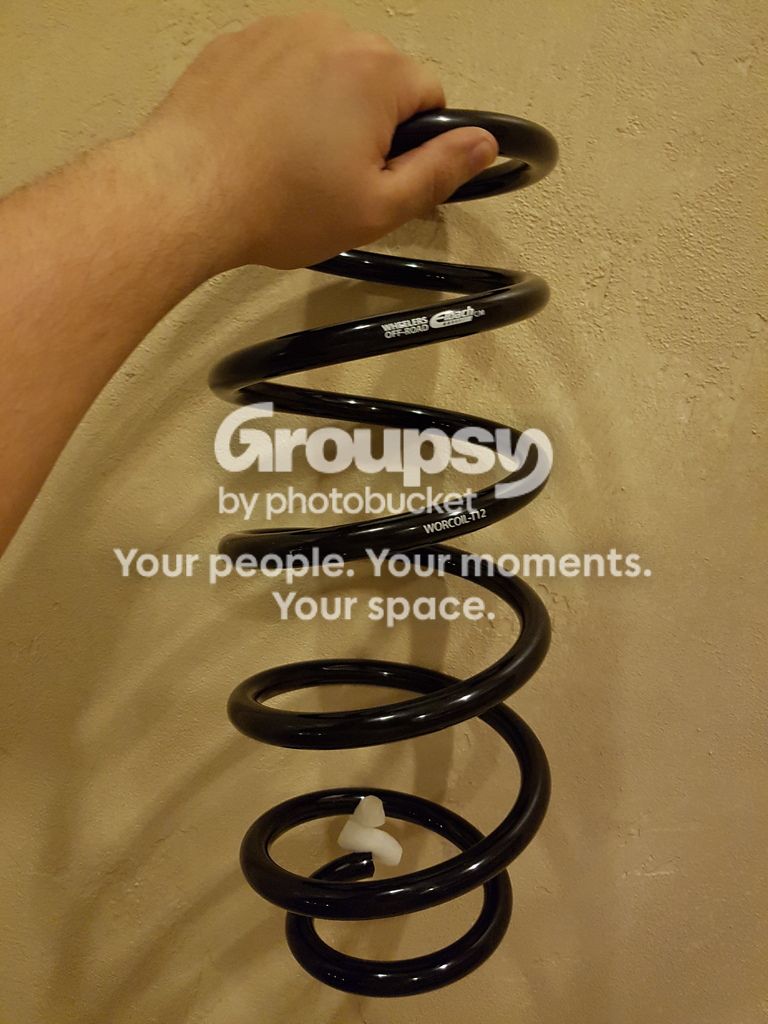
Wheeler's T12 rear coils (i.e. Wheeler's version of the Sway-a-way 1.5" rear coils... both made by eibach)
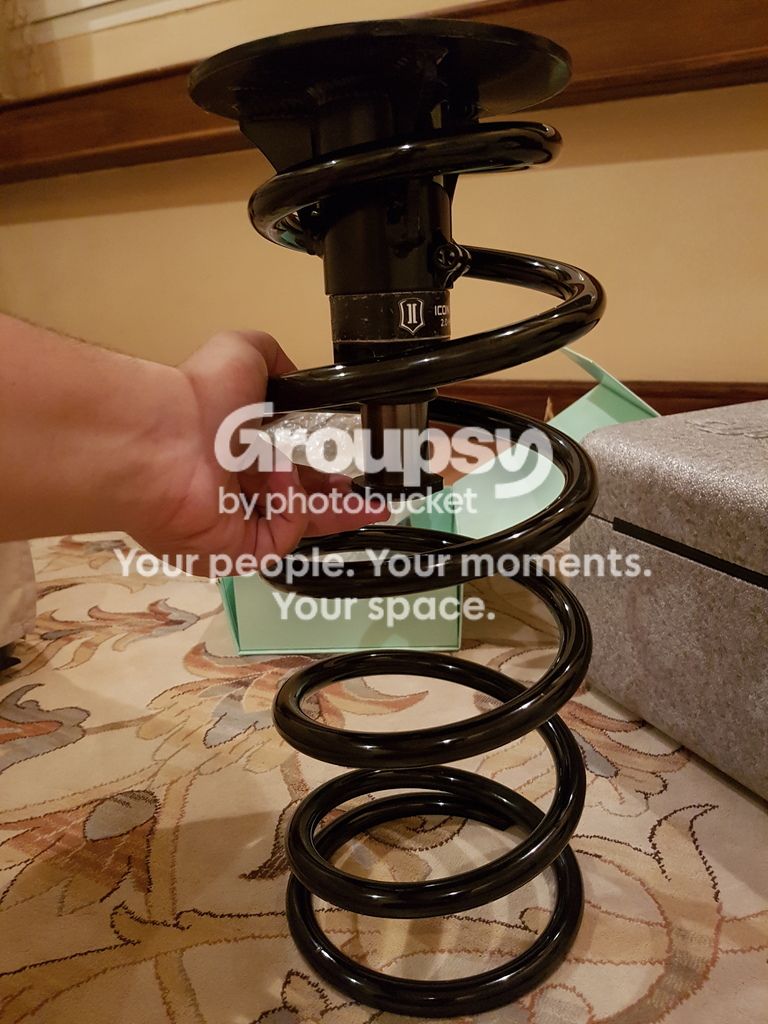
will go nicely with ICON rear hydraulic bumps!! (yes coils are flipped)
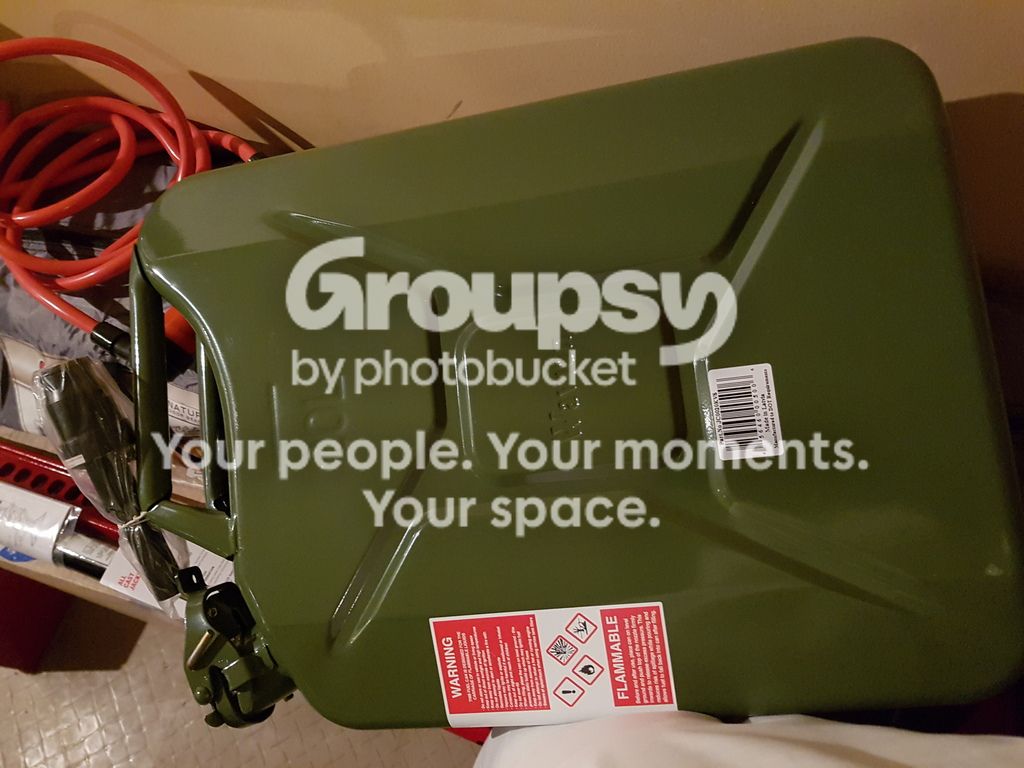
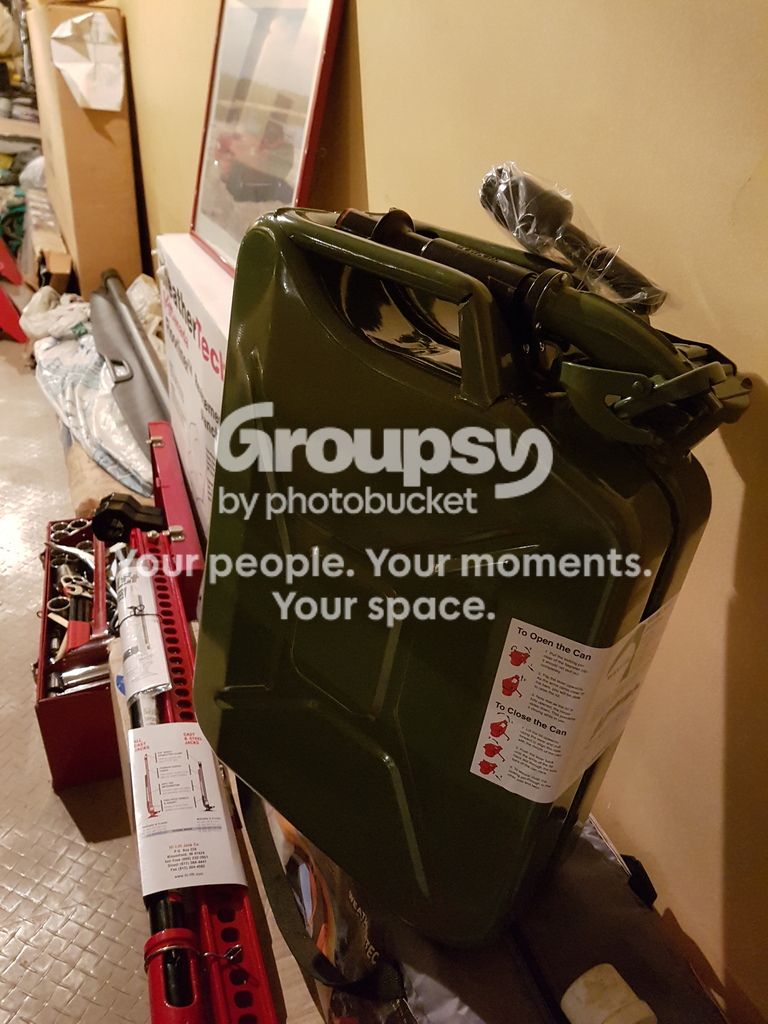
WAVIAN 20L cans.. seem sturdy. Hope they hold up in the sun
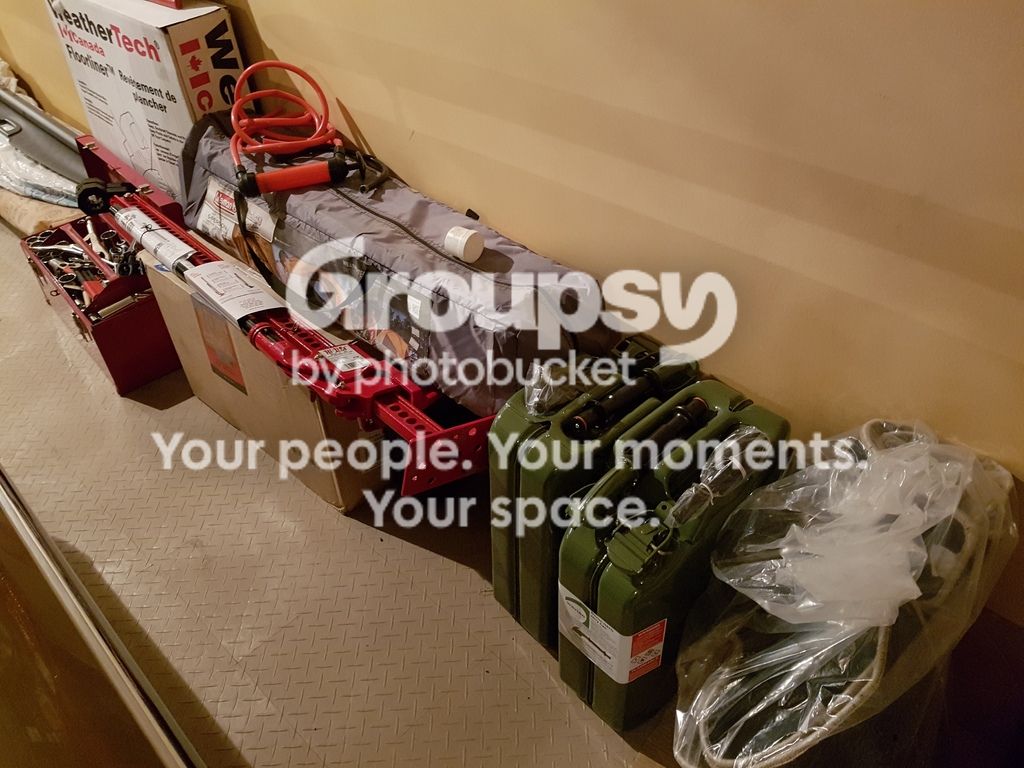
Hi-Jack down there too
All waiting patiently for the SSO rear bumper!!
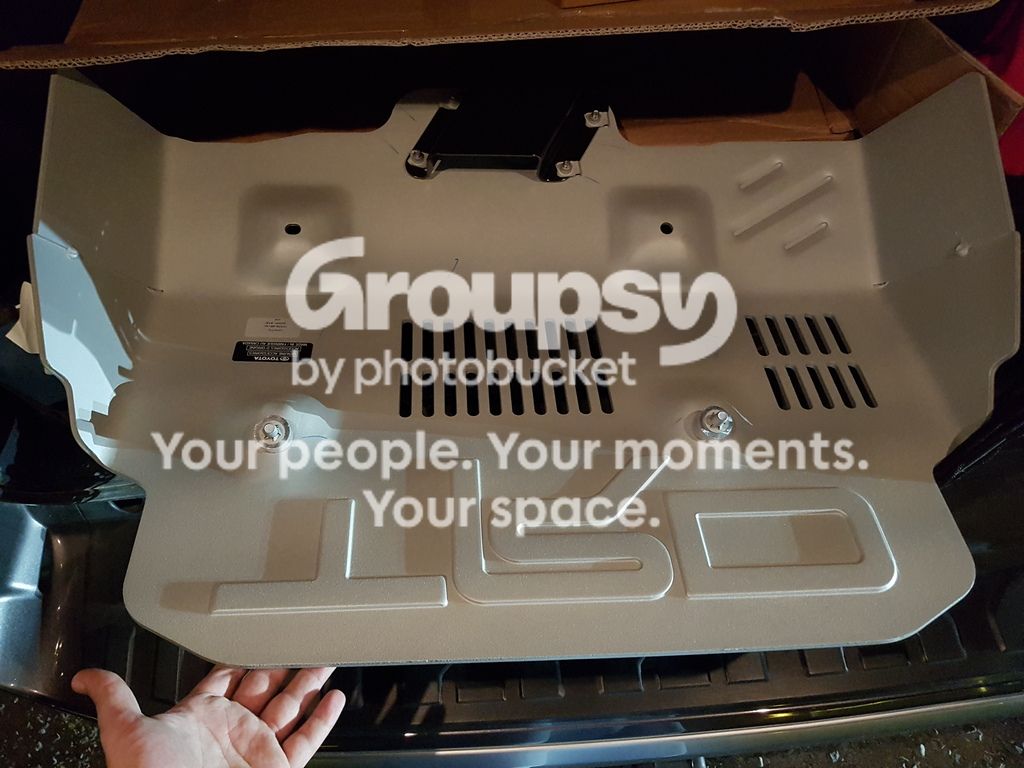
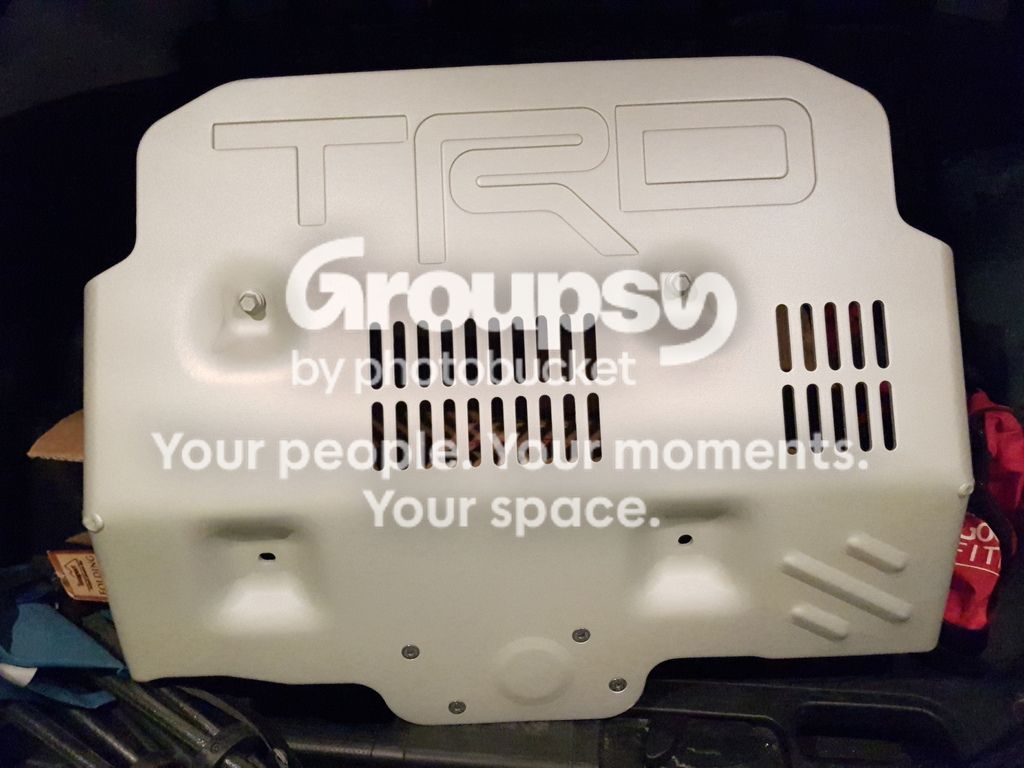
TRD skid plates.. still need to be cut to make way for KDSS sway bar
As clean as they'll ever be
Side shot
front yellow LEDs from Amazon
Wheeler's T12 rear coils (i.e. Wheeler's version of the Sway-a-way 1.5" rear coils... both made by eibach)
will go nicely with ICON rear hydraulic bumps!! (yes coils are flipped)
WAVIAN 20L cans.. seem sturdy. Hope they hold up in the sun
Hi-Jack down there too
All waiting patiently for the SSO rear bumper!!
TRD skid plates.. still need to be cut to make way for KDSS sway bar
As clean as they'll ever be
Side shot
Magnetic4R
New member
I would be concern with the coil and rear Sso bumper. They will sag
borfoo3
New member
I would be concern with the coil and rear Sso bumper. They will sag
I'm counting on it.. hoping I'd end up closer to a 1.5" lift with the bumper on than the 2.25" people are getting with these. Don't really load up my truck much either.
Just hope it still rides good by then.
borfoo3
New member
[MENTION=123911]borfoo3[/MENTION] - loving the build. I'm intrigued by the Sprint Booster - any additional thoughts/feedback since install and what part number did you go with? I can't decipher which one I would need from the aFe site. Thanks!
The one I got was SKU# SBTO1052S
I really like it so far. as I mentioned elsewhere around here, it doesn't "add" anything from a technical perspective, but "changes" a behavior (i.e. throttle curve) that really wakes up the throttle pedal.
In short, if the 4Runner throttle pedal response bothers you its worth every penny.
If your fine with how your 4R runs as is, put your money elsewhere as its not cheap for what it does.
borfoo3
New member
Alright so got the following done today:
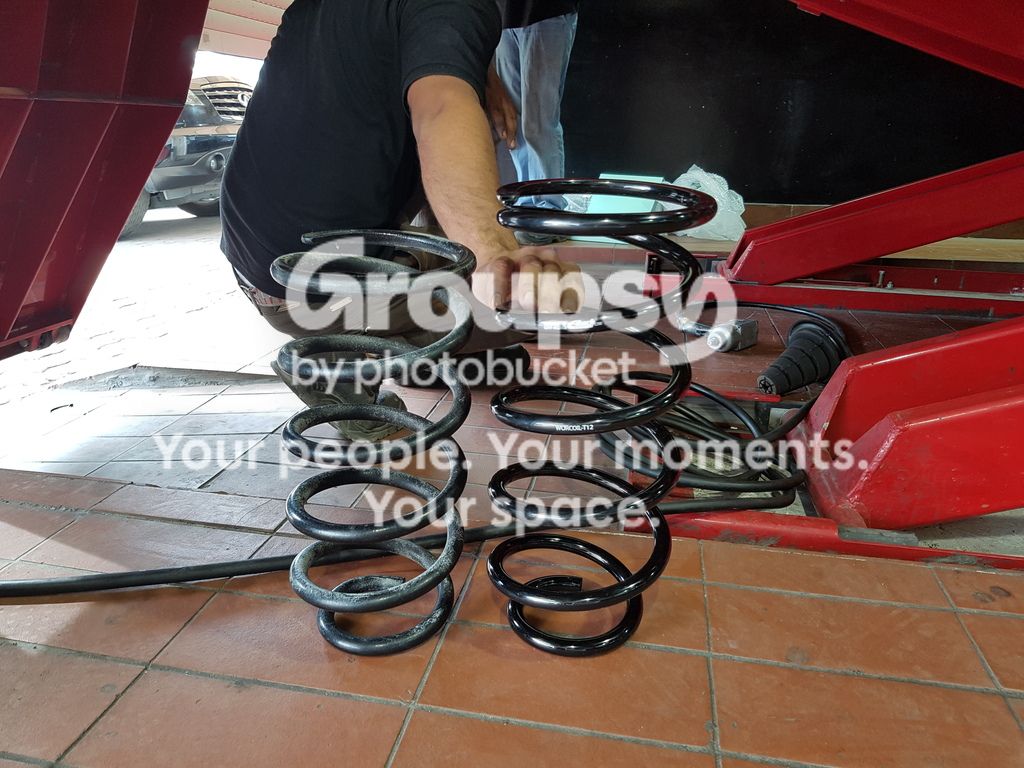
Wheelers 1.5" T12 rear coils
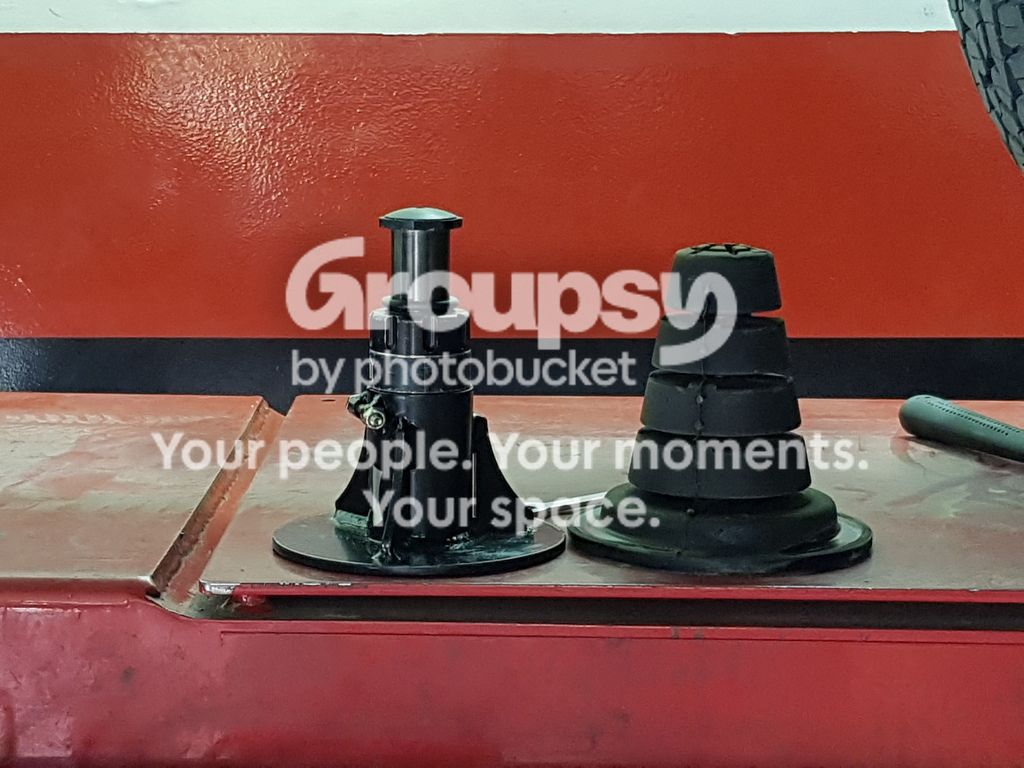
ICON rear hydraulic bump stops
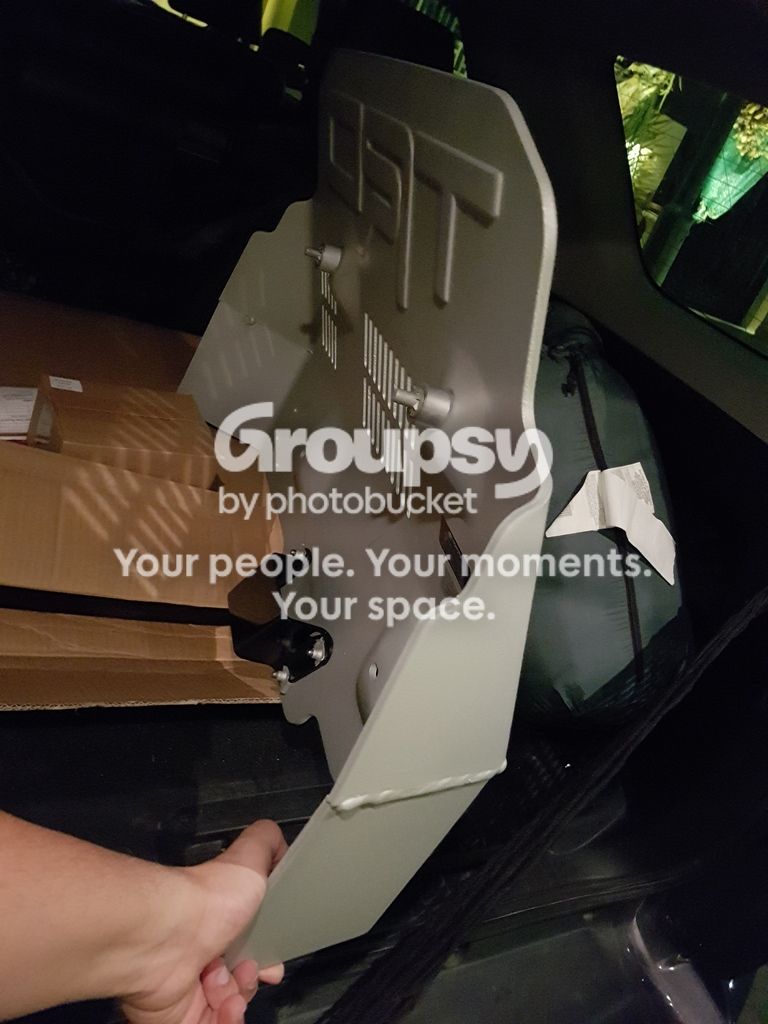
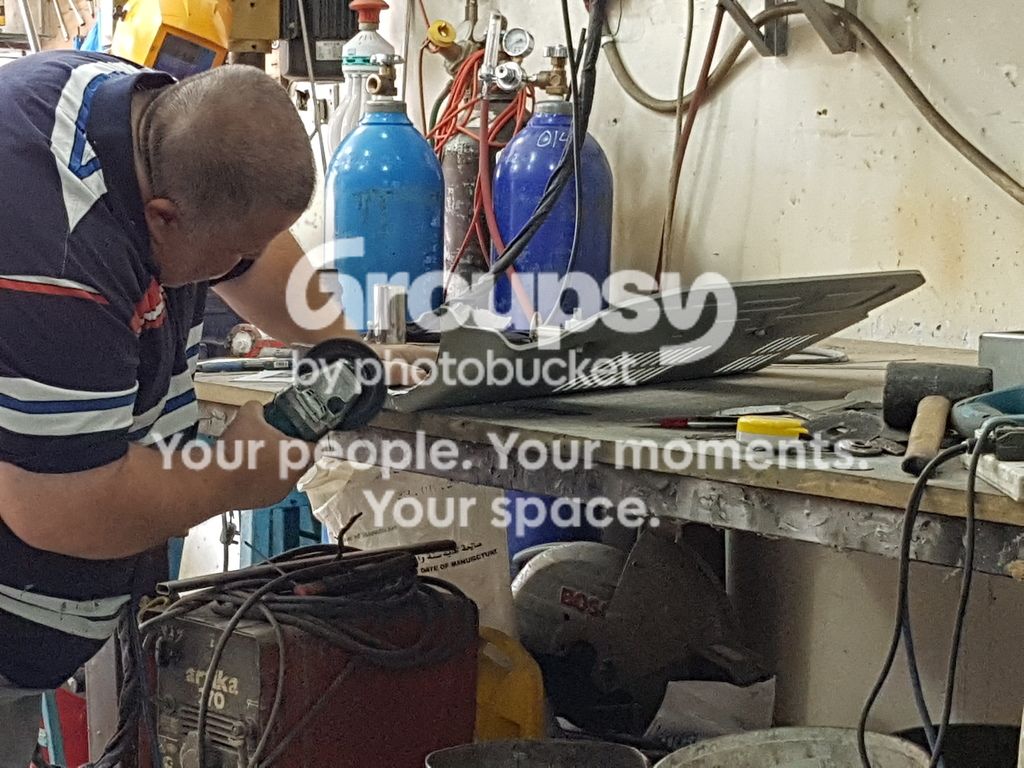
TRD front skid plate (modified for KDSS sway bar clearance)
4x Spidertrax 1.25" wheel spacers
Front bumper liner mod and minor trim to eliminate rubbing
Notes:
Skid plate went on without major hassles once they were trimmed. Kudos to [MENTION=139345]MtlTRDPro[/MENTION] for posting the cut dimensions and all others who posted their setups at TRD Pro Skid on '15 4Runner TE w/ KDSS
Pics as follows:
The idea
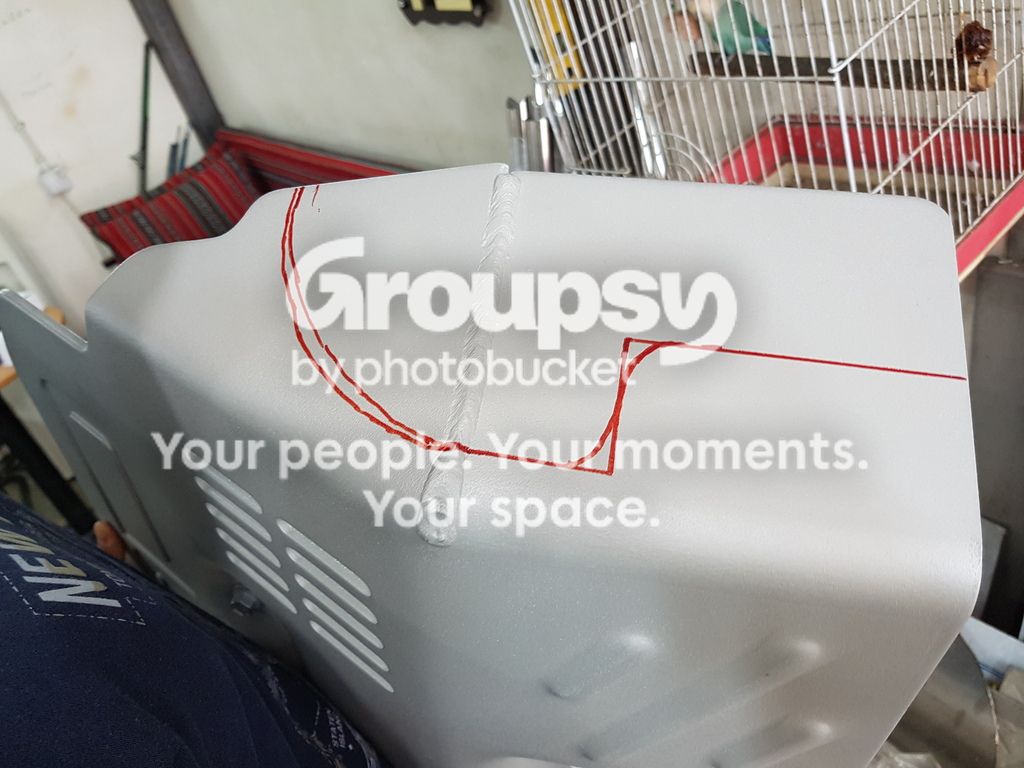
The execution
Stock skid off.. brackets exposed
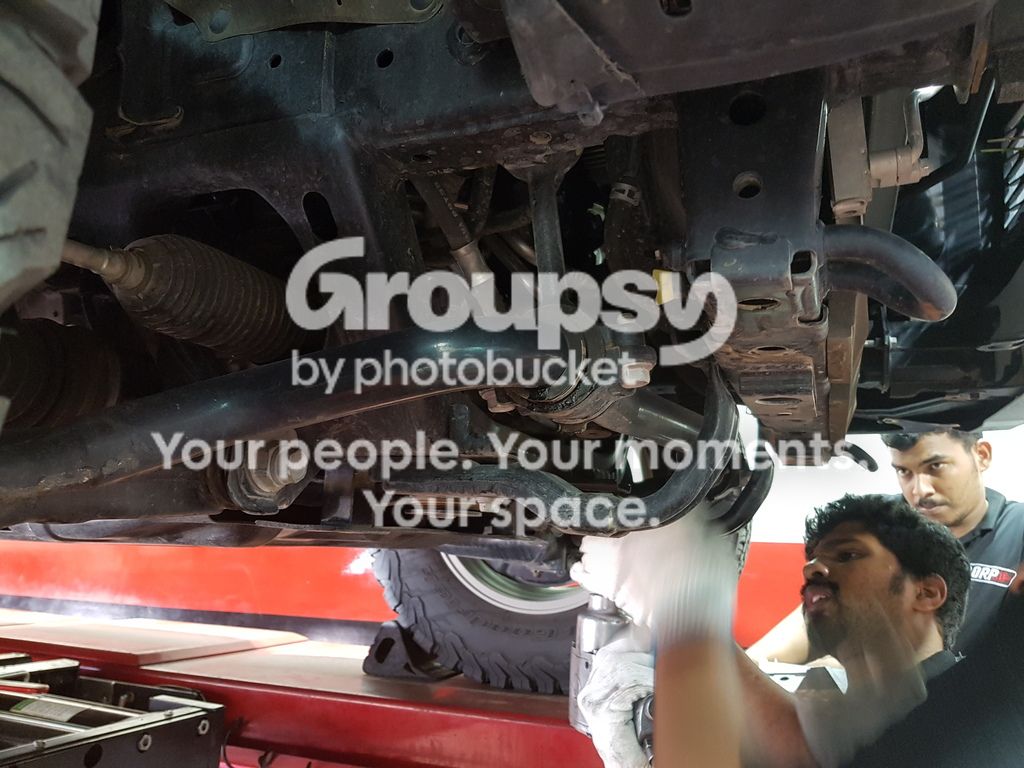
Brackets removed as well
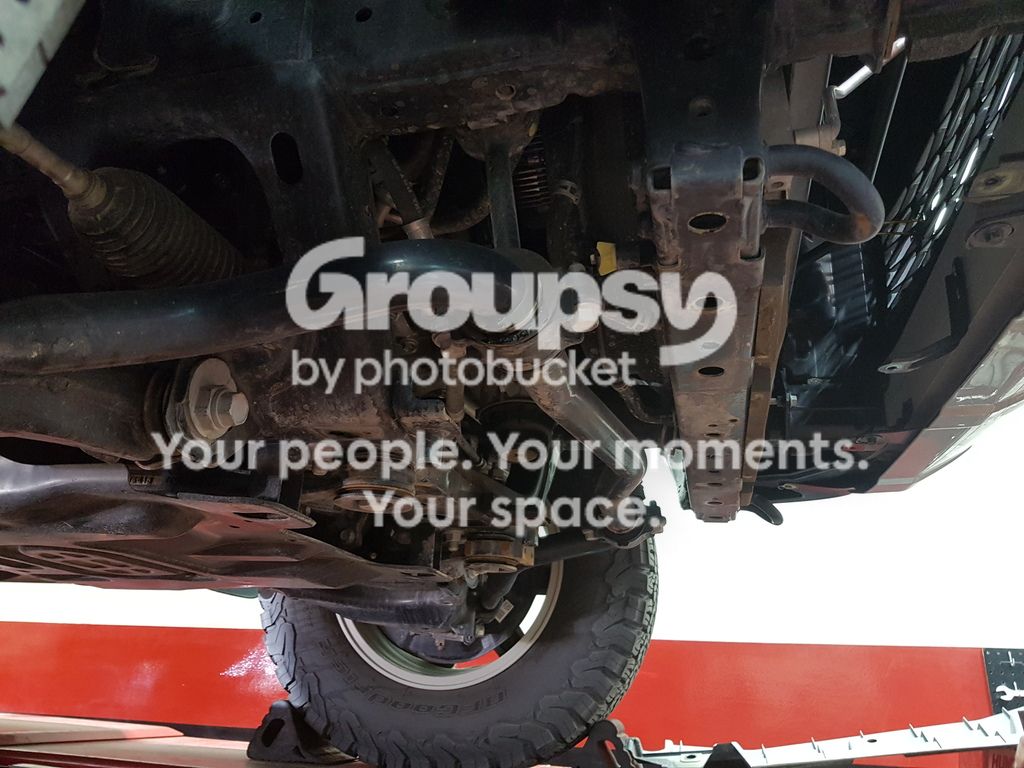
Cleared
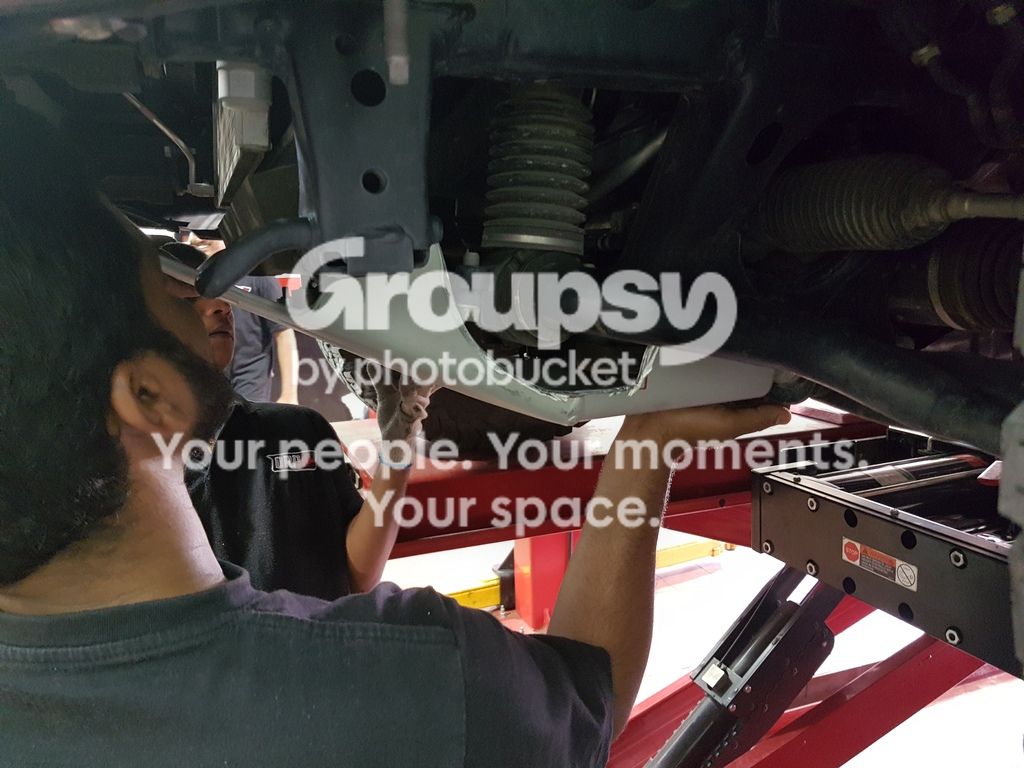
Making sure it all fits first
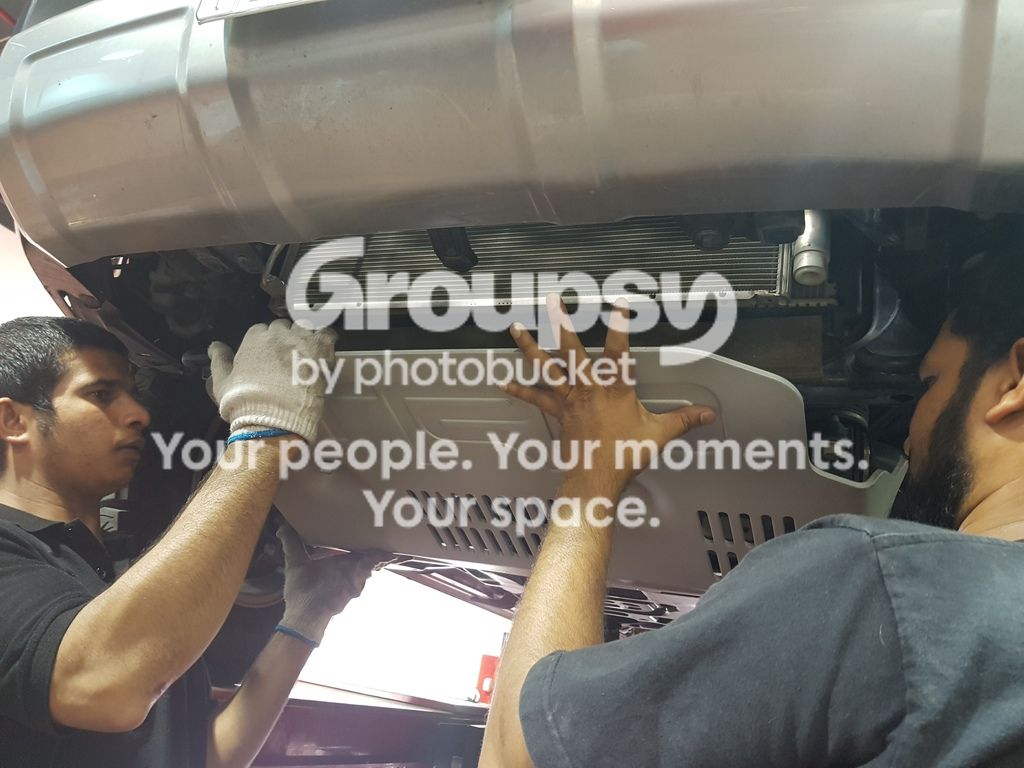
Figured to put the plastic trim back on and sandwich it between the skid and frame to minimize dust intrusion (vs leaving it off as some have done here)
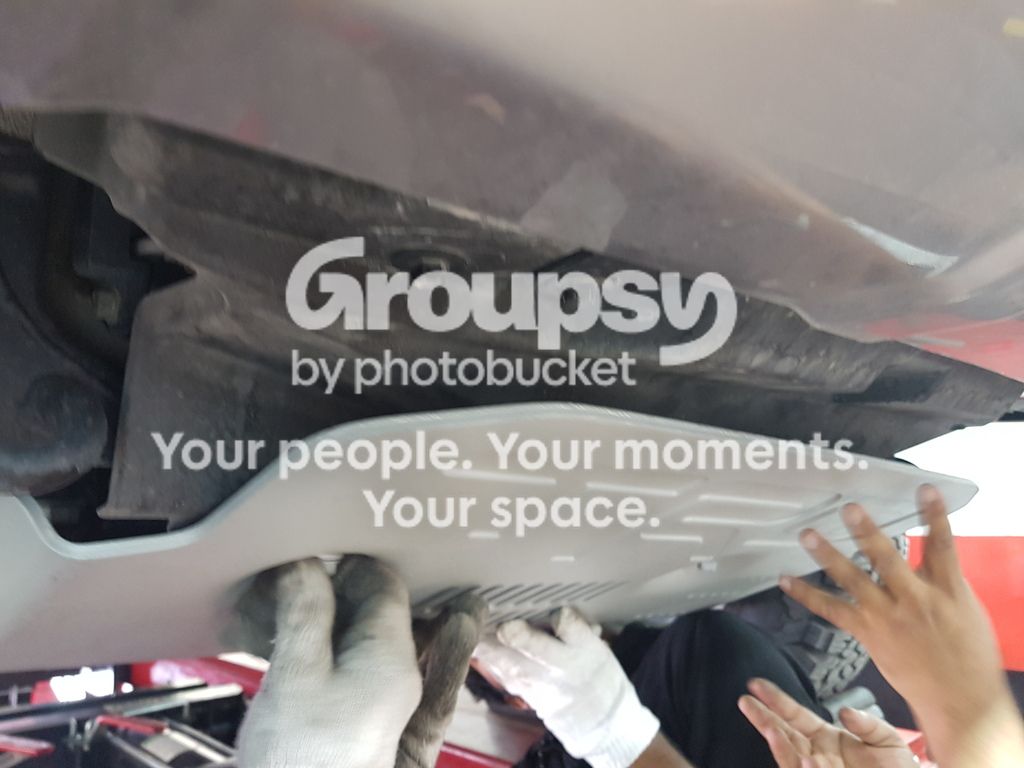
All put together and tightened up

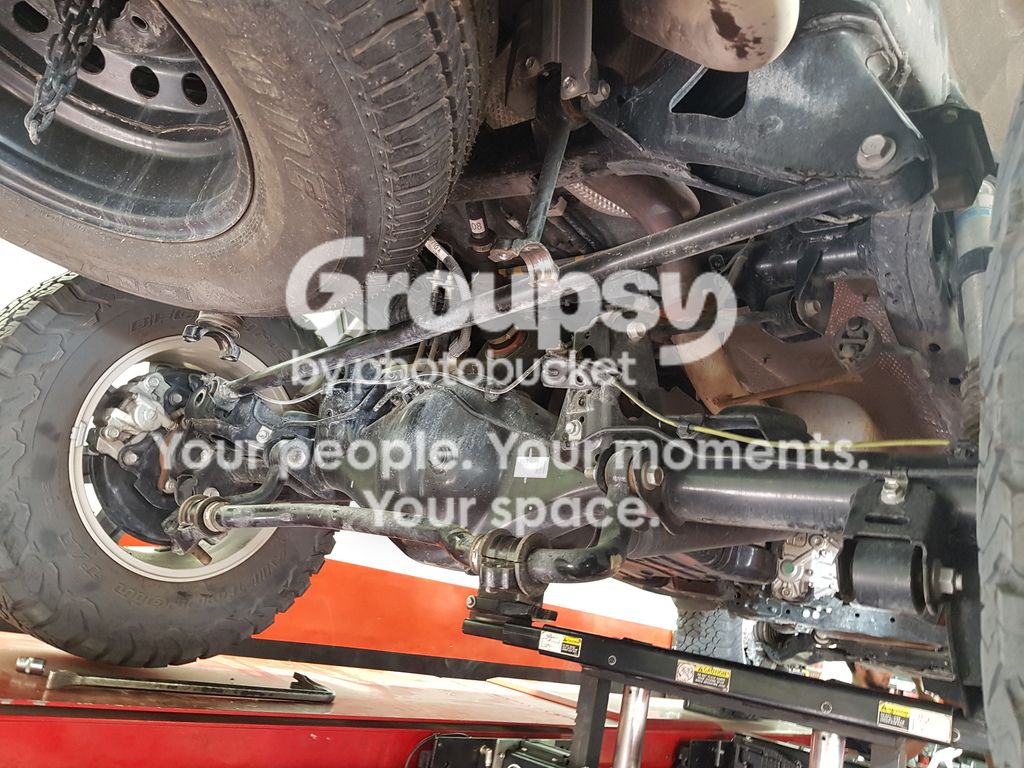
Rear end loosened up.. stock springs and bump stops off
Stock coil vs Wheelers T12
Stock bumpstops vs ICON hydraulic bump stops
All going in, just needed someone to tug the tire side down a bit to slide it through
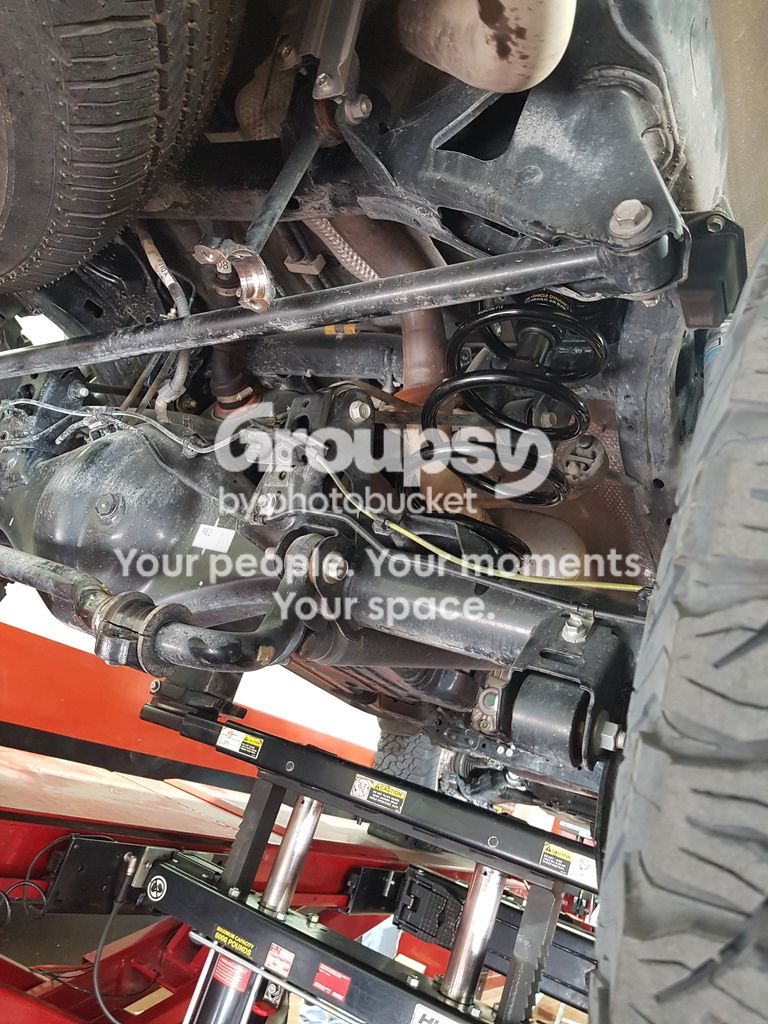
Second side with new rear coil and bump stops
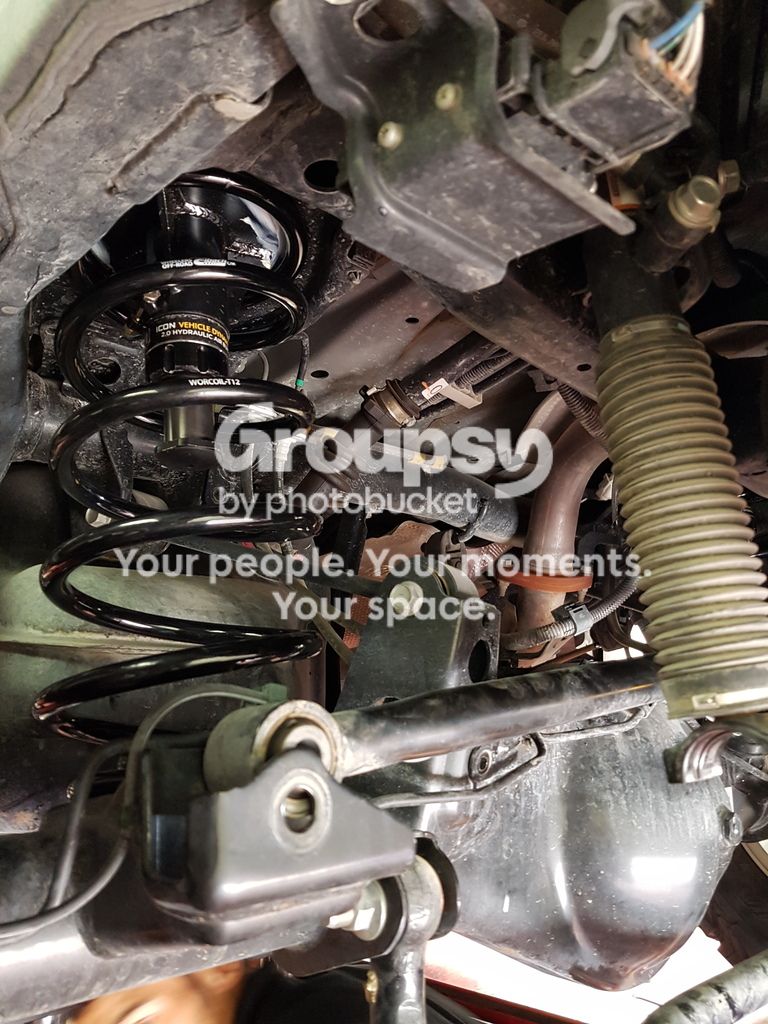
Spidertrax on all 4 sides
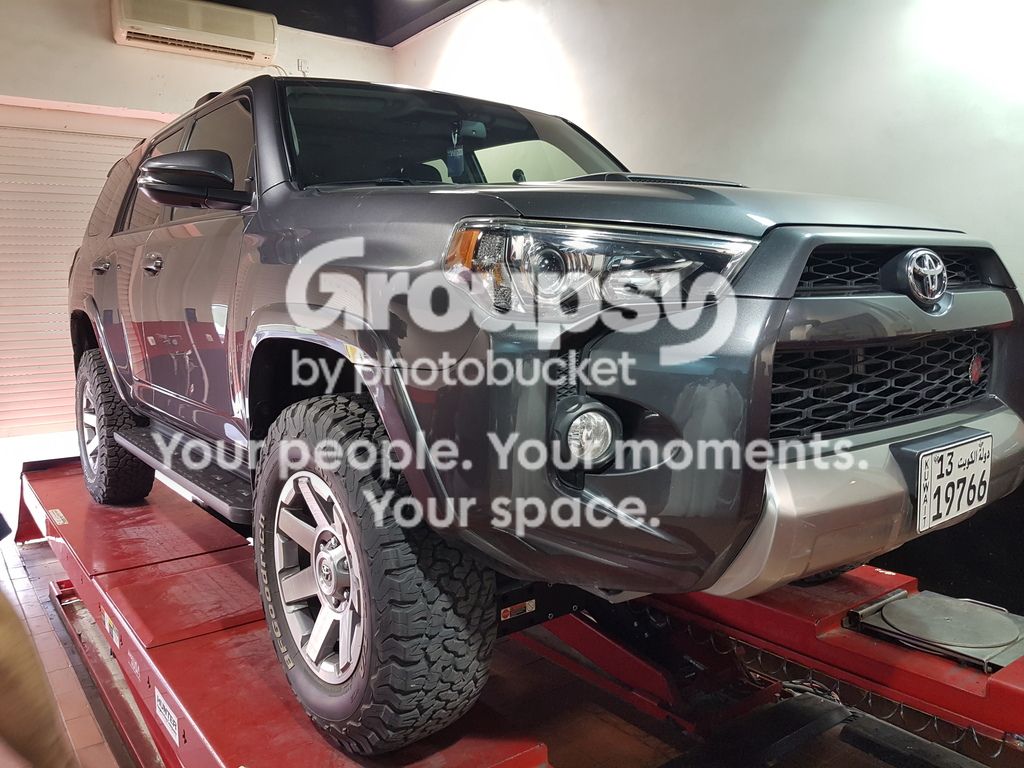
Rear end up at +2" lift over stock.. higher than I wanted, but should come down once the SSO rear bumper comes in

Second angle
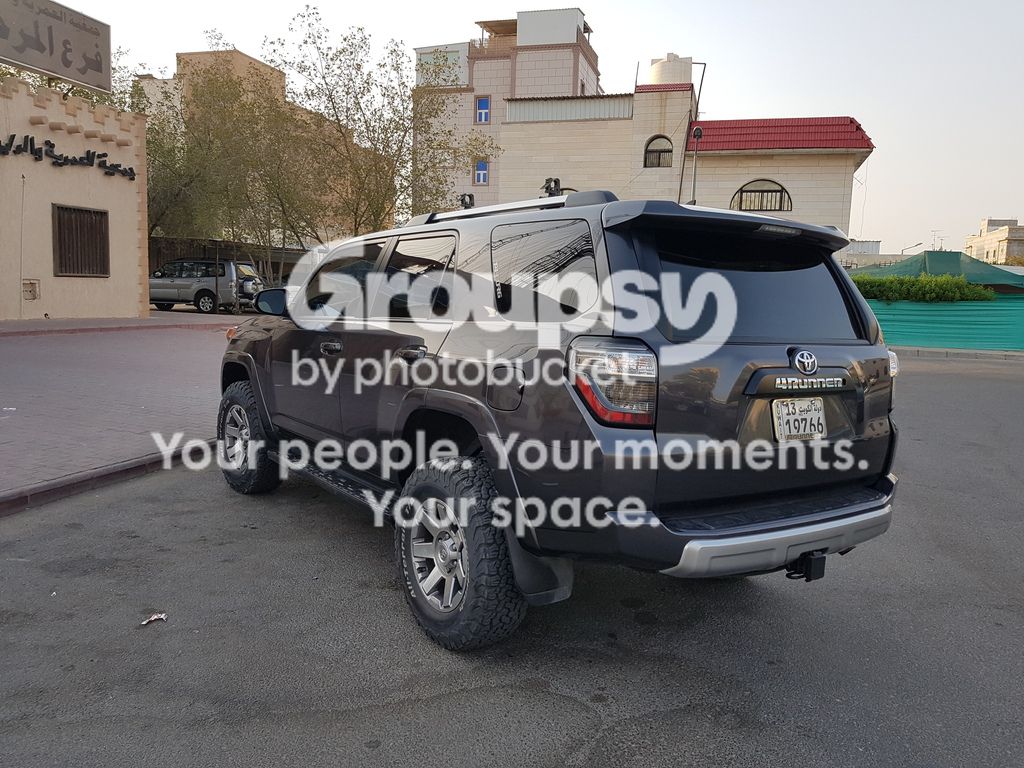
Wheelers 1.5" T12 rear coils
ICON rear hydraulic bump stops
TRD front skid plate (modified for KDSS sway bar clearance)
4x Spidertrax 1.25" wheel spacers
Front bumper liner mod and minor trim to eliminate rubbing
Notes:
Skid plate went on without major hassles once they were trimmed. Kudos to [MENTION=139345]MtlTRDPro[/MENTION] for posting the cut dimensions and all others who posted their setups at TRD Pro Skid on '15 4Runner TE w/ KDSS
Pics as follows:
The idea
The execution
Stock skid off.. brackets exposed
Brackets removed as well
Cleared
Making sure it all fits first
Figured to put the plastic trim back on and sandwich it between the skid and frame to minimize dust intrusion (vs leaving it off as some have done here)
All put together and tightened up
Rear end loosened up.. stock springs and bump stops off
Stock coil vs Wheelers T12
Stock bumpstops vs ICON hydraulic bump stops
All going in, just needed someone to tug the tire side down a bit to slide it through
Second side with new rear coil and bump stops
Spidertrax on all 4 sides
Rear end up at +2" lift over stock.. higher than I wanted, but should come down once the SSO rear bumper comes in
Second angle
Last edited:
TotalAutomotiveLV
New member
Looking good!
borfoo3
New member
Dual Battery Setup
2 months and 6000 miles of desert off-roading /camping, its time for a post on my dual battery setup.
I'm no expert when it comes to electrics, so had a buddy help out on much of the wiring. Would advise the same to all fellow members unless you know what you're doing..
Basic components used are as follows:
1- Fabricated battery tray
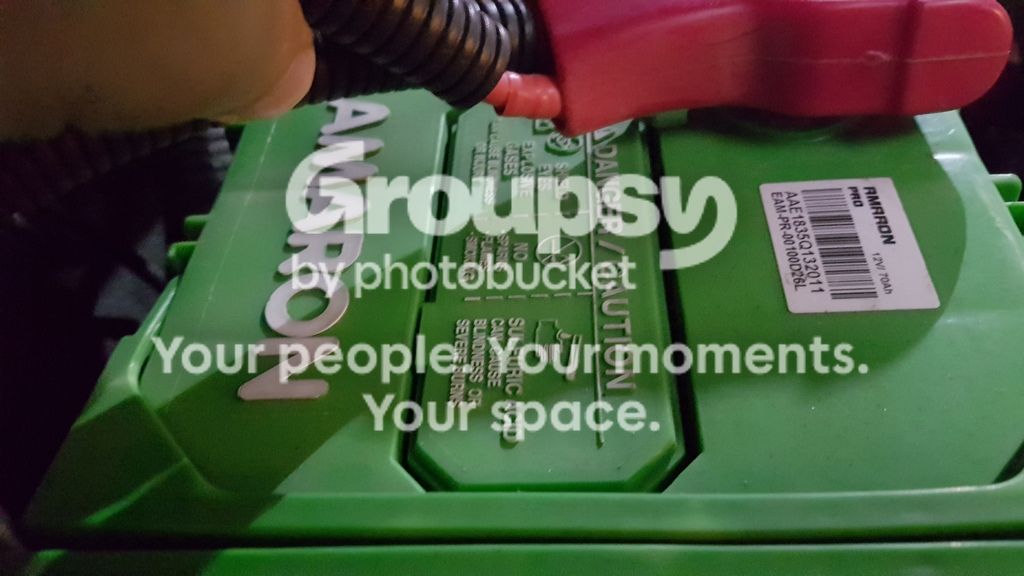
2- A 12v battery (in my case,
3- Some sort of battery controller/ isolater. Mine was the 150amp WirthCo 20092 Battery Doctor Isolator
4- (optional) A fuse box to facilitate connecting everything together to the 2nd battery. Alternatively, you can wire straight to the battery.
From how I understood it, this is how it basically works:
Charge loop:
Car alternator (with engine running) charges main battery -> when main battery is full, isolator switch opens and starts charging 2nd battery.. otherwise, the two batteries are isolated -> Pushing the override PUSH button on isolator would manually 'open' the switch and both batteries are connected in parallel (i.e. allows you to start the engine when main battery is dead). Once the engine runs, the switch is closed and repeats this loop (i.e. lets primary battery charge first)
Discharge loop:
When engine is off (i.e. camping) you can power what you need from the 2nd battery and drain it. This will not affect the primary battery in any way, as they are isolated. If you need to recharge the 2nd battery, you can just turn the engine on and the 'Charge loop' above happens.
There are fancier/ more complicated setups out there, but I chose this one as it all happens automatically without driver intervention. Only issue I had so far was the ground wire screw coming loose once after some hard dune bashing (discovered by the isolator red power light being off) and just needed to be tightened.
Pics of my setup:
Overview, all wiring is covered and runs paraller to the firewall at the back
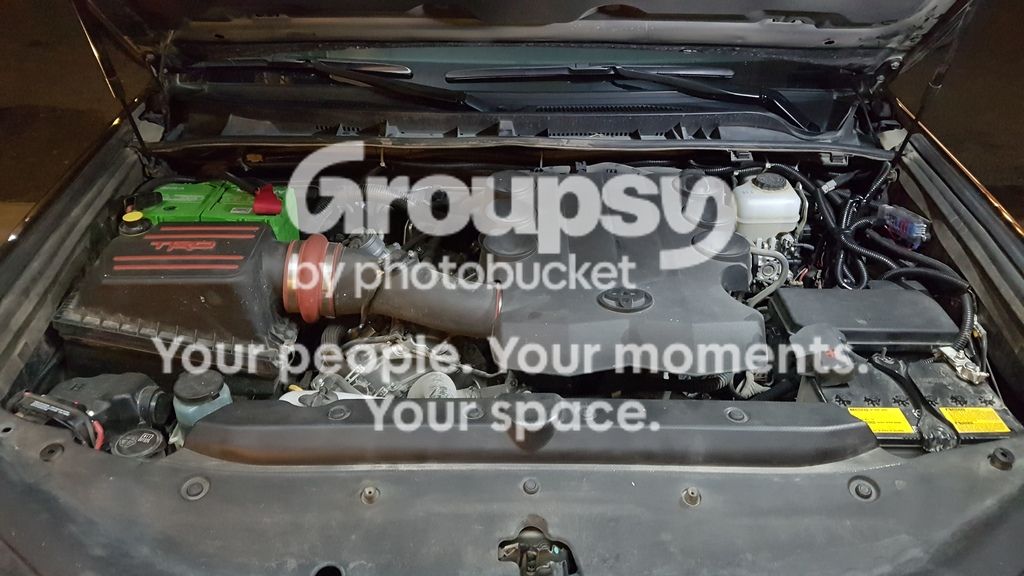
Space is tight behind the intake box, but fits
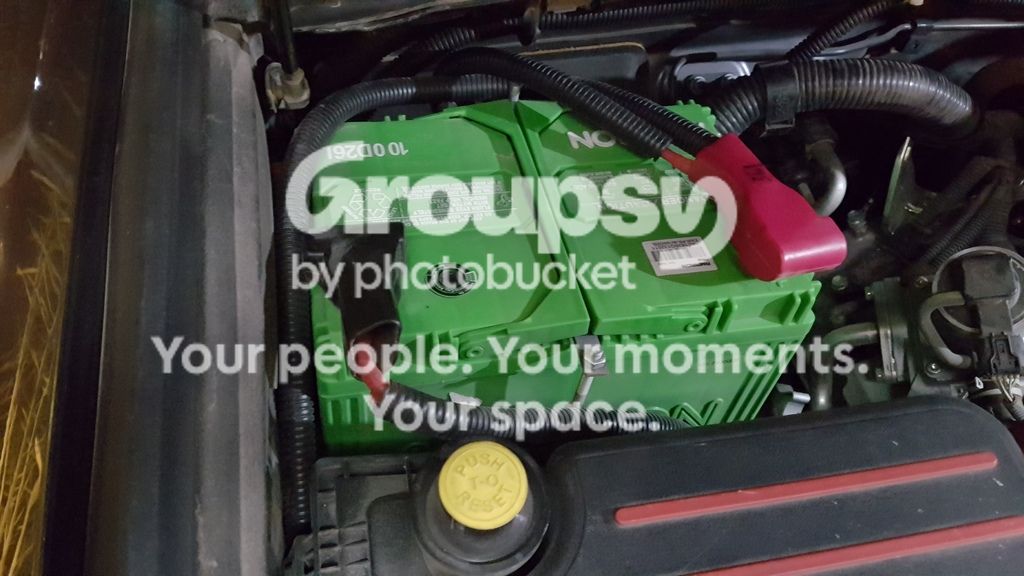
Battery closeup
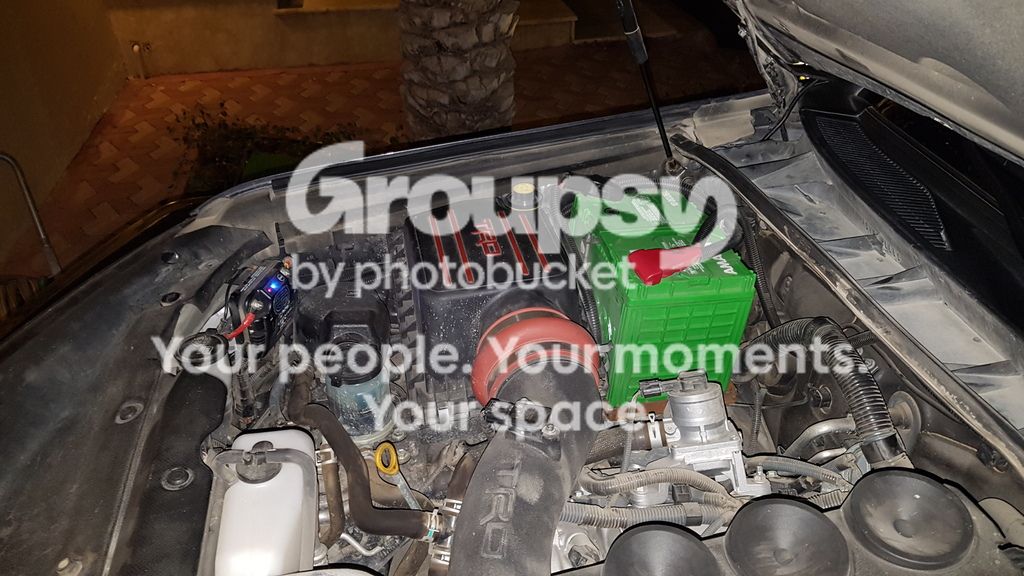
Side shot
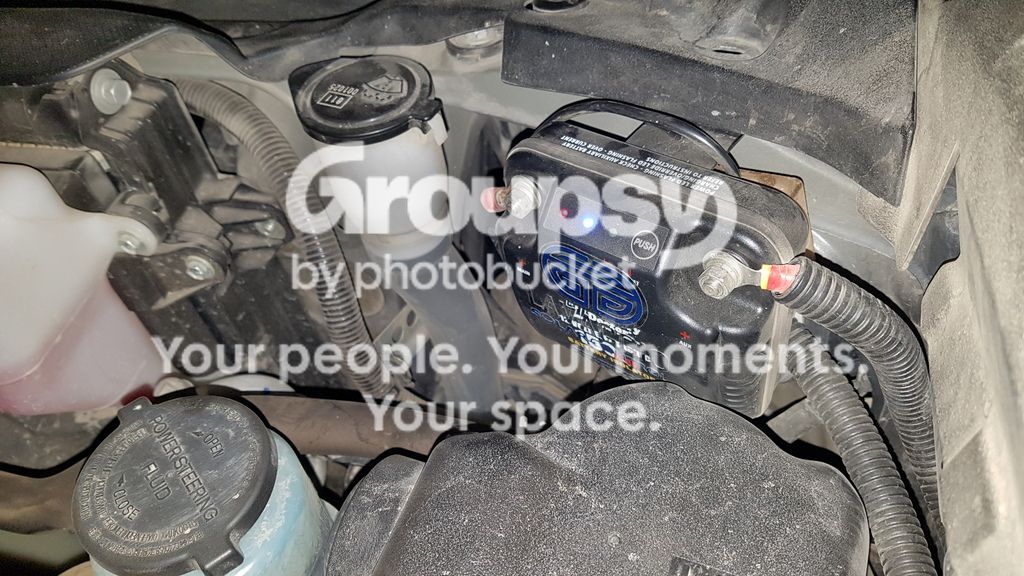
Battery Isolator (don't mind the sticker on it) mounted on the frame next to the washer fluid filler
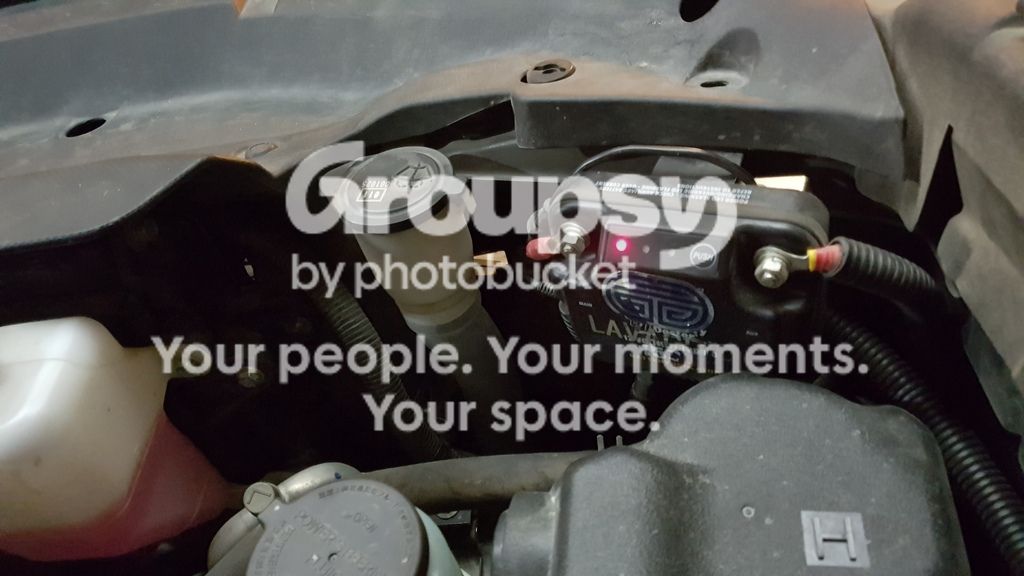
When the engine is running, blue light indicates it is charging the 2nd battery, PUSH button is the manual override mode
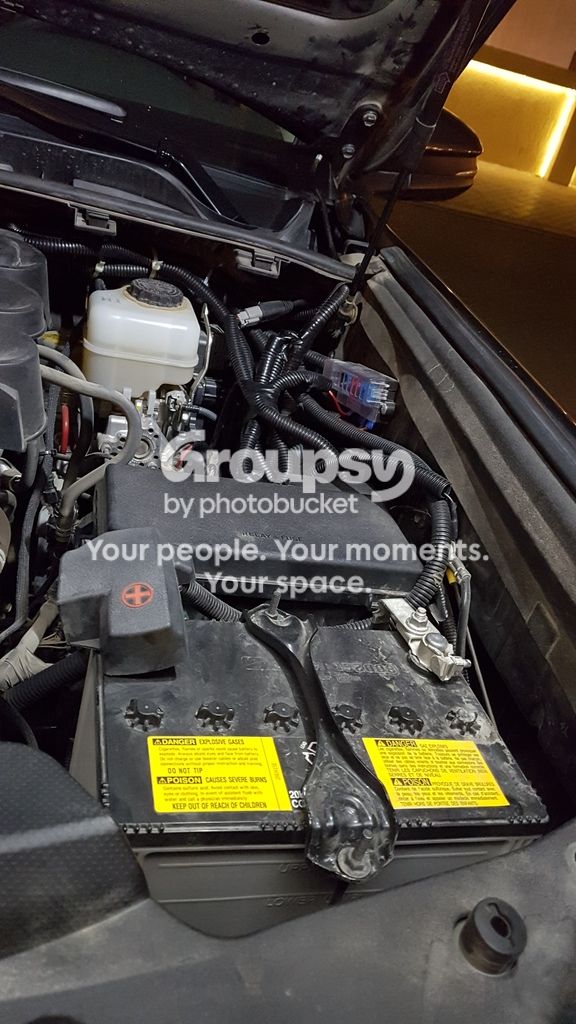
8-peice Fuse box mounted on driver side, behind the existing OEM fuse box. This is wired directly to the 2nd battery. Currently powers all additional lights and 2 extra (constant on) power outlets.
Closeup
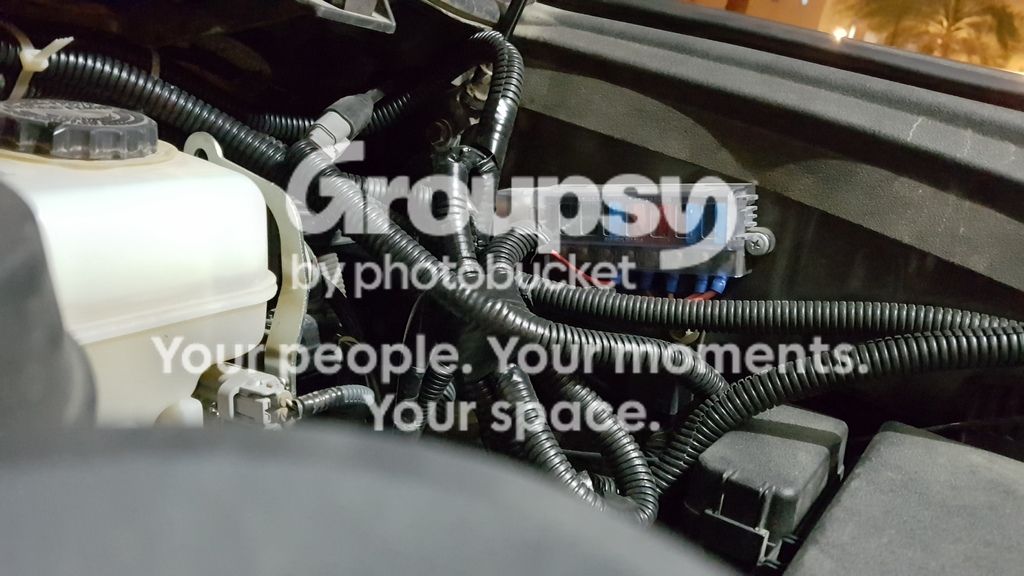
2x red fuses are 10-amp (for the roof mounted HighPower LEDs, pair on each side) and 3x blue fuses are 15 amp (1x fridge, 1x extra power socket, 1x Rigid D2 lights). Still got room for 3 more fuses
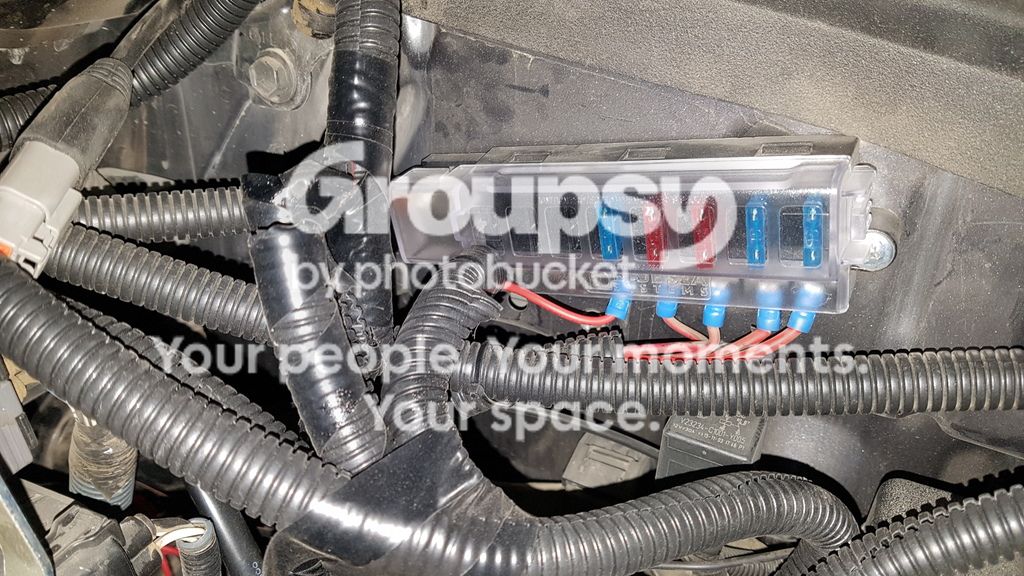
2 months and 6000 miles of desert off-roading /camping, its time for a post on my dual battery setup.
I'm no expert when it comes to electrics, so had a buddy help out on much of the wiring. Would advise the same to all fellow members unless you know what you're doing..
Basic components used are as follows:
1- Fabricated battery tray
2- A 12v battery (in my case,
3- Some sort of battery controller/ isolater. Mine was the 150amp WirthCo 20092 Battery Doctor Isolator
4- (optional) A fuse box to facilitate connecting everything together to the 2nd battery. Alternatively, you can wire straight to the battery.
From how I understood it, this is how it basically works:
Charge loop:
Car alternator (with engine running) charges main battery -> when main battery is full, isolator switch opens and starts charging 2nd battery.. otherwise, the two batteries are isolated -> Pushing the override PUSH button on isolator would manually 'open' the switch and both batteries are connected in parallel (i.e. allows you to start the engine when main battery is dead). Once the engine runs, the switch is closed and repeats this loop (i.e. lets primary battery charge first)
Discharge loop:
When engine is off (i.e. camping) you can power what you need from the 2nd battery and drain it. This will not affect the primary battery in any way, as they are isolated. If you need to recharge the 2nd battery, you can just turn the engine on and the 'Charge loop' above happens.
There are fancier/ more complicated setups out there, but I chose this one as it all happens automatically without driver intervention. Only issue I had so far was the ground wire screw coming loose once after some hard dune bashing (discovered by the isolator red power light being off) and just needed to be tightened.
Pics of my setup:
Overview, all wiring is covered and runs paraller to the firewall at the back
Space is tight behind the intake box, but fits
Battery closeup
Side shot
Battery Isolator (don't mind the sticker on it) mounted on the frame next to the washer fluid filler
When the engine is running, blue light indicates it is charging the 2nd battery, PUSH button is the manual override mode
8-peice Fuse box mounted on driver side, behind the existing OEM fuse box. This is wired directly to the 2nd battery. Currently powers all additional lights and 2 extra (constant on) power outlets.
Closeup
2x red fuses are 10-amp (for the roof mounted HighPower LEDs, pair on each side) and 3x blue fuses are 15 amp (1x fridge, 1x extra power socket, 1x Rigid D2 lights). Still got room for 3 more fuses
borfoo3
New member
Lights - Rigid D2 front pair + HighPower roof mounted side LEDs
On the topic of electronics, all lights below are running on the 2nd battery.
Rigid D2 Driving lights give a nice wide beam. Not as focused as 'spots', but more output than 'diffused' for night driving. These were mounted on Rago Fabrication brackets, which are a perfect fit on the stock hood. No heating/ melting of any sorts needed as everything cleared well. D2's came with a plug-n-play wire harness inclunding a 15amp fuse, relay, and round switch that needs a 3/4" hole drilled to fit in the cab.
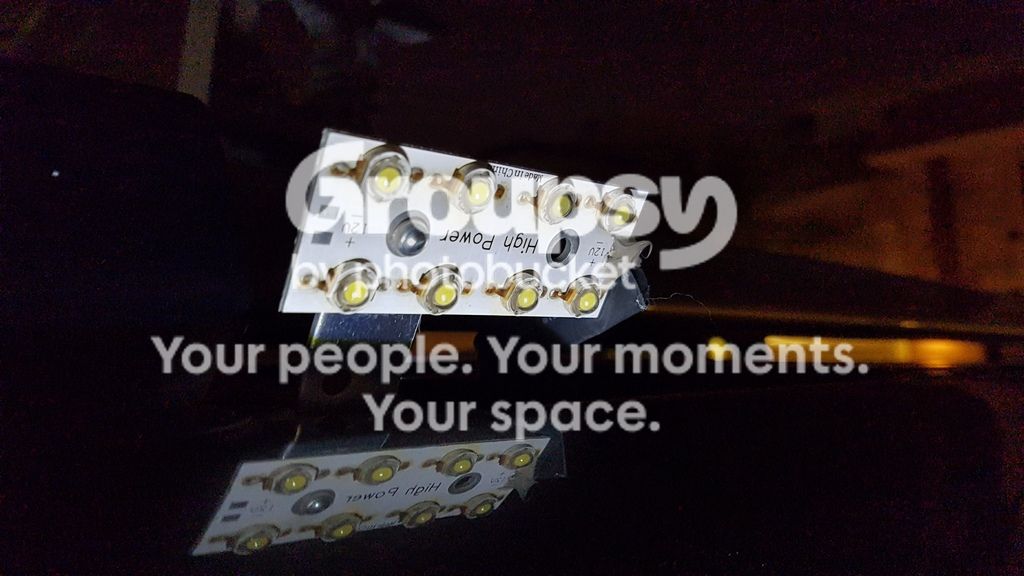
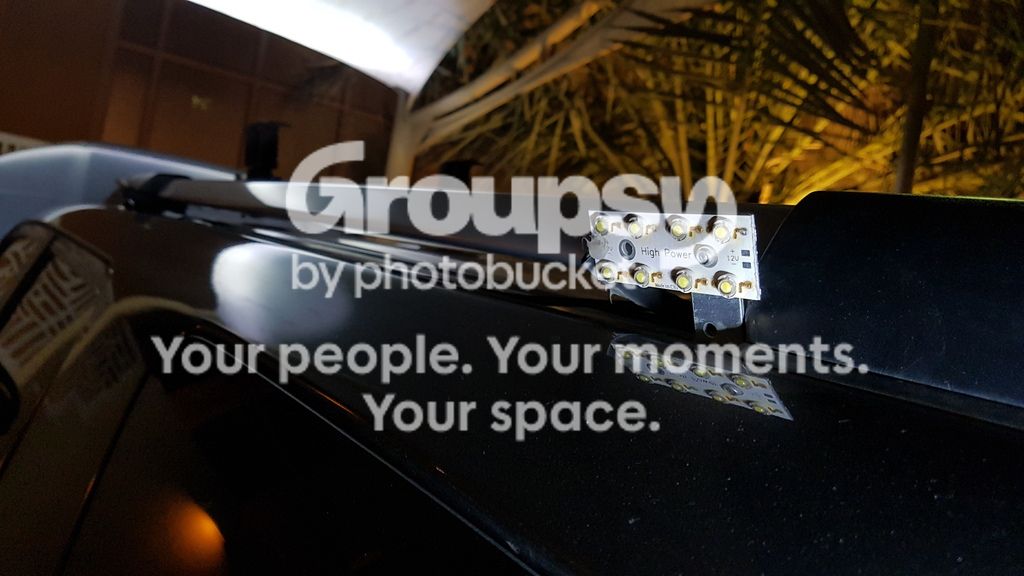
HighPower side LEDs are chinese cheapos commonly used here. Held up good so far in sand and rain despite their look. Has super thin profile that near invisible, and cheap to buy. These are silicone mounted to the roof using some bent brackets, and wiring done through the roof rubber rails. You can get these bigger (longer with double the no. of LEDs) or shorter (half the no. of LEDs)
pics as follows:
Rago Fabrication ditch light brackets mounted

Inside shot, mounting on existing hood bolts
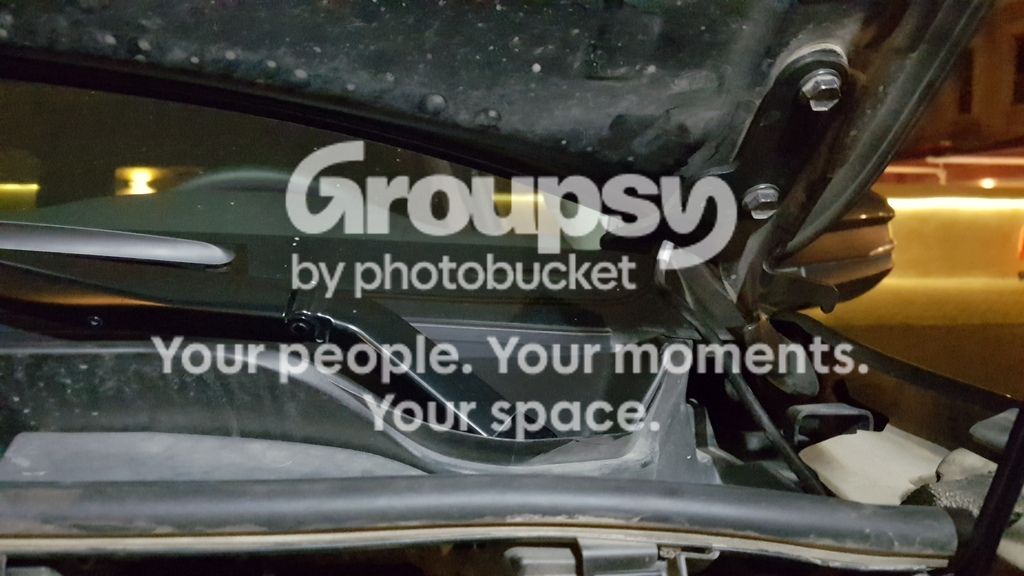
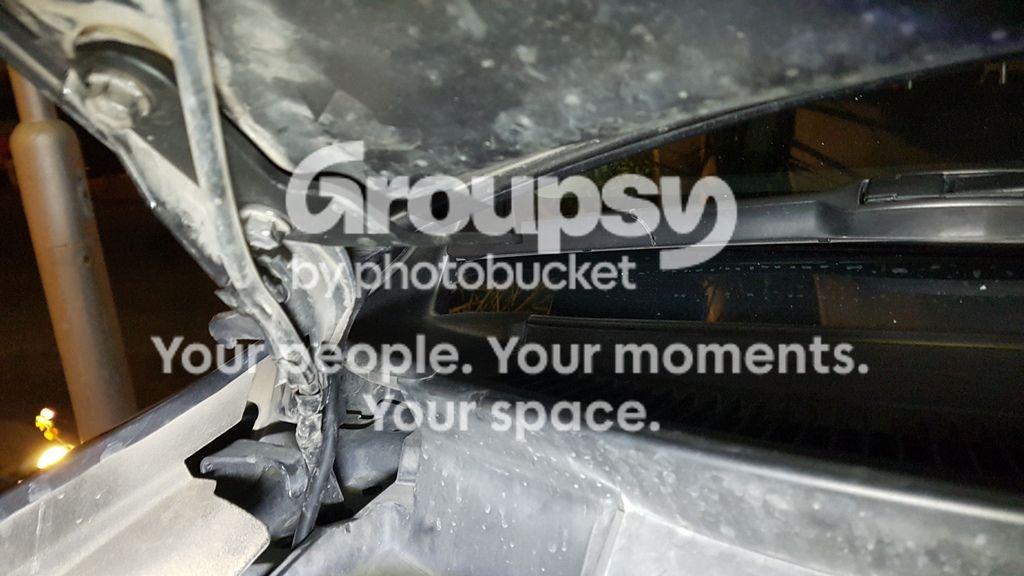
Closeup, tight but no rubs so far
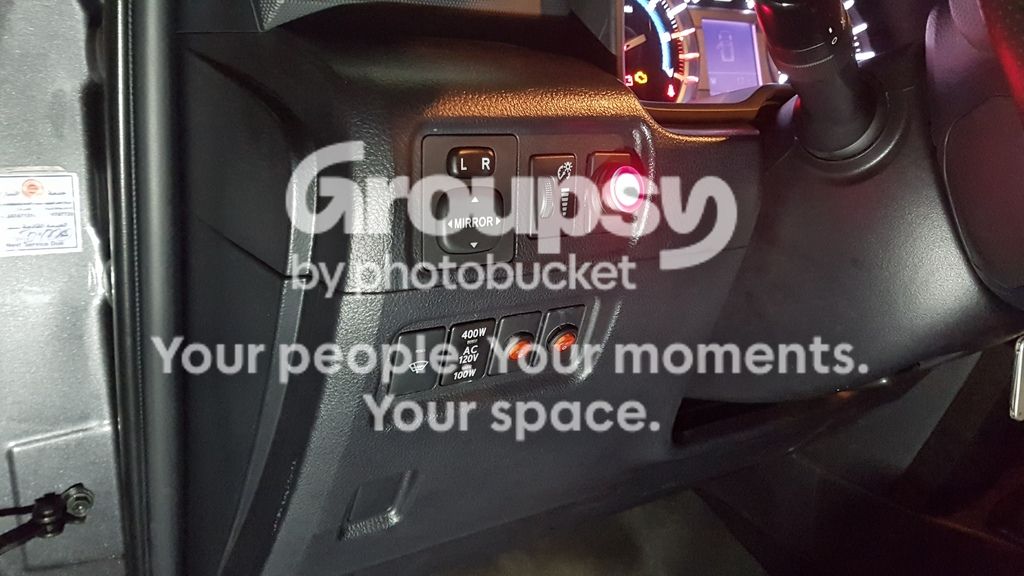
Switches mounted on the existing blank dash switches. Large on on top is for Rigid D2 ditch lights (comes with them). Two red ones below for the side roof lights
Rigid D2s mounted, note pic is with the optional Rigid Industries 20198 Smoked Protective Polycarbonate Light Cover

Mr. 'High Power' LEDs in silicone glory (driver - front side)
Mr. 'High Power' LEDs in silicone glory (driver - rear side)
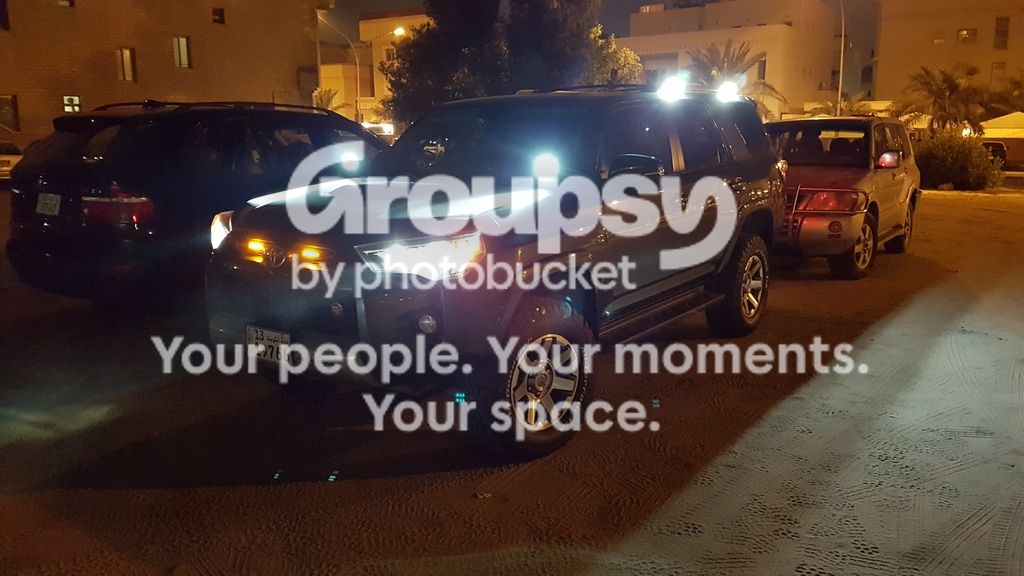
All on
On the topic of electronics, all lights below are running on the 2nd battery.
Rigid D2 Driving lights give a nice wide beam. Not as focused as 'spots', but more output than 'diffused' for night driving. These were mounted on Rago Fabrication brackets, which are a perfect fit on the stock hood. No heating/ melting of any sorts needed as everything cleared well. D2's came with a plug-n-play wire harness inclunding a 15amp fuse, relay, and round switch that needs a 3/4" hole drilled to fit in the cab.
HighPower side LEDs are chinese cheapos commonly used here. Held up good so far in sand and rain despite their look. Has super thin profile that near invisible, and cheap to buy. These are silicone mounted to the roof using some bent brackets, and wiring done through the roof rubber rails. You can get these bigger (longer with double the no. of LEDs) or shorter (half the no. of LEDs)
pics as follows:
Rago Fabrication ditch light brackets mounted
Inside shot, mounting on existing hood bolts
Closeup, tight but no rubs so far
Switches mounted on the existing blank dash switches. Large on on top is for Rigid D2 ditch lights (comes with them). Two red ones below for the side roof lights
Rigid D2s mounted, note pic is with the optional Rigid Industries 20198 Smoked Protective Polycarbonate Light Cover
Mr. 'High Power' LEDs in silicone glory (driver - front side)
Mr. 'High Power' LEDs in silicone glory (driver - rear side)
All on
Similar threads

- Replies
- 0
- Views
- 2K
- Replies
- 4
- Views
- 5K

- Replies
- 0
- Views
- 2K


