Brian's FX-R 3" HID Retrofit on 97 4Runner Project (T4R.org)

BrianSD_42

New member
:cool: Brian's FX-R 3" HID Projector Retrofit on 97 4Runner Project (T4R.org) :cool:


End Result Looks Something Like This ....
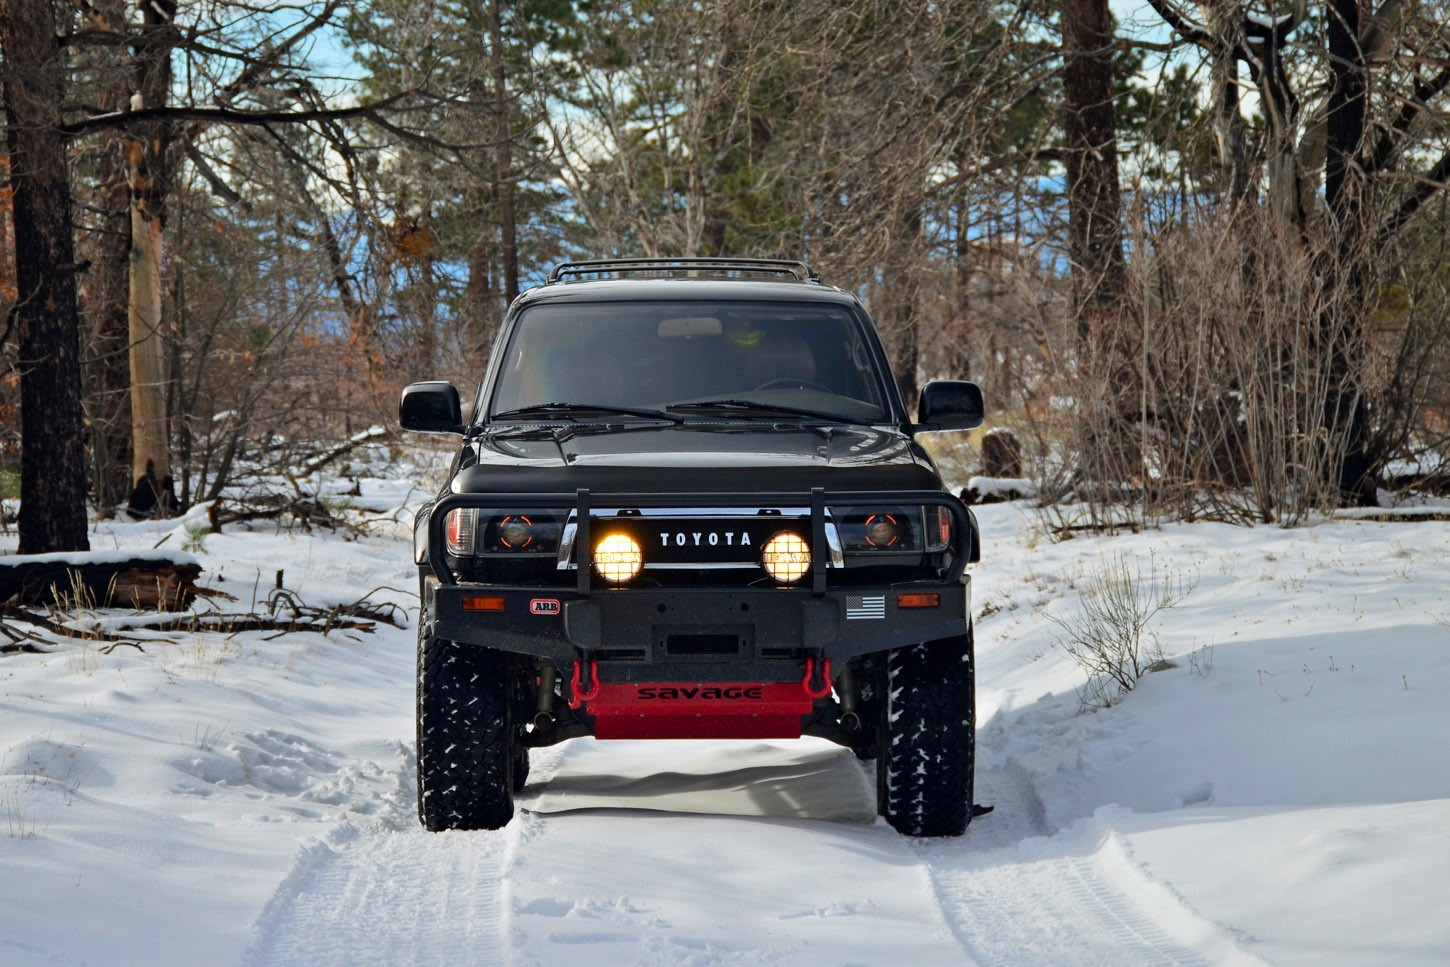


[ note if the pics are too big hit Control (-) ]


Hi,
Here are the results of my FX-R retrofit on a 97 4Runner. I previously had a full retrofit kit with Lexus Projectors done by a semi-pro. It was quite a good kit but I wanted to build one on my own that was painted on the inside and had amber halos. This is my first retrofit attempt. I don't really think of this as "write up", it is more of a project report. I will try to be as thorough as possible.

For anyone trying this project - I would highly recommend reading at least the first two pages of the thread and not just the initial post. I made several important updates below that you will find useful.


{ Sources }

* Retrofit Source Guide: The Retrofit Source Inc
* [DEAD] PDF Guide: http://www.theretrofitsource.com/pdf/trs_tech/FX-R_Projector_Retrofit.pdf [DEAD]
* FX-R Retrofit Guide: http://www.theretrofitsource.com/diy-installation-guides/fxr-guide.html
* RickAshay: http://www.flickr.com/photos/headlight-hookup/
* Aiming Headlights: http://www.toyota-4runner.org/3rd-gen-t4rs/130317-how-properly-aim-projector-headlights.html


Buy parts:
* TYC L/R Headlights Pair from EBAY (~$85)
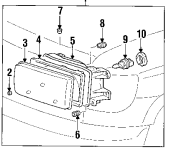
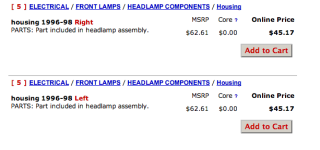
* OEM Toyota Headlight Housing L + R (~$45 each)
* HID Components Kit from RetrofitSource.com ($400 - $500)
* Paint: SEM Charcoal Metallic, High Build Primer (~ $15 each)
* Silver Foil Tape ($10)
* Silicone Sealant ($5)
* EPOXY, JB Weld ($5 each)
* Screws set from home depot x2


{ MARK ALIGNMENT ON WALL }

This is difficult. I had already marked the cutoff lines on my garage wall using my old custom 4Runner projector set. This really helped me out a lot since I had a baseline for the alignment. Assuming you don't have a working completed projector set ready you will want to follow the instructions linked above. Whatever you do, don't throw away your OEM headlights because you will need them for marking on the wall if you don't already have a set like me. The first time I did a projector retrofit, like a dumb@ss I threw away my headlight housings. They are worth $$$ so don't do that.


{ SWAP TYC HOUSING OUT }
At the minimum you will want the black plastic OEM "headlight housings" since the ones that come with the TYC set are brittle and may break when you try to adjust it; the rest of the TYC headlight is still good. So assuming you are not just modifying your existing OEM housings you will need to swap the cheap TYC housing off the TYC headlight assembly and replace that housing (the part that is adjustable) with the OEM one.


Small steps
* Put onto the 4Runner and align the light with a screwdriver so that the lens looks flush and correct when turned OFF. Basically does it look flush with the grill.
* Remove lights from truck and take into garage.
* Remove battery from truck.
* Bake Lights in oven at 275 F for 7 mins, do this ONE at a time.
* Remove each lens with two screw drivers, it should pry off with a small amount of pressure.


{ DRILL THE HOLES }

* Use a dremmel tool with a small cutting blade to cut out and widen the lightbulb hole in the back of the light as pictured.
* Tape up the inside of the light (you can probably skip this); I did this so I could easily mark the screws.
* Set the projector light into the housing, power up light, align on the wall (refer to a different guide than this one), mark where the screws touch the headlight inside with a sharpie.
* Drill holes where marked; they should be oval shaped. Make the holes wide and oval shaped so you can move the projector around after putting the screws through.
* Now that the holes are drilled, set the projector in the light and try to get it to align on the wall as per your tape marks. If it is too tight or won't align then widen the holes.
* Repeat until you can perfectly align both lights on each side and the light matches up with your tape marks.


Remove the projectors and set aside in a safe place.


{ PAINT THE LIGHTS }

* Lightly sand the inside of the light and the plastic shrouds with soft grit sandpaper.
* Wipe down with water and a cloth.
* Wipe down with paint thinner and a cloth.
* Spray the primer, 2x coats
* Spray with main paint, 2x coats
* Let dry for a long time, long enough to handle the paint. I would say at least 3 hours.
* Cover the entire inside of the light with blue painters tape. This is to protect the paint while to man-handle the housing, install the projectors, and glue them in. You don't want epoxy or J-B Weld on your nice paint job.


{ GLUE PROJECTORS IN, PART I }

* Mix up some 5 min clear epoxy, power on the HIDs on your work bench, align correctly on the wall, adjust screws, *lightly* apply epoxy and hold in place while aligned. Be sure to use only a small amount in case you messed up the alignment and have to "reverse it".
* Repeat for other light.


{ TEST PART I }

* Test on truck, be careful since they aren't fully glued yet.
* Confirm alignment is true and accurate


{ FINAL GLUING }

* If you confirmed the alignment is good then you can now put a full batch of J-B Weld on each side of each screw hole (hence the blue tape).
* Let sit for awhile, say 2 hours. I let mine sit overnight mostly because I ran out of time and it was getting cold.
* Once the J-B Weld is fully set you can remove the tape on the inside of the light.


{ GLUE HALOS TO INSIDE OF SHROUD }

* Tape up the outside of the shrouds, (again) to project the nice paint.
* Use clear epoxy and glue halos inside shroud. Use best judgement because this is difficult. I held in place for 5 mins while it dried.
* Let dry.


{ Install Shrouds and re-seal lights }

* Snap the shrouds (with halo inside) onto the face of the projector - don't scratch the lens. I chose not to glue the shrouds onto since the fit was so tight. Gluing is unnecessarily permanent for this step (don't glue them onto the projector!)
* Use the oven to reseal the headlight lenses back onto each headlight, be sure to wipe of any fingerprints first.
* Install. Op-Test.


{ Create and install modified breather tube with new filter }

* See pictures a few posts down. This is a REALLY important step.


Addendum for reference ...

* I drilled the holes.
* Test fit and powered up inside garage.
* Drilled more, adjusted until they could be aligned.
* Then sanded and painted.
* Then taped inside of light
* Then did a basic light gluing using a small amount of super glue / epoxy (not JB weld).
* Tested on the truck and confirmed alignment was good before the final JB Weld
* Lastly I applied a full amount of JB/weld to the screws on inside and outside.[/QUOTE]


// THE END //


PREVIEW


:usa2: LEAVE A COMMENT PLS! I LOVE FEEDBACK :usa2:

.
 
Last edited:
Register to hide this ad
Reserved: Pictures Part I (coming soon)!


{ PARTS }

1.


{ OEM TOYOTA HOUSING PIECE, $45 }

2.


3.


4.


5.


6.


7.


8.


{ USE ALUMINUM FOIL TAPE TO BLOCK LIGHT LEAKAGE }

9.


10.


11.


{ WIDEN THE REAR WHOLE USING DREMEL }


12.


13.


{ DRILL HOLES }

14.


{ SAND }

15.


{ PAINTING }


16.


17.


18.


19.


20.


/////
 
Last edited:
Reserved: Pictures Part II :laser:


{ OP-TEST HALOS !!!!! }


1.


2.


{ TAPE INSIDE OF LIGHT & APPLY EPOXY (PART I) THEN JB-WELD (PART II) }


3.


4.


{ SEAL UP HEADLIGHT BACK W/ A-TAPE & SEAL BALLASTS W/ SILICONE }


5.


6.


7.


{ TESTING LIGHT OUTPUT ON MY GARAGE WALL }


8.


{ TEST-ALIGNMENT, FX-R OUTPUT WITH LIGHTS MOUNTED ON THE TRUCK }


9.


10.


:)
 
Last edited:
{ Final Report & More Pics! }


{ Installing the halos: }
* When removing the tape from my painted shrouds (I put tape on them to protect the nice paint from danger when epoxy'n the halos onto them), I torn a small piece of paint off
* Solution: hand paint on a patch of primer, followed the same SEM paint I originally used.
* Problem #2, when pushing the shroud onto the projector (drivers side) I popped the halo free of its epoxy attachment => that halo shows amber fully on only 2 of the 4 light holes.
* Solution #2: in the future I will re-bake and after removing the lens, take the shroud off then re-glue. Good thing I didn't epoxy the actual shroud to the projector :)


{ Corner-light Issues }
As you can see below the light emitted from my 99-clear corner lights is immense compared to the amber halos. AND they are clear but my headlights are Charcoal Metallic SEM .... what to do ... what to do?
Answer 1: paint the inside of the corners to match!
Answer 2: & paint the actual 194 bulbs with tailight tint paint so they are a lot less bright.
---> I've never seen anyone else do this but I think it will turn out great.


Almost Final Pics ....


Paint Troubles

1.


All Put Together

2.


Light Sealed Up

3.


4.


Halos Powered Up

5.


6.


FX-R Output

7.


Halos vs Corner-Lights

8.


Painting the bulbs and inside of corner-lights


9.


10.


11.


12.


13.


14.


15.


// Almost the end // I will post pics of the corner lights up after I install them. I just painted them tonight.
 
Last edited:
thats a nice pile of sticks and leaves, very well lit up!

lol, i have the fx-r's in mine (done by rickashay) and love them. you did a great job, very nice work!
 
{ Installed Painted Corner Lights }


I ended up disconnecting the parking lights because they are very bright despite the 1 coat of night-shades tint and the halos are still enabled and they perform a similar function.


PAINTED with SEM TRIM CHARCOAL METALLIC

1.


2.


INSTALLED

3.


Disconnected the corner lights, will revisit later on

4.


5.


// THE END
 
Last edited:
oh my :jaw:

Looks Sweet man. I was actually thinking about my next retrofit all day today. I so wish i had the funds to get going on it. Just like everyone else said it looks fantastic ,and those shrouds are sick! They look like they were meant to go in there.
 
One has to love the thoroughness of a DIY constructed by an engineer. Approaching BFAD status for write-ups.

The lights look great. Can't wait to see the finished product on the 4runner.

I get other drivers who flash their high beams at me some nights thinking I have my highs on when in reality all that are in my lights are some five year old Silverstars. I don't know if the idiot drivers around here could handle it.
 
Do the TYC headlights have glass lenses? My passenger side lens has the tape peeling on the inside, and I am not really wanting to pay 196 for a new OEM housing.
 
Update: 01-06-2014


So it has been 1 year since did this mod and some dust has gotten inside the light housings.

I believe the reason is because the default breathing tubes (2) let in dust.

I have now fixed this so no dust can get in.


Here is the fix:

1. Bake lights (every time), open up and clean inside, wipe out the dust
2. Put the glass back on and re-bake, put on the metal clips etc
3. Add silicone sealant around the outside of the light and on the back around where the bulb is. This may be overkill but I don't want to do this a 3rd time.
4. Pull off the 2 rubber breathing tubes on the back of the light
5. Fill one of the tubes PARTIALY with silicone sealant, , enough to block any air, let it dry.
6. Upgrade the second tube with extended hose and filter
7. Add about 6-8" of Fish Tank Air Hose ($6 Petsmart) and glued it to the small breathing rubber. The idea is not to block the airway at all when doing this.
8. Add an air filter into the fish tank hose. I bought Cheese Cloth from Michaels (Arts & Crafts Store) and cut out a 1" by 2" piece and then twisted it up and shoved it in the tube.
9. Test that you can push (blow) air through the hose with the filter installed, better make sure the silicone had a few hours to dry!
10. Once it is dried, install onto the light as such.


Pictures!


1. Dirty Light (notice the dust in top right corner)


2.


3.


4.


5.


6. Dust Free Lights!


7.


////////////////////////////////


One has to love the thoroughness of a DIY constructed by an engineer. Approaching BFAD status for write-ups.

That's a nice comment but BFAD is in a class of his own. I think of this as more of a project report then a write up :)
 
Last edited:
so with this set-up you obviously test fit to ensure the output is correct before putting the glass back on. Are you adjusting the projector with those screws after you epoxy it?
 
so with this set-up you obviously test fit to ensure the output is correct before putting the glass back on. Are you adjusting the projector with those screws after you epoxy it?

I will go back and edit my report with more details later today.

I drilled the holes.
Test fit and powered up inside garage.
Drilled more, adjusted until they could be aligned.
Then sanded and painted.
Then taped inside of light
Then did a basic light gluing using a small amount of epoxy.
Tested on the truck. Cofirmed good.
Applied a full amount of JB/weld to the screws on inside and outside.

Slight setback. Part of the paint on my shroud came off when I hastily pulled on the tape. I will hand paint on the small patch this afternoon.


--- AND ---


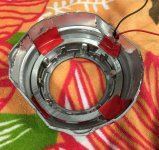
Just to be totally clear, the picture below is the ONE piece you will absolutely want to keep from your OEM lights.

I tried using the TCY "housing" piece and it seemed to work great until after I fully installed in on the truck, at which point I tried to adjust the lights up/down and the plastic adjusters fell apart. It is inferior grade plastic. Re-use the OEM one.

You can either:
* Keep everything OEM except GLASS ---- just swap the glass.
* Use everything on the TYC except the adjustable housing piece (I did this), basically bought a TYC headlight assembly and then (since I had previously thrown away my OEM headlights) I bought just the single "housing" piece from online parts seller for $45 each. Then swapped that piece onto the TYC lights after all the drilling and painting was completed.


THIS ---->


Code:
http://parts.camelbacktoyota.com/partlocator/index.cfm?


:bat:
 

Attachments

  • Screen Shot 2013-08-22 at 9.26.08 AM.png
    Screen Shot 2013-08-22 at 9.26.08 AM.png
    20.4 KB · Views: 1,198
  • Screen Shot 2013-08-22 at 9.25.50 AM.png
    Screen Shot 2013-08-22 at 9.25.50 AM.png
    35.7 KB · Views: 1,190
Last edited:
A question was asked about how to run the wires


Yep. The red wires shown coming out the back are for the high low function.

The wiring harness from TRS includes cables to connect these to. I op-tested the brights but haven't connected them to the harness yet. I didn't really mention that in my report.

I now have so many fracking wires running around my hood that it is a mess.

I plan to do a clean re-visit to my entire electrical setup soon.


1.


Trimming The Shroud So That The Halos Are More Visible


I took the passenger headlight apart and fixed the apollo v2 shroud.
When I first installed the shroud onto the projector, the amber halos became off-center.

I removed the shroud easily because I didn't glue it (instead I originally used 3M tape to attach) and did the following:
a) trimmed the center hole so more light shines out
b) re-epoxied the amble LEDs to the shroud.

----->


Attaching the Halos .... don't glue them. Instead use 3M mounting tape. I left the red attached. Don't glue the shrouds on either, again use mounting tape so you can remove the shrouds down the road.


:bat:
 

Attachments

  • IMG_1901.jpg
    IMG_1901.jpg
    132.7 KB · Views: 1,098
Last edited:

Members online

Forum statistics

Threads
278,316
Messages
3,554,123
Members
248,016
Latest member
Advally Service

Trending content

Back
Top