BrianSD_42
New member
Hey everyone,
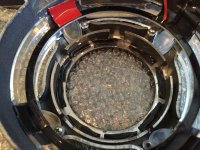
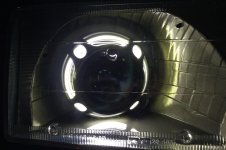
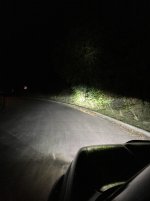
Here is my take on a DIY (or just my journey through it) of how to make 96-02 4Runner Projector Retrofit using the Morimoto (The Retrofit Source) Mini D2S v3.0 with the Panorama shrouds.
Retrofit Specifications:
* Panorama Shrouds
* TRS Morimoto D2S Mini v3 round projectors with stock TRS clear lens
* 35W Morimoto Ballasts
* 5500K Morimoto D2S Bulbs
* New TYC housings with a couple of personal upgrades to make them last
Other specifications notes:
* Housings are slightly modified to fit the retrofit but no major drilling
* Alignment is not an issue since these are (highest quality) bolt on vs FX-R
* Longer breathing tube with cotton filter to keep out dust
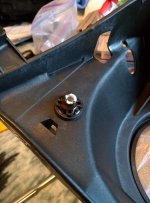
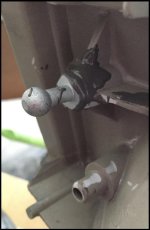
* Large housing screw is JB-Welded in so it won't come loose like mine did
* Silicone glue on some of the components so it stays in place longer and to seal up the electronics
These will be very similar to the ones documented in my DIY retrofit thread. Please read this thread first to understand the process.
* http://www.toyota-4runner.org/3rd-g...it-97-4runner-project-toyota-4runner-org.html
This type of retrofit will stand up to moderate off-roading. Look at my build thread if you want to see the kind of off-roading I've done. They will not survive you driving off a cliff and might not survive jumping multiple feet on the rocks. Still, they are very sturdy and if you follow my thread you'll see I've given my own set a lot of use.
Required tools:
Needle nose pliers
Socket set with 10mm socket
Phillips screw driver
2 Flat Head Screwdrivers
Exacto knife
JB-Weld (Quick)
Clear Silicone
Silver Metal Automotive Tape (its a metal tape you can buy at most auto stores)
3M heavy duty mounting tape
ATTENTION 3 Critical Updates:
1. Reinforcements with JBWeld are required if you have the TYC plastic vs OEM ($39 / side BTW). See post below
2. Fogging. This happens because of a lack of air circulation. The lights need to breath. But you want to keep dust out. I added a third tube and put some cotton and extended the length of the two default tubes. If your lights fog the consider using a shorter length of tube than I did. Maybe only 2" vs 6". Up to you. With the 3rd breathing tube I think it will be fine.
3. JBWeld the shroud to the projector
Although not shown you must put some kind of JBWeld or heavy glue on shroud and the projector. The 3M tape will not hold. I used 3M tape (must be the Grey one not the black, the black mounting tape sucks trust me) and then put JB weld around the outside of the projector where it meets the shroud. Be CAREFUL not to get JBWeld on your lens. That is why I would put it on the projector not the shroud since installing the shroud can be messy. Also (duh) wipe everything with alcohol swabs first and make sure the plastic on the inside of the shroud is sanded down and any loose paint scraped away. I put tape on the inside of the shroud when painting it to prevent overspray then removed the tape.
Note that if you sealed up the light using aluminum tape like I suggested then you will actually be glueing the shroud to the tape and not the projector so it possible to swap out the shrouds down the road, add Halos etc.
Day 1:
* Disassembled the housings
* Baked the lights then took them apart
* Wet scratch pad scuffed up the housings then the Panorama Shrouds
* Taped up the housings, covering up the glue so it isn't painted
* Taped the shrouds, marking them to be cut
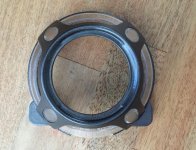
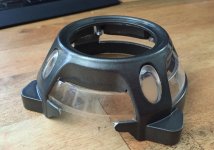
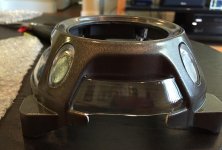
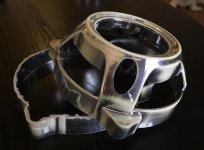
* Broke off the alignment tabs on the Panorama shrouds, they don't fully engage and they let light out. 3M tape will be more than good enough.
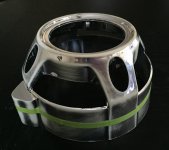
* Used my dremel to cut the Panorma shrouds along the tape line
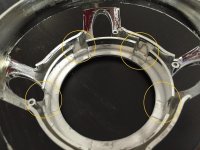
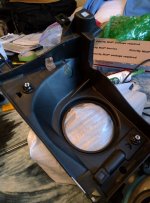
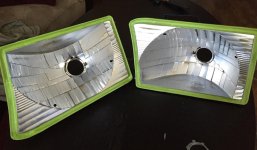
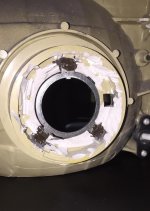
* Used my dremel to cut the light housings as shown
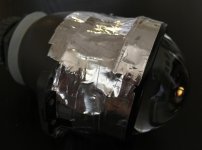
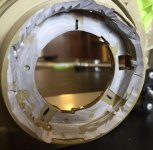
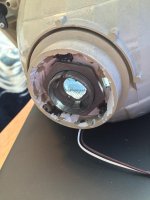
* Sealed up each Mini D2S 3.0 projector with metal tape to remove all light pollution (this took an hour for both BTW)
* Installed bulbs and op tested the projectors with the ballasts on my truck
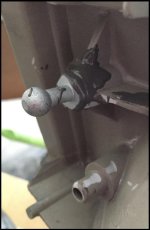
* JB Welded the metal alignment key into the light housing, let it sit for 30 mins then tape over it
* Painted the shrouds, 5 coats (primer 2x, paint 2x, clear 1x)
* Painted the housings, 5 coats (primer 2x, paint 2x, clear 1x)
Note: don't try to install the projectors until 6 hours goes by so that the JB-Weld and the paint both dry properly
Day 2:
* Drilled additional hole in the light housing to run the wires through. Will seal this with silicone later on.
* Assembled the housings by mounting the projector and screwing it together
* Look at the projector in the housing. Align it left/right so that the bottom looks as horizontal/flat with the housing as possible. If you do both lights properly they it will be aligned
* Place small dabs of JB-Weld onto the outside back of the assembled housing so that the big nut stays in place and then on the main projector threads to hold it in place.
* Installed the bulbs (be sure to clean them with an alcohol pad)
* Let the JB-Weld sit at least an hour
* Re-check that the projector is properly aligned one more time, it should be very very tight but you can still move it slightly clockwise/counter which is why we align it and then set the JB-Weld
* Trimmed the shrouds with the dremel tool. The Panorama must have the bottom cut as pictured
* Installed (screwed in) the Panorama clear plastic
* Trimmed the clear plastic at the bottom using an exacto knife so doesn't touch the bottom of the light housing
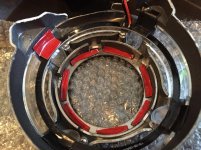
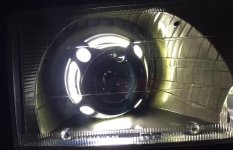
* Installed the LED Halo using 3M mounting tape to hold it in place. You could use epoxy but I've found it will eventually break due to the vibrations vs. mounting tape which holds up and is flexible.
* Ran the wires for the hi-beams and the halo through the extra drilled hole
* Placed 3M mounting tape in small strips on the inside of the panorama shroud now that it is put back together and also trimmed
* Installed the shroud over the projector, the 3M tape will hold it in place
* Clean the lens one last time, clean the inside of the TYC glass
* Put the glass back onto the assembly, bake at 275F for 8 mins, take out, put the metal clips back on.
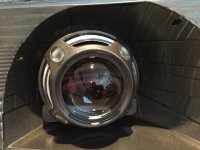
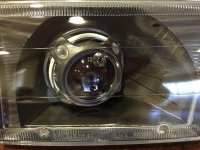
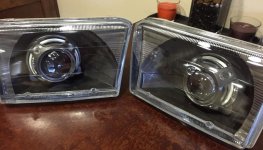
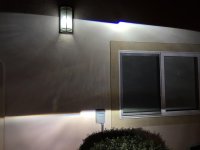
Pictures Below. More information to follow.
Here is my take on a DIY (or just my journey through it) of how to make 96-02 4Runner Projector Retrofit using the Morimoto (The Retrofit Source) Mini D2S v3.0 with the Panorama shrouds.
Retrofit Specifications:
* Panorama Shrouds
* TRS Morimoto D2S Mini v3 round projectors with stock TRS clear lens
* 35W Morimoto Ballasts
* 5500K Morimoto D2S Bulbs
* New TYC housings with a couple of personal upgrades to make them last
Other specifications notes:
* Housings are slightly modified to fit the retrofit but no major drilling
* Alignment is not an issue since these are (highest quality) bolt on vs FX-R
* Longer breathing tube with cotton filter to keep out dust
* Large housing screw is JB-Welded in so it won't come loose like mine did
* Silicone glue on some of the components so it stays in place longer and to seal up the electronics
These will be very similar to the ones documented in my DIY retrofit thread. Please read this thread first to understand the process.
* http://www.toyota-4runner.org/3rd-g...it-97-4runner-project-toyota-4runner-org.html
This type of retrofit will stand up to moderate off-roading. Look at my build thread if you want to see the kind of off-roading I've done. They will not survive you driving off a cliff and might not survive jumping multiple feet on the rocks. Still, they are very sturdy and if you follow my thread you'll see I've given my own set a lot of use.
Required tools:
Needle nose pliers
Socket set with 10mm socket
Phillips screw driver
2 Flat Head Screwdrivers
Exacto knife
JB-Weld (Quick)
Clear Silicone
Silver Metal Automotive Tape (its a metal tape you can buy at most auto stores)
3M heavy duty mounting tape
ATTENTION 3 Critical Updates:
1. Reinforcements with JBWeld are required if you have the TYC plastic vs OEM ($39 / side BTW). See post below
2. Fogging. This happens because of a lack of air circulation. The lights need to breath. But you want to keep dust out. I added a third tube and put some cotton and extended the length of the two default tubes. If your lights fog the consider using a shorter length of tube than I did. Maybe only 2" vs 6". Up to you. With the 3rd breathing tube I think it will be fine.
3. JBWeld the shroud to the projector
Although not shown you must put some kind of JBWeld or heavy glue on shroud and the projector. The 3M tape will not hold. I used 3M tape (must be the Grey one not the black, the black mounting tape sucks trust me) and then put JB weld around the outside of the projector where it meets the shroud. Be CAREFUL not to get JBWeld on your lens. That is why I would put it on the projector not the shroud since installing the shroud can be messy. Also (duh) wipe everything with alcohol swabs first and make sure the plastic on the inside of the shroud is sanded down and any loose paint scraped away. I put tape on the inside of the shroud when painting it to prevent overspray then removed the tape.
Note that if you sealed up the light using aluminum tape like I suggested then you will actually be glueing the shroud to the tape and not the projector so it possible to swap out the shrouds down the road, add Halos etc.
Day 1:
* Disassembled the housings
* Baked the lights then took them apart
* Wet scratch pad scuffed up the housings then the Panorama Shrouds
* Taped up the housings, covering up the glue so it isn't painted
* Taped the shrouds, marking them to be cut
* Broke off the alignment tabs on the Panorama shrouds, they don't fully engage and they let light out. 3M tape will be more than good enough.
* Used my dremel to cut the Panorma shrouds along the tape line
* Used my dremel to cut the light housings as shown
* Sealed up each Mini D2S 3.0 projector with metal tape to remove all light pollution (this took an hour for both BTW)
* Installed bulbs and op tested the projectors with the ballasts on my truck
* JB Welded the metal alignment key into the light housing, let it sit for 30 mins then tape over it
* Painted the shrouds, 5 coats (primer 2x, paint 2x, clear 1x)
* Painted the housings, 5 coats (primer 2x, paint 2x, clear 1x)
Note: don't try to install the projectors until 6 hours goes by so that the JB-Weld and the paint both dry properly
Day 2:
* Drilled additional hole in the light housing to run the wires through. Will seal this with silicone later on.
* Assembled the housings by mounting the projector and screwing it together
* Look at the projector in the housing. Align it left/right so that the bottom looks as horizontal/flat with the housing as possible. If you do both lights properly they it will be aligned
* Place small dabs of JB-Weld onto the outside back of the assembled housing so that the big nut stays in place and then on the main projector threads to hold it in place.
* Installed the bulbs (be sure to clean them with an alcohol pad)
* Let the JB-Weld sit at least an hour
* Re-check that the projector is properly aligned one more time, it should be very very tight but you can still move it slightly clockwise/counter which is why we align it and then set the JB-Weld
* Trimmed the shrouds with the dremel tool. The Panorama must have the bottom cut as pictured
* Installed (screwed in) the Panorama clear plastic
* Trimmed the clear plastic at the bottom using an exacto knife so doesn't touch the bottom of the light housing
* Installed the LED Halo using 3M mounting tape to hold it in place. You could use epoxy but I've found it will eventually break due to the vibrations vs. mounting tape which holds up and is flexible.
* Ran the wires for the hi-beams and the halo through the extra drilled hole
* Placed 3M mounting tape in small strips on the inside of the panorama shroud now that it is put back together and also trimmed
* Installed the shroud over the projector, the 3M tape will hold it in place
* Clean the lens one last time, clean the inside of the TYC glass
* Put the glass back onto the assembly, bake at 275F for 8 mins, take out, put the metal clips back on.
Pictures Below. More information to follow.
Attachments
Last edited: