Brillos Builds

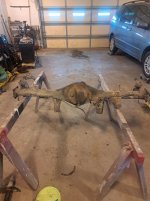
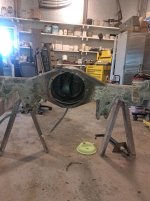
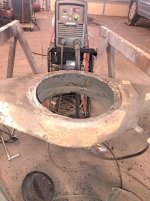
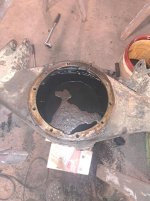
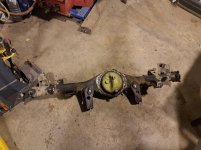
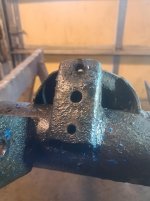
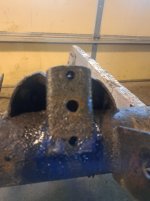
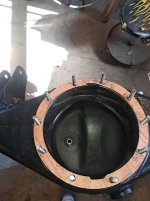
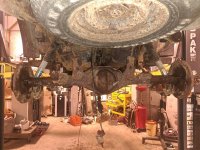
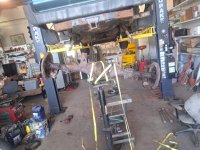
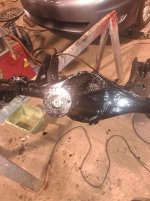
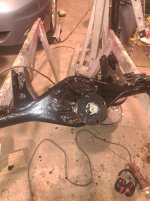
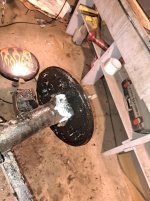
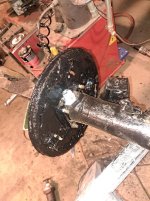
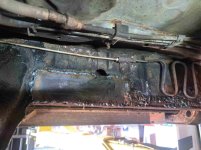
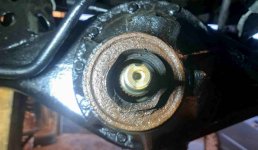
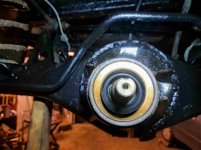
So I got the axle housing out. Plasma cut the rear plate off. Then grinding down the ring so that I can weld on the replacement backing plate. :-)
 

Attachments

  • 4_Axle_Housing_20250706_131822-min.jpg
    4_Axle_Housing_20250706_131822-min.jpg
    134.2 KB · Views: 118
  • 5_Axle_Houding_Fix20250706_131850-min.jpg
    5_Axle_Houding_Fix20250706_131850-min.jpg
    132.6 KB · Views: 118
  • 6__Axle_Housing_Fix_20250706_152902-min.jpg
    6__Axle_Housing_Fix_20250706_152902-min.jpg
    133.8 KB · Views: 118
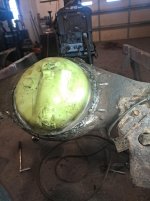
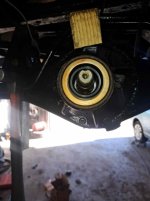
So when I welded the back plate on. Then filled the housing with motor oil to check for leaks.
 

Attachments

  • 7_Axle_Hosuing_Fix_20250706_173208-min.jpg
    7_Axle_Hosuing_Fix_20250706_173208-min.jpg
    131.2 KB · Views: 122
  • 8_Axle_Hosuing_Fix_20250706_193002-min.jpg
    8_Axle_Hosuing_Fix_20250706_193002-min.jpg
    134 KB · Views: 119
Which I expected, it took me 3 passes of welding to get that plate sealed back onto the housing and having zero seeps...:-) This photo was just before painting, but you can see.. I had to significantly beefing up the welds around to get it sealed.. So if you have seeps.. No biggie, grind down the welds and weld again ...
 

Attachments

  • 9_Axle_Hosuing_Repair_20250824_202338-min.jpg
    9_Axle_Hosuing_Repair_20250824_202338-min.jpg
    133.9 KB · Views: 119
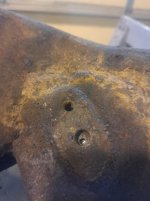
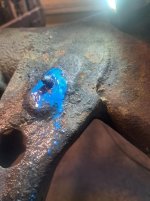
Now, this is axle housing lived its life in the rust belt. So I had 8 bolts that just snapped...So now I just drilled a 1/8 hole in each of these bolts... Starting with a 1/16 bit for a pilot. Then jumped up a few more bits to get a larger hole surface inside the bolts. Once that is completed. I use wax crayons to circle around the bolts to use the wax for 2 purposes. When you weld the bolt hole shut the heat will melt the wax down to the threads. Then 2nd is so i don't weld to the other metal next to the bolt. As its always best to get the old bolt out and clean up the threads, then to completely drill it out and re-tap the bolts which mostly you have to jump up a size or 2 to get good threads again.
So here are a few pictures of me doing the sway bar bolts and other bolts. :-)
 

Attachments

  • Axle_Housing_Repair_20250824_145452-min.jpg
    Axle_Housing_Repair_20250824_145452-min.jpg
    120.6 KB · Views: 120
  • Axle_Housing_Repair_20250824_145445-min.jpg
    Axle_Housing_Repair_20250824_145445-min.jpg
    135 KB · Views: 118
  • Axle_Housing_Repair_20250824_145018-min.jpg
    Axle_Housing_Repair_20250824_145018-min.jpg
    129.8 KB · Views: 121
  • Axle_Horuing_Repair_20250824_145013-min.jpg
    Axle_Horuing_Repair_20250824_145013-min.jpg
    115.6 KB · Views: 118
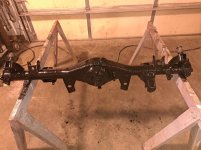
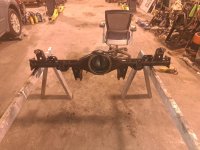
Here is the painted axle housing. I am waiting for the breather gasket and axle seals... I am also modifying the 3rd member studs and nuts. Being in the rust belt. I got 45mm x 8mm X1.25 tap bolts with flanged nuts in Stainless Steel. This is so the bolts don't seize. I also put stainless in the rest of the housing for the same reason. I don't have the bolts yet so I don't have a photo of the completed housing with the nickle copper brake lines and the stainless steel nuts on the brake lines too..
 

Attachments

  • Axle_Housing_Painted_20250825_205418-min.jpg
    Axle_Housing_Painted_20250825_205418-min.jpg
    131.5 KB · Views: 118
  • Axle_housing_Painted_20250825_205429-min.jpg
    Axle_housing_Painted_20250825_205429-min.jpg
    131.3 KB · Views: 118
I guess I'm surprised that the housing to basically container of oil could rust through. Wow.

They rust from the outside in on the housings... The boxed frames go from inside out. Its interesting but what happens. The life in the rust belt. Where you not only fight the chemicals on the roads. You have to fight the freeze thaw ratio that is what gets us here.. That freeze thaw is complete hell on steel with the expansion and contraction of the steel. That really execrates the rot and you throw the salt and melting chemicals in the mix is like using a flame thrower.. Oh well, it what happens in this environment. :-)
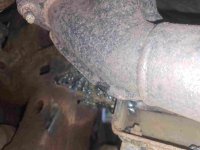
 
My 45mm X8mm X1.25 tap stainless bolts arrived. :-) Along with the my axle seals, breather and 3rd member gasket. So I pulled the old axle gaskets out and put the tap bolts in and set the gasket on. Now ready to pull the the old axle out so I can start the swap out. :-)
 

Attachments

  • Axle_Housing_New_Stainless_Bolts_and_Gaskets_20250830_165204-min.jpg
    Axle_Housing_New_Stainless_Bolts_and_Gaskets_20250830_165204-min.jpg
    127.2 KB · Views: 70
The Rear axle housing being removed. I should have just used the table. So I did not think that one through. Good thing they are not supper heavy and 2 people can move them. :-)
 

Attachments

  • 20250901_011444-min.jpg
    20250901_011444-min.jpg
    138.6 KB · Views: 48
  • 20250901_150138-min.jpg
    20250901_150138-min.jpg
    138.5 KB · Views: 43
Well I got the 3rd member out of the old axle housing. Cleaned up and back into the replacement housing. The 45mm are too long. You can actually use 30 mm Bolts which would make it a lot easier to get the member in. I could
not get the abs out of the old housing which doesn't surprise me at all. So set the axle in and see how the worked. :-) I painted the member and cut the extra off the bolts. Torqued the nuts naturally before painting it all.
 

Attachments

  • 20250902_200818-min.jpg
    20250902_200818-min.jpg
    131.2 KB · Views: 276
  • 20250902_200823-min.jpg
    20250902_200823-min.jpg
    134 KB · Views: 274
Got the dust shields cut off as there was nothing left of them. Then just painted the outside of the back plates as I wait for the new replacement nuts.
Granted its a lot easier to clean the body panels with the rear axle out Along with the frame. :-)
 

Attachments

  • 20250903_200541-min.jpg
    20250903_200541-min.jpg
    133.4 KB · Views: 221
  • 20250903_200548-min.jpg
    20250903_200548-min.jpg
    137.3 KB · Views: 221
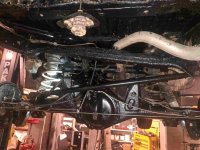
I did get the rear axle back in along with the gas tank. :-)

However, for whatever reason. I currently can't add compressed images to my thread. Seems to be a firefox web browser issue. Chrome works so I added the photos.. There is the rear axle and gas tank with skid back in the rig. :-)
 

Attachments

  • jpeg-optimizer_20250930_202730-min.jpg
    jpeg-optimizer_20250930_202730-min.jpg
    99.1 KB · Views: 179
Last edited:
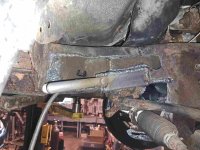
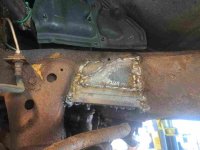
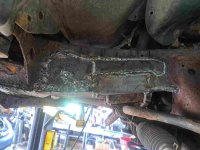
Now I am plating the rest of the frame that needs repaired due to the Rot that the rust belt keeps on giving me. There is an 1/8 plate angle behind the front section. Not much metal there but with the angle in there and welded in it will be stronger now. I didnt grind the welds down or paint it yet.
 

Attachments

  • jpeg-optimizer_20251005_135520-min.jpg
    jpeg-optimizer_20251005_135520-min.jpg
    91.8 KB · Views: 183
Last edited:
So, because I don't have seal press that will push seals in with shafts in them. This is what happened my first try. Yes, I do make mistakes. Good thing the seals are reasonable. :-)
 

Attachments

  • Bad_Seal_Install.jpg
    Bad_Seal_Install.jpg
    94.4 KB · Views: 180
So on these styles of seal. If you don't have the seal press like I don't, I used a piece of wood. Taking my time. Just giving it a little tap tap tap... That is definitely a lot better seal installation...:D
 

Attachments

  • Correct_Pinon_Seal.jpg
    Correct_Pinon_Seal.jpg
    92.1 KB · Views: 182
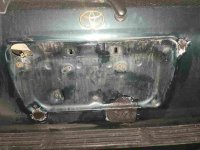
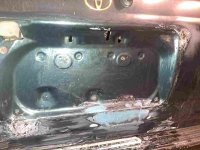
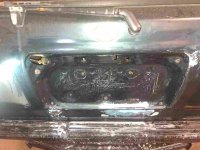
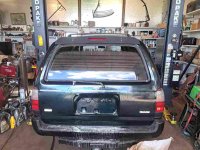
The Lift gate repair. Looks a lot better then a hole in it.​
 

Attachments

  • 20251022_120446.jpg
    20251022_120446.jpg
    40.9 KB · Views: 150
  • 20251025_173352.jpg
    20251025_173352.jpg
    45.6 KB · Views: 152
  • 20251026_140022.jpg
    20251026_140022.jpg
    45.7 KB · Views: 153
  • 20251026_160225.jpg
    20251026_160225.jpg
    58.7 KB · Views: 157
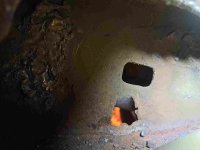
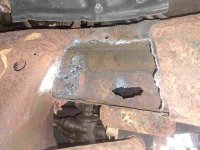
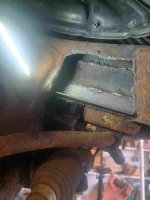
The frame needed repaired the front arches needed metal.. The rear frame is all plated in this rig. So I just rebuilt the front arches. The passenger side first. Then the drivers side​
I expect 5 years or so then I have to replace the frame. Which I have but need swap a few around. Then take one of those other frames and replace this one.
 

Attachments

  • 20251028_180844_1_11.jpg
    20251028_180844_1_11.jpg
    100.3 KB · Views: 147
  • 20251028_184832_2_11.jpg
    20251028_184832_2_11.jpg
    54.5 KB · Views: 153
  • 20251102_125345_3_11.jpg
    20251102_125345_3_11.jpg
    93.1 KB · Views: 156
  • 20251102_125430_5_11.jpg
    20251102_125430_5_11.jpg
    67 KB · Views: 153
  • 20251102_125442_1_11.jpg
    20251102_125442_1_11.jpg
    52.1 KB · Views: 149
  • 20251102_134720_2_11.jpg
    20251102_134720_2_11.jpg
    39 KB · Views: 151
  • 20251102_143129_3_11.jpg
    20251102_143129_3_11.jpg
    45.5 KB · Views: 149
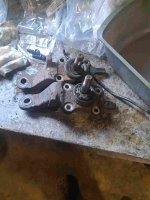
Last but not least. Was the replacement calipers and rotors.. along with replacement lower ball joints. Those were the old ones with one looking aftermarket and the other original 220K on the clock​
 

Attachments

  • 20251108_110353_4.jpg
    20251108_110353_4.jpg
    52.2 KB · Views: 150

Members online

Forum statistics

Threads
278,310
Messages
3,554,080
Members
248,016
Latest member
Advally Service

Trending content

Back
Top