Broken plastic electrical connector. OEM replacements? *Pic*

I picked up a similar tool kit.


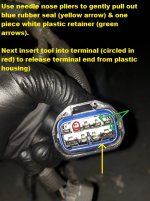
From what I saw on youtube, it seems like to depin this connector, you first pull out the white plastic retainer circled in yellow in the first pic using needle nose pliers, then insert the depinning tool so it slides underneath the small plastic tab that is resting on top of the metal terminal, in the 2nd pic circled in red, to release the terminal correct?
Yes! The only resistance should be the wire seal on the back of the housing. Any old pick should be able to move the locking tab, as it is right there. Go pin by pin (remove, insert into correct pin on new connector, continue) to avoid mistakes.

-Charlie
 
I had a lock tab break so I just put a little RTV on the plug, only a small spot to hold the plug in place but able to remove if needed.:zoom:
 
I use Findpigtails.com at work for any connector that the dealer doesn't offer or when I don't want to replace a complete harness. Yes they are expensive, but they come ready to solder to the existing wiring and then plug in.
 
Kinda off-topic and kinda not, does anyone know what kind of pins Toyota used for their wiring harnesses?

A whole ton of different manufactures. Some sumitomo, yazaki, and furukawa connectors and pins that I know of. Maybe some other manufactures might be mixed in there. I know there might be some others, I also used some Japanese motorcycle connector company called eastern beaver. I'll look for the link, got a lot of mazda DIY COP connector stuff from them.

Connectors
 
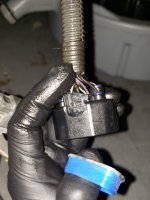
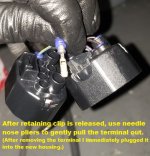
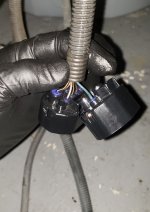
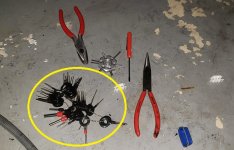
Pics below depinning the park neutral position switch terminals & repinning into new housing. This was pretty quick & easy to do BUT I destroyed my original plastic housing because each time I inserted the tool to release the terminals the plastic would break apart. Not an issue in my case because I was replacing it with a new one since the original one was already broken. It was probably a combination of the old brittle plastic and my lack of experience depinning electrical terminals. The tool circled in yellow (last picture) worked better than the hex shaped lisle tool above it.
 

Attachments

  • electrical connector face.jpg
    electrical connector face.jpg
    97.2 KB · Views: 1,254
  • electrical connector rubber seal.jpg
    electrical connector rubber seal.jpg
    82.3 KB · Views: 1,293
  • electrical connector replacement 1.jpg
    electrical connector replacement 1.jpg
    84.4 KB · Views: 1,310
  • electrical connector replacement 2.jpg
    electrical connector replacement 2.jpg
    69.5 KB · Views: 1,244
  • electrical connector tool.jpg
    electrical connector tool.jpg
    115.5 KB · Views: 1,240
Pics below depinning the park neutral position switch terminals & repinning into new housing. This was pretty quick & easy to do BUT I destroyed my original plastic housing because each time I inserted the tool to release the terminals the plastic would break apart. Not an issue in my case because I was replacing it with a new one since the original one was already broken. It was probably a combination of the old brittle plastic and my lack of experience depinning electrical terminals. The tool circled in yellow (last picture) worked better than the hex shaped lisle tool above it.
How do you like that tool with all.the different size depinning options?. I know mine comes in handy. :)

Sent from my SM-J337V using Tapatalk
 
I liked it much better than the lisle tool because it had a lot more size options to fit into the terminals.
 
Reviving this thread. Anyone know if that part # worked out? Smashed my electrical connection on my E locker today… :trophy:
 

Members online

Forum statistics

Threads
278,310
Messages
3,554,079
Members
248,016
Latest member
Advally Service

Trending content

Back
Top