Changing of the guard: SR5 to the Metal Tech TE

Be interesting to hear your opinion on the gearing now that you down sized the tires.


He's going to tell you it kicks ass.

Just get your gears and lockers, the sooner you do, the less time and miles you will have to regret not having them. I should have listened to Harper7 when he first told me, but I was hesitant to spend the $2400 (I only needed 1 locker). If I were to start from scratch again, it would be my first mod and I would put everything else off, even at twice the price.
 
He's going to tell you it kicks ass.

Just get your gears and lockers, the sooner you do, the less time and miles you will have to regret not having them. I should have listened to Harper7 when he first told me, but I was hesitant to spend the $2400 (I only needed 1 locker). If I were to start from scratch again, it would be my first mod and I would put everything else off, even at twice the price.


I know I know. I need to stop procrastinating.
 
I know I know. I need to stop procrastinating.
Unless it will put you in a financial bind, do it. I promise you will freaking love it.

BTW, were you in Moab in January-March of 2013? I saw a silver 5th gen there with a rear bumper and swing out, when at the time, there were no production ones for sale, as far as I know.
 
Unless it will put you in a financial bind, do it. I promise you will freaking love it.


BTW, were you in Moab in January-March of 2013? I saw a silver 5th gen there with a rear bumper and swing out, when at the time, there were no production ones for sale, as far as I know.


Nope never been. I would like to head out there though.
 
New look

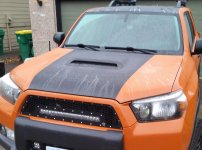
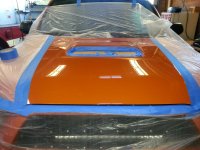
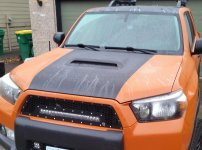
plasti-dipped the hood yesterday. Second attempt. The edging was the issue the first time I let it dry before I pull the tape. Oops. This is also to try to alleviate the glare I get off the hood at different angles of the Sun.
 

Attachments

  • 20141212_092046~2.jpg
    20141212_092046~2.jpg
    123 KB · Views: 715
plasti-dipped the hood yesterday. Second attempt. The edging was the issue the first time I let it dry before I pull the tape. Oops. This is also to try to alleviate the glare I get off the hood at different angles of the Sun.

If that doesn't work out, vinyl works well.
 
looked at vinyl but wanted to try this... and alot cheaper. Now that I've done it, its easy and can be retouched easily. Youtube had alot of good vids about application:peace:
 
Platidip hood

Had a request to do a write up about this so here goes:
I did the dipping to cut the glare off the hood I have experienced. I considered vinyl wrap but came across some youtube vids by dipyourcar.com and decided to give it a try.

-Couldn't figure out how to caption the pictures so here goes
-Cleaned the surface
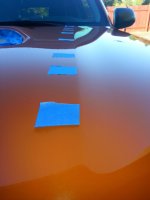
-I used the tape pieces to get the edge curve then taped the edge
-Used plastic to cover the truck
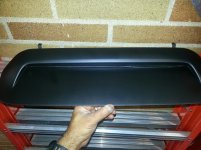
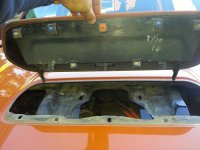
-removed the scoop and painted it first
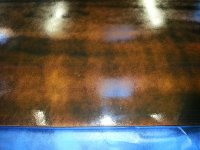
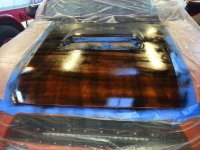
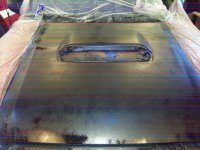
-followed www.dipyourcar.com video instructional to lay down 5-6 LIGHT coats on the center part of the hood first (its easy to go too thick and get drip or rough surface texture, patience)
-letting each coat dry before applying the next, avoiding the edges for now (pic #6 was my first attempt, went to the edges, it dried and the edges pulled up: don't do that!)
-Then I focused on the edges (theres a vid about edging) 5-6 coats but don't let them dry in between. Careful no to go too thick here. Practice first. Once you have good coverage then peel the tape off a sharp angle to get a good edge.
-The only problem I had was that the edges (about 3-4" from the edge) look smoother and wetter than the center which has a flat/duller look. That's due to application technique (or lack of)
The end result worked, I think it looks good for now and when I (or the wife) get tired of it it peels off easily (I know this from the 2 previous attempts ;) )
 

Attachments

  • image (5).jpg
    image (5).jpg
    135.5 KB · Views: 785
  • image (3).jpg
    image (3).jpg
    125.5 KB · Views: 787
  • image (10).jpg
    image (10).jpg
    126.5 KB · Views: 788
  • image (11).jpg
    image (11).jpg
    128.8 KB · Views: 786
  • image (12).jpg
    image (12).jpg
    136.2 KB · Views: 777
  • image (7).jpg
    image (7).jpg
    134.6 KB · Views: 810
  • image (2).jpg
    image (2).jpg
    134.3 KB · Views: 793
  • PDHood.jpg
    PDHood.jpg
    123 KB · Views: 800
Last edited:
So, you got a clean edge using painter's tape? I didn't think P-D did that - like it didn't separate well from the tape edge, or some-such.

Looks great!
 
Last edited:
So, you got a clean edge using painter's tape? I didn't think P-D did that - like it didn't separate well from the tape edge, or some-such.


Looks great!


If you pull it while it's still wet you can a get chance of it coming out alright
 
"Then I focused on the edges (theres a vid about edging) 5-6 coats but don't let them dry in between. Careful no to go too thick here. Practice first. Once you have good coverage then peel the tape off a sharp angle to get a good edge.
-The only problem I had was that the edges (about 3-4" from the edge) look smoother and wetter than the center which has a flat/duller look. That's due to application technique (or lack of)
The end result worked, I think it looks good for now and when I (or the wife) get tired of it it peels off easily (I know this from the 2 previous attempts ;)"
 
How are you liking the LT +2 front end? I am thinking of waiting to rebuild my shocks and do Lower Control arms up front and decide if i want LT. Probably go with the Metal Tech LT rear to match. Then that should conclude my suspension setup.
 
How are you liking the LT +2 front end? I am thinking of waiting to rebuild my shocks and do Lower Control arms up front and decide if i want LT. Probably go with the Metal Tech LT rear to match. Then that should conclude my suspension setup.

2". When I talked to LT, he said they would have gone 3.5" if they had been planning to put fenders on. As it is, they ate at least one fender running the 35s and 2" LT kit. http://www.toyota-4runner.org/metal-tech-4x4/114946-metal-tech-4x4s-2011-trail-team-4runner.html
 
Latest mod: Hi Lift mounting

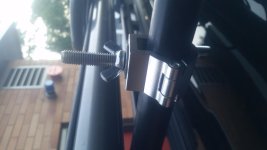
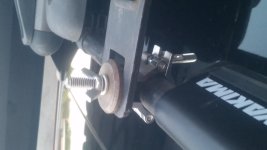
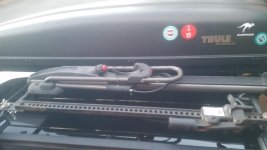
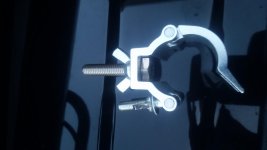
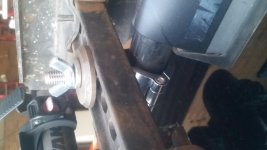
Finally:whoo: found a way to mount my i Lift onto my Yakima bars. I had to move the bars (48") over to allow for the box to be all the way over to the passenger side and allowing enough room for the jack and bike rack. I used TRUSST CLP35HC clamps found on Amazon for $10 each. I used a couple of heavy duty washers I had and longer grade 10.5 bolts. My only concern is using the top of the jack's attachment being the bolted on "eye". I may bring the bars close enough to use the beam as the anchor points for the clamp bolts to go through. Let me know if any of you have any thoughts.(:frusty: I didn't know how to shrink to pics down or to rotate them, they were straight when I downloaded the files)
 

Attachments

  • 20150819_195218.jpg
    20150819_195218.jpg
    103.9 KB · Views: 416
  • 20150819_200425.jpg
    20150819_200425.jpg
    123.8 KB · Views: 413
  • 20150819_195120.jpg
    20150819_195120.jpg
    112 KB · Views: 402
  • 20150819_200420.jpg
    20150819_200420.jpg
    113.2 KB · Views: 412
  • 20150819_200305.jpg
    20150819_200305.jpg
    117.9 KB · Views: 401

Members online

Forum statistics

Threads
278,317
Messages
3,554,129
Members
248,016
Latest member
Advally Service

Trending content

Back
Top