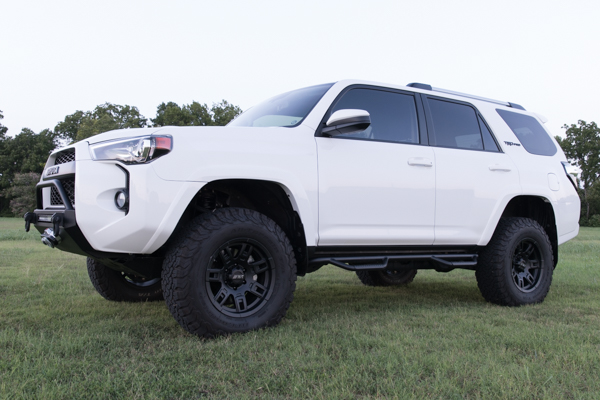
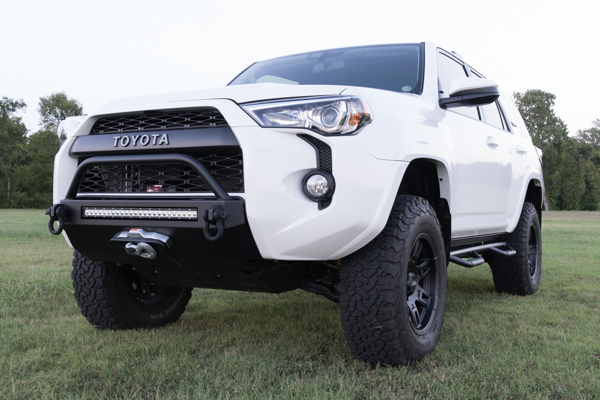
Chudiddy- Inferno TRD PRO Build

Well done on the marker light install.

Its funny working at the Toyota dealer and having my car in the parking lot. There have been many offers made on my truck. Some lowball, some legit, but mostly lookers. I did get one legit offer from the boss of my best friend who does all the work on my truck. He owns the railroad here locally and is a gagillionaire. He offered me $60K cash for my truck but I refused. He happened to make the offer right after I got my truck back after having all the work completed and I just wasn't ready to let go of it. In hindsight, I probably should have taken it and most would call me a dumb ass but I am in love with this truck. For one, they don't make the inferno anymore and two, I am quite certain I can drive this for another few years and still get a huge return on my investment. In any regard, I don't regret my decision.
 
Had the [MENTION=131444]C4 Fabrication[/MENTION] sliders installed for about a week now. Just getting around to posting some pics of them. I think they turned out great and i'll say it again...the sliders and the fuel tank skid are a work of art. They are beefy and look amazing. I 100% recommend them. Enjoy the pics.

Any chance of water getting inside around those screws?​
 
Just a quick update.

After my recent trip to Rausch Creek, it seems the suspension has finally settled and has softened the ride up quite a bit. I actually like this as the ride is not as stiff anymore. I am still very happy with the spacer lift, I think it compliments the TRD suspension nicely. For the serious off-roader however, it probably wouldn't suffice.

When I upgraded to the 285's, I got quite a bit of rubbing. Even worse after Rausch Creek. I recently did the body chop mount mod on both sides and now I have absolute no rubbing whatsoever. I'll try and post some pics but you can hardly tell anything was modified.

There's really nothing else I have planned to do except make more trips off road.
 
I picked up the MT Sidebiters that I tried to tempt you with a while back. I think they look good.

mudpie-albums-mt+sidebiter+ii-picture41627-mickey-thompson-sidebiter-ii-17x9-bfg-ko2s-285-70-17.jpg


mudpie-albums-mt+sidebiter+ii-picture41626-mickey-thompson-sidebiter-ii-17x9-bfg-ko2s-285-70-17.jpg


Front end sag and braking dive wore me down with the ToyTec spacer kit so I opted for the OME Nitrocharger Sport strut and mid-weight spring to bring everything to a balance. Ride is still good, just a touch stiffer.
 
Hey Chudiddy, when you got your GOBI Stealth rack, did it come pre tabbed for the forward and rear facing light bars. Also did you go with the fixed or movable crossbars?

Thanks in advance

Hi, yes when I ordered the rack I told them what lights I was putting on and they pre fabbed the brackets. Crossbars are fixed.
 
Really wanted to do this, but realized that the Limited grill has the Toyota emblem in the way that would impede adding 3 lights....ugh

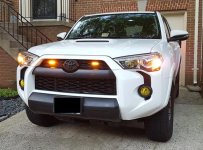
Thanks for chudiddy amber light idea. I installed it on my TE, it looks pretty good too at night!
 

Attachments

  • runner2.jpg
    runner2.jpg
    53.8 KB · Views: 2,481
Which rear bumper is that? It is hard to tell as most only show pics with swing arms on them and I definitely havent really looked at all of them. Hell I am still trying to save up just to do the front bumper. I am doing the SS slim with Loop, have to bu a new light br probably. Rigid 28: E2 if it will fit, and a Warn Zeon. That shit right there is 3k easy. Hard to do when I am sending off my Glocks to Agency Arms to get a make over.. To loves and they will break you Firearms and Trucks. Either have a damn good job with good income or a well paying sugar momma. Not this military retirement stuff. By the time I am able to save up to get everything done it will be damn near 10 years old.... Haha

Did my own. Marker light mod then I saw you put them beihind the grill may have to steal this idea. Looks cleaner than the front
will take some photos of my wiring and connections for others.

Also sent you. Pm asking some other questions..
 
Last edited:
Good find....ill have to get a set of these. Thanks!!

I'm obviously well behind on commenting on this... but I had one of these to secure the spare on my JK (back when I had it) and these do not handle well being exposed to the elements. It probably could have used some WD40 but after being on there for two years, the lock seized up and I broke my key trying to unlock it. Just my .02
 
Which rear bumper is that? It is hard to tell as most only show pics with swing arms on them and I definitely havent really looked at all of them. Hell I am still trying to save up just to do the front bumper. I am doing the SS slim with Loop, have to bu a new light br probably. Rigid 28: E2 if it will fit, and a Warn Zeon. That shit right there is 3k easy. Hard to do when I am sending off my Glocks to Agency Arms to get a make over.. To loves and they will break you Firearms and Trucks. Either have a damn good job with good income or a well paying sugar momma. Not this military retirement stuff. By the time I am able to save up to get everything done it will be damn near 10 years old.... Haha

Did my own. Marker light mod then I saw you put them beihind the grill may have to steal this idea. Looks cleaner than the front
will take some photos of my wiring and connections for others.

Also sent you. Pm asking some other questions..

Steve, this is the CBI Rear Bumper. I opted not to get the swing out just because I need access to my trunk quite often. The rigid E2 28 is exactly what I have in the front bumper, took a plasma cutter to extend the length but the height fit perfect. I cut about and inch off on each end to fit it but it came out perfect.
 
Steve, this is the CBI Rear Bumper. I opted not to get the swing out just because I need access to my trunk quite often. The rigid E2 28 is exactly what I have in the front bumper, took a plasma cutter to extend the length but the height fit perfect. I cut about and inch off on each end to fit it but it came out perfect.

Thanks. I like the looks of it. Have used swing outs before. I like the ones that open automatically with a swinging door. But they become problematic with the regular ones and two armed swingouts. Especially with regular use, they tend to stick out a good bit when parking and doing every day stuff. Though on the positive side they do provide an excellent platform for mounting items.


IE the SS Bumper and the 28 Rigid E2. "Height fit perfect" that is the regular cut that SS had on the bumper? They will not cut out the bumper to 28 due to the welds with the tubular bar and the mounting points for the recovery anchors. They also said bends and welds prevent them form cutting any larger than they do. I take it that they cut the bumper pre production. Not after the bumper is assembled and it prevents them from being able to cut it out. Without having the skill or anyone with a plasma cutter being able to cut it out I may be forced to use a single instead of double led light bar. It is unfortunate.
 
Thanks. I like the looks of it. Have used swing outs before. I like the ones that open automatically with a swinging door. But they become problematic with the regular ones and two armed swingouts. Especially with regular use, they tend to stick out a good bit when parking and doing every day stuff. Though on the positive side they do provide an excellent platform for mounting items.


IE the SS Bumper and the 28 Rigid E2. "Height fit perfect" that is the regular cut that SS had on the bumper? They will not cut out the bumper to 28 due to the welds with the tubular bar and the mounting points for the recovery anchors. They also said bends and welds prevent them form cutting any larger than they do. I take it that they cut the bumper pre production. Not after the bumper is assembled and it prevents them from being able to cut it out. Without having the skill or anyone with a plasma cutter being able to cut it out I may be forced to use a single instead of double led light bar. It is unfortunate.

Yes the cut for the single row led that they include is the correct height for the E2 Rigid 28. I was fortunate enough that my friend had both a plasma cutter and the knowledge to use it to fit the 28 E2. Huge difference.

21151249013_2fc0e55f17_c.jpg
 
Location of wires to tap

24386767165_3ce3c93629_c.jpg


Ok so since the most common question regarding my truck has been the 3 Amber Lights in my grill, I thought I would do a quick, simple write up on what was used, how they're mounted, and how they're wired. Its actually more simple then what people think.

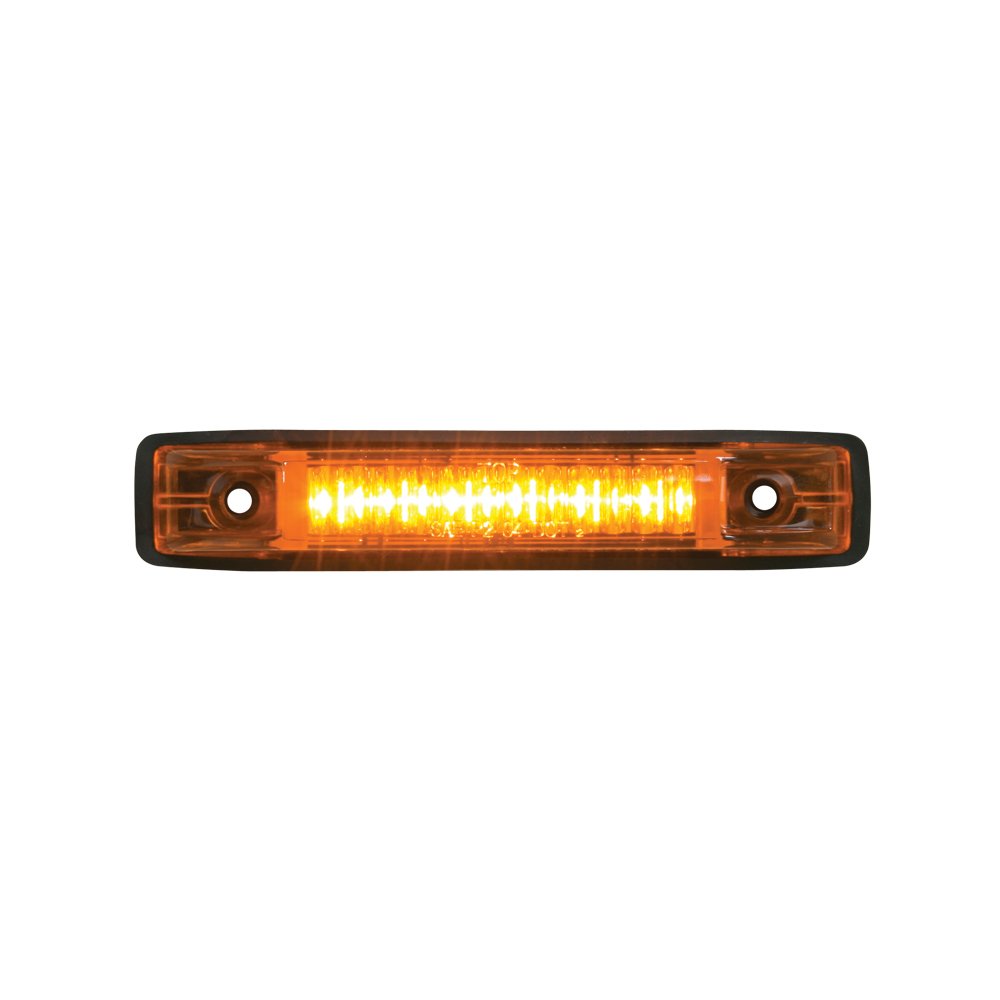
First off these are the Amber Marker lights I chose:

51NUVG5eG0L._SL1000_.jpg


Amazon.com: Grand General 77650 Amber Thin Line 6-LED Marker and Clearance Sealed Light: Automotive

The next part pertains to installs for the TRD Pro grill: What we ended up doing was trimming the plastic ribs that extended off the main body of each marker light. That way they fit in each opening of the TRD PRO grill. A bench grinder was used to do this although i'm sure a dremel would work as well.

Ok next is the hardest part:

25093604936_b53756ba85_c.jpg


24493103453_66441af365_c.jpg


The marker lights are simply attached to the grill using zip ties. Simple, yet effective. That's it!!

As far as wiring goes, the marker lights are wired in parallel. Take all the red (positive +) from each marker lights and wire them together. Do the same thing with all the black (negative -) wires and wire them together. Then take each red and black wire and tap in to the corresponding (+) and (-) parking light wires. Solder them up, wrap them in electrical tape, and VOILA...you're done.

You do not want to wire these LED's in series, there will be a drop in voltage if you do this and won't be as bright.

Enjoy!!​

Can you please post a picture and location of the wires that you tapped?
 
24386767165_3ce3c93629_c.jpg


Ok so since the most common question regarding my truck has been the 3 Amber Lights in my grill, I thought I would do a quick, simple write up on what was used, how they're mounted, and how they're wired. Its actually more simple then what people think.

First off these are the Amber Marker lights I chose:

51NUVG5eG0L._SL1000_.jpg


Amazon.com: Grand General 77650 Amber Thin Line 6-LED Marker and Clearance Sealed Light: Automotive

The next part pertains to installs for the TRD Pro grill: What we ended up doing was trimming the plastic ribs that extended off the main body of each marker light. That way they fit in each opening of the TRD PRO grill. A bench grinder was used to do this although i'm sure a dremel would work as well.

Ok next is the hardest part:

25093604936_b53756ba85_c.jpg


24493103453_66441af365_c.jpg


The marker lights are simply attached to the grill using zip ties. Simple, yet effective. That's it!!

As far as wiring goes, the marker lights are wired in parallel. Take all the red (positive +) from each marker lights and wire them together. Do the same thing with all the black (negative -) wires and wire them together. Then take each red and black wire and tap in to the corresponding (+) and (-) parking light wires. Solder them up, wrap them in electrical tape, and VOILA...you're done.

You do not want to wire these LED's in series, there will be a drop in voltage if you do this and won't be as bright.

Enjoy!!​

Love the LEDs. I'm going add this mod to my truck. Rather than wire to the parking lights, what can I tap into to keep it on as long as the truck is started? The harnesses to the lights are a bit tricky to get to.
 
Love the LEDs. I'm going add this mod to my truck. Rather than wire to the parking lights, what can I tap into to keep it on as long as the truck is started? The harnesses to the lights are a bit tricky to get to.

It is easier to tap into the parking lights, you can grab it right from either side. If you want it on constantly then you have to connect to ignition which would be more difficult. Hope that helps.
 

Members online

Forum statistics

Threads
278,316
Messages
3,554,120
Members
248,016
Latest member
Advally Service

Trending content

Back
Top