COB's 1990 4Runner 2-Door

In the 9 years that I've been a member of this forum, this is probably one of the few times I've ever actually perused the 1st & 2nd Gen section. I've got a 3rd gen. But dude. This was an awesome read. It's not even my build but I feel so excited for you! Sounds like it's been quite the journey finding this thing and tearing it down and building it back up the way you envision. I hope one day I can do the same thing too. But for the meantime I'm gonna keep on driving my 01 until the wheels fall off it.

Sent from my SM-S908U using Tapatalk
 
Shot COB: I didn't even get through the first post and thought, "I recognize that driveway from a Supra build..."

Sure enough. Great finds and great projects. The revival of the paint is awesome! Our 1st gen's paint is not nearly in as good of shape as your 2nd gen. I did try to wash/clay/polish a small section and it'll look better, but not as deep as your red.

You keep finding these gems: Any odds of a non-roached tailgate for a 1st gen?? I find them, roached out, but still $500.
 
Good to see you're still around! The fleet looks fantastic as always.

I'm jealous of that find, a now running 2 door 4x4 2nd Gen for $1800 is great. The interior looks about perfect also, and she's shining up really well.

I've been wanting to get a 1st/2nd gen project but everyone wants way too much around here it seems. I went to look at a couple partial 3.4 swapped 2nd gens a couple weeks ago but they were not as clean as the pictures led me to believe.

How did the 3rd gen do towing the 2nd gen on the U-Haul dolly? I've got a 4th gen V6 now that I could use to tow, but I'm still hesitant to put the weight of another 4runner behind it.

Hey Unner! It’s been a long time! I still see your posts on IG, man that MK3 is a beauty. Have you ever considered taking it to Supras In Vegas? A lot of cars get trailered if mileage is a concern.

I believe had the 2-door been any closer to CA that it’d have been gone quickly. Boise ID was far, just far enough that it was out of reach for most CA buyers, but not impossibly far for the right person. Helped that he didn’t actually write “2-door” in the ad. Not sure how big the 4Runner crowd is in Boise, but that rig took 2 months to sell.

It’s hard for me to blame any 4Runner owner for wanting a lot for their rigs, but I see where you’re coming from. Some guys really have an inflated idea of value, or fail to see how major issues could affect the value. It’s miserable when you show up to a purchase and find it misrepresented online. Sorry that happened to you.

The 3rd gen is, of course, not the proper weight for this towing situation, it was certainly overloaded, but it is manageable with caution. This is at least my 4th time towing another 4Runner with a 3rd gen and I wouldn’t entirely recommend it if better options are available. I will venture to say that we have a 4th gen V6 that does a better job towing, used it to tow my 94 Supra on a 2-axle trailer as well as a 16 foot flatbed, it is certainly better suited than the 3rd gen, but still not quite as good as a V8 Tundra or a V8 4th gen would be.

DAMN, COB!!! "Patches" and I are so Jealous! I would love to be your neighbor! My brothers lived off of Benidorm & Aliso, many years ago. My old girl (1990 2D, built in Japan, in JUL 89)has 523K on the clock, with the 3.Slow. I wish I had a roof rack and spoiler, but one can't have it all! I SO look forward to following your posts!

Patches is a beauty! Love the white on a 2-door. Mine is also an 89 baby, born in September. I think I prefer it without the rack to be honest! Something about having a smooth roof with no holes or filler strips looks pretty cool.

523K?! Holy bologna. Impressive. Mine’s not even at half that yet lol. Gotta love the durability of these old Toyotas.

Thanks for checking out my build and I hope to keep you entertained!

Nice find! Wish I could have gotten that! My new 3rd gen sure is nice though

You made the right call by a longshot. 3rd gens are the best. Congratulations on the new rig.

So glad to see your still saving theses rigs.

Hey Chris in the Super Duty rock crawler!! Dude!! This was your first post in 4 years! I remember seeing your posts every day. Time sure flies. You still have any of your 4Runners?

I still have that shifter trim you gave me all those years ago.

This is awesome! Where state is the transmission at now?

Thanks Jeff! Manual transmission is just sitting in wait.

There’s an issue getting AISIN clutches apparently. Seems they have been on backorder for months. Marlin’s out of HD clutches too.

I got a 3.4 flywheel and was hoping to get a new AISIN CKT-040 clutch to go with it. Those are out of stock, too.

Worst case, I have a 3.0 flywheel with a used clutch.

In the 9 years that I've been a member of this forum, this is probably one of the few times I've ever actually perused the 1st & 2nd Gen section. I've got a 3rd gen. But dude. This was an awesome read. It's not even my build but I feel so excited for you! Sounds like it's been quite the journey finding this thing and tearing it down and building it back up the way you envision. I hope one day I can do the same thing too. But for the meantime I'm gonna keep on driving my 01 until the wheels fall off it.

Thanks for checking it out. It’s a fun way to build a car. Makes for a good story and gives it some character.

I see you are a man of taste, it is always best to have at least one 3rd gen before building a side project 4Runner. Sounds like you’re half way to glory lol. You can drive the 3rd gen all you want, but unless you’ve got bad ball joints, I’ll bet the wheels will stay on it lol.

I built my second 4Runner, an ’87 turbo, while daily driving my 3rd gen. Similar to the 2-door here, it was an immediate teardown, followed by a motor build, manual swap, suspension refresh, etc… a solid 3rd gen makes the dream possible

Shot COB: I didn't even get through the first post and thought, "I recognize that driveway from a Supra build..."

Sure enough. Great finds and great projects. The revival of the paint is awesome! Our 1st gen's paint is not nearly in as good of shape as your 2nd gen. I did try to wash/clay/polish a small section and it'll look better, but not as deep as your red.

You keep finding these gems: Any odds of a non-roached tailgate for a 1st gen?? I find them, roached out, but still $500.

On a 4Runner forum, no less, lol. My dearly beloved 94 Supra, I miss it dearly. It’s been just over 5 years since the restoration started. Two more weeks until the new turbo is here. Soon it will drive again.

After sticking both 1st and 2nd gen 4Runners together, it’s evident that the 1st gen is a darker red than the 2nd gen’s Cardinal Red. Maybe that’s got something to do with it. Those single stage paints are easy to work with so I’m sure you can get some depth as long as there’s some solid paint left. Meguiar’s products seem to do the trick for me.

$500 for a roached tailgate? Holy cow. I recall the hunt for parts being scarce even 5+ years ago. Haven’t seen one in the junkyard in years now. Sounds like we are officially paying the rarity tax :( I have a lead on some doors and other misc parts, no tailgates though.


Awesome! Thanks for the new tread. Cool project. Can't beat that engine / supercharger deal.

Thanks Cali 4runner. Right? $280 overall is basically free in today’s market. Gonna take some money to fix them up, still worth it though.
 
New license plates showed up.

Front bumper looks like it took a hit on the lower left section of the valance. Bumper is pushed upward on the left side overall. Don’t know if the valance will straighten out easily, the but the level overall should be easy to adjust.

I have a 92-95 front bumper and debating installing it instead.

52399211203_c0a371b9dc_b.jpg


52399005554_bb89d4b940_b.jpg


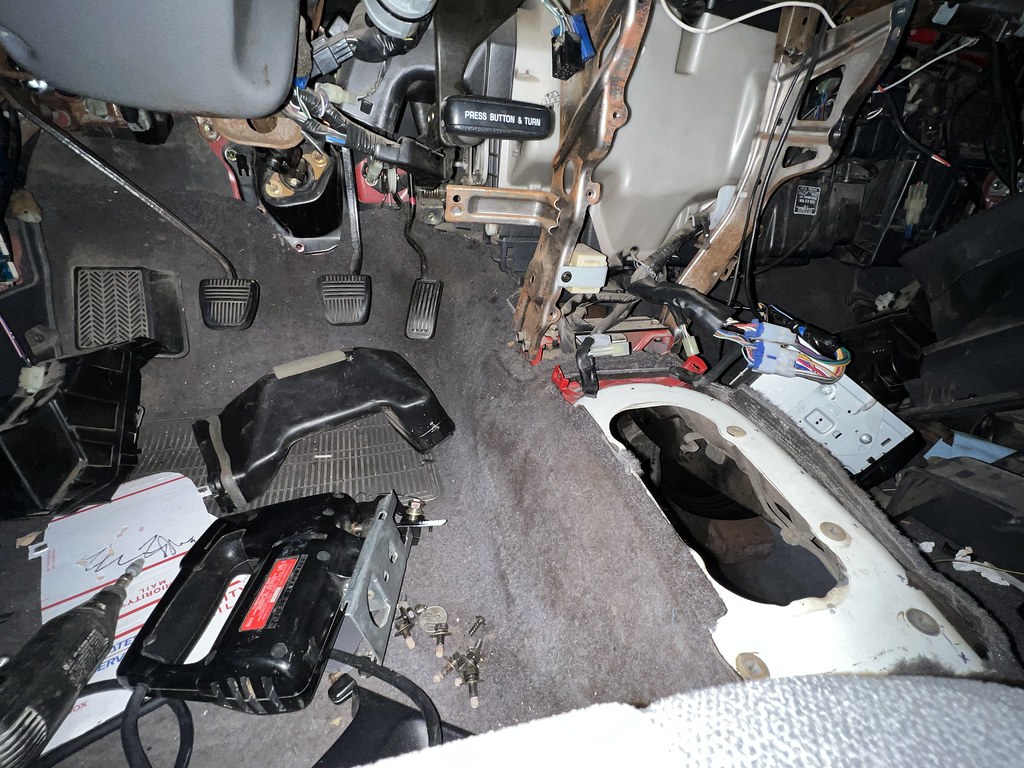
Interior is ready to come apart for swap festivities.

52399005479_bcc796e23b_b.jpg


Cluster was removed and donated to my 89 Pickup.
https://www.toyota-4runner.org/3765018-post18.html

The original auto transmission used a VSS with a cable to speedometer. The R150F being used for the swap came from a 1993 model with electronic VSS.

I just happened to have a newer SR5 cluster to swap into the 4Runner, and all it will take is to wire in the electronic VSS (3 wires). I also disassembled the odometer to match the mileage, so the mileage reading is still 100% accurate.

52398190147_37459e10b9_b.jpg


52399210793_3a01a815a4_b.jpg


Dashboard out

52398717771_8d0a93b135_b.jpg


52399210638_a007e8f024_b.jpg


Auto pedal removed, left. Manual pedals, right.

52399209863_1fd9251385_b.jpg


Notice the clutch master cylinder-shaped cutout in the inner insulation

52399004119_d57b5ba76e_b.jpg
 
From the other side

52398716726_a2a75eaf6d_b.jpg


First holes drilled, and new pedal bracket installed

52399003844_644aa5c853_b.jpg


Master installed. Here it is in its new home.

52560552798_852cc78ffb_b.jpg


Interior view with pedals installed

52398716316_f555f7b64d_b.jpg
 
Last edited:
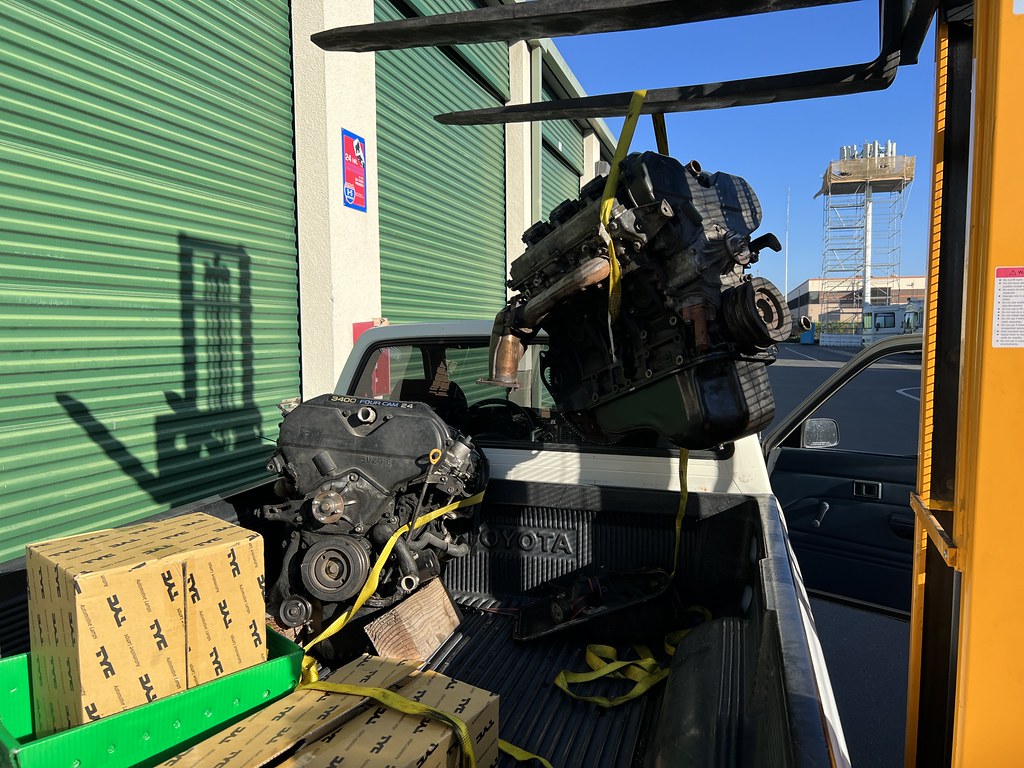
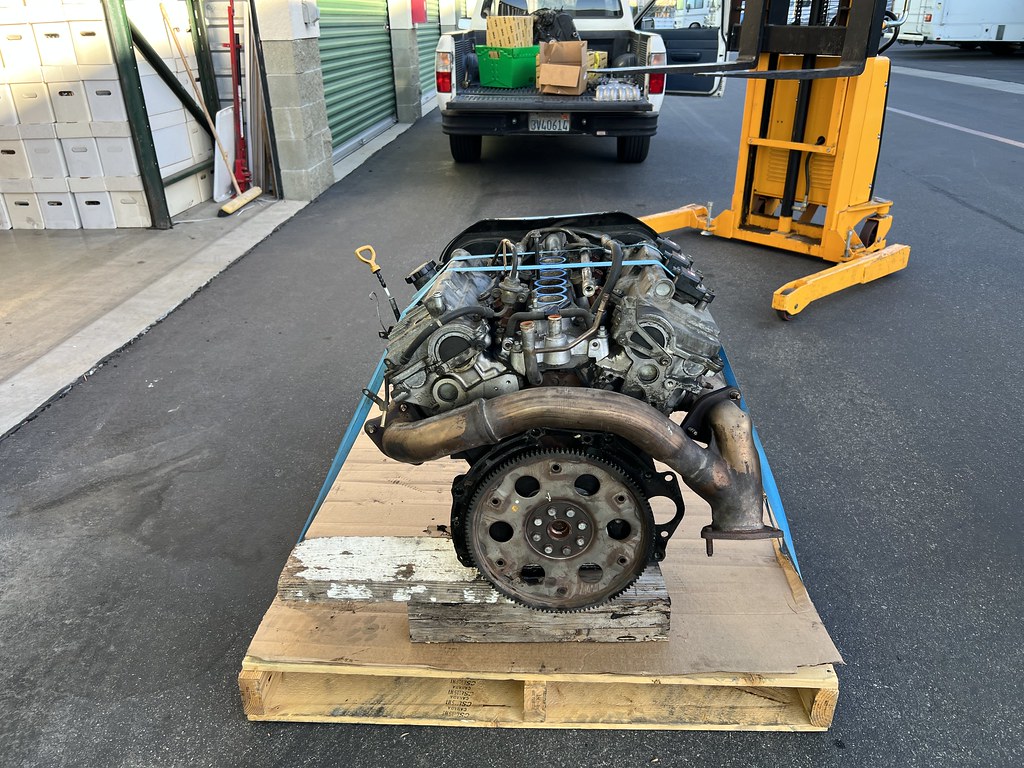
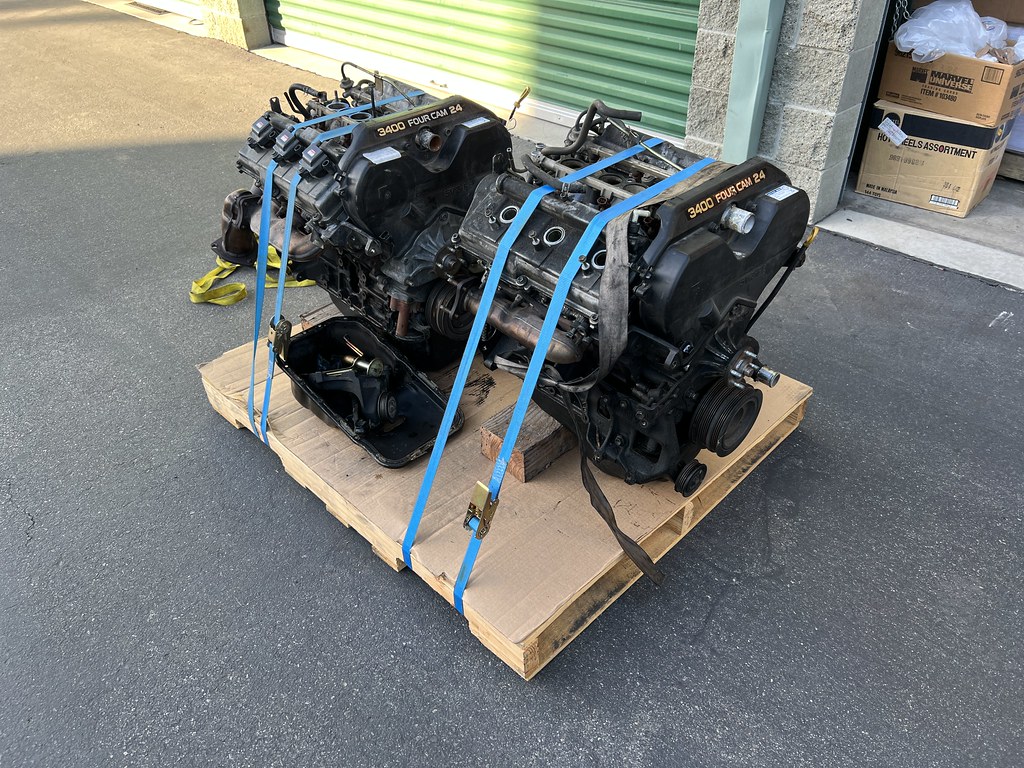
Scored another 5VZ-FE. This one threw a rod and blew a hole in the block. Heads are probably still good and there’s a lot of useable spare parts. Should be able to make one good engine between the two engines.

52399127970_d155c0200f_b.jpg


52399209063_3f061ec62a_b.jpg


52399208988_501ff32578_b.jpg


52398201532_e5e046ff15_b.jpg


Loaded up in the pickup

52399140735_cda726c1af_b.jpg


Unloading using my handy-dandy Uline straddle stacker

52399001579_6d2a68636c_b.jpg


52398199877_90499e052b_b.jpg


52398199697_e94f4d27fa_b.jpg


Strapped to a pallet along with the supercharger (in white box) for future shenanigans

52398713226_a2ba8b7826_b.jpg


52399206248_d42d846d8b_b.jpg


52399139125_a88eed5aa6_b.jpg
 
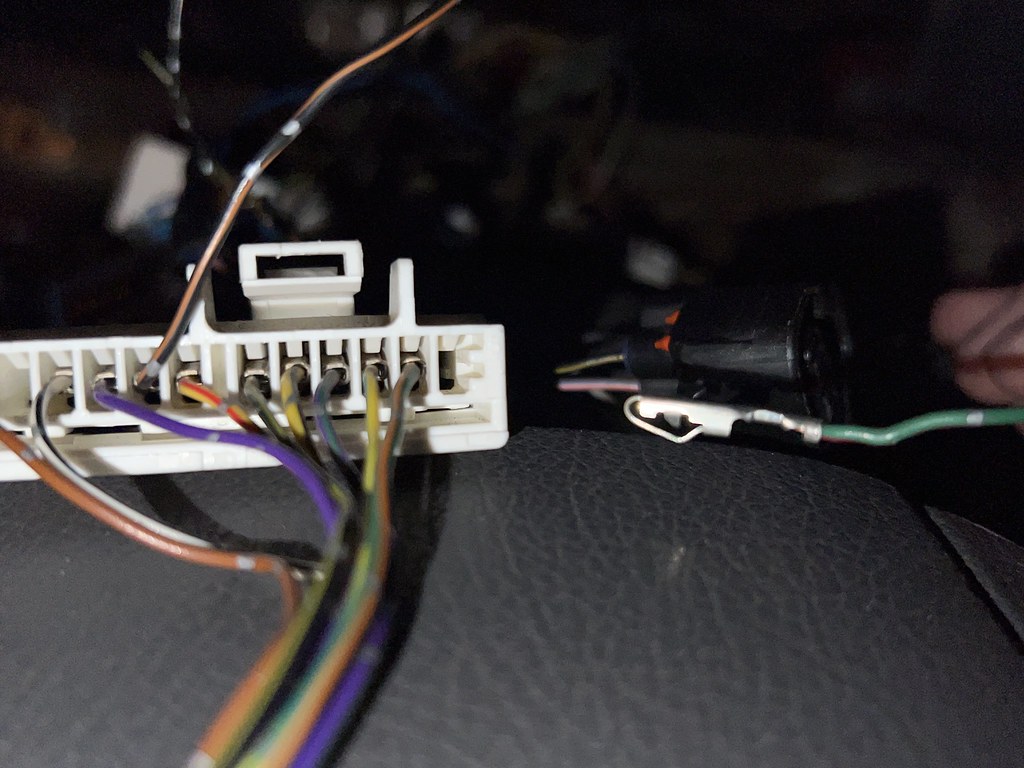
Back to cluster swap. Plugs are identical for clusters 1990-1995. Some pins are not used on 1990-1991 clusters. 1992-1995 clusters utilize 2 more pins for the electronic VSS. I got some extra 92+ cluster plugs from the junkyard, removed the two extra VSS wires with pin, and inserted them into the factory 1990 harness in the truck.

The electronic VSS uses these wires from the 92+ plug:

Blue wire on far side of plug

52449206508_a522c18867_b.jpg


Removed whole

52448167052_74383f81c0_b.jpg


Factory 1990 harness has this pin location, but it is unused, so it is left empty. Here’s the 1992+ VSS wire installed into 1990 harness

52449132870_7cdd64becf_b.jpg


Next wire is the green/red on the far side of another plug

52449206968_a086a03fab_b.jpg


Removed whole

52448694326_50f54b6bd8_b.jpg


Factory 1990 harness with empty pinhole

52448694461_6efdcb9d90_b.jpg


Green/red wire installed into factory 1990 harness

52449207763_d7703507fa_b.jpg


These wires will run directly to the VSS at the tail end of the transfer case. The 3rd VSS wire taps into GAUGE 12V wire. Will post pics upon completion.

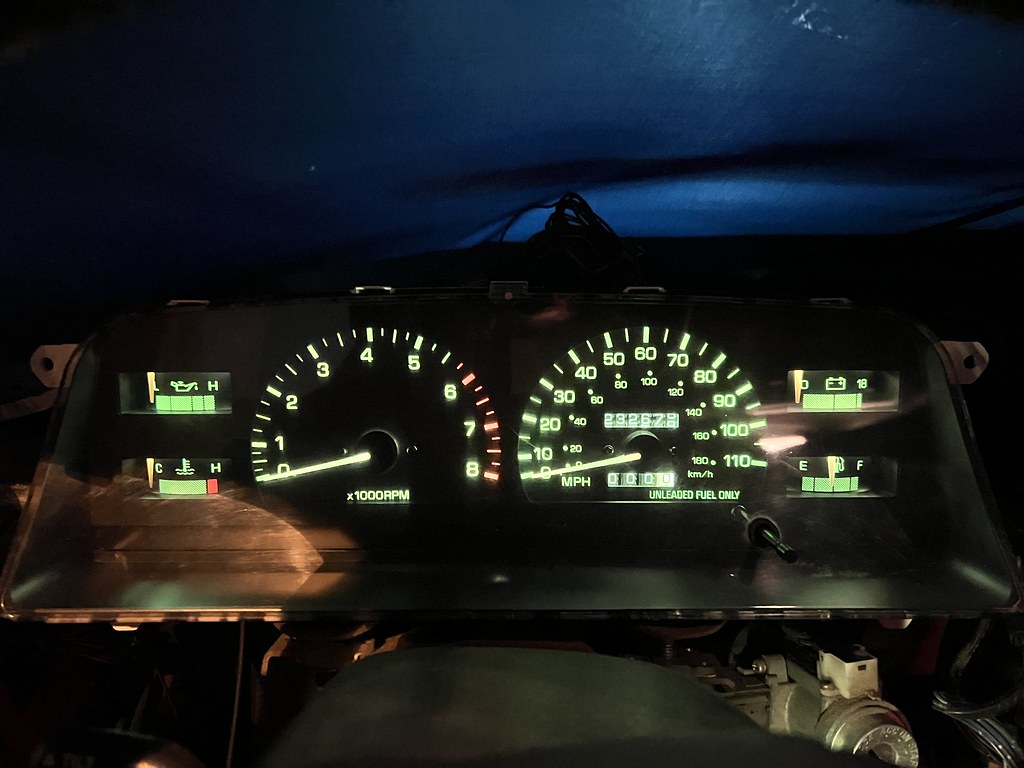
Test run with new cluster. Works great so far. Needs green bulbs.

52449197123_5a13e1a3f3_b.jpg


Mileage is spot on and cluster is functional.

52449133810_8c95709bb2_b.jpg
 
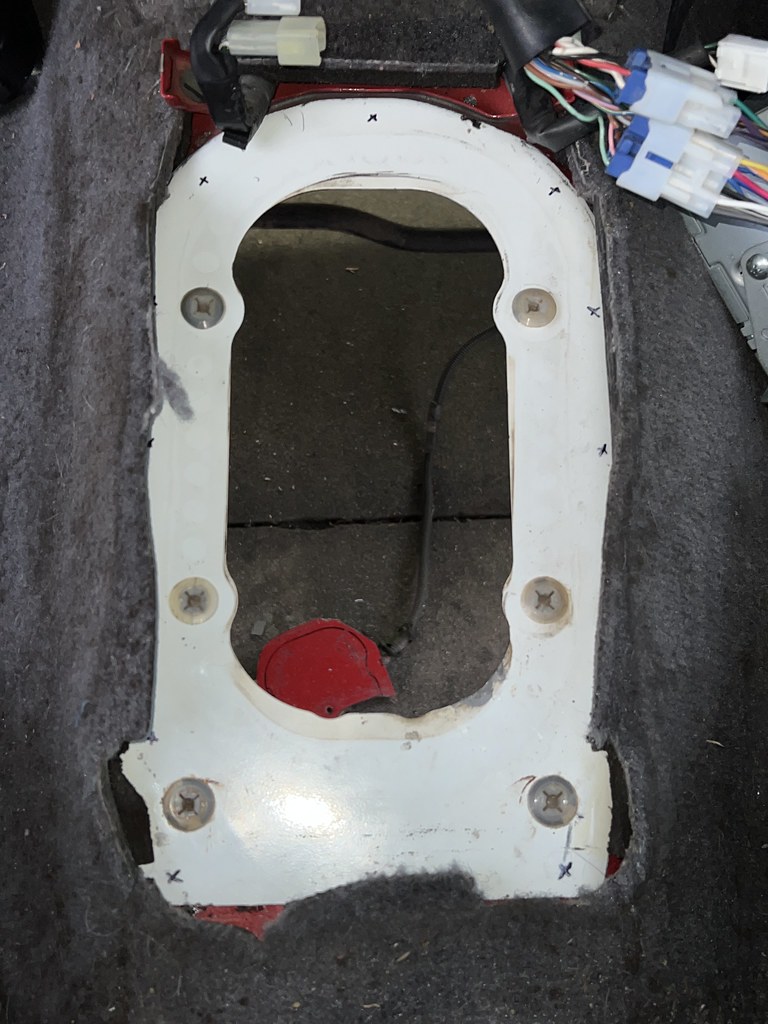
Manual transmission tunnel opening is next. This is the tunnel from the parts truck. It’ll be trimmed and reused in this 1990 4Runner. Will allow for factory boot installation and overall factory fitment.


52666154971_4db7c939eb_b.jpg


52448684076_ceb50e71de_b.jpg


Tracing out the cut line, and marking rivet hole locations

52449197393_85c51038b4_b.jpg


Cardboard template for the cutting of the auto tunnel. The auto tunnel cut is about 1/2” oversized.

52451652582_4a69e53e2d_b.jpg


52452621570_3d37964ec7_b.jpg


Trimming of the new manual transmission tunnel overlay

52452621380_399d3dbb12_b.jpg


52451651717_ea37f6cf50_b.jpg


52452692433_6014fe2f55_b.jpg


Overlayed over factory auto tunnel for tracing purposes

52452691958_7b4dd98b59_b.jpg


Manual hole marked and square grommet holes marked

52451650672_0b183dd56f_b.jpg


Cut lines marked

52451650527_50f99491ed_b.jpg
 
Last edited:
Cutting in process

52452691483_3131e2de7a_b.jpg


Drilled out spot welds holding auto shifter mounting/support metal

52451649717_7936095c6b_b.jpg


52451649837_aab02af0cb_b.jpg


Hole cut and grommet areas notched

52452170366_e4348f6af2_b.jpg


Overlay test fitment. Notice the entirety of the automatic hole and cut sections are now covered.

52452618685_8cd10ce348_b.jpg


50/50 view towards front of truck. Bottom of tunnel cut visible. Enough room to rivet new tunnel overlay into place.

52452174441_cc468a3f36_b.jpg


50/50 view towards rear of truck. Bottom of tunnel cut visible.

52472315878_579ef90d98_b.jpg


Next step is to drill rivet holes, apply seam sealer, and rivet into final position.

52452621800_f4fae1f51d_b.jpg


52452442644_0b882bae37_b.jpg
 
Some more progress to report on

This time I went to my local junkyard and found a 95 with a gray interior.

Parts bought:
- Passenger door handle in gray, with rod clip
- Passenger door armrest in gray, good condition
- Dashboard hardware
- Cluster green bulbs #194 and #74
- Small plastic pocket under radio in gray
- Driver side dash vent assembly

Also found some other parts for my 89 pickup.

The 92-95 electronic VSS cluster as it currently is, as shown previously:

52449197123_5a13e1a3f3_b.jpg


The green bulbs are a big deal for me and there was no way the cluster was going in the truck without them.

Here are the bulbs removed from the 2nd gen at the yard. These are the three main #194 bulbs that light up the speedo and tach. Notice the green bases.

52560305124_199a99a29c_b.jpg


The #194 bulbs in the 2-door’s new cluster are not green, the bulbs have a black base. Maybe these came from some another Toyota since it doesn’t look like someone just swapped the bulbs and kept the original green bases. Never knew these clusters to come with anything other than green bulbs/bases.


52560555123_959fd26202_b.jpg


Bulb comparison

52559558857_ba00ec3ae7_b.jpg


Bulbs swapped

52560304749_de0866cd12_b.jpg


There are also 4 additional smaller green #74 bulbs to illuminate the side gauges. There are 2 per side.

52559558517_8762bce2e0_b.jpg


Upon initial testing, one of the main 3 #194 bulbs and one of the side 4 #74 bulbs were each burnt out.

52560553573_55bf289c44_b.jpg


After removing the non-functional #74 side bulb, it was determined to have a broken filament. With enough time and patience, I was able to remove the original green sleeve from one of the side bulbs.

52560004996_ed6e0e6803_b.jpg


The bulb is the same size as found in the lower strip of indicators on the bottom of the cluster. This truck will never need the ECT PWR lamp. It was decided to harvest this bulb.

The ECT PWR bulb is in a black base with a clear bulb, no green cover. Here it is shown left:

52560304259_949658c042_b.jpg


ECT PWR bulb, now with green cover, installed into green base to be repurposed as new side bulb.

52560554168_45027d2084_b.jpg


Next up was the burned out main #194 bulb. On closer inspection, it also had a bad filament. I grabbed the original DLX tach-less cluster left over from my 89 pickup. It also uses the same size #194 bulbs in green. I pulled one bulb and installed it in the center of the 2-door cluster.

Here is the first test. The left side is now illuminated properly with the old ECT PWR bulb. Unfortunately, the color of the center pickup bulb was noticeably different than the other 4Runner bulbs.

52559557362_1952d07143_b.jpg


I debated removing the green sleeve from the pickup bulb, but decided it would be best to put it back into the original pickup cluster it was removed from and leave it be.

The only option, excluding new or finding another cluster to steal bulbs from, was to use one of the three clear #194 bulbs that came out of this cluster earlier.

They turned out to be OEM and of the same power/output specification as the other #194’s in the cluster.

With more time and patience, I removed the green sleeve from the burnt 4Runner cluster bulb and installed it onto one of the 3 clears.

Final test - we’ve got matching OEM green bulbs!

52560477775_fd72ed2ec8_b.jpg


Next was to go through the remaining bulbs in the dash. The HVAC control panel green bulb was dead. The glovebox lamp was working, but not green. The ashtray bulb is both green and working.

For the HVAC control panel bulb, the wires come directly from the blower motor fan switch. Thankfully, I’ve got a few of those laying around, and one of them had a good functional bulb with a green sleeve already on it. The color was spot on since it was from the identical application. The old burnt bulb was set aside as it still had a green sleeve on it that could be used elsewhere.

The last #74 that needed attention was for the glovebox. No green sleeve and clearly has been replaced with a non-OEM unit. I swapped this bulb with another unused #74 cluster bulb, this time from A/T OIL TEMP.

Now that it had an OEM bulb, it just needed to be green. The burnt HVAC bulb had a good green sleeve still left on it, and made for the perfect solution.

Green bulbs are complete!

52559557122_e119c19eec_b.jpg
 
With all of the bulbs in the dash area sorted out, there was only one more lamp related issue with the interior. The dome lamp in the center of the cab was not working in the “DOOR” position. It was working well in the “ON” position.

I noticed the driver door switch was a bit intermittent. Sometimes the map lights would come on, and other times there’d be nothing. While I have several more door switches, curiosity came knocking. I grabbed the white plastic pin in the center of the switch and cycled it in and out, then rotated it back and forth a handful of times. Surprisingly, that seems to have worked, as the door switch is functioning normally now. Map lights come on every time. Cool!

So obviously, since the map lights at the base of the rear view mirror were working in the “DOOR” position, the door switch is excluded from being the culprit in the center dome light situation.

Pulled the dome light out and found out someone’s been into it before.

52560304024_1bd3d5d63e_b.jpg


You’ll see there’s two metal prongs where the electrical plug connects. One of the prongs stretches across from the plug and riveted to the end of the bulb contact. All of the power going to the dome light is sourced from this one wire and flows through this one prong. The wire that connects to this prong is a constant 12V power source.

The other prong connects to the Door Switch circuit. More on that later.

Since the bulb lights up in the “ON” position, something must be wrong with the internal connections of the dome lamp assembly itself.

The constant power current flows through the prong and into the bulb contact, through the bulb and opposite contact, and then circles around to the the 4-contact selector switch.

The power source connects to the both center contacts of the switch. The two outer contacts go to different ground sources.

The dome selector switch is operated with a lever (what you use with your hand). The lever has a small metal ball at the inside end where it can complete a circuit between contacts.

Contact 1 - BODY GROUND (SCREW)
Contact 2 - 12V CONSTANT POWER
Contact 3 - 12V CONSTANT POWER
Contact 4 - DOOR SWITCH GROUND

When the dome selector switch is set to the “ON” position, the metal ball on the end of the lever touches Contact 1 and Contact 2. Contact 1 leads to the metal strap in the dome light assembly that receives direct body ground from the dome light mounting screws. With a direct route to ground, the dome bulb illuminates.

When the dome selector switch is set to the “OFF” position, the metal ball connects both matching center contacts, Contacts 2 and 3. Since both contacts are fed from the same power source, no ground connection is present. The circuit is not completed. Without a source of ground, the bulb does not illuminate.

When the dome selector switch is set to the “DOOR” position, the metal ball on the end of the lever touches Contact 3 and Contact 4. Contact 4 leads to the other prong in the main dome plug. The wire that connects to this prong provides ground ONLY when the door switch is extended (door is open). When the door switch is released, Contact 4 receives ground, bulb illuminates.

Whoever was in here tried to melt plastic around the metal prong for the plug into place after it was inexplicably popped out.

52559557907_517c0b331a_b.jpg


I connected a voltmeter to check for continuity and the circuit was broken where the prong is riveted at Contact 4.

Using a jumper wire, I connected Contact 4 to ground and the dome light illuminated. This riveted connection was no longer functioning.

I had a small diameter screw from a MK3 Supra gauge cluster face laying around. It just happened to be the perfect diameter to replace original rivet. I popped it in place and confirmed the dome was now working in the “DOOR” position.

The only issue with this was that I could not get a nut for the opposite end of the screw. I ended up melting a red aerosol can straw, jamming it over the end of the threads, where it hardened and became the perfect little threaded nut.

52560303184_62204e3f97_b.jpg


52560553088_c2627be878_b.jpg


52560003726_3b2e6484dd_b.jpg


52559557817_ea2ae4666f_b.jpg


52559556897_7db2237a3f_b.jpg
 
3.4L flywheel bolts
52560566738_7a373ca913_b.jpg


There’s been a shortage of AISIN clutches lately. I had no luck waiting for any of my typical distributors to get more units in stock.

I’m using a 3.4L flywheel, so the clutch kit required is the AISIN CKT-040. This uses a CTX-107 pressure plate and DTX-136 clutch disc.

I found a seller on eBay, clutchamerica, who apparently offers AISIN clutch kits, and claimed to have the CKT-040 in stock. Don’t know how, but I figured eBay would cover me if he was a liar.

I got the kit for $290 shipped. Here’s what I got. Box was opened and resealed. Inside, I found:

AISIN CTX-107 pressure plate
Random brand throwout bearing (garbage)
Random brand pilot bearing (garbage)

52560302519_c5011788b5_b.jpg


I had expected some non-sense with the bearings as the kit was advertised as having “HD bearings.” The seller buys AISIN clutch kits, takes the bearings from the kits, and then resells them separately online for more, all while replenishing the gutted AISIN kits with cheaper, off-brand bearings. Double dipping dishonesty.

Thankfully, the early R150F (pre-96) does not use the 3.4 throwout and I was planning to get a new 3.0 bearing anyway. The pilot bearing was cheap enough to just get new from Toyota.

I was willing to deal with all of the above, but there was one major flaw that could not be overlooked. This guy was pulling the same shady shit with clutch discs.

What a bunch of bullshit.

52560476825_caf2c19a13_b.jpg


The seller’s listing specifies that the clutch disc included cross-references/interchanges with Toyota OEM part # 31250-35352-84. I have checked with Toyota and have confirmed that part # 31250-35352-84 is the correct clutch disc for 3.4L V6. Everything is checking out, on paper.

AISIN shows clutch kit # CKT-040 as containing clutch disc DTX-136. DTX-136 directly cross-references/interchanges with Toyota OEM part # 31250-35352-84.

But wait… what I received is a DTX-137 clutch disc.

The DTX-137 is not used in CKT-040, but it is instead used in AISIN kit # CKT-051, for the 3RZ-FE 2.7L. The AISIN DTX-137 clutch disc does not cross-reference/interchange with Toyota OEM part # 31250-35352-84 as the listing indicates.

The DTX-137 clutch disc label cross-references/interchanges to three Toyota OEM part numbers:
1. 31250-35311
2. 31250-35400
3. 31250-37160

I checked all three OEM part numbers on the AISIN label fitted to the DTX-137 clutch disc box. All three of the above part numbers are not interchangeable with 5VZ-FE. None of these three part numbers are specified in the seller’s listing.

While the DTX-137 may have similar diameters, splines, etc, the DTX-137 clutch disc is not interchangeable with DTX-136.

The seller denied having basically cobbled together a bunch of clutch kits with incorrect parts to make a quick buck on people, and was insistent that I was wrong and that the DTX-137 was correct for the V6.

As an eBay seller myself, I am sure he could tell I was in no position to mess around. I’ll get my money back and make him pay for shipping, too. He was caught bullshitting people.

Let’s just say that ClutchAmerica was prompt in sending me a return label for the disc.

Two days later, a DTX-136 showed up in the mail. Brand new in the AISIN box. Oh, the sweet taste of victory. An out of stock clutch and only at the expense of some bearings and eBay hassle.

52560002831_fbff632e1c_b.jpg


Now I’m sure I don’t have to say this, but 3.4 clutch discs fit opposite of most Toyotas. The markings on the disc are incorrect. Here’s a diagram that shows the orientation of the 5VZ-FE clutch disc. Maybe the guy was having issues with people returning this kit due to this oversight by AISIN. Regardless, this is a documented issue, and this disc is indeed specified for the 5VZ-FE and is not just a 3RZ-FE disc like the other one he tried to pawn off on me. Bad practice from a seller. Beware of ClutchAmerica. Make sure they send you what they claim is in the box.

52560551978_b66e9a7c05_z.jpg
 
Last edited:
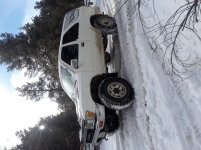
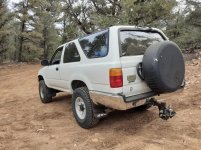
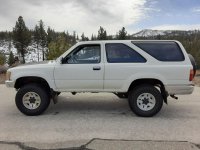
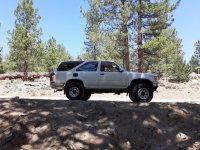
Hey COB. I am uploading pics of my Gen 2, 2 Door. I read that you're collecting pics. My gal is a 1990 (built in Japan, in July of '89). I believe I'm the 4th owner. She has had some front end damage. Don't know if her motor was replaced. She has 523K on the clock, although the odom only shows 325K. The odom was replaced by the previous owner, as it was broken. I had the clutch replaced @ a Toyota stealership in '18. She was my daily driver for two years, without a single issue. She now own's our family garage. I drive her on occasion (once a week) and on ALL camping trips. Wife hates the fact, that I call her a "truck". I always ask, "What has 2 doors and a tailgate?", a TRUCK!

Kennedy Meadows,CA

Patches

Bitter Creek, CA

Fish Creek, CA
 

Attachments

  • 20190308_080116S edit small.jpg
    20190308_080116S edit small.jpg
    139.7 KB · Views: 696
  • 20190308_080129 edit small.jpg
    20190308_080129 edit small.jpg
    133.5 KB · Views: 722
  • 20200307_095518 edit small.jpg
    20200307_095518 edit small.jpg
    139.9 KB · Views: 724
  • 20200307_125907 Edit small.jpg
    20200307_125907 Edit small.jpg
    135.4 KB · Views: 750
  • 20200619_142720 edit small.jpg
    20200619_142720 edit small.jpg
    139.9 KB · Views: 714
Last edited by a moderator:
Never seen one of these before. Pretty cool

Bitter Creek, CA

Pretty cool area for sure

These bulbs are the worst

I need to do the same.. not looking forward to it

If I find one for a 3.0 for a decent price, I'll do it for sure
 
Last edited by a moderator:
Hey COB. I am uploading pics of my Gen 2, 2 Door. I read that you're collecting pics. My gal is a 1990 (built in Japan, in July of '89). I believe I'm the 4th owner. She has had some front end damage. Don't know if her motor was replaced. She has 523K on the clock, although the odom only shows 325K. The odom was replaced by the previous owner, as it was broken. I had the clutch replaced @ a Toyota stealership in '18. She was my daily driver for two years, without a single issue. She now own's our family garage. I drive her on occasion (once a week) and on ALL camping trips. Wife hates the fact, that I call her a "truck". I always ask, "What has 2 doors and a tailgate?", a TRUCK!

Kennedy Meadows,CA

Patches

Bitter Creek, CA

Fish Creek, CA


Thanks for sharing. I have added your photos to the 2-door album.


View the whole album here: 2-Door 2nd Gen 4Runners | Flickr


560+ photos of 2nd gen 2-door 4Runners!


Never seen one of these before. Pretty cool

Pretty cool area for sure

These bulbs are the worst

I need to do the same.. not looking forward to it

If I find one for a 3.0 for a decent price, I'll do it for sure


Thanks for your messages. The bulbs job isn't that bad. Satisfying to have lights all sorted!
 
Transmission tunnel install

I got a GoPro for Christmas, so here’s a video in addition to the photos:

<iframe width="560" height="315" src="https://www.youtube.com/embed/P8VMPEdgRe8" title="YouTube video player" frameborder="0" allow="accelerometer; autoplay; clipboard-write; encrypted-media; gyroscope; picture-in-picture; web-share" allowfullscreen></iframe>


And here are the video contents in picture form:

Clamped in place and ready to drill

52655243053_ac6b853de7_b.jpg


Holes drilled. 1/8” rivets just sitting in place.

52654760716_c6c85b8f56_b.jpg


52654271342_a61225aa27_b.jpg


Another look without the rivets

52655037744_2b8a45c455_b.jpg


Holes through body. Ready for seam sealer

52654271047_162dabd03d_b.jpg


Black SEM seam sealer. Rivets installed.

52655037319_856d02dd1f_b.jpg


52655037154_a41b3a7d5b_b.jpg


Transmission tunnel is done. Next will be a rear main seal, pilot bearing, flywheel, and clutch install.

52654270717_ec5801681b_b.jpg
 

Members online

Forum statistics

Threads
278,309
Messages
3,554,069
Members
248,016
Latest member
Advally Service

Trending content

Back
Top