
You are using an out of date browser. It may not display this or other websites correctly.
You should upgrade or use an alternative browser.
You should upgrade or use an alternative browser.
COB's '89 Supra Turbo
- Thread starter ChildrenOfBodom
- Start date

ChildrenOfBodom
Moderator
Thanks!Love this car!
Because why not? Dust is annoying. The wax doesn't really have to be reapplied, I just keep up with an extra coat of Meguiar's "Last Touch" spray detailer on top of the wax.why do you wax weekly? looks like you barely drive her.
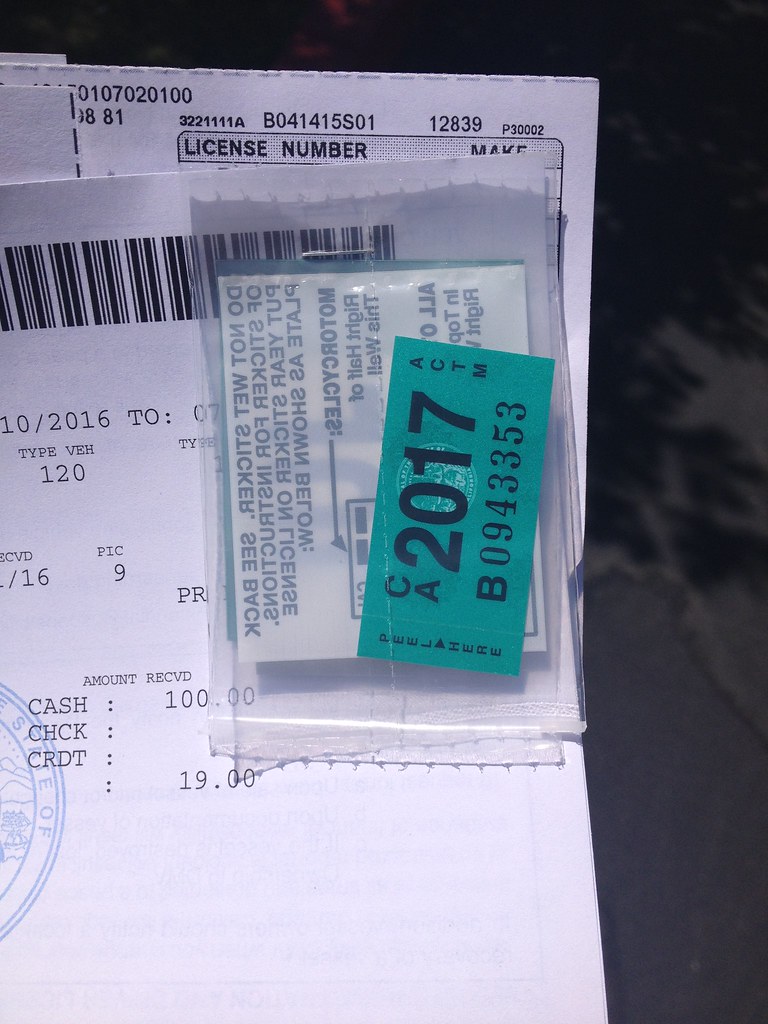
For the record, I just got tags for it on 7/11/16. The rear tire that was on there before was old and cracked, scary to drive on. With the new rear tires, it has 875 miles on the motor/trans combo now. I drive it as often as possible. Keeping in mind there is no roof, I don't take it anywhere where I won't be with it. No roof is life.
cool. makes sense.
I was in SD for a wedding last week and took a day out to drive up to Irvine/Mission Viejo for fun. Met a friend at the 'shops @ mission veijo' and had some ice cream.
Gorgeous city. Looks like the whole city was just drawn up in CAD and printed new lol. Didnt see a single crappy car on road.
Jealous of your CA highways compared to Denver as well.
I assume you take the Supra pretty fast on those nice 6/7 lane highways? -- You better! Hell, I was flooring my Hyundai rental. lol.
BTW COB, random question. From the initial $1,700, do you have a final investment price between the day of picking her up and then eventually driving that first time? Just curious more than anything in case I ever pursue an old resto.
I was in SD for a wedding last week and took a day out to drive up to Irvine/Mission Viejo for fun. Met a friend at the 'shops @ mission veijo' and had some ice cream.
Gorgeous city. Looks like the whole city was just drawn up in CAD and printed new lol. Didnt see a single crappy car on road.
Jealous of your CA highways compared to Denver as well.
I assume you take the Supra pretty fast on those nice 6/7 lane highways?
-- You better! Hell, I was flooring my Hyundai rental. lol.BTW COB, random question. From the initial $1,700, do you have a final investment price between the day of picking her up and then eventually driving that first time? Just curious more than anything in case I ever pursue an old resto.
Last edited:
ChildrenOfBodom
Moderator
cool. makes sense.
I was in SD for a wedding last week and took a day out to drive up to Irvine/Mission Viejo for fun. Met a friend at the 'shops @ mission veijo' and had some ice cream.
Gorgeous city. Looks like the whole city was just drawn up in CAD and printed new lol. Didnt see a single crappy car on road.
Jealous of your CA highways compared to Denver as well.
I assume you take the Supra pretty fast on those nice 6/7 lane highways?
Yeah, that's a planned community for ya. It's comparable to Highland Ranch from what I've heard from CO locals. It's good and bad.
Once you head up a little to North Orange County, the whole area looks run down compared. That's where the strip malls have dentists next door to coffee shops and laundromats. We sheltered folk call that the ghetto, lol.
It's a nice area in the little bubble here in south orange county, but cops are super strict about minimal things and the kids are entitled little brats with rich parents. That's why my family chose the one area in MV without an HOA - people can't tell us what to do. Anyone who doesn't like my truck bed trailer can shove it!
I stay away from the hell that is Irvine, where you can rent an overpriced "living space" with no driveway or yards, lease your low-end luxury car, have a stick up your ass 24/7 and be considered normal, and shop at REI so you can drive 5mph on a fire road in your wife's DD Jeep Wrangler. You'll find the most anal-retentive people who will spend money on ridiculous things like "junk removal," where someone comes to their gated HOA-nazi complex and picks up some foam and cardboard boxes from their garage, then charges $180.
Ok, I'm starting to rant a little too much... lol...
The roads are smooth and wide, which is great when they're not congested (which is most of the time). There's a whole lot of left-lane hogs and inconsiderate people to deal with during traffic hours. It's great when it's clear! Thankfully the hills allow for some curvy roads in the area. North OC is nothing but square grids - which makes for a comatose driving experience at best.
BTW COB, random question. From the initial $1,700, do you have a final investment price between the day of picking her up and then eventually driving that first time? Just curious more than anything in case I ever pursue an old resto.
I did not keep track, sort of on purpose. I'm roughly 6-7k into it if I had to guess. Definitely more than 5k, but considering I bought a parts car, a transmission, a whole boatload of performance parts, some expensive discontinued parts, etc, I'm happy with the overall cost of the project. Supra parts just aren't cheap like the trucks.
The red 87 4Runner I built a while back was somewhat cheap, but the truck is not really built much beyond a stock rig. It's just got some OEM upgrades (turbo, brakes, digidash, etc) which are great ways to have fun and keep costs down. If you consider the value I got out of the 88 extra cab parts rig (which donated the 5-speed trans and the bed for the trailer project), I hardly paid anything for that truck. Those trucks are great candidates for low-budget restoration!
ChildrenOfBodom
Moderator
Some pictures to look at Gotta add some more driver's side photos to even out the rest of the thread, lol.
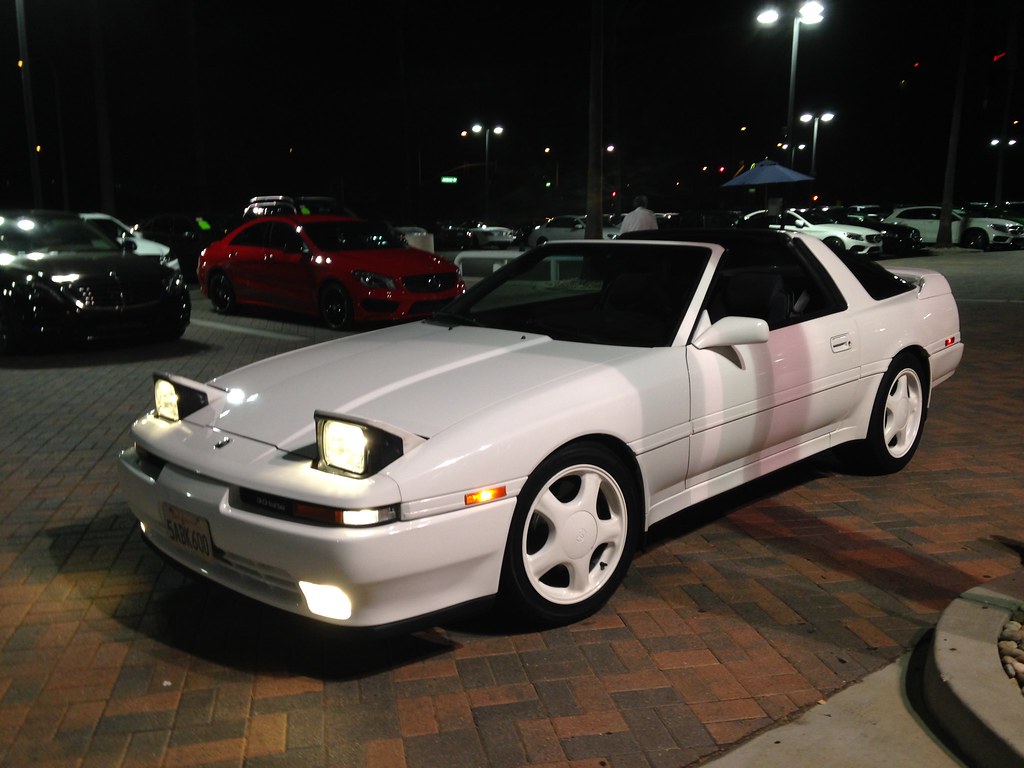
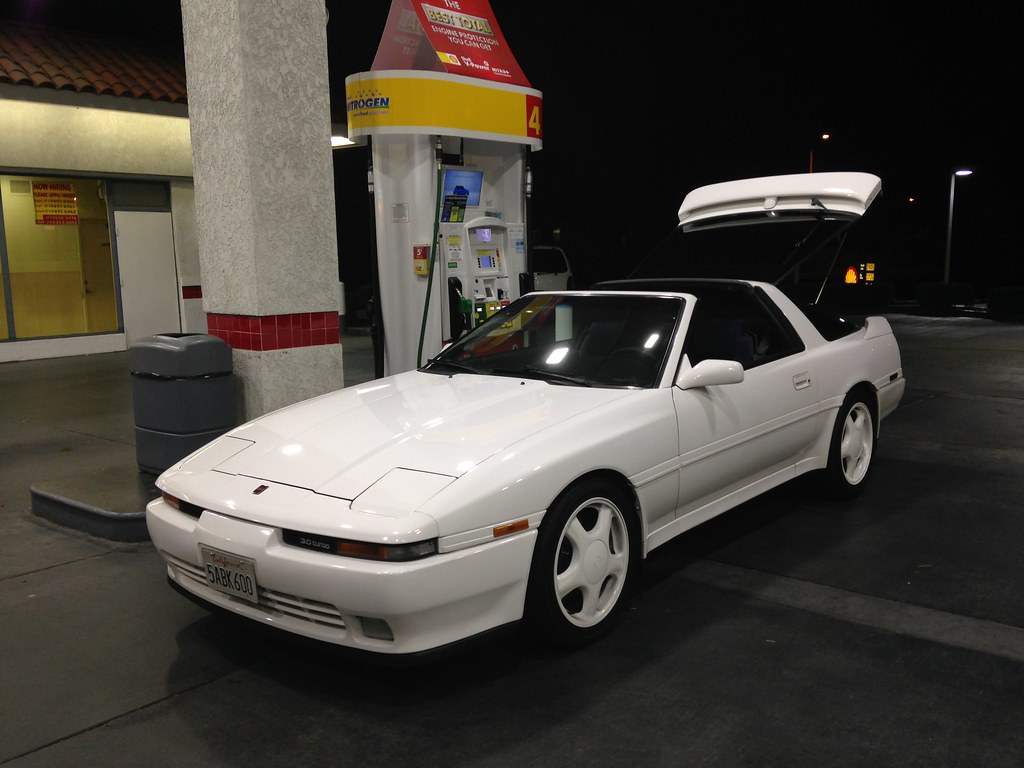
I love little details, I got a second little clip for the AFPR vacuum line. OEM parts and OEM fit.
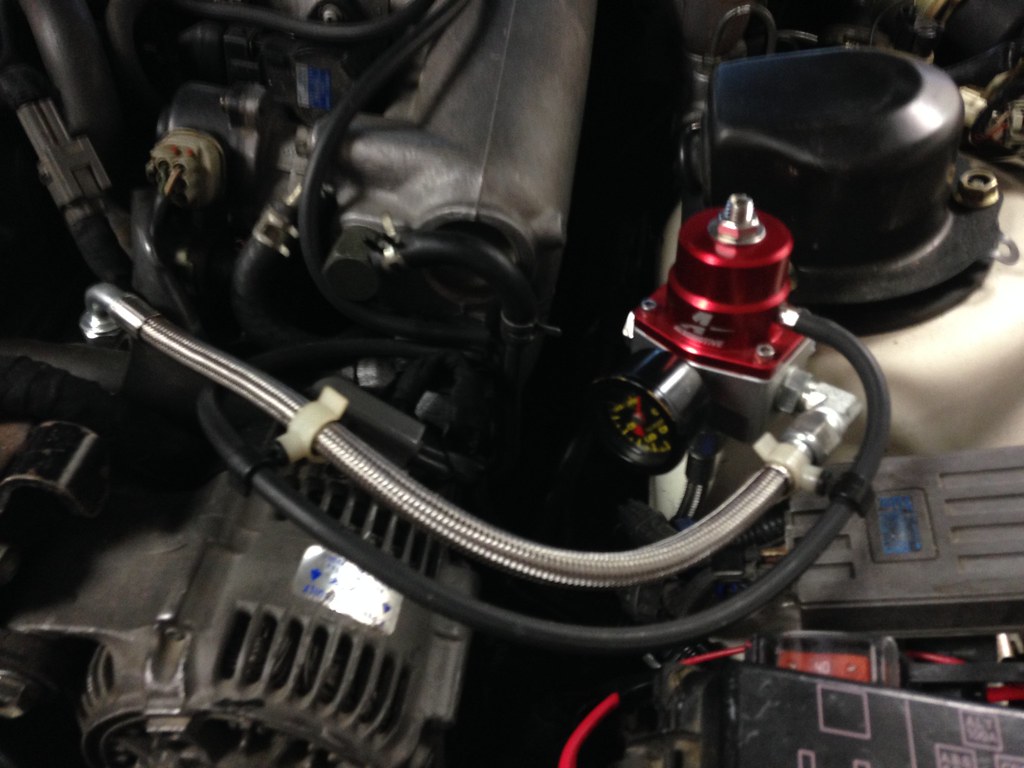
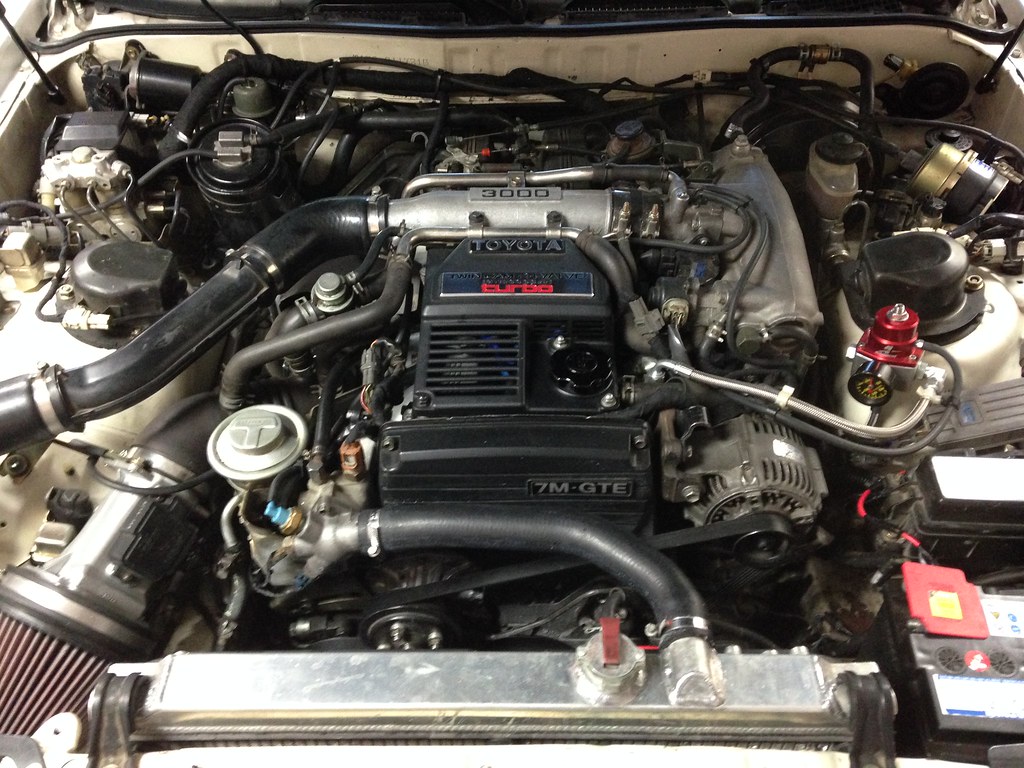
Now the car has about 1100 miles Finally gave the gas pedal the beans and it's boosting a stock 6psi quite nicely.
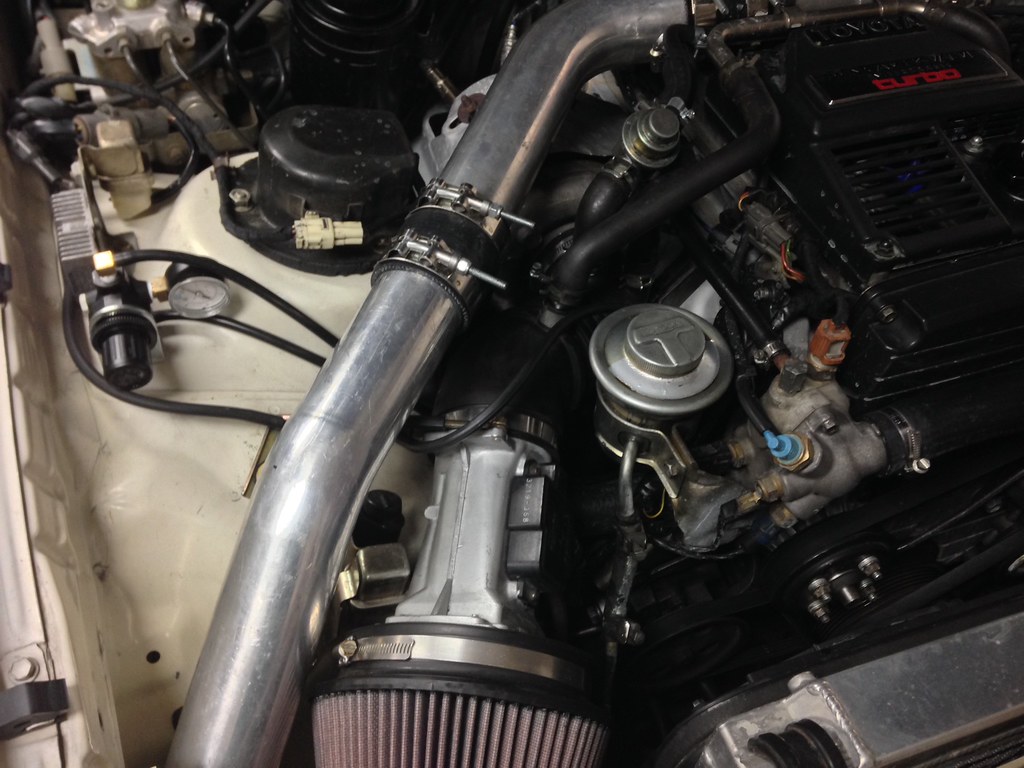
So before I get a boost controller and start making PSI adjustments, I need to upgrade the intercooler and charge piping.
At first, I found a used intercooler piping kit for the stock intercooler, which came with all the clamps and silicone couplers. I changed my mind and resold the kit.
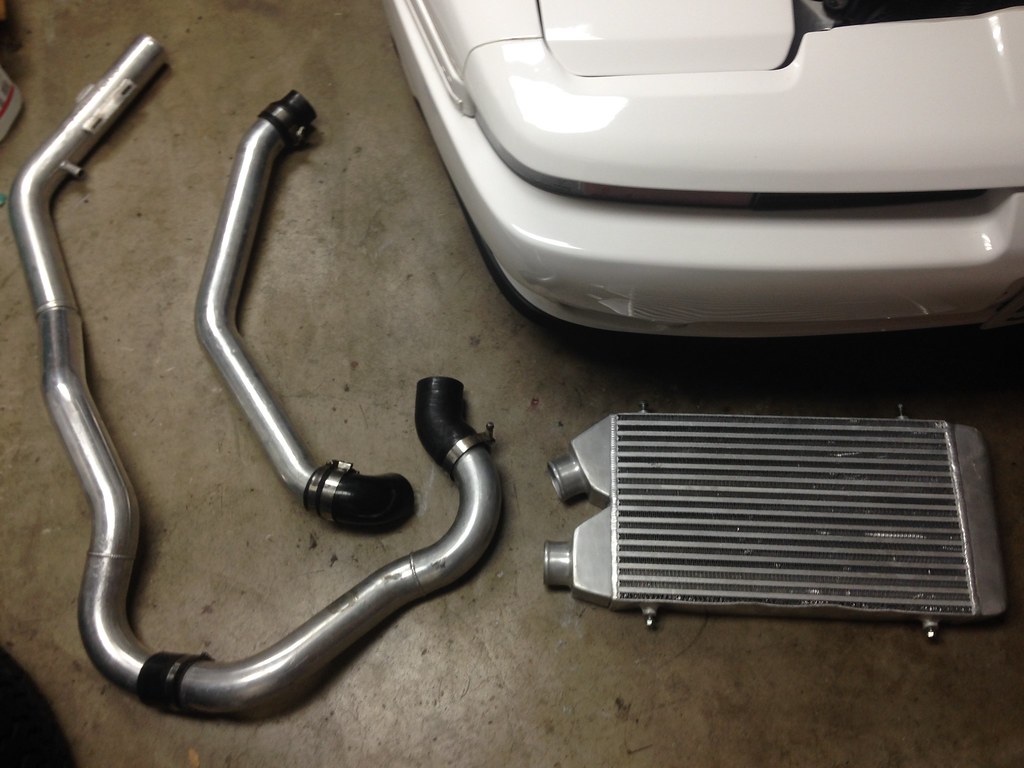
The next day, an ad for a complete used intercooler kit popped up. This is the exact kit that driftmotion and CX racing both sell for $450.
I got the kit for $100. Since it was a good deal, I bought all new silicone couplers and T-bolt clamps ([email protected]", 1@2"), just for the hell of it. Last, I stopped by the Home Depot and got a 1"x36" piece of angle aluminum for an intercooler mount. I chose an angle piece because of the extra rigidity, plus it lines up with the stock intercooler mounts.
Total of $150 ($300 saved!)
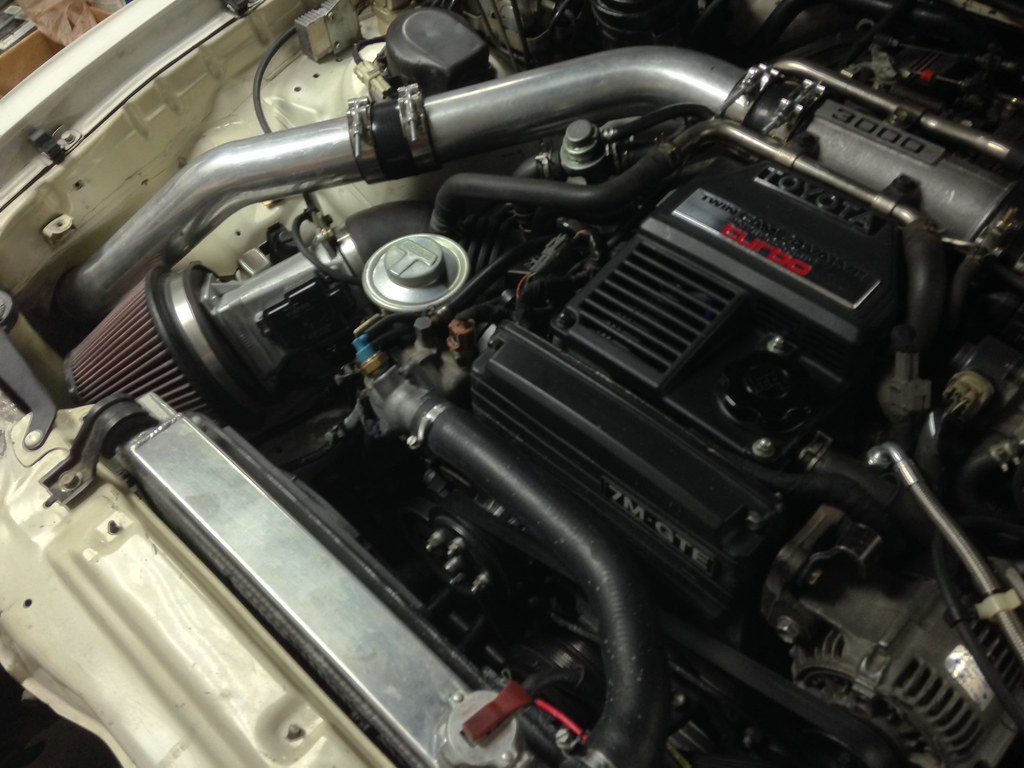
Things to take note in the following photo - the top left pipe is the one for the throttle body that replaces the 3000 pipe. Some idiot thought it would be a smart idea to make every single one of these kits with a MKIV "Supra" logo and "turbo" in generic font. This is the very definition of tacky. It's dreadfully bad.
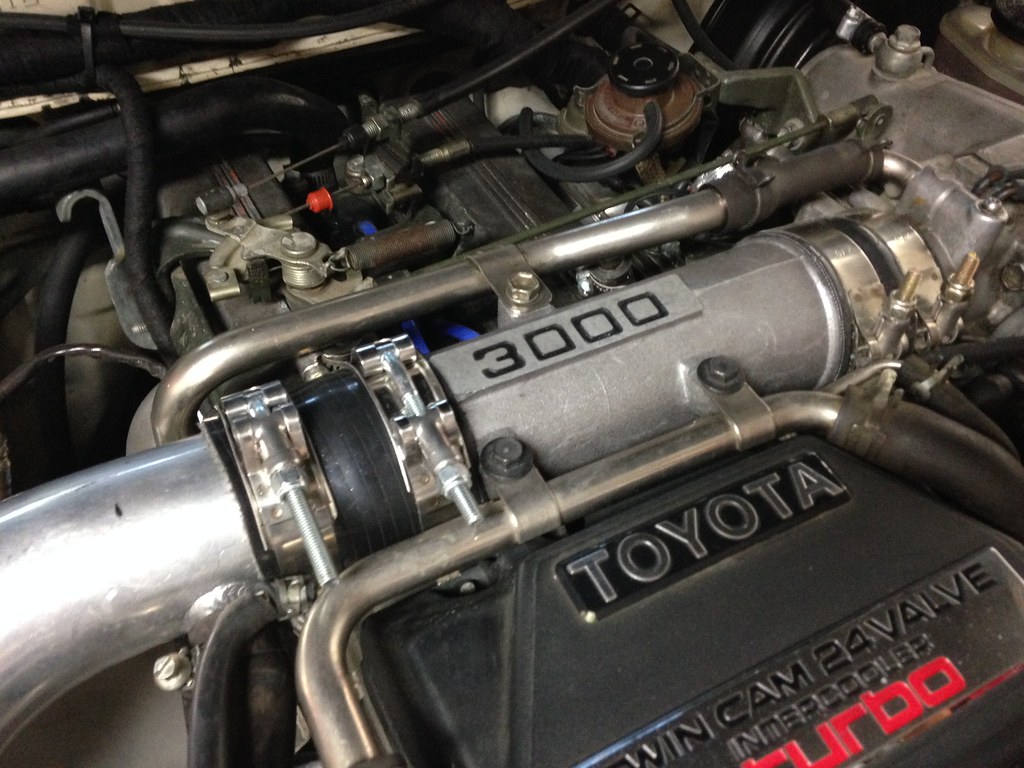
If you install the supplied 3000 pipe, it sticks up instead of matching the angle of the original 3000 pipe. This is how misaligned the pipe looks when installed on another car.
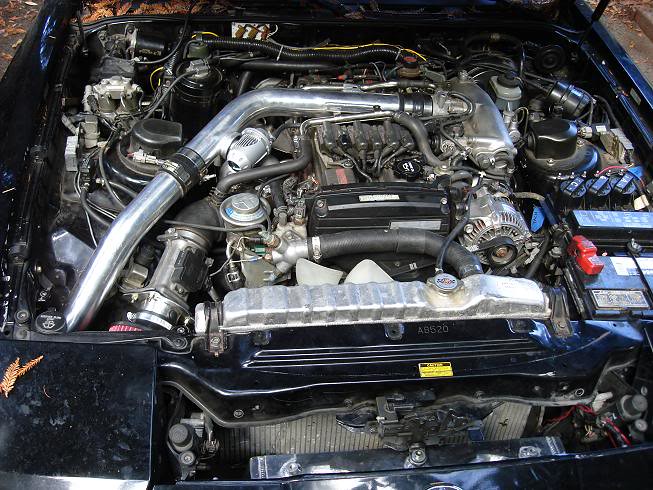
This is where I would get an HKS 3000 pipe, but they're rare. I had to do the next best thing. I cut the restriction from the 3000 pipe so it's one size all of the way through. I chopped the nasty "Supra turbo" pipe just before the factory BOV port and joined the two with a silicone coupler and T-bolt clamps.
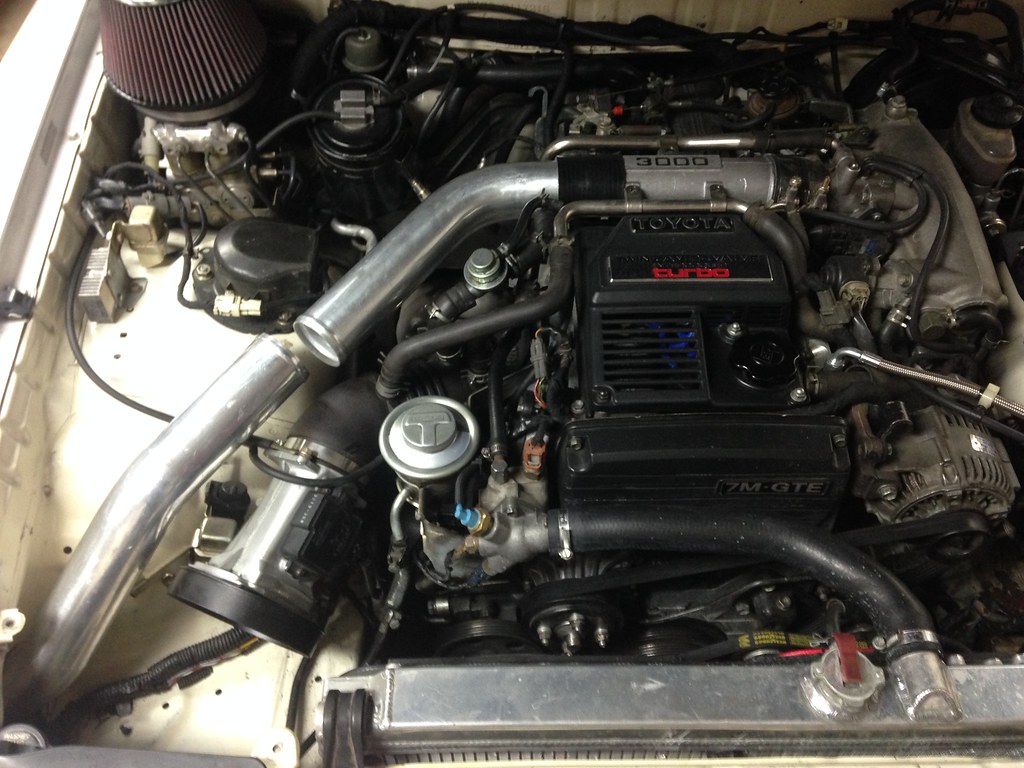
Stock intercooler, horns, hood latch, AC fan, oil cooler, and bracketry all removed.
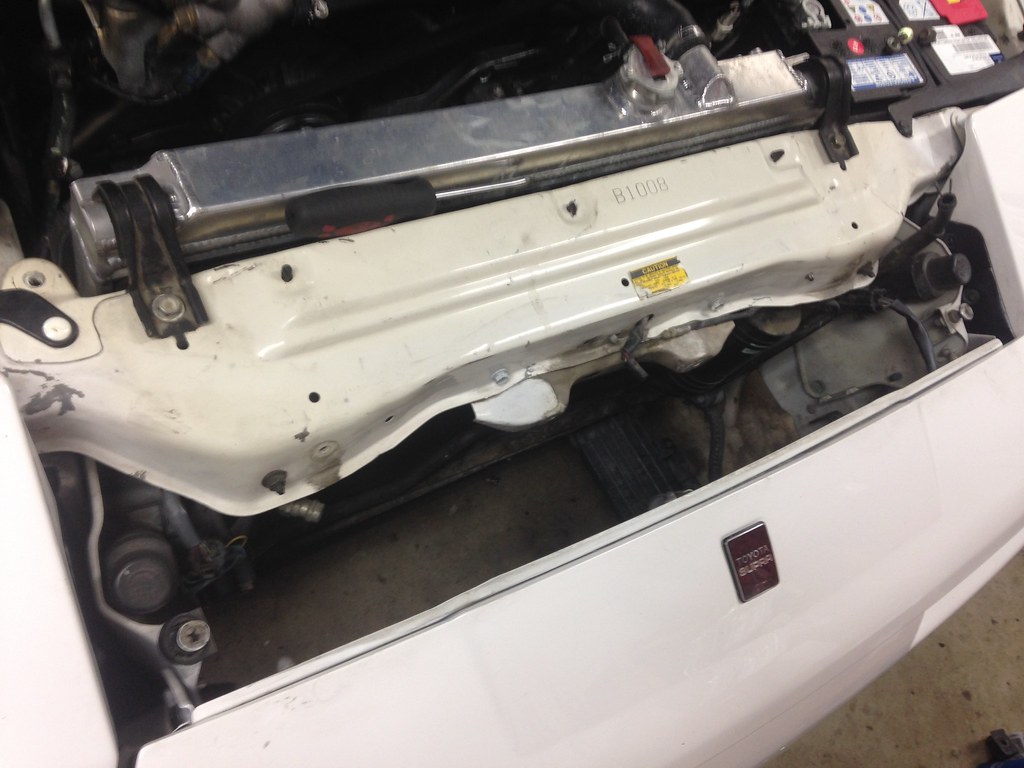
I cut the angle aluminum to length, then fitted it to where the original intercooler mounted. The aftermarket intercooler core was too tall to use the stock intercooler mounts directly, so I bridged the gap using two small brackets. The brackets were originally a small strip of metal about 3" long, which I cut in half and drilled holes into. The bracket was in a pile from my parts Supra, so it was originally a Toyota part (OEM whenever possible!).
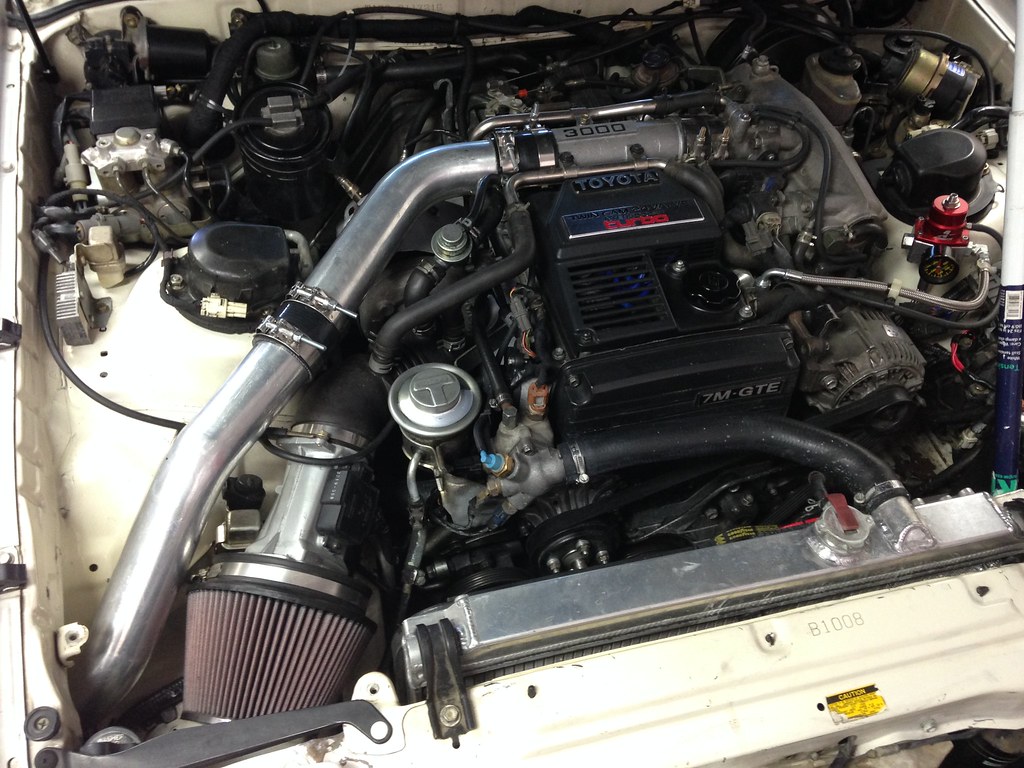
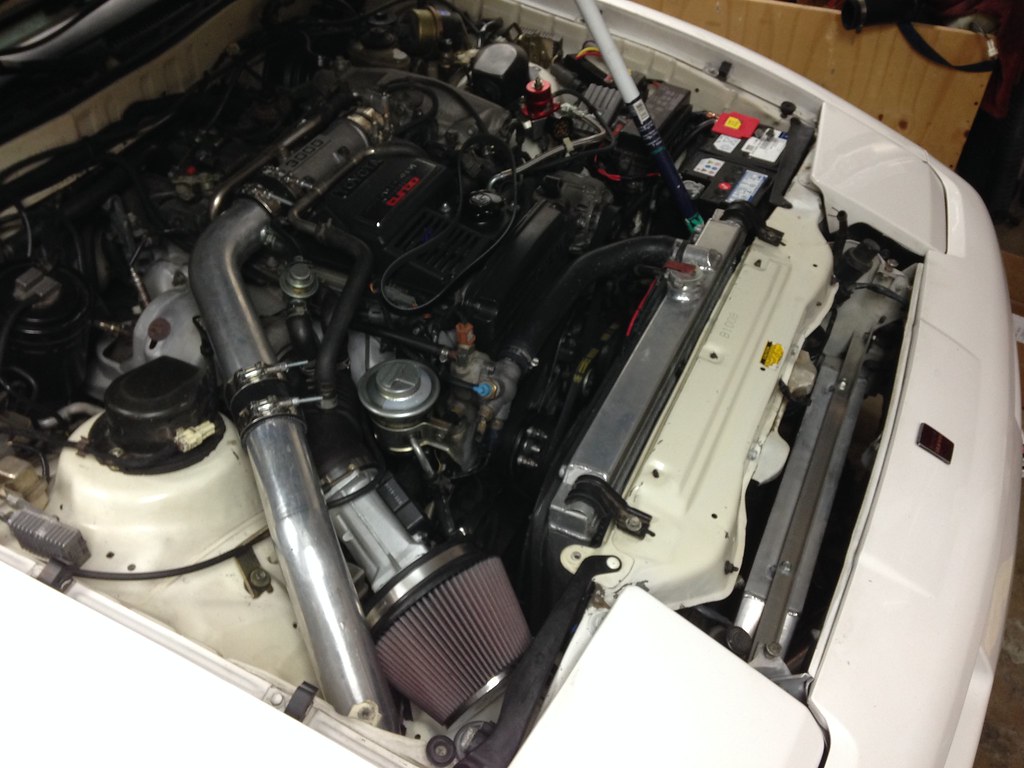
Here we have the mounted intercooler.
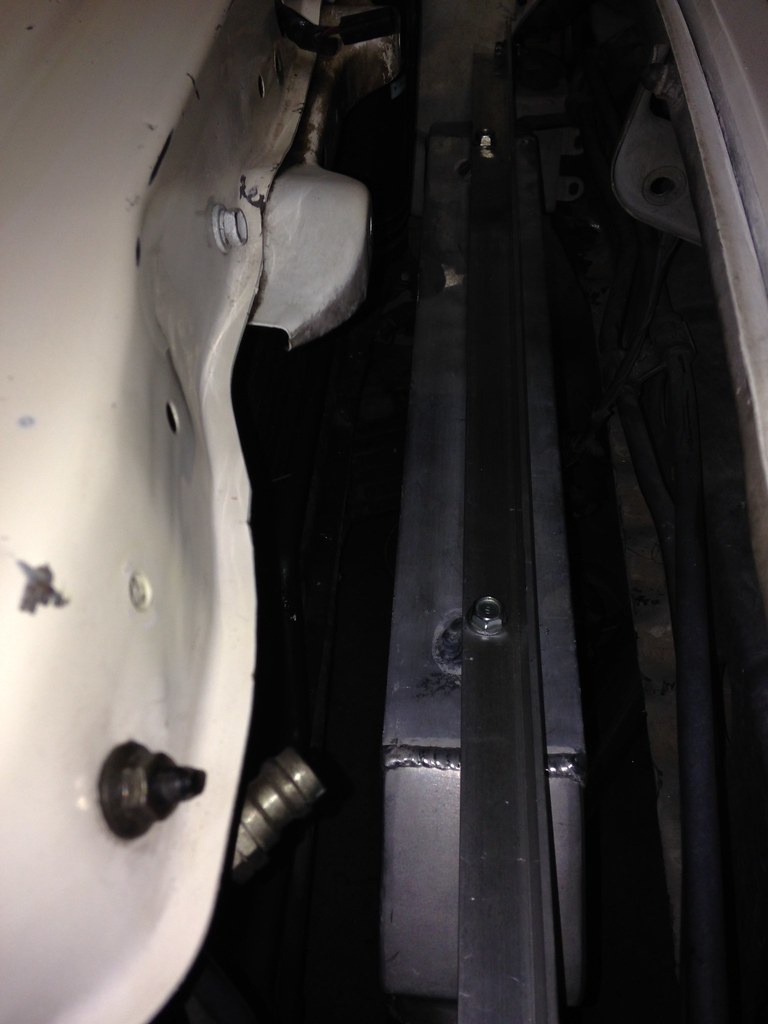
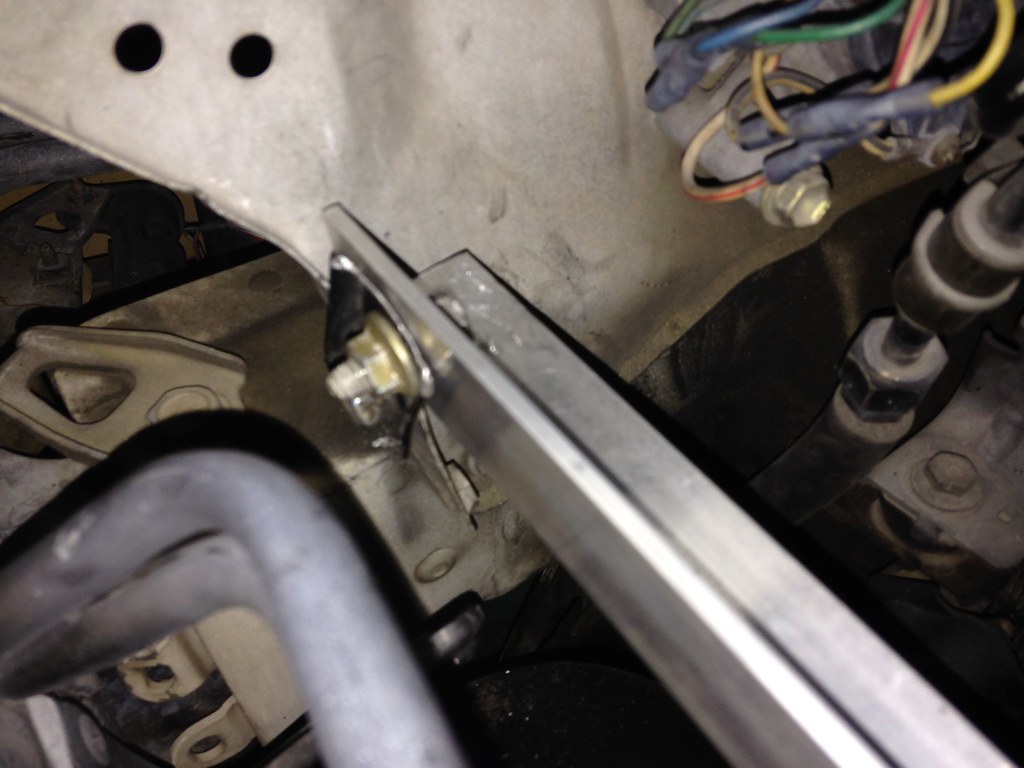
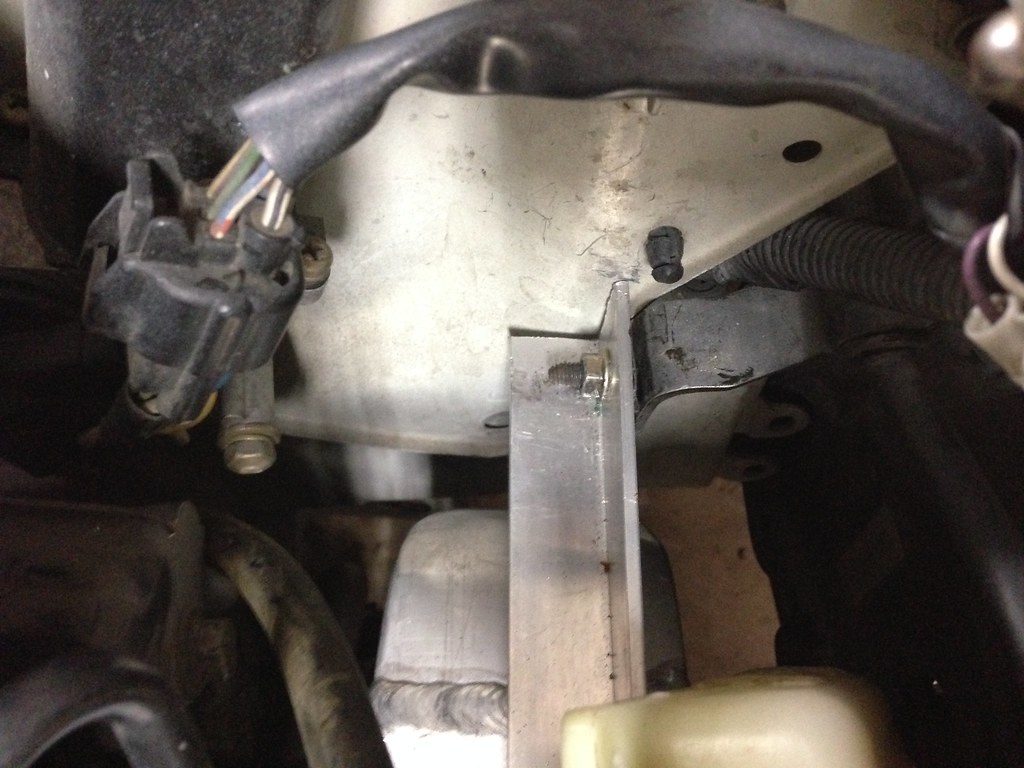
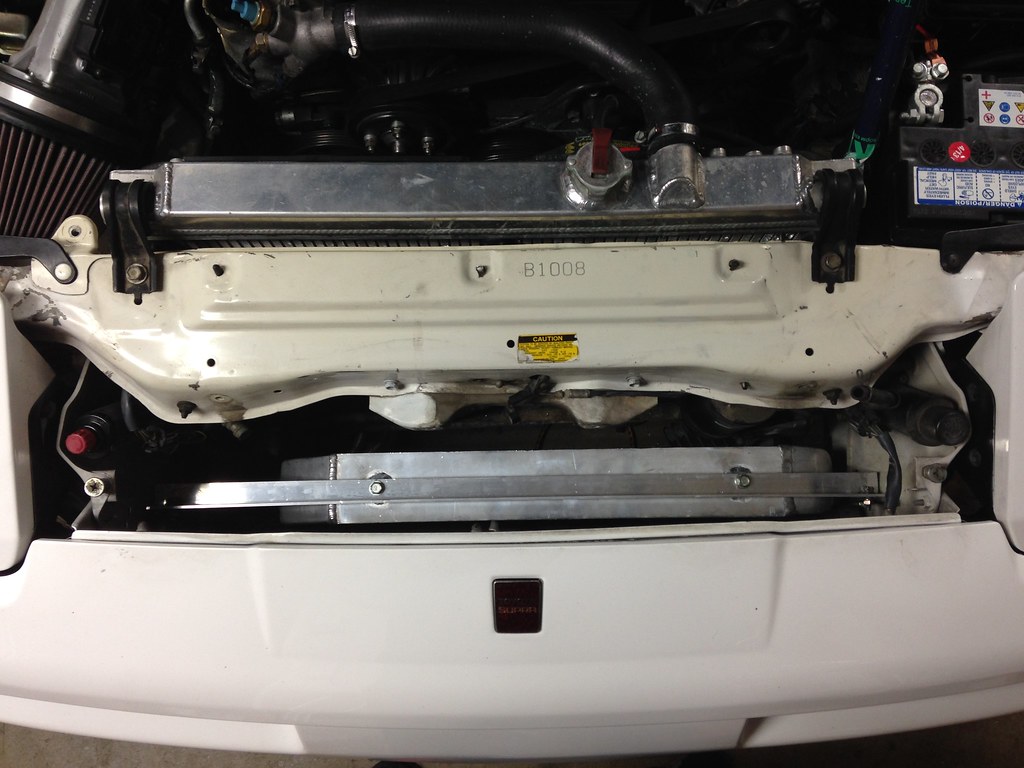
I cut off the lower portion of the hood latch support - this way the latch still has plenty of rigidity. The horns fit on either side of the hood latch rather well also. This is a temporary setup, but that is a MKIV coolant overflow. Currently considering a stainless overflow that is more friendly on the eyes ($39 on Amazon).
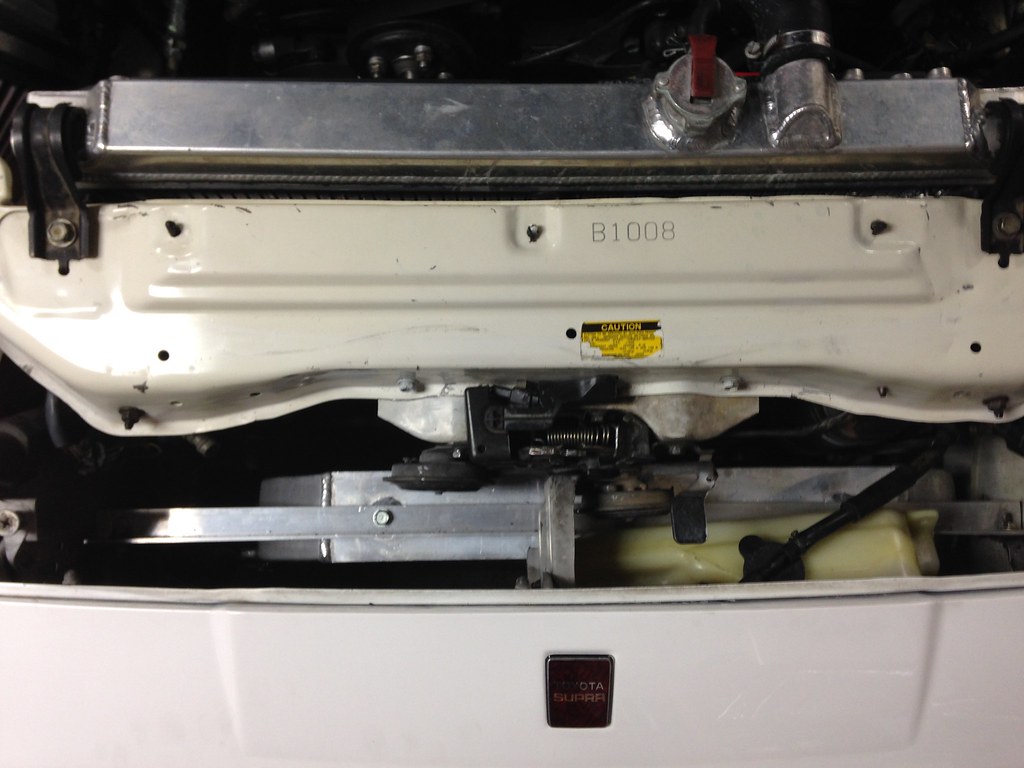
The intercooler mounting is very solid and hardly moves with force. There aren't any clearance issues with the crash bar or with scraping on the ground. The turbo spool up is more audible as well, I'm quite pleased with it.
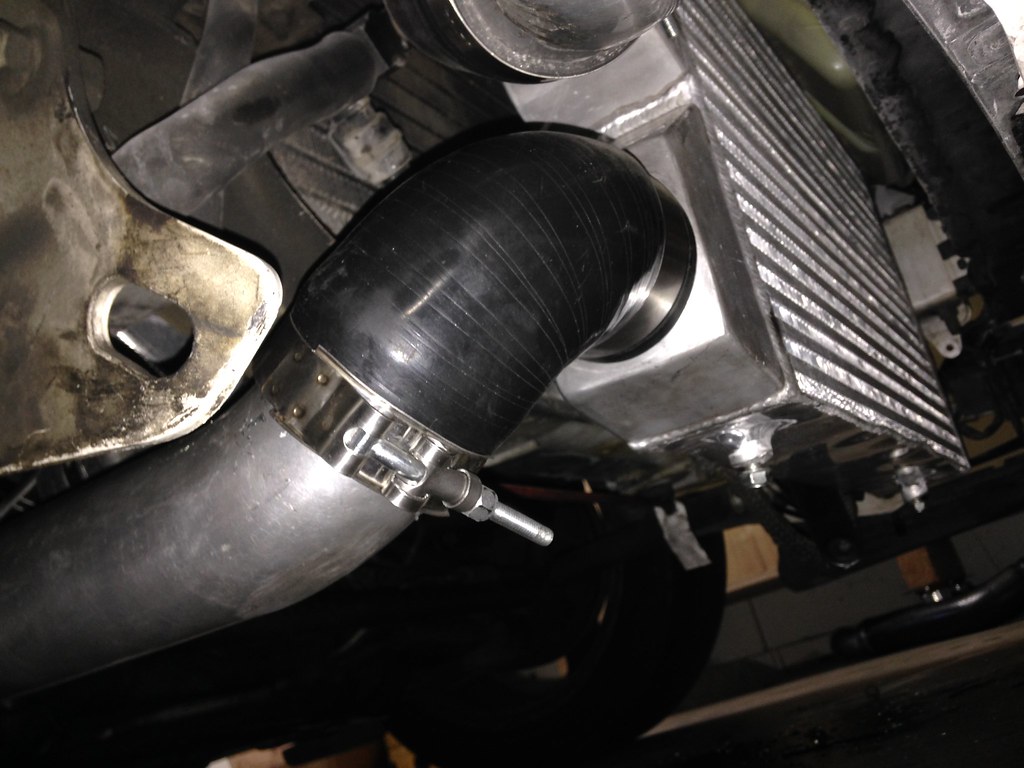
Gotta add some more driver's side photos to even out the rest of the thread, lol.
I love little details, I got a second little clip for the AFPR vacuum line. OEM parts and OEM fit.
Now the car has about 1100 miles
Finally gave the gas pedal the beans and it's boosting a stock 6psi quite nicely. So before I get a boost controller and start making PSI adjustments, I need to upgrade the intercooler and charge piping.
At first, I found a used intercooler piping kit for the stock intercooler, which came with all the clamps and silicone couplers. I changed my mind and resold the kit.
The next day, an ad for a complete used intercooler kit popped up. This is the exact kit that driftmotion and CX racing both sell for $450.
I got the kit for $100. Since it was a good deal, I bought all new silicone couplers and T-bolt clamps ([email protected]", 1@2"), just for the hell of it. Last, I stopped by the Home Depot and got a 1"x36" piece of angle aluminum for an intercooler mount. I chose an angle piece because of the extra rigidity, plus it lines up with the stock intercooler mounts.
Total of $150 ($300 saved!)
Things to take note in the following photo - the top left pipe is the one for the throttle body that replaces the 3000 pipe. Some idiot thought it would be a smart idea to make every single one of these kits with a MKIV "Supra" logo and "turbo" in generic font. This is the very definition of tacky. It's dreadfully bad.
If you install the supplied 3000 pipe, it sticks up instead of matching the angle of the original 3000 pipe. This is how misaligned the pipe looks when installed on another car.
This is where I would get an HKS 3000 pipe, but they're rare. I had to do the next best thing. I cut the restriction from the 3000 pipe so it's one size all of the way through. I chopped the nasty "Supra turbo" pipe just before the factory BOV port and joined the two with a silicone coupler and T-bolt clamps.
Stock intercooler, horns, hood latch, AC fan, oil cooler, and bracketry all removed.
I cut the angle aluminum to length, then fitted it to where the original intercooler mounted. The aftermarket intercooler core was too tall to use the stock intercooler mounts directly, so I bridged the gap using two small brackets. The brackets were originally a small strip of metal about 3" long, which I cut in half and drilled holes into. The bracket was in a pile from my parts Supra, so it was originally a Toyota part (OEM whenever possible!).
Here we have the mounted intercooler.
I cut off the lower portion of the hood latch support - this way the latch still has plenty of rigidity. The horns fit on either side of the hood latch rather well also. This is a temporary setup, but that is a MKIV coolant overflow. Currently considering a stainless overflow that is more friendly on the eyes ($39 on Amazon).
The intercooler mounting is very solid and hardly moves with force. There aren't any clearance issues with the crash bar or with scraping on the ground. The turbo spool up is more audible as well, I'm quite pleased with it.
Last edited:


BrianSD_42
New member
Everything with this project continues to look amazing man.

ChildrenOfBodom
Moderator
10 pages later and wow...Supra's lookin' awesome!
I'm so jealous how well cars hold up out west. You could never find something like that out here.
Thanks for sharing the pics and information COB.
Thanks! Glad you stuck through it. The car was starting to go sour a little with the silver Enkei wheels, but that turned around quickly.
It's a big redeeming quality of CA to have no rust. Someone mentioned it before, but the rust belt cars that some deem as alright make us cringe over here!
Thanks for the time you took to read it all, it was my pleasure to post it.
Everything with this project continues to look amazing man.
Thanks Brian! Glad you like it.
man! I love MKIII supras. Had an 87 i was rebuilding but sold it due to rolling the truck.
This thing is super clean!
You know, for how rare these things are getting, it's surprising how many people have told me about owning one! Sucks to hear about your 87 having to go, definitely post some pictures if you decide to get back into a MKIII!
Thanks for the clean compliment! If the car could talk, it'd say thanks!
ChildrenOfBodom
Moderator
The tanabe exhaust is great in many ways, but horrible in others.
Pros:
Quiet (good for cops)
Good size and flow
Opens up nicely with throttle
Will be great with exhaust cutout so I can have quiet and loud
Cons:
Giant muffler. Not just that.... STAINLESS giant muffler.
It's a damn mirror when you're driving behind it, night driving especially
Takes away from the cleanliness of the car, looks cheap.
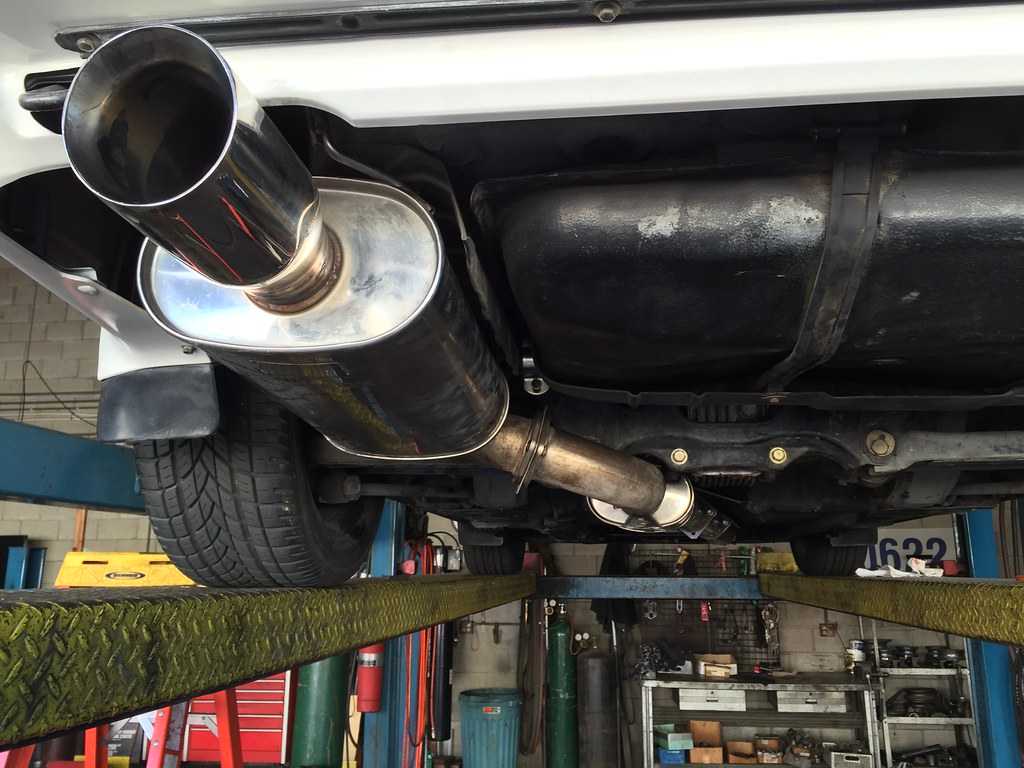
The solution, ironically, is something cheap. VHT Hi-Temp black paint! I taped the muffler tip off as well as the weld joining it to the muffler, the rest is black.
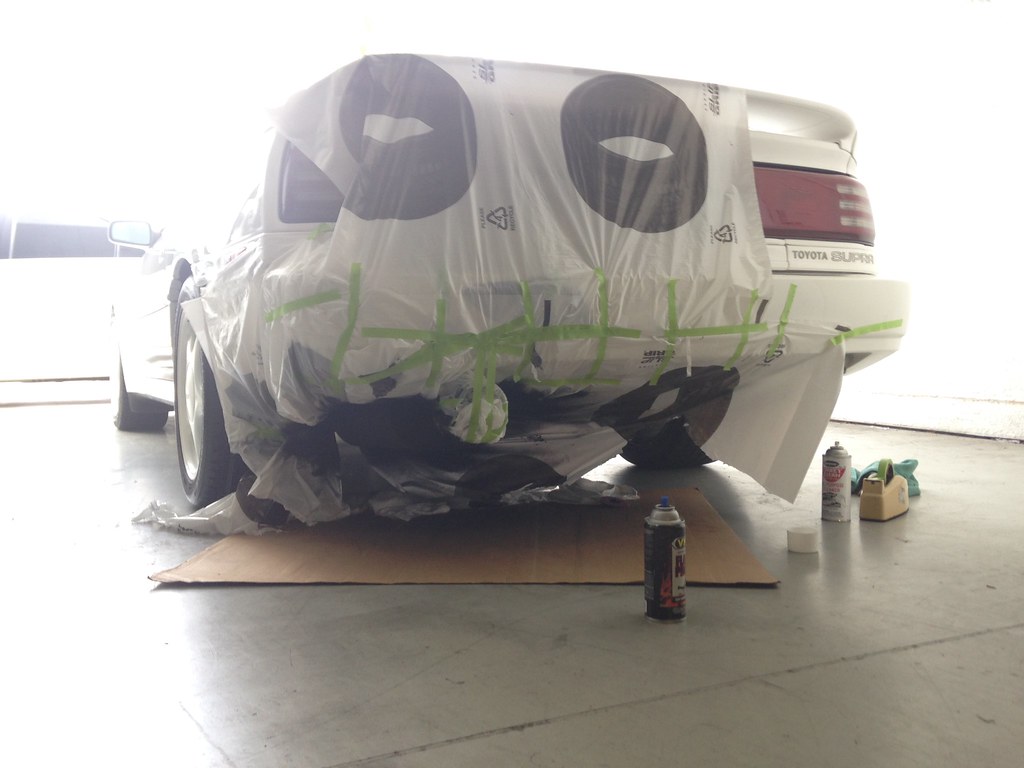
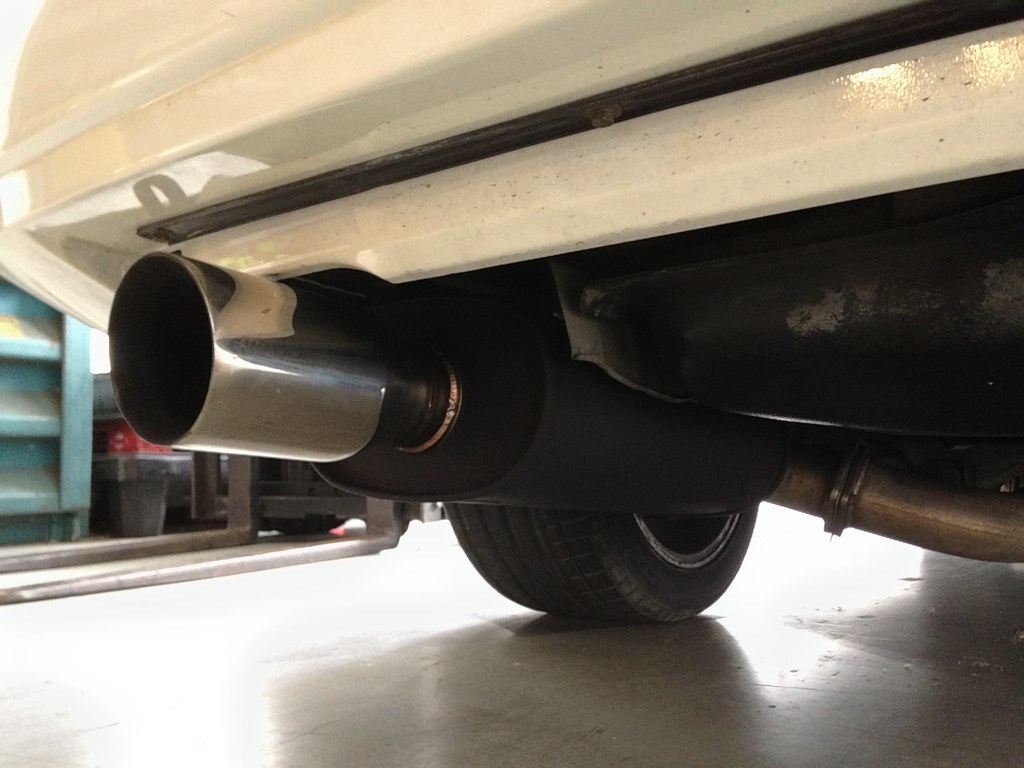
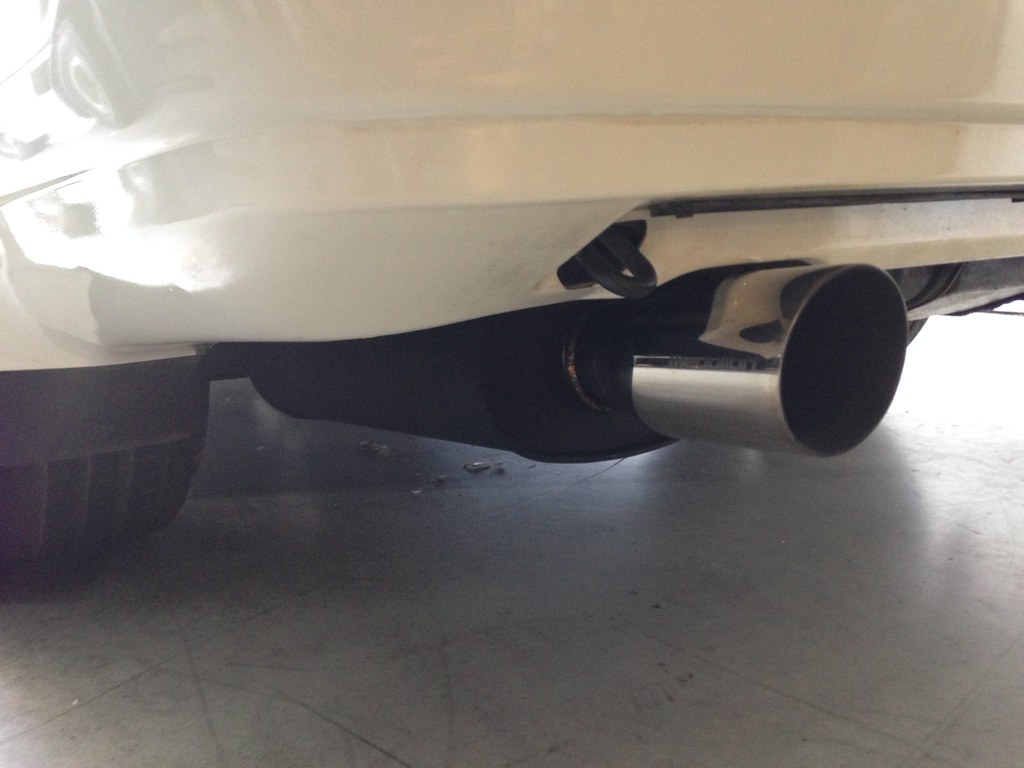
The muffler is much more subtle and not nearly as much of any eyesore. The black muffler along with the 285's really worked wonders with the rear end stance.
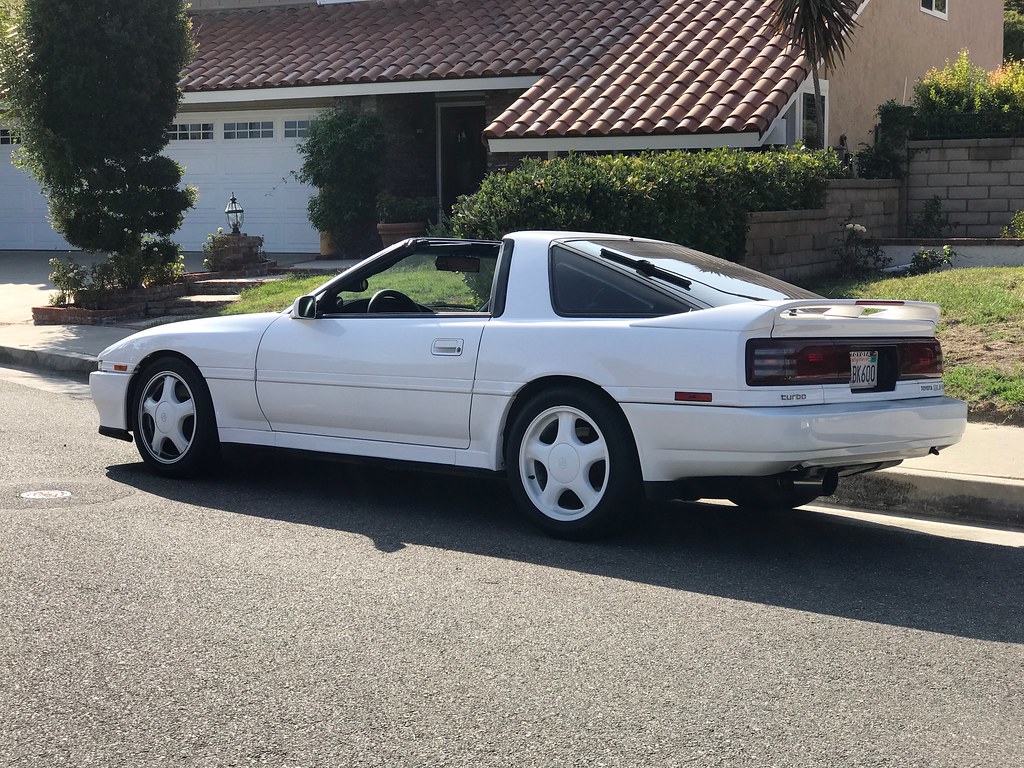
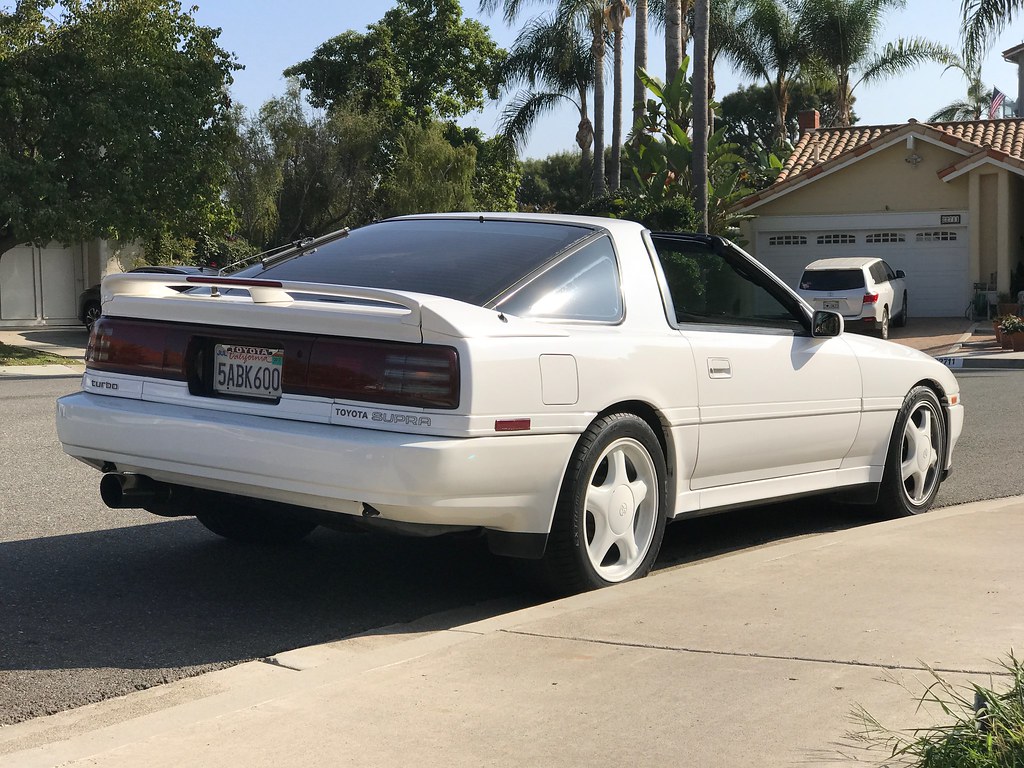
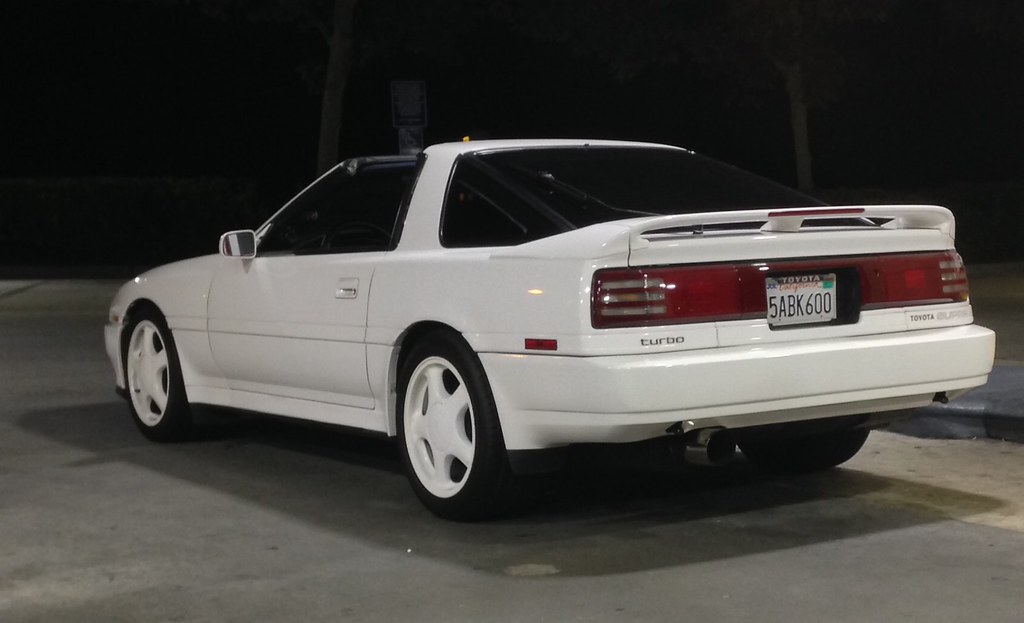
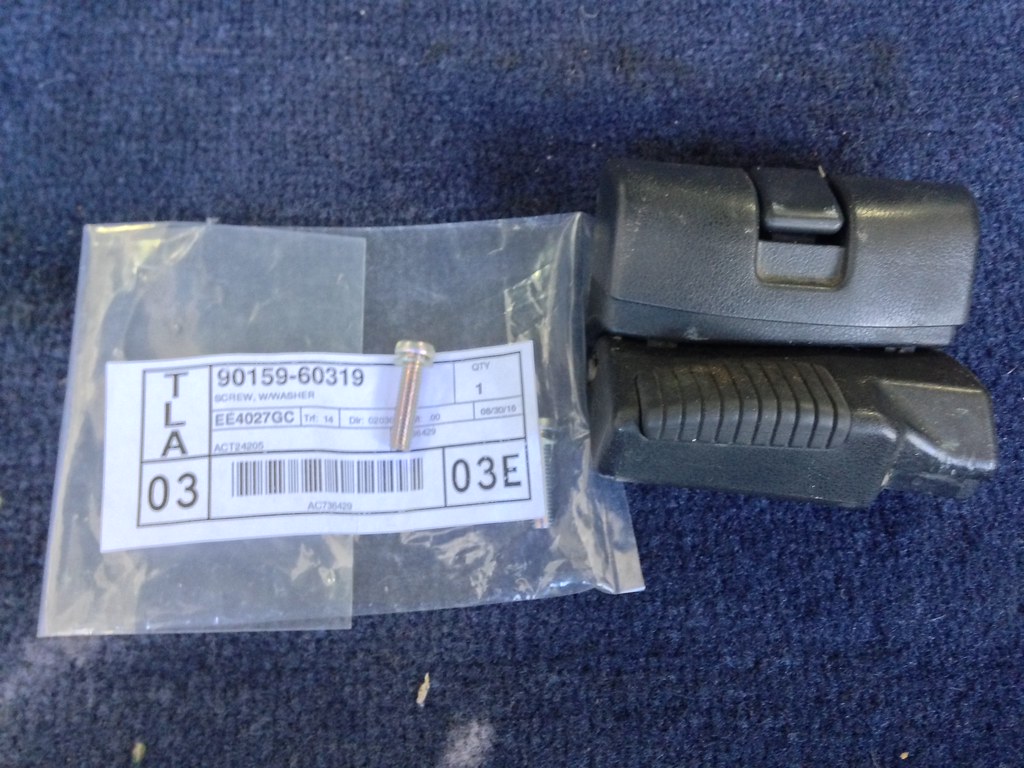
Targa holder for the right side was off when I was building the car. I misplaced the screws for one side, thus I had to order new ones from Toyota (cents each, why not go OEM?)
Functional targa holders are seriously something to behold. I couldn't believe how well they still work. I didn't photograph the top in the trunk, but damn, take my word for it when I say it's nice.
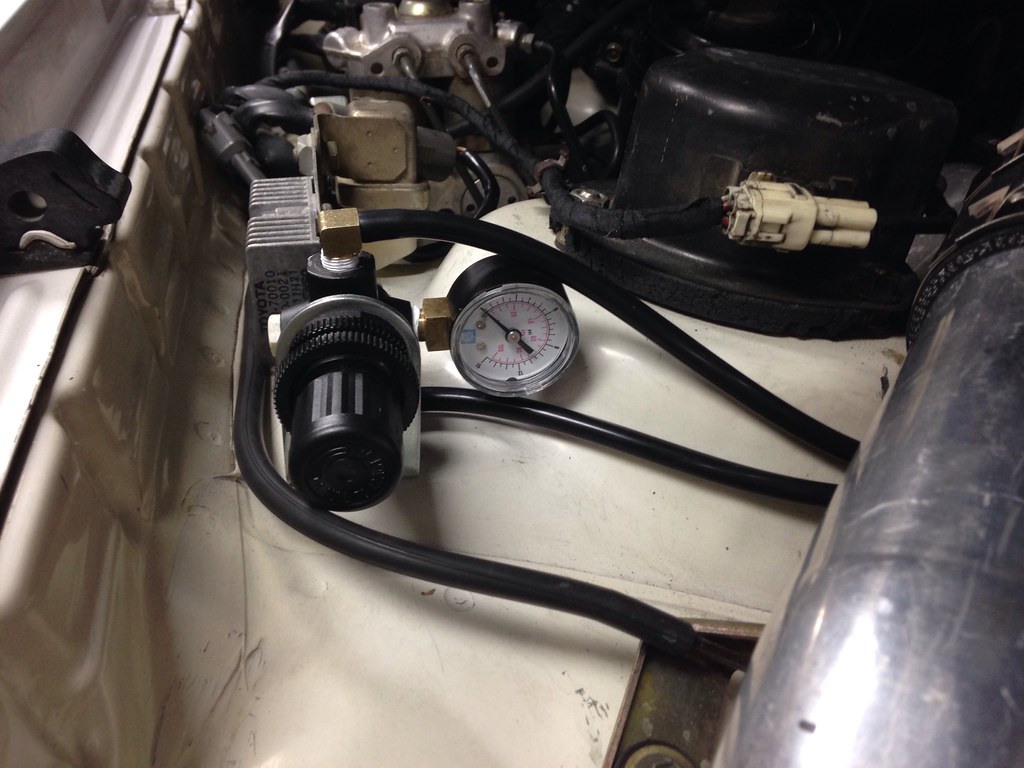
Norgren regulator installed as a boost controller. Tight = no pressure to wastegate AKA never ending boost buildup. Loosen until the wastegate opens at desired pressure and done! Currently set to 15PSI, night runs in this car are a blast!
The 285's chirp in second easily!
Pros:
Quiet (good for cops)
Good size and flow
Opens up nicely with throttle
Will be great with exhaust cutout so I can have quiet and loud
Cons:
Giant muffler. Not just that.... STAINLESS giant muffler.
It's a damn mirror when you're driving behind it, night driving especially
Takes away from the cleanliness of the car, looks cheap.
The solution, ironically, is something cheap. VHT Hi-Temp black paint! I taped the muffler tip off as well as the weld joining it to the muffler, the rest is black.
The muffler is much more subtle and not nearly as much of any eyesore. The black muffler along with the 285's really worked wonders with the rear end stance.
Targa holder for the right side was off when I was building the car. I misplaced the screws for one side, thus I had to order new ones from Toyota (cents each, why not go OEM?)
Functional targa holders are seriously something to behold. I couldn't believe how well they still work. I didn't photograph the top in the trunk, but damn, take my word for it when I say it's nice.
Norgren regulator installed as a boost controller. Tight = no pressure to wastegate AKA never ending boost buildup. Loosen until the wastegate opens at desired pressure and done! Currently set to 15PSI, night runs in this car are a blast!
The 285's chirp in second easily!

BrazilianT4R
New member
Hi.
Foreigner doubt about licence plates...
The licence plate for the 3rd gen I get is personalized, but why the 1st gen/89 supra´s are white and the 94´s black?
BTW, I liked the blackened muffler a lot more as well. It was "competing" for looks with the rest of the car altogether.
Foreigner doubt about licence plates...
The licence plate for the 3rd gen I get is personalized, but why the 1st gen/89 supra´s are white and the 94´s black?
BTW, I liked the blackened muffler a lot more as well. It was "competing" for looks with the rest of the car altogether.
Last edited:
ChildrenOfBodom
Moderator
3 year picture dump...
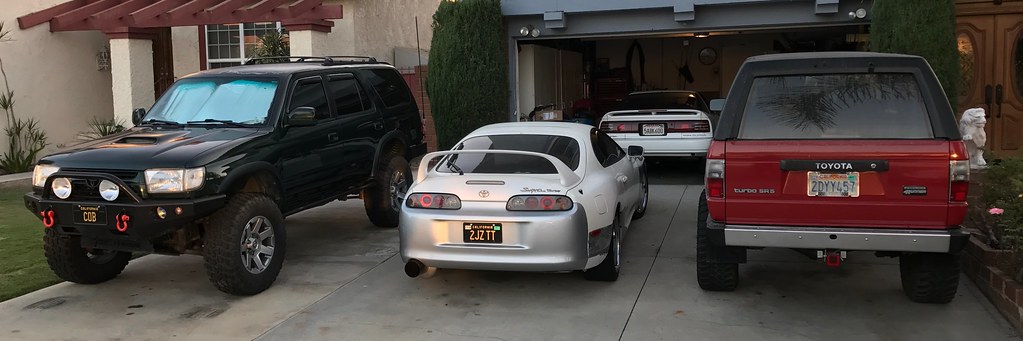
My two 80's Toyotas

Got this one off of a friend, carbon fiber plate frame.

I also did the wiring mod for the fog lights to stay on without the headlamps.


Replacement mirror switch from a RAV4
[


My two 80's Toyotas
Got this one off of a friend, carbon fiber plate frame.
I also did the wiring mod for the fog lights to stay on without the headlamps.
Replacement mirror switch from a RAV4
[
ChildrenOfBodom
Moderator
One random day, I saw a craigslist post about a door panel for sale. Good condition blue door panels are rarer than hens teeth.
The existing driver door panel:

Contrasting against an otherwise clean interior...

Here's the panel comparison... old on top, new on bottom.

I elected to only use the vinyl card portion of the new panel and reuse the rest of my existing parts.


AutoExtrude cup holder insert. Came free with a targa brace.

Fender Heavy

The existing driver door panel:
Contrasting against an otherwise clean interior...
Here's the panel comparison... old on top, new on bottom.
I elected to only use the vinyl card portion of the new panel and reuse the rest of my existing parts.
AutoExtrude cup holder insert. Came free with a targa brace.
Fender Heavy
Last edited:
ChildrenOfBodom
Moderator
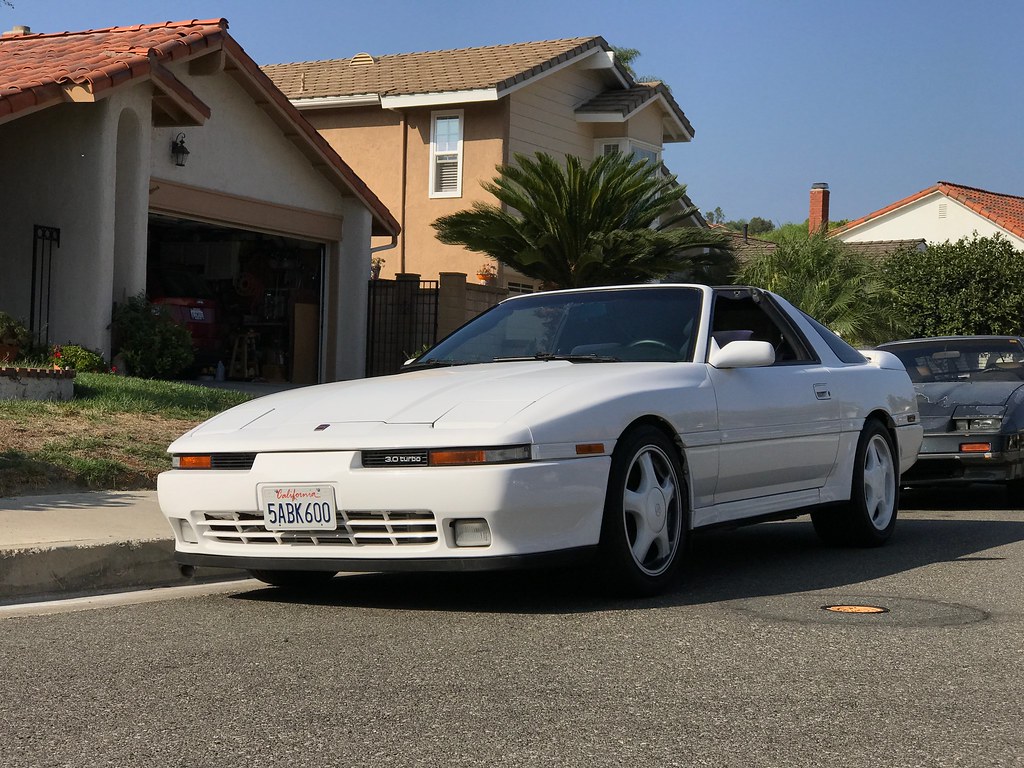
The car has had 2 plate numbers over the course of its existence...
From new until the accident, it had plate # 2PGD613. California plates beginning with 2 are generally from the late 1980s.
The car received the plate # 5ABK600 around 2005.
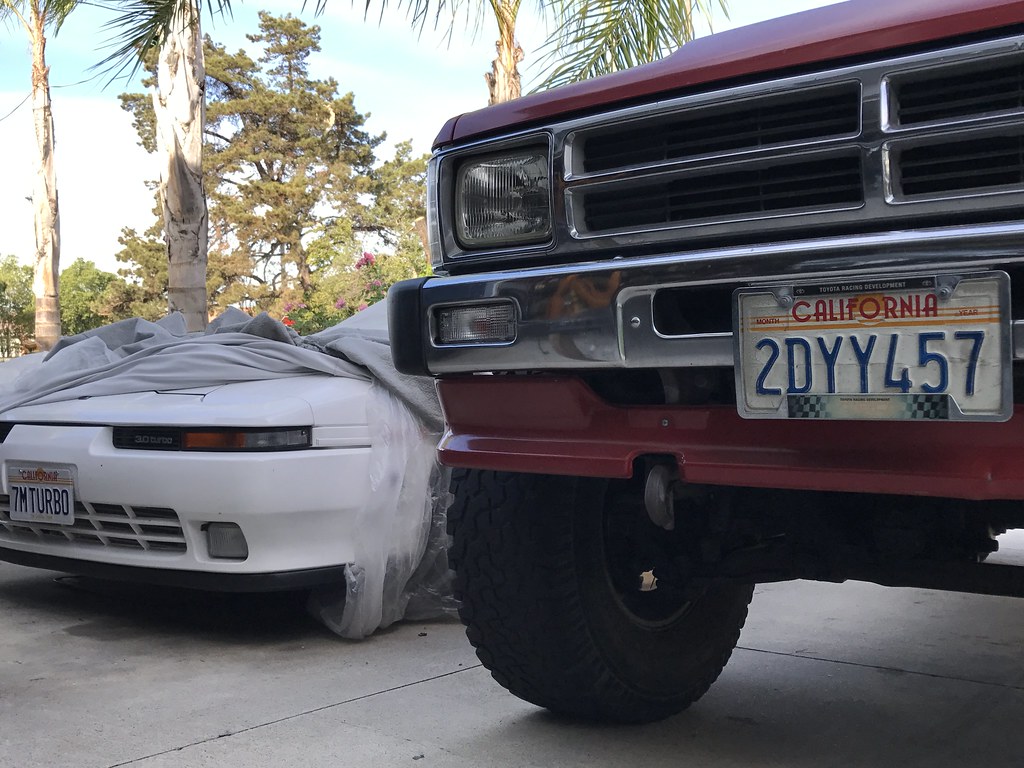
One particular license plate design that has always caught my attention is the "California Sunrise" plate, available only for a very short period of time in the late 1980s. Many earlier MK3's have these plates.
DrivingWhileAwesome offers a reflective sticker kit that effectively converts your newer style white CA plate into the California Sunrise.
New plate # 7M TURBO


Versus the real thing
From new until the accident, it had plate # 2PGD613. California plates beginning with 2 are generally from the late 1980s.
The car received the plate # 5ABK600 around 2005.
One particular license plate design that has always caught my attention is the "California Sunrise" plate, available only for a very short period of time in the late 1980s. Many earlier MK3's have these plates.
DrivingWhileAwesome offers a reflective sticker kit that effectively converts your newer style white CA plate into the California Sunrise.
New plate # 7M TURBO
Versus the real thing
ChildrenOfBodom
Moderator
The puck clutch in this car just plain sucks to daily... this car deserves much better...


That point was finally hit home when I busted the R154 5th gear thrust washer... 1st was completely inoperable and the car was parked.

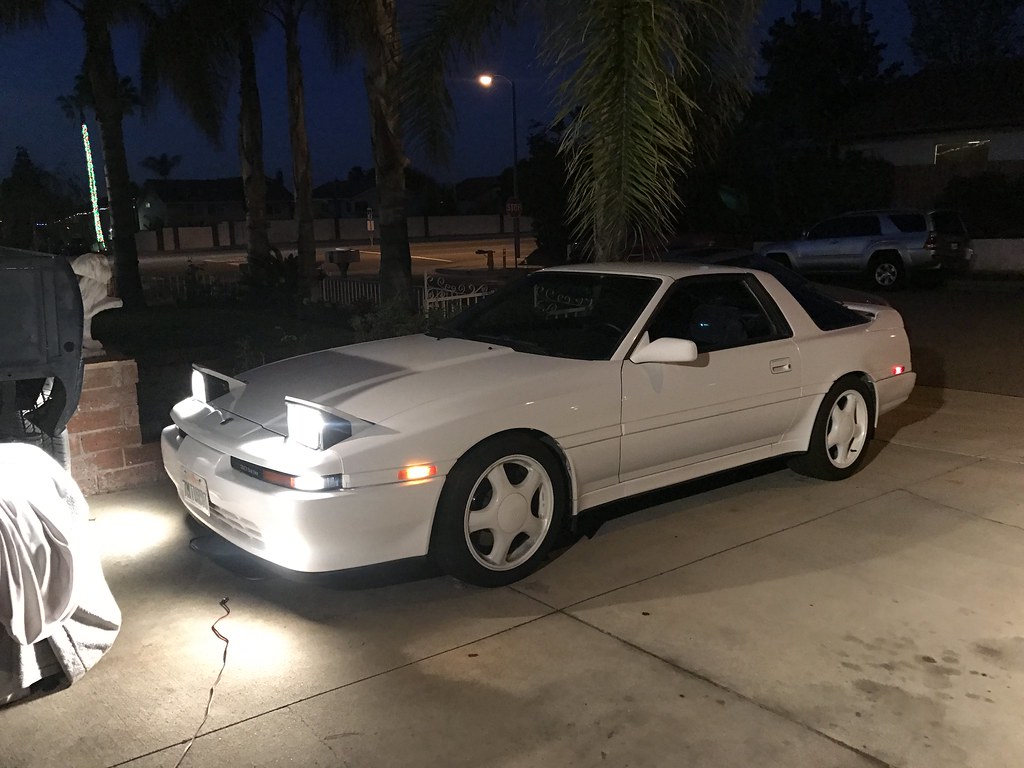
(ooooh little puppy)

The MK4 Supra was off to paint, so this MK3 went into hibernation...


The MKIV, when she came back...
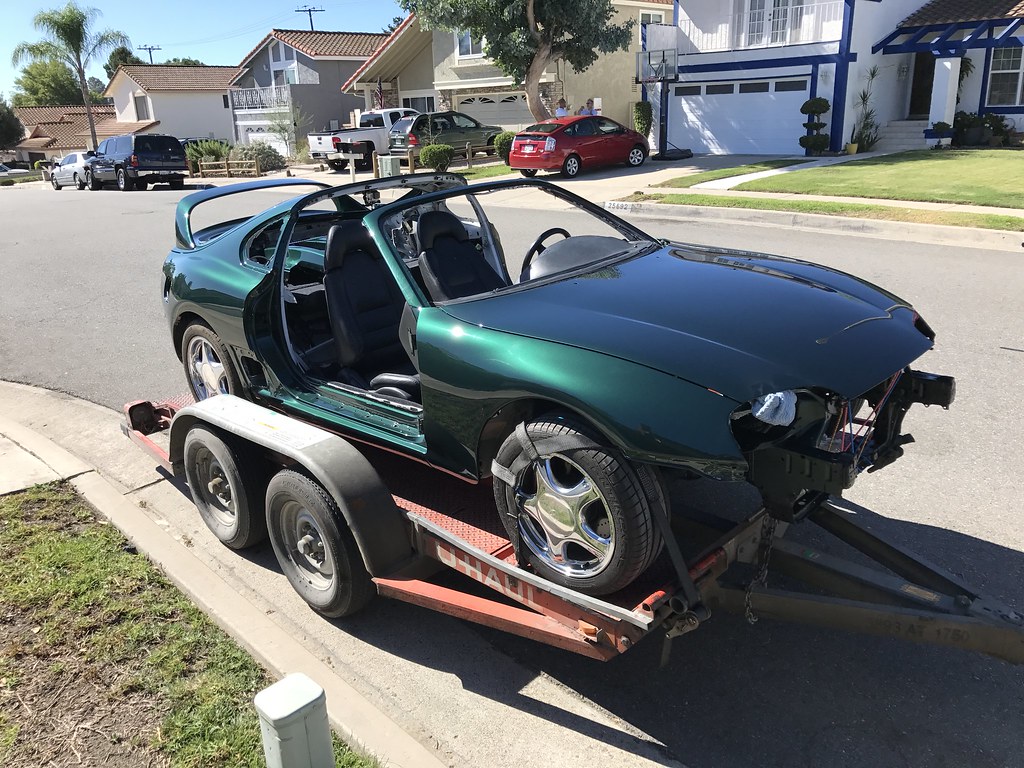
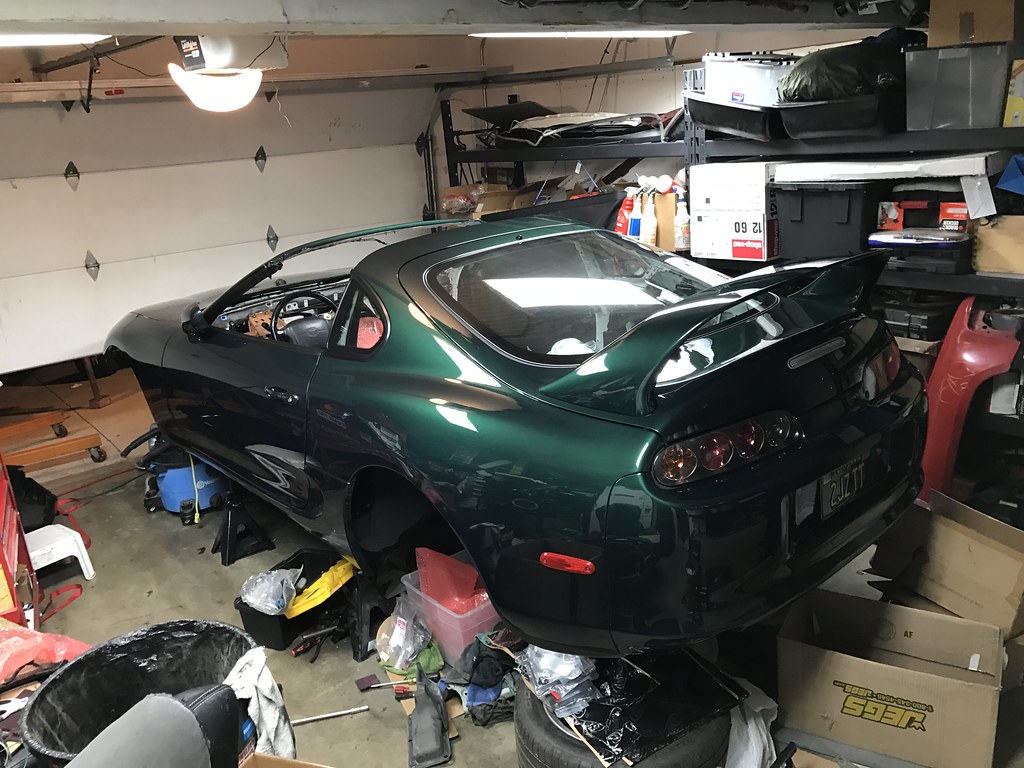


That point was finally hit home when I busted the R154 5th gear thrust washer... 1st was completely inoperable and the car was parked.
(ooooh little puppy)
The MK4 Supra was off to paint, so this MK3 went into hibernation...
The MKIV, when she came back...
Last edited:
BrianSD_42
New member
Looks great James!
ChildrenOfBodom
Moderator
The R series transmissions are covered quite nicely by the Marlin Crawler guys in Fresno, CA. They offer billet shift forks, chromoly thrust washers, heavy duty bearing retainer plates, shift bushings, and more.

If you've read through this thread, then you may recall when the transmission was rebuilt. The rebuild consisted of new bearings and synchronizers, but retained stock forks, thrust washer, and bearing retainer.
Marlin parts... anodized red billet is nice Only two forks shown, but I got all three. One was backordered at the time.

One of my favorite mods for older sealed-beam headlight replacements are these conversion housings. NAPA Nightvision VIVID bulbs.

Up on stands...


Working well into the night

Transmission out! I dropped it off at the shop where I used to work (where the engine and trans rebuild took place).


If you've read through this thread, then you may recall when the transmission was rebuilt. The rebuild consisted of new bearings and synchronizers, but retained stock forks, thrust washer, and bearing retainer.
Marlin parts... anodized red billet is nice
Only two forks shown, but I got all three. One was backordered at the time.
One of my favorite mods for older sealed-beam headlight replacements are these conversion housings. NAPA Nightvision VIVID bulbs.
Up on stands...
Working well into the night
Transmission out! I dropped it off at the shop where I used to work (where the engine and trans rebuild took place).
ChildrenOfBodom
Moderator
I continued on with suspension work to get the car feeling like it should.
Here are the new Energy Suspension bushings.
Front and rear end links
Front and rear control arm bushings
Front and rear Greaseable sway bar bushings with new brackets
Coil spring isolators for the front struts
Engine mounts
Engine damper
Transmission mount

The original bushings were completely ruined...

Hammered the flanges back to get somewhere to grip and press these out.


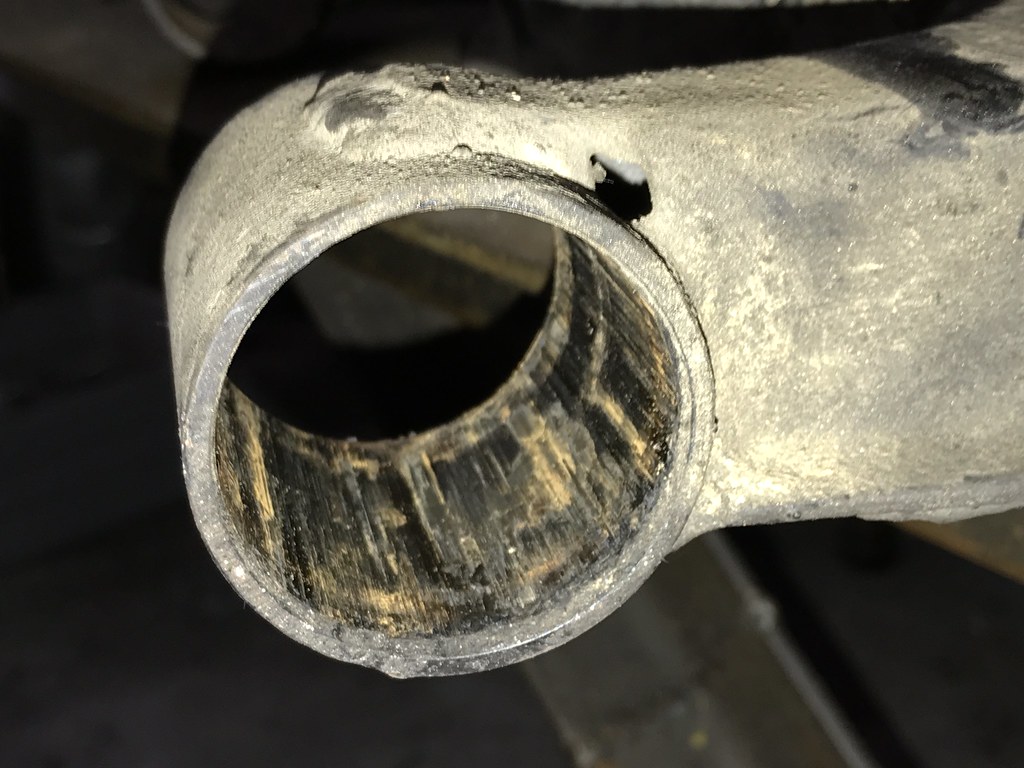
The new polyurethane control arm bushings # 8.3126R installed in the passenger side arms.


End link

Coil spring isolator

Here are the new Energy Suspension bushings.
Front and rear end links
Front and rear control arm bushings
Front and rear Greaseable sway bar bushings with new brackets
Coil spring isolators for the front struts
Engine mounts
Engine damper
Transmission mount
The original bushings were completely ruined...
Hammered the flanges back to get somewhere to grip and press these out.
The new polyurethane control arm bushings # 8.3126R installed in the passenger side arms.
End link
Coil spring isolator
ChildrenOfBodom
Moderator
I love rain and all, but dang man, I've got a car to build...
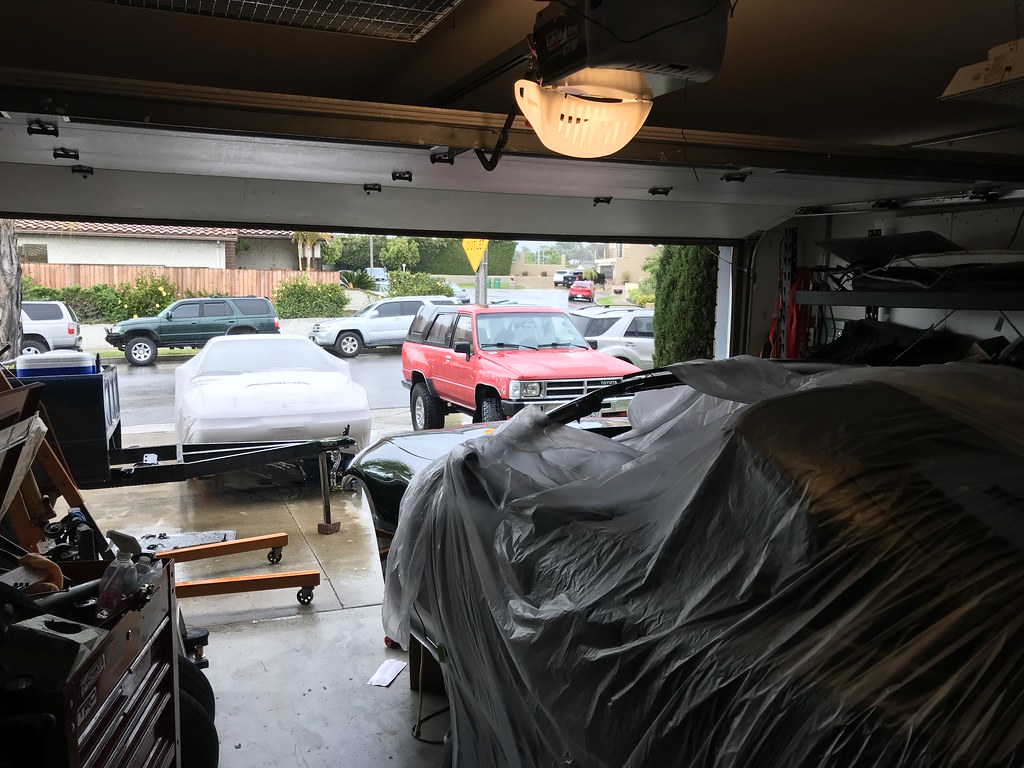
Eventually the rain calmed down and I got the R154 back.

The factory thrust washer, which was new and only had 2,500 miles, broke into 5 pieces.

I started by gathering my mount stuff and installing an Energy Suspension polyurethane transmission mount # 3.1108R. This mount is originally for a GM transmission, same pattern as the TH350/400's. It has a 3.75"-4.25" bolt spacing on one side and 1.5" on the other.

It gets installed upside-down into the Toyota, the crossmember side of the GM mount instead will be used to accept a single-bolt bracket produced by driftmotion (seen in the photo above, upper right hand corner)
The factory R154 crossmember can be drilled to accept the transmission side of the GM mount (I chose to use a 4" spacing to allow for some adjustability).


I swapped to another 7M bell housing. The one I had installed previously has had a crack in it since I got it, directly where the starter bolts up. I also swapped the reverse switch.


Next up was engine mounts... did not want to do this while working around a transmission. I installed Energy Suspension 2.1104R engine mounts for Jeep CJ-5/7 with a special adapter, also made my driftmotion.


Eventually the rain calmed down and I got the R154 back.
The factory thrust washer, which was new and only had 2,500 miles, broke into 5 pieces.
I started by gathering my mount stuff and installing an Energy Suspension polyurethane transmission mount # 3.1108R. This mount is originally for a GM transmission, same pattern as the TH350/400's. It has a 3.75"-4.25" bolt spacing on one side and 1.5" on the other.
It gets installed upside-down into the Toyota, the crossmember side of the GM mount instead will be used to accept a single-bolt bracket produced by driftmotion (seen in the photo above, upper right hand corner)
The factory R154 crossmember can be drilled to accept the transmission side of the GM mount (I chose to use a 4" spacing to allow for some adjustability).
I swapped to another 7M bell housing. The one I had installed previously has had a crack in it since I got it, directly where the starter bolts up. I also swapped the reverse switch.
Next up was engine mounts... did not want to do this while working around a transmission. I installed Energy Suspension 2.1104R engine mounts for Jeep CJ-5/7 with a special adapter, also made my driftmotion.
ChildrenOfBodom
Moderator
Next up was the flywheel.
Old flywheel on the left is a competition brand with full aluminum face, weighs somewhere around 12-15 lbs.
New flywheel on the right is a Fidanza brand with steel friction face, weighing in at 11lbs.


driftmotion full face clutch good for 450rwhp.

Going up!


New ARP bolts for the pressure plate.

Raining... oh well, keep going

Both sides got new Moog ball joints, inner and outer tie rods, and new steering bellows.

Old flywheel on the left is a competition brand with full aluminum face, weighs somewhere around 12-15 lbs.
New flywheel on the right is a Fidanza brand with steel friction face, weighing in at 11lbs.
driftmotion full face clutch good for 450rwhp.
Going up!
New ARP bolts for the pressure plate.
Raining... oh well, keep going
Both sides got new Moog ball joints, inner and outer tie rods, and new steering bellows.
Similar threads
- Locked
- Replies
- 6
- Views
- 6K


- Replies
- 5
- Views
- 11K
- Replies
- 4
- Views
- 4K


