Complete 2000 4wd, manual, v6 swap into 2wd auto 1999 build/project

deanx2009

New member
SO,

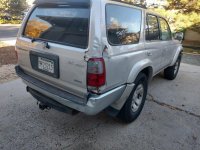
Sold a small 95 toyota pickup 4wd 5spd I got with a completely rusted out frame (I meticulously removed rust and repaired) for a well below market price today, and stumbled upon an awesome expedition vehicle to start my build.

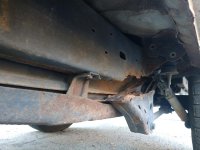
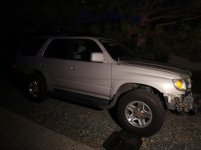
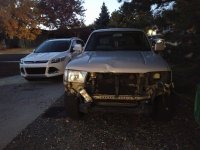
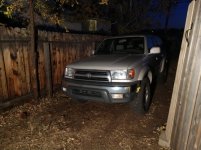
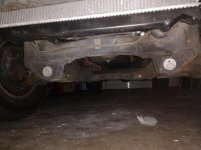
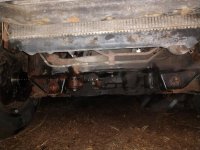
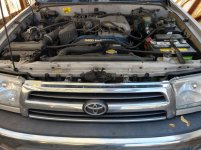
I got this for $1400. A running 3.4L v6 with 171k miles, a fresh timing belt, water pump, and ignition wire/spark plug set. 5 speed, 4x4, sr5...THE CATCH...more rust! I have a hatred and love for rusted out frames now. People see em, and immediately the whole car has a DISEASE. Well, im a compassionate fellow-and this 4runner is going to survive (or at least its heart).

My plan of overlanding in the pickup werent possible due to the tow restrictions and limited power output of the 22re. I have a small expedition trailer I 90% finished that I still use, but I will be making a new trailer for this build. Even with the trailer I own and the planned trailer build being well under a few thousand pounds, I still prefer to have the ability to tow AND go the speed limit.

Currently the runner I purchased is sitting in the driveway, unwise to my plans. My plans, unless someone were to dissuade me, are to find a nice condition 4runner donor body (auto or manual) that il be swapping the good driveline into. This body isnt in the worst shape, but if I can get a frame, interior, exterior....uh...everything except the driveline for a fair price in good condition, its going to make this build a hell of a lot easier.

I still have $1700 left to get the base vehicle, so il be searching craigslist, facebook, and driveways for a fit!
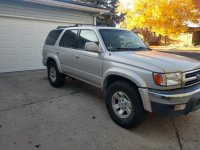
 

Attachments

  • FF23A3D3-F7E5-46EB-9D7C-642FFAB3B1FD.jpg
    FF23A3D3-F7E5-46EB-9D7C-642FFAB3B1FD.jpg
    136.7 KB · Views: 1,623
  • 982B6D28-C2A0-4341-9266-0E2C7659ED4A.jpg
    982B6D28-C2A0-4341-9266-0E2C7659ED4A.jpg
    137.1 KB · Views: 1,386
  • B0BF3964-DD44-4F24-8867-C090FC1919BC.jpg
    B0BF3964-DD44-4F24-8867-C090FC1919BC.jpg
    136.7 KB · Views: 1,668
  • F5202E9A-3887-44B0-8A2C-27493EC7F2D7.jpg
    F5202E9A-3887-44B0-8A2C-27493EC7F2D7.jpg
    129 KB · Views: 1,312
Register to hide this ad
UPDATE

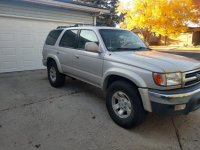
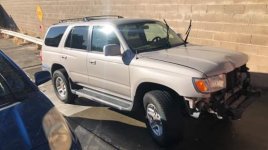
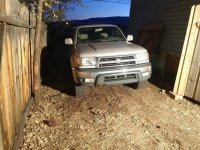
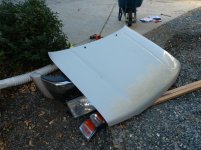
found a 99 runner with a v6, automatic, and front end damage (hit a deer, frame is great!

It seems to be the same color , so swapping pieces should work easily. I believe it was repainted because of how new the paint looks, and it looks a little more sparkly than I recall from the first runner I bought . We will see tomorrow in the light!

Got it for 1300, will be driving it 200 miles back to the house tomorrow. It has 300k miles but surprisingly runs and drives very well...

Plan is to swap everything mechanical from the donor 4wd into this much better frame and body..sad thing is this one is not an sr5 and doesn’t have a moon roof, but I can live without that for no huge dents in the rear and no rust.
 

Attachments

  • F654E592-37B8-40E9-9159-CBEFB8C80B82.jpeg
    F654E592-37B8-40E9-9159-CBEFB8C80B82.jpeg
    29.9 KB · Views: 1,288
  • F91F4F65-88AE-45F2-B150-6B6E24BA6C7D.jpg
    F91F4F65-88AE-45F2-B150-6B6E24BA6C7D.jpg
    136.3 KB · Views: 1,326
  • E2BC2A55-26A0-4315-901B-FCDAC17263AB.jpg
    E2BC2A55-26A0-4315-901B-FCDAC17263AB.jpg
    136 KB · Views: 1,509
No sunroof = no leaks and extra headroom.

You are on the right path here. Looks like the 4WD donor is an '00 and that should be nearly 100% compatible with the '99 chassis.

You will need to move the transmission mount crossmember and modify the shifter hole. Otherwise, it is as close to plug-n-play as it gets...

See my thread, linked in my signature for more info/ideas. I stayed auto, but most of the work applies either way.

-Charlie
 
No sunroof = no leaks and extra headroom.

You are on the right path here. Looks like the 4WD donor is an '00 and that should be nearly 100% compatible with the '99 chassis.

You will need to move the transmission mount crossmember and modify the shifter hole. Otherwise, it is as close to plug-n-play as it gets...

See my thread, linked in my signature for more info/ideas. I stayed auto, but most of the work applies either way.

-Charlie

Subscribed! I love a good swap :thumb3:

I've actually read through both of your build threads before I even got this second 4runner...very thorough and gave me the information I needed! Only question is did you feel welding in the OEM 4wd crossmember was worth the time? Or would you buy the budbuilt. Heard they make one that's a direct fit...

The truck made it the 180 mile trip back to where I call home. Checked the codes and it has misfire on 1-2-3 ...go figure. I'd like to fix it before I pull it so I know it runs good if I happen to try and sell it for a few hundred with a working auto transmission.

Il post pictures later.
 
subbed. i'm looking forward to seeing how this goes for you. that rusted-out lower control arm (?) mount is frightening. glad you got home ok.
 
subbed. i'm looking forward to seeing how this goes for you. that rusted-out lower control arm (?) mount is frightening. glad you got home ok.

Oh yeah, it sure is. Luckily it was a short drive of only about 8 miles or so. Kept it below 30.


UPDATE:

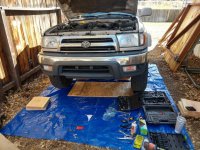
Both vehicles in the yard. I actually but the vehicle with the good body/frame in the garage, and PB blasted the donor vehicle in every single spot i thought I might touch. Im going to let it soak overnight, hit it again in the morning, then hopefully start to remove the driveline.

I have decided to remove the 4x4 Engine, diff, transmission, xfer case, driveshaft and related components first-I may leave the engine/trans hanging in the vehicle so its not exposed to rain (should it happen to rain in the desert) until I remove the drivetrain from the automatic. Reason being is that I think it will be most difficult to do it, and with winter approaching (insert winter is coming meme here) and it being outside, I want to get as much work done as I can.

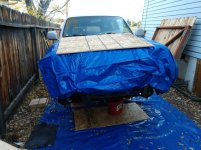
I plan to stop at home depot before tear down and grab some plywood and tarp to go under the vehicle while I work. If i decide to pull all the parts, theyll go on some plywood too with a tarp protecting them from the elements.

The engine/trans in the vehicle il be swapping into is in pretty good shape, but with 305k miles its got to be a little tired. Driving over the pass today was very difficult and I had several check engine lights for misfires in cylinders 1,2,3. I would like to try and get the problem diagnosed down to a part (I.E. coil pack) so that if I sell it, I can tell the new owner of the engine what to expect. Il also run a quick compression test before removing.

Here are some photos...you can see which one is the donor vehicle and which one is the keeper!
 

Attachments

  • IMG_20191025_183337709-min.jpg
    IMG_20191025_183337709-min.jpg
    124 KB · Views: 1,312
  • IMG_20191025_183414412-min.jpg
    IMG_20191025_183414412-min.jpg
    141.7 KB · Views: 1,359
  • IMG_20191025_183420803-min.jpg
    IMG_20191025_183420803-min.jpg
    132.4 KB · Views: 1,664
  • IMG_20191025_183353848-min.jpg
    IMG_20191025_183353848-min.jpg
    133 KB · Views: 1,254
  • IMG_20191025_193745576-min.jpg
    IMG_20191025_193745576-min.jpg
    128.2 KB · Views: 1,394
  • IMG_20191025_194017586-min.jpg
    IMG_20191025_194017586-min.jpg
    132 KB · Views: 1,508
Last edited:
Looks like fun! I feel like the 3rd Gen 4Runners are great for an overlanding platform.

Neither of those 4Runners of yours had the factory rear locker in them right? potentially noob question: Is a rear locker something you'll need on your excursions and thus be adding in the build?
Just curious, hope it all goes well for you!
 
Looks like fun! I feel like the 3rd Gen 4Runners are great for an overlanding platform.

Neither of those 4Runners of yours had the factory rear locker in them right? potentially noob question: Is a rear locker something you'll need on your excursions and thus be adding in the build?
Just curious, hope it all goes well for you!

No lockers, actively searching...I really liked the locker in my fj cruiser, and I actually got out of some stuff with it easily a few times.

This is a somewhat budget build, so if there money after refreshing suspension, getting the engine cleaned up, and misc parts, I'm definitely going to try and get it done.

UPDATE:

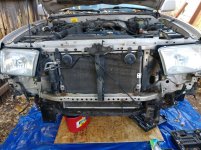
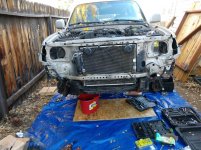
started tear down. Only spent about 3.5 hours today after I finished cementing a fence post on my side yard and setting up the work area (jacking etc). I also stopped at home Depot and had them cut a 10ft *12 inch board into 10 1*1 slabs. I used these to lift the jack stands and give myself more room to work.

I got the bumper, grill, lights, radiator and other assorted trim off. I thought that the front end upper brace was removable after unbolting, but it seems it's spot welded. It seems it would be much easier if I lt was removable, but it's not bad as is.

I detached the fuel lines, most electrical connectors, throttle cables , evap lines, vacuum hoses, and started on the alternator. I haven't removed the a/c compressor from the body yet. I'm going to have to have someone evacuate the system for me as I need to swap the lines from this one to the other runner because the impact from the deer damaged the hard line .

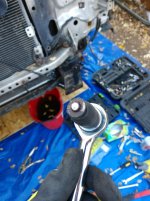
Throughout today, with the help of a lot of pb blaster, all of the bolts except one broke free and turned. The bumper bolts were snug 90% of the way out, but they held. The only bolt that snapped (pictured) was from the lower radiator mount to the fan shroud. Hardly required , plus I'm not reusing those parts as the other vehicle is in much better shape rust wise.

More to follow tomorrow or the next day depending on when I sneak out of work.
 

Attachments

  • IMG_20191026_142449944_HDR-min.jpg
    IMG_20191026_142449944_HDR-min.jpg
    141.6 KB · Views: 1,619
  • IMG_20191026_144339328_HDR-min.jpg
    IMG_20191026_144339328_HDR-min.jpg
    135.7 KB · Views: 1,797
  • IMG_20191026_154822307-min.jpg
    IMG_20191026_154822307-min.jpg
    140.8 KB · Views: 1,874
  • IMG_20191026_161621282-min.jpg
    IMG_20191026_161621282-min.jpg
    137.6 KB · Views: 1,131
  • IMG_20191026_161618541-min.jpg
    IMG_20191026_161618541-min.jpg
    141.2 KB · Views: 1,334
  • IMG_20191026_162759933-min.jpg
    IMG_20191026_162759933-min.jpg
    127.5 KB · Views: 2,552
  • IMG_20191026_174803_01-min.jpg
    IMG_20191026_174803_01-min.jpg
    136.8 KB · Views: 1,516
Great progress, keep up the good work. The cargo area (with seats folded down) is a great parts holding location. Try to keep anything you might need until the good truck is up and running well - you never know what you might need!

You'll probably need to drop the trans/transfer case out the bottom and pull the engine out the top if you aren't pulling the body off the frame.

It is pretty easy to cut the frame horns off the donor and weld them on the good truck - or keep the frame horns in place on the donor and move the frame horns on the good truck. They are the same OEM part number, just welded in a different location.

-Charlie
 
Great progress, keep up the good work. The cargo area (with seats folded down) is a great parts holding location. Try to keep anything you might need until the good truck is up and running well - you never know what you might need!

You'll probably need to drop the trans/transfer case out the bottom and pull the engine out the top if you aren't pulling the body off the frame.

It is pretty easy to cut the frame horns off the donor and weld them on the good truck - or keep the frame horns in place on the donor and move the frame horns on the good truck. They are the same OEM part number, just welded in a different location.

-Charlie

Awesome, thank you for the information. I got some more work done today. I removed the ECU, wire harness, A/C compressor, power steering pump, exhaust, and trans cross brace bolts. No broken bolts this time!

I believe il be cutting out the front cross brace/radiator support and attempting to pull the engine, trans, and transfer case all as one. Looks like as long as I remove the drifeshaft front and rear this is possible.

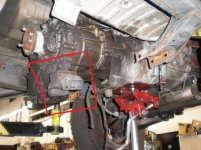
The xfer case looked like it was missing a crossbrace, as I saw a rubber mount with nothing attached to it on the bottom. :help: Il be posting pictures tomorrow as my phone died...

Il be doing some parts diagram research tonight to try and figure out the next steps which include the interior (shouldn't be too much for the manual) and seeing if dropping the front diff now is advantageous. The front CVS are definitely new which is nice-although Im not sure if they are a good brand.

Hopefully will have some time tomorrow, but no promises..


Heres the mount im talking about. It was just hanging, there nothing its attached to besides the case....am I missing something?
 

Attachments

  • Random mount.jpg
    Random mount.jpg
    107.3 KB · Views: 1,274
Last edited:
Subscribed! I love a good swap :thumb3:

Read through your thread again, included one of your pictures in a question I have...any answers!? Also....Im trying to do some reading on the wiring...I would assume since its the same engine, same year, both SR5, that the wiring harnesses should be the same-but after seeing your crazy wiring harness modifications im curious...Did you have to swap out that much? or was it simply because the two vehicles were different in trim level/year?

Just trying to figure out what I need to pull and swap. I was planning on swapping the instrument cluster and pulling the dash anyways-just wasnt sure just how different the two harnesses are...!
 
Last edited:
Heres the mount im talking about. It was just hanging, there nothing its attached to besides the case....am I missing something?
Not missing anything mechanical... just missing technical understanding. That is just a vibration dampener. As long as the rubber is still (kinda) solidly attached there, just leave it as-is.

It can also be removed if you want, though there might be slightly more vibration/noise from the drivetrain.

-Charlie
 
You will want/need to swap the engine harness, at the least. There may still be minor differences to the truck if they are not both CA (or federal emissions) trucks, so keep that in mind.

If both trucks are base/SR5 (manual AC), the dash harness may be the same. You may still want/need to swap it if you find some incompatibility... That's why I say that you shouldn't throw anything out from either truck until you have a swap that is 100% working.

Another suggestion will be to find/buy the wiring diagrams for both trucks (hard copies, try eBay) - or get a Toyota TIS subscription and download all the diagrams for each truck. Then you get to do the tedious process of comparing between the two...

-Charlie
 
You will want/need to swap the engine harness, at the least. There may still be minor differences to the truck if they are not both CA (or federal emissions) trucks, so keep that in mind.

If both trucks are base/SR5 (manual AC), the dash harness may be the same. You may still want/need to swap it if you find some incompatibility... That's why I say that you shouldn't throw anything out from either truck until you have a swap that is 100% working.

Another suggestion will be to find/buy the wiring diagrams for both trucks (hard copies, try eBay) - or get a Toyota TIS subscription and download all the diagrams for each truck. Then you get to do the tedious process of comparing between the two...

-Charlie


Awesome. Thanks for the information. They are both CA emissions vehicles-Il double check the rest based on vins. Il definitely be keeping the trucks parts until I finish the swap.
 
Not missing anything mechanical... just missing technical understanding. That is just a vibration dampener. As long as the rubber is still (kinda) solidly attached there, just leave it as-is.

It can also be removed if you want, though there might be slightly more vibration/noise from the drivetrain.

-Charlie

AH this makes much more sense. And im happy im not already missing pieces! I love the knowledge that you guys and others on this forum have-awesome to have access to!

[MENTION=125520]deanx2009[/MENTION] Here's a link to 2000 factory service manual: 2000 4Runner FSM - Printable - Google Drive and a 2000 electrical wiring diagram: Dropbox - 2000 4Runner Electrical Wiring Diagram (EWD383U) - Printable - Simplify your life

Use at your own risk, but I haven't discovered any discrepancies in either yet. Good luck with the swap!

Thanks for this. Will definitely use-at my own risk.


UPDATE:

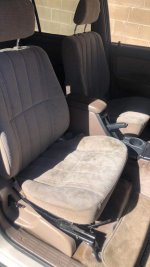
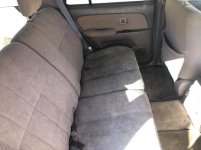
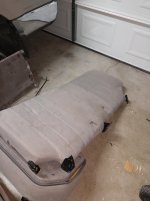
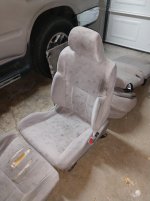
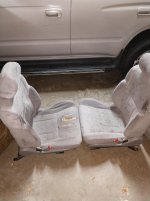
found some of these seats online for 130 bucks. The drivers seat bottom is in bad shape-plane to reupholster it if I can get it done for cheap. I really like the deep bucket style and both of the 4runners I have are more of a bench bucket.

If I cant reupholster for cheap at a shop I may pull the covers of the two seat bottoms and try my hand at it. Ive done some sewing before, and with templates from the good covers it seems fairly easy to do the inserts. Il update on that as time goes on. Anyone know what these seats were in from the factory? way nicer looking IMO, almost like a faux suede look to em.

They definitely need some cleaning...hoping to find someone to steam clean and see what they turn out to be. few holes in em from what looks like cig's, but no smoke smell (maybe from some recreational smoke).

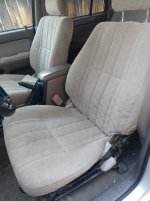
This build is for a 80% solution to a cleaned up 4runner, so small blemishes will be fine. Last photo is of the current seats.

Finally getting some time off this weekend/week after tomorrow to really start tearing things down. I hope to pull the engine/trans/xfer case tomorrow, spindles/hubs whatever other wiring and instrument cluster throughout thurs, and start working on the vehicle all this is going into on friday. I dont forsee getting anything in this week-I need to order a bunch of gaskets, bearings, bushings, fluids, lines, and other parts to change while the engine and trans is out. I expect to finish those jobs throughout next week and then start putting parts in sometime at the end of next week (ish).
 

Attachments

  • IMG_20191029_191404537-min.jpg
    IMG_20191029_191404537-min.jpg
    132 KB · Views: 578
  • IMG_20191029_191400343-min.jpg
    IMG_20191029_191400343-min.jpg
    129 KB · Views: 569
  • IMG_20191029_191356379-min.jpg
    IMG_20191029_191356379-min.jpg
    131.3 KB · Views: 556
  • IMG_20191028_170011_01-min.jpg
    IMG_20191028_170011_01-min.jpg
    136.5 KB · Views: 570
Last edited:
Those are 01 or 02 seats (that shape matches earlier 'sport' seats, but the upholstery is the 01/02 stuff). As a bonus, you also get top tethers with those rear seats (not sure if you will have baby seats in there, but they are a big safety improvement for front-facing seats).

You *might* still be able to get the OEM driver's seat bottom upholstery new...

Or, get a passenger side seat bottom cover and swap it on to the driver's bottom - they are the same shape.

-Charlie
 

Members online

Forum statistics

Threads
278,316
Messages
3,554,121
Members
248,016
Latest member
Advally Service

Trending content

Back
Top