Cytronus 2016 4Runner Trail Premium Build Thread (Pic Heavy)

Your rig is sweet!

Wow, you've got some sick mods! How do you like those Nitto Trails? I'm hoping to pull off another trip or 2 between Sept and Oct. Anyone have anything planned? It would be awesome to get a group together.
 
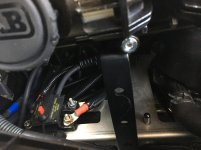
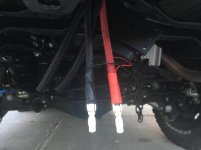
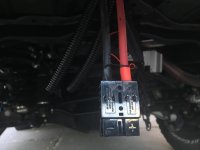
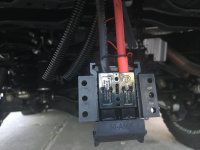
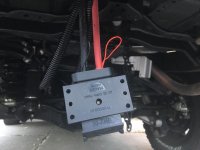
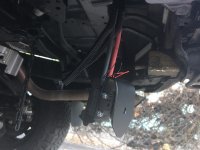
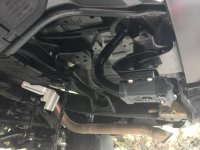
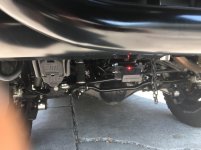
Camper trailer battery charger installed

Today I added new 6 AWG welding wiring from the aux battery to a 50 amp circuit breaker with wire running to the rear, terminating with a 50 amp Anderson plug and weather proof TrailerVision housing with spring loaded, sealed door and a nice red LED light indicating power. I made a custom bracket to hold the unit which can mount in multiple locations if need be.

This will charge 2 lithium polymer 12V batteries on a camper trailer that I'm taking delivery of this weekend in Las Vegas. I'm pretty stoked but not about the 20+ hour round trip drive.

It was important to have a circuit breaker in line so that when doing water crossings where the plug at the rear may submerge, power can be cut by maually switching the breaker to prevent a short. I'm planning to leave the breaker "off" unless I'm pulling the trailer.
 

Attachments

  • IMG_4711.jpg
    IMG_4711.jpg
    130.9 KB · Views: 2,037
  • IMG_4698.jpg
    IMG_4698.jpg
    123.1 KB · Views: 2,030
  • IMG_4699.jpg
    IMG_4699.jpg
    117.4 KB · Views: 2,066
  • IMG_4700.jpg
    IMG_4700.jpg
    127.7 KB · Views: 2,021
  • IMG_4701.jpg
    IMG_4701.jpg
    131.3 KB · Views: 2,030
  • IMG_4702.jpg
    IMG_4702.jpg
    127.4 KB · Views: 2,047
  • IMG_4705.jpg
    IMG_4705.jpg
    130.4 KB · Views: 2,013
  • IMG_4714.jpg
    IMG_4714.jpg
    125.5 KB · Views: 2,025
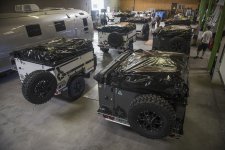
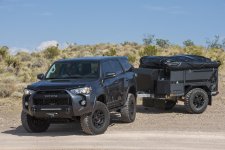
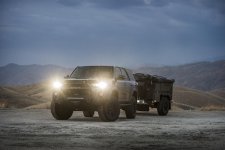
Camper Trailer Acquired! Patrior Campers X1 GT

Well, I've gone and got a camper trailer. I decided on the trailer after considering adding a fridge, roof top tent and other items to the rig would add too much weight, raise the center of gravity, making it more difficult to handle the 4Runner in moderate to aggressive off-roading, especially with passengers.

I've been a big fan of the Australian-made Patriot Campers for over a year, after finding them on YouTube. I haven't been really enticed with the U.S. camper trailer market so far, so I looked into importing an X1 but it was too complex and costly so I thought I'd wait and see how the nascent U.S. market develops over the coming year or two. But then I heard the news at SEMA early this year that Patriot Campers would be coming to the U.S. this summer.

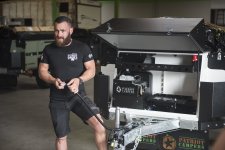
I ordered one in early spring, becoming their first U.S. customer. Justin, the owner/founder personally delivered the first U.S. shipment with a full run down of the trailer operation. He's a class act and a great guy with a tireless work ethic.

I have to admit, photos don't do this thing justice. It's truly a masterful work of engineering, refined metal craft and a practical, makes-sense design all around. The attention to details are incredible and I'm stoked to take it out to remote locations where no running water or bathrooms exist while still being able to enjoy a convenient outdoor experience.

I wanted to be able to camp, set up quickly, unhook and roll out on the trails during the day, and that's just what I did with the X1 this past weekend for its first camping adventure at Shaver Lake and Bald Mountain.

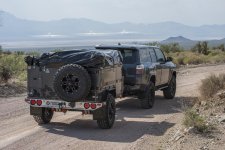
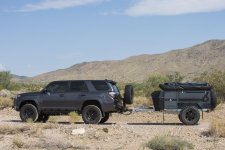
I learned a lot about using the trailer efficiently, or rather inefficiently on this first trip. I'll share more photos of that trip soon but first,for the sake of linearity, the NV desert photos from delivery day where I drove it home from Las Vegas to the SF Bay Area. I took a short detour out in the desert to see how well it handled and it barely felt like it was there.

More soon!
 

Attachments

  • DSC_6989web.jpg
    DSC_6989web.jpg
    139.1 KB · Views: 1,940
  • DSC_6999web.jpg
    DSC_6999web.jpg
    134.1 KB · Views: 2,053
  • DSC_7075web.jpg
    DSC_7075web.jpg
    136.9 KB · Views: 1,902
  • DSC_7082web.jpg
    DSC_7082web.jpg
    136.9 KB · Views: 1,964
  • DSC_7090web2.jpg
    DSC_7090web2.jpg
    138.2 KB · Views: 2,014
  • DSC_7095web.jpg
    DSC_7095web.jpg
    137.7 KB · Views: 1,890
This is an amazing build thread and that camper looks solid. Looking forward to seeing the rest of the build come together. You have a good way of putting your installs and reasoning behind it into clear and concise threads with great photos to back it.
 
Sub'd. Just found your build thread and decided that my 4Runner wants to be like yours when it grows up. Nice work and special thanks for posting the detailed write-ups and pictures.
 
I love your photos! IS there any way you can post the higher resolution photos so I can use them for a wallpaper?

Thanks for the inquiry! The forum automatically compresses the images when I post. Do you know of a work-around to post larger photos? If not, I'm happy share via Google Drive or Dropbox.
 
Thanks for the inquiry! The forum automatically compresses the images when I post. Do you know of a work-around to post larger photos? If not, I'm happy share via Google Drive or Dropbox.

You could upload to imgur or another image host then link to it. I work at VW and everyone gets a kick out of the 4Runner background on my desktop.
 
I finally got around to installing the new bracket and it works beautifully. Also got the sPOD mounted to the larger bracket and the isolator indicator lights are still visible above the sPOD as planned. Really happy with this location so far.

Enjoy following your mods, detailed posts and writing style. May I ask what tool did you use to cut the brackets you made and how did you bend them? Thanks
 
Metalworking and bracketeering

Enjoy following your mods, detailed posts and writing style. May I ask what tool did you use to cut the brackets you made and how did you bend them? Thanks

Thanks for the note. Depending on the application, I will use 1/16" thick steel or 1/8" aluminum, sourced from OSH or Ace Hardware. I first make the bracket in cardboard. Then, before any bending, I drill any holes with a simple, cheap drill press from Home Depot with some oil, to preserve the bit.

After that, I place the metal vertically in a bench vise with smooth angle iron on both vise jaws, to prevent the naked vise diamond pattern from marring/imprinting the bracket metal. I use a cheap hand-held hack saw with metal cutting blade to make the cuts. You can only cut so far in, about 5"-6" before the hacksaw top stops the cut from going further. I cut into the metal at certain angles, often using triangle relief cuts to allow the saw to keep cutting. After some experience, you figure out the cut angles in your mind before even starting. I'll use a DeWALT 12" double bevel miter saw with a ferrous metal cutting blade to cut smaller pieces more quickly than a hack saw.

Next is bending in the vise by hammering the metal with a rubber mallet or with wood against the metal and a heavy duty hammer or small sledge hammer. More rarely, for thick steel, I heat the metal up with a Map gass torch from OSH, which softens the metal to help prevent breaking and makes for cleaner bends.

Last, I'll grind the corners and the edges smooth on both sides with a cheap electric stone grinding wheel, followed up by more precise filing in the bench vise. Always file aluminum, don't use the stone grinding wheel because aluminum clumps up on the stone wheel, rendering it useless.

Media blast or sand and then paint or powder coat! Done!

 
Cytronus - Can you post more pics of the X1 deployed with the options? I'm seriously considering the Patriot Camper (X2 vs X1). Did you see both X1 and X2 - what made you go with the X1? How does the 4runner drive off road with the X1 - did you look into re-gearing at all? Truck looks awesome and with the graphite X1 behind - off the charts!
 
Thanks for your honest review and the accurate pics of the Weathertechs, because of this I just bought some for our new 2018 T4r OR, you made the choice an easy one !
 
Can’t help but add another post ....I just read through your whole thread and have to say you are one of the most thorough and detailed mod’ers on this whole forum. Everything you’ve done is unbelievable. I’m new to the forum and the 4runner world and wantEd to say thank you for all of the ideas, detailed write ups and fantastic pics !!
 
I'm starting in on the research for deploying a dual battery set up. Here's what I have so far:

Design considerations:

-Aux battery: Odyssey 25-PC1400 (850 CCA, 65 Hrs at 20 Hr Capacity)
-Aux battery tray: Shrockworks with air pump relocator
-National Luna Isolator and battery controller
-Support all non-factory accessories via an auxiliary battery
-Ability to jump start from the auxiliary battery
-Support Warn Xeon Platinum 10-S Winch (311 to 465 Amps)
-Support ARB Dual Air Compressor (CKMTA12) with room for bracket
-Power sPOD Source SE with 8 channels for smaller sub-30 Amp accessories
-Support future accessories: Inverter, camper trailer anderson plug, upgraded sound system

Per National Luna, no fuses are to be installed between the isolator and batteries, to ensure the winch may consume high non-continuous amperage draws from the system. Per Warn, no fuse or circuit breaker is installed between the winch and battery.
Awesome 4runner! I was wondering if you had any trouble fitting the dual air compressor and the air pump in that spot. Was there any clearance issues?
 

Members online

Forum statistics

Threads
278,316
Messages
3,554,120
Members
248,016
Latest member
Advally Service

Trending content

Back
Top