dahorst Build & Adventure Thread

dahorst

New member
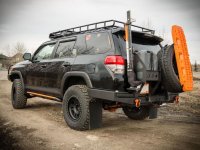
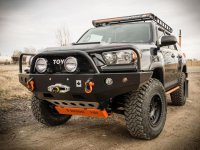
Ok...so I bought my 2010 T4R TE with all the major modifications already complete. I was never planning on buying something like this, but it came up, it was a great deal so I never looked back! There are a few additions/modifications I would like to make to suit my needs. I'm sure I will think of more.

Planned Mods
Samsung Galaxy Tab 2 7" mount & OBD2/Torque App ..........Complete!
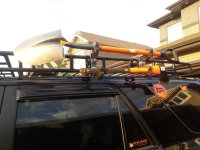
Shovel & Axe mount to roof rack ........................................Complete!
Camping Stove Install .......................................................in progress

Wish List
CB Radio
Fold down table integrated into rear bumper
Storage bins for roof rack (army surplus?)
Roof top tent
 

Attachments
  • $_21.jpg
    $_21.jpg
    85.8 KB · Views: 2,362
  • $_22.jpg
    $_22.jpg
    85.6 KB · Views: 4,761
  • $_25.jpg
    $_25.jpg
    71 KB · Views: 1,999
Last edited:
Register to hide this ad
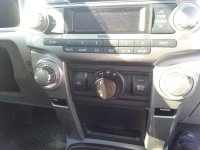
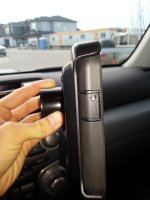
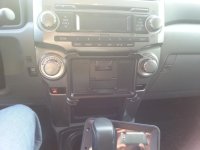
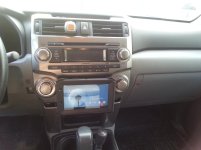
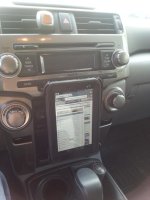
I scoured the web for ideas on how to mount my tablet. I came across so many options, none of which I was particularly intrigued by. I almost bit the bullet and purchased a CD slot mount until I came up with my own idea. Sorry, the pictures are not great and they really don't do the final look justice.

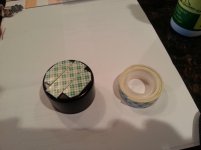
1. I rummaged through my 'random crap' bin in my garage. I came across a metal cylindrical 'bracket'. This was actually a support for one of those door frame chin up bars.

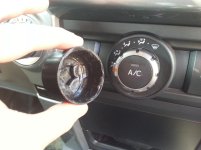
2. I had to come up with a way to attach this metal bracket to the 'air direction' controller knob. Obviously this connection had to be easily removable but very sturdy. I ended up making a mixture of 100% black silicone and corn starch (as a thickener).

3. I spread this on the inside of the bracket with my finger (soapy water helps smooth the silicon).

4. Applied soapy water to the surface of the 'air direction' controller knob as a release agent.

5. Pushed the bracket with the silicone onto the knob so that the knob profile would be translated into the bracket.

6. Removed the bracket and let it dry.

7. Purchased an Otter Box case for my tablet. It has two parts - a rubbery case and hard plastic holder.

8. Attached the metal/silicon bracket to the case using double sided tape.

9. Tested it out!

The mount is very sturdy - no movement + little to no vibration. Yes, button is strong enough to support the weight. The position of the tablet in my opinion is perfect - no glare and easy to use because it is at hand height. The tablet doesn't obstruct controls that I need to change often. The tablet is easily removable (either from the plastic holder or then entire assembly). Tested it out off road this past weekend, absolutely no issues whatsoever.
 

Attachments

  • WP_20140721_004.jpg
    WP_20140721_004.jpg
    126.7 KB · Views: 1,895
  • WP_20140721_005.jpg
    WP_20140721_005.jpg
    127.6 KB · Views: 1,867
  • WP_20140730_004.jpg
    WP_20140730_004.jpg
    106 KB · Views: 1,812
  • WP_20140730_014.jpg
    WP_20140730_014.jpg
    123.1 KB · Views: 1,807
  • WP_20140730_011.jpg
    WP_20140730_011.jpg
    131.1 KB · Views: 1,821
  • WP_20140730_013.jpg
    WP_20140730_013.jpg
    131.3 KB · Views: 1,870
  • WP_20140730_008.jpg
    WP_20140730_008.jpg
    123.3 KB · Views: 1,869
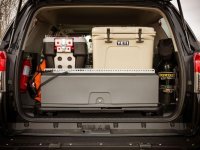
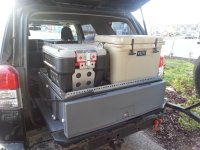
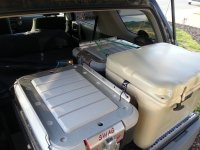
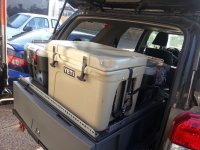
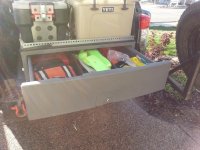
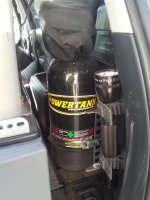
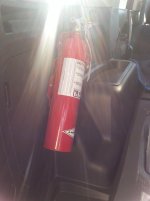
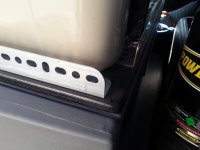
Nice truck dude. I wouldn't mind seeing some more shots on how the rear interior accessories are mounted up, like that storage box and the baja bin for the action packer.. Looks really clean.
 
Nice truck dude. I wouldn't mind seeing some more shots on how the rear interior accessories are mounted up, like that storage box and the baja bin for the action packer.. Looks really clean.

Sorry it took me so long. Here are some more pictures.
 

Attachments

  • WP_20140807_001.jpg
    WP_20140807_001.jpg
    133 KB · Views: 2,127
  • WP_20140807_002.jpg
    WP_20140807_002.jpg
    126.9 KB · Views: 1,743
  • WP_20140807_003.jpg
    WP_20140807_003.jpg
    130.8 KB · Views: 1,789
  • WP_20140807_004.jpg
    WP_20140807_004.jpg
    133.9 KB · Views: 1,777
  • WP_20140807_007.jpg
    WP_20140807_007.jpg
    132.1 KB · Views: 1,817
  • WP_20140807_008.jpg
    WP_20140807_008.jpg
    107.7 KB · Views: 1,716
  • WP_20140807_009.jpg
    WP_20140807_009.jpg
    125.3 KB · Views: 1,703
Last edited:
I actually saw your tablet mount design when I was searching. I'm guessing you welded that together with a MIG? I only have a cheap stick welder which tends to burn through smaller gauge steel.
 
Looks great, you built a beast. I can`t add anything to the other great comments but had to say something.

:trophy: :trophy:
 
Ok...so I bought my 2010 T4R TE with all the major modifications already complete. I was never planning on buying something like this, but it came up, it was a great deal so I never looked back! There are a few additions/modifications I would like to make to suit my needs. I'm sure I will think of more.

Planned Mods
Samsung Galaxy Tab 2 7" mount & OBD2/Torque App ..........Complete!
Shovel & Axe mount to roof rack ........................................Waiting on parts


Wish List
CB Radio
Fold down table integrated into rear bumper
Storage bins for roof rack (army surplus?)
Roof top tent
nice grab. that's pawzitiv's rig. (Arie?)

the '14 refresh and imminent TRD Pro seem to have generated a lot of new interest and faces, but it's always a little sad when another 5G OG moves on.

sounds like you got a good deal on a great truck. enjoy it. :cheers:
 
nice grab. that's pawzitiv's rig. (Arie?)

the '14 refresh and imminent TRD Pro seem to have generated a lot of new interest and faces, but it's always a little sad when another 5G OG moves on.

sounds like you got a good deal on a great truck. enjoy it. :cheers:

Yep, bought it from Arie. I am enjoying it and intend on doing so for a long time!
 
Do you know anything about your rear bumper? Where it came from? Or who makes it? Very nice purchase by the way, you got your money's worth with that rig!
 
Romantic drive turned adventure

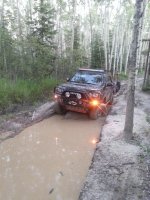
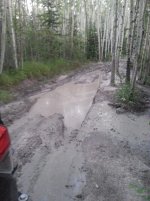
Went out for dinner and on the way back decided to drive down a nice windy road to the local golf course. There is a steep dirt road off the side of the road that caught my eye. I switched it to 4H and pulled off the road. The trail was nice until this...

I got hopelessly high centered in some very deep ruts. At one point I couldn't open my door because the side of the rut. Got out of the truck in the bug infested forest and hooked up the winch. In about 15 minutes we were on our way.

Had some weird noise coming from the wheels on the ride home...it ended up being mud and rocks. This brings up a question: How do you guys clean to topside of your skid plates? I have a huge amount of dirt up there that I'm guessing with be hard to get at with a pressure washer...
 

Attachments

  • WP_20140810_007.jpg
    WP_20140810_007.jpg
    137.3 KB · Views: 743
  • WP_20140810_008.jpg
    WP_20140810_008.jpg
    134.3 KB · Views: 722
Last edited:
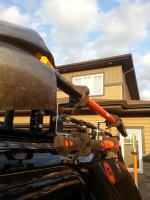
Shovel & Axe

Mounted my shovel and axe. I modified some brackets that were originally meant for my high lift jack.
 

Attachments

  • WP_20140819_002.jpg
    WP_20140819_002.jpg
    131.2 KB · Views: 671
  • WP_20140819_003.jpg
    WP_20140819_003.jpg
    126.4 KB · Views: 682
I know it is a bit late to answer but if you can't shoot the dirt/mud out with a power washer, drop the skid and clean it off. It is only a few bolts. We have all had to do it when we get in the nasty stuff. I've found the sooner you clean it out, the easier it is... Let it bake in there and the job gets worse.
 
I know it is a bit late to answer but if you can't shoot the dirt/mud out with a power washer, drop the skid and clean it off. It is only a few bolts. We have all had to do it when we get in the nasty stuff. I've found the sooner you clean it out, the easier it is... Let it bake in there and the job gets worse.

I agree. But my real solution is to not drive in mud. I hate mud.
 

Members online

No members online now.

Forum statistics

Threads
278,306
Messages
3,554,045
Members
248,016
Latest member
Advally Service

Trending content

Back
Top