Daily Driver Kayak Hauler Build

blackjackck

Member
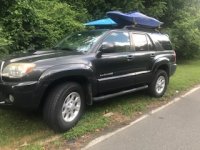
I Didn’t really have anything to share as this was just a Daily Driver and a Kayak Hauler. But the past few months… Let me start from the Beginning:

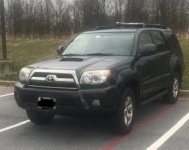
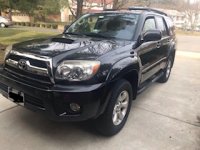
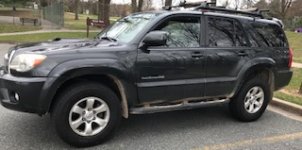
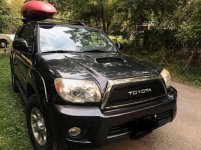
Bought this 2008 Sports Edition with 75K miles on Jan. 2015 from a Toyota Dealer. After all the research on this site, I knew there be there be some issues, some basic mechanical issues so I negotiated the Platinum Plan Warranty. I'll come back to the Plan in a second.

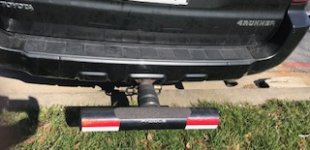
The First thing I purchased was this:Receiver Hitch Step that helps eliminate rear end collision damage | shock absorbing hitch step | Superbumper | Bumper Shield . With all the distracted drivers out there I wanted ALL the DOUCHEBAGS behind me to fully understand that if they’re distracted and hit me, my battering ram will absorb some impact and their car will be crushed.

Due to the Platinum Plan I did nothing to it as I didn't want to give Toyota any reason NOT to fix anything that would break, which I knew would use the hell out of it.
 

Attachments
  • IMG_2415.jpg
    IMG_2415.jpg
    56.1 KB · Views: 1,651
  • IMG_2406.jpg
    IMG_2406.jpg
    28.8 KB · Views: 1,497
Last edited:
Register to hide this ad
Platinum Plan

The Platinum Plan started to pay off. The following are what the dealer repaired or replaced:
103k Replaced both front CV boots
103k Replaced rear axle seal
104k Replaced both front brake calipers
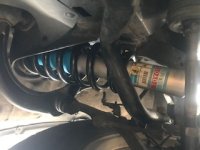
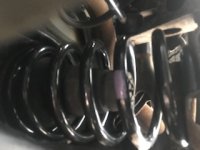
122k Replaced both front XREAS shocks and coil

These were done after
142k Alternator replaced
216k Replaced rusted out exhaust with muffler
245k Rebuild rear differential
252k Replace FJ Shocks with Bilstein 5100, still using FJ Coils

129k Replaced the XREAS system with FJ Off Road Package coil and shocks. The dealer or Toyota VSA wouldn’t allow a straight swap and they would only replace what was on the 4Runner. SO I told the “service advisor” that I will buy the FJ parts and when the NEW XREAS arrive just put them in the back of my T4R, and install the FJ coil and shocks(that I provided) instead. It's a win-win for the dealer as the (1) “back end of the business” will get paid. (2) They do less work as it’s easier to install FJ parts so they pay out less hours for labor. (3) Service Advisor gets a nice commission as XREAS replacement is a big job and although his commission will be from Toyota, he’s more than happy to help. (4) I get free labor on FJ part installation which is what I wanted, would have been better if Toyota VSA would have given me the parts as part of the warranty. But I’ll take what I can get.

130K Replaced Sway Bar Bushing, both front Stabilizing bar as well as rear Stabilizing bars. Again this was covered under the Platinum Plan so I paid nothing.... or Paid when I bought the truck (depending on perspective)
133K Replaced Power steering REPLACED PRESSURE LINE and replaced power steering fluid.
 

Attachments

  • IMG_2339.jpg
    IMG_2339.jpg
    27.1 KB · Views: 1,485
  • IMG_2340.jpg
    IMG_2340.jpg
    23.3 KB · Views: 1,494
  • current.jpg
    current.jpg
    33.2 KB · Views: 1,482
Last edited:
Did some changes to help carry my kayak.

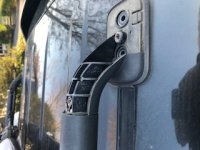
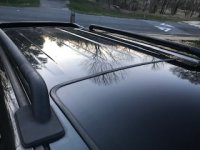
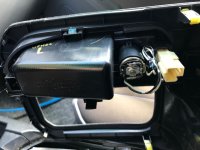
Since I need longer crossbars I took off the factory bars. The 08' SE has the tube roof rack. The roof rack is a bit different to to take the cross bars off. I popped off the cover thinking I can just slide off the crossbars, sadly I had to undo the 2 star bolts that attached the base to the 4Runner. Then there's a small screw that's attached the base to the tube rack.

After you disassembled the base you can then slide the crossbars off.
 

Attachments

  • IMG_2417.jpg
    IMG_2417.jpg
    30.4 KB · Views: 1,416
  • IMG_2420.jpg
    IMG_2420.jpg
    29 KB · Views: 1,448
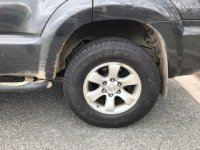
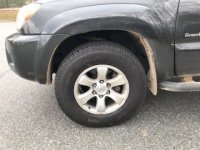
Had some time this weekend and was able to get some stuff done. Bought a set of (4) 255/75/17 from a Jeep take off for $250 along with the wheels. Granted they're the GY Wrangler SR-A but for a set that only has 100 miles on, you can't really beat the price. I sold the Jeep TPMS as well as the Jeep stock wheels or a total of $250. So in essence I got the tires for free and all I had to do was pay for mount and balance. Went to a used tire shop and had them balance and mount the tires for $90.

If anyone like some cheap new tires, buy them from Jeep Owners, they're practically begging people to take them.

Just in case anyone one need anymore assurance 255/75/17 will fit without lift. My rig only has New FJ off-road package (coils and shocks). As much as I like to put a lift on, I wouldn't be able to put kayaks on top of the rig.

THINK next mod needs to be satoshi grille.
 

Attachments

  • IMG_2446.jpg
    IMG_2446.jpg
    26.6 KB · Views: 1,354
  • IMG_2448.jpg
    IMG_2448.jpg
    31.8 KB · Views: 1,419
  • IMG_2447.jpg
    IMG_2447.jpg
    30.7 KB · Views: 1,419
Last edited:
Cargo Storage Box

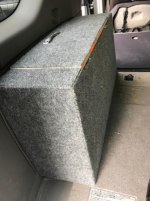
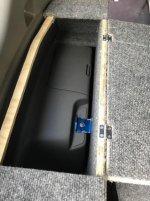
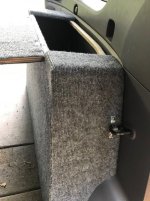
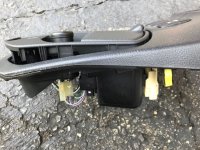
Since its the start of kayak season needed storage for my ropes and straps, so went ahead and build myself a rear cargo storage box.

Thanks to [MENTION=15785]J.A.[/MENTION] 's website: Toyota 4Runner Cargo Organizer Box

thanks to all the others: [MENTION=212467]Zeke588[/MENTION], [MENTION=90911]MT Runner[/MENTION], [MENTION=226160]New_2_4runners[/MENTION], [MENTION=44831]JohnsD90[/MENTION] who I borrowed ideas from.

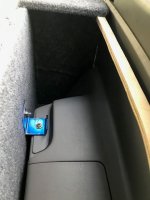
I made something similar. First I made templates from craft foam board to make sure the sides fit before cutting the 1/2 inch plywood. I used spare kayak parts for the handle as well as that blue attachment piece inside the box. The carpet I used is from Homedepot. Found it in the carpet section:

https://www.homedepot.com/p/Foss-Un...ndoor-Outdoor-Area-Rug-CP45N41PJ1VH/202800194

besides the price, its nice and thin so its easy to work with. Luckily the color was a perfect match. As you can see I still have some areas that are naked, I'll either paint it gray or glue pieces of the rug on.

ALSO just to point out, I'm no carpenter. the only tools I used is a Father's Day gift bag of Ryobi hand held power tools so this is completely manageable if you're in need or more storage.
 

Attachments

  • Storage Box3.jpg
    Storage Box3.jpg
    49.1 KB · Views: 1,366
  • Storage Box4.jpg
    Storage Box4.jpg
    50.9 KB · Views: 1,367
  • Storage Box5.jpg
    Storage Box5.jpg
    49 KB · Views: 1,364
  • Storage Box6.jpg
    Storage Box6.jpg
    133 KB · Views: 1,380
Last edited:
Since its the start of kayak season needed storage for my ropes and straps, so went ahead and build myself a rear cargo storage box.

Thanks to [MENTION=15785]J.A.[/MENTION] 's website: Toyota 4Runner Cargo Organizer Box

thanks to all the others: [MENTION=212467]Zeke588[/MENTION], [MENTION=90911]MT Runner[/MENTION], [MENTION=226160]New_2_4runners[/MENTION], [MENTION=44831]JohnsD90[/MENTION] who I borrowed ideas from.


Very cool work! Thanks for the mention too. I can't speak highly enough of my storage box. Love it.
 
Since its the start of kayak season needed storage for my ropes and straps, so went ahead and build myself a rear cargo storage box.

Thanks to [MENTION=15785]J.A.[/MENTION] 's website: Toyota 4Runner Cargo Organizer Box

thanks to all the others: [MENTION=212467]Zeke588[/MENTION], [MENTION=90911]MT Runner[/MENTION], [MENTION=226160]New_2_4runners[/MENTION], [MENTION=44831]JohnsD90[/MENTION] who I borrowed ideas from.

I made something similar. First I made templates from craft foam board to make sure the sides fit before cutting the 1/2 inch plywood. I used spare kayak parts for the handle as well as that blue attachment piece inside the box. The carpet I used is from Homedepot. Found it in the carpet section:

https://www.homedepot.com/p/Foss-Un...ndoor-Outdoor-Area-Rug-CP45N41PJ1VH/202800194

besides the price, its nice and thin so its easy to work with. Luckily the color was a perfect match. As you can see I still have some areas that are naked, I'll either paint it gray or glue pieces of the rug on.

ALSO just to point out, I'm no carpenter. the only tools I used is a Father's Day gift bag of Ryobi hand held power tools so this is completely manageable if you're in need or more storage.

Nice man that looks good! It really helps with all that extra stuff that you don't want out rolling around either.
 
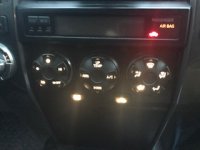
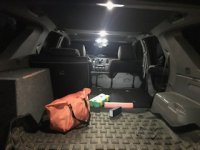
Let me catch up on some work I did. In the spring I replaced my HVAC bulbs with LED as well as my dome and door bulbs with LED. Bought mine from:

LED Lights, Bulbs & LED Lighting Accessories | superbrightleds.com

I just went through the vehicle search and bought the bulbs for the doors, dome, glove box.

For the HVAC I bought the NEOx
NEOx LED Bulb - High Power Instrument Panel LED | Super Bright LEDs
The HVAC is a straight swap so it was easy but the LCD display....

I couldn’t or didn’t have the time to fix the LCD DISPLAY as that’s not lighting up. I haven’t replace the glove box as it’s a pain in the ass.
 

Attachments

  • D368790A-797B-4B7C-9CF5-71D445429401.jpeg
    D368790A-797B-4B7C-9CF5-71D445429401.jpeg
    24.7 KB · Views: 1,238
  • 50EE03AE-C333-487A-89CA-F595E98A615F.jpeg
    50EE03AE-C333-487A-89CA-F595E98A615F.jpeg
    61.7 KB · Views: 1,227
  • F1526419-0DB3-4FB0-8539-73E6DC545398.jpeg
    F1526419-0DB3-4FB0-8539-73E6DC545398.jpeg
    38.4 KB · Views: 1,171
Last edited:
Last Month picked up a set of 2012 FJ Cruiser wheels off facebook for $250. They were in spectacular condition as it was on a 4Runner Mall Crawler. Just put the the original TPMS from the 4th Gen and my 255/75/17. Maybe when this set wears out I'll get something bigger but any taller I would have a difficult time loading Kayaks. Also this set of tires turned out to be Free as I sold off the Jeep wheels and Jeep TPMS that came with the set at 500 miles.

While I was down there I replaced my front rotors and pads with Toyota OEM.
 

Attachments

  • image1.jpeg
    image1.jpeg
    32.3 KB · Views: 1,130
Last edited:
:jump:
I'm impressed with your set up!!! I've thought of that, my only issue is I have a family and my 4Runner is a family vehicle from time to time so I can't modify it as much as I like. its bad enough I get comments like "YOU CAR SMELL like the river". SO make my mods are a little subtle.

BUT NICE job on the sleeping platform! I'll definitely will use some of your ideas for sure!
 
:jump:
I'm impressed with your set up!!! I've thought of that, my only issue is I have a family and my 4Runner is a family vehicle from time to time so I can't modify it as much as I like. its bad enough I get comments like "YOU CAR SMELL like the river". SO make my mods are a little subtle.

BUT NICE job on the sleeping platform! I'll definitely will use some of your ideas for sure!

You know you have a problem when river funk smells good to you.

My most recent mod is I bought my wife a car so I don't have to share the truck. :D
 
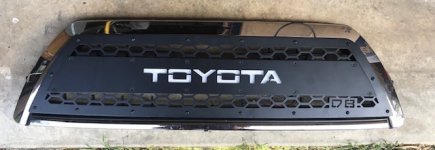
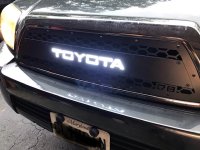
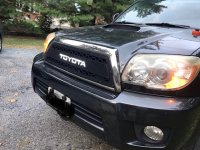
Custom GRILLE!

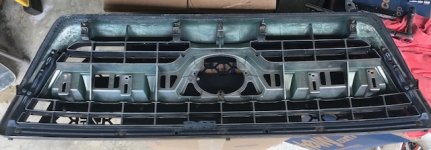
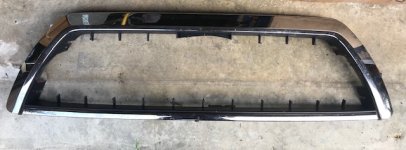
Finally I had some time so I was able to installed my DB CUSTOMZ front grille. I did have to cut the inside out of the Stock Grille Then just bolt the Custom Grille into the frame. The Grille had tabs for you to bolt it in as well as 2 hooks at the bottom corner. I did have to drill holes so the tabs can be attached.

I cut the center of the grill out by using a reciprocating saw to cut the most of it. To trim it down I used shears. I didn't cut it all the way down to the frame fearing that I need the nubs to help stabilized the custom grille. That's why you see the extra pieces sticking in the second picture.

Its relatively straight forward, the first problem I had was just the rust from the nut that made it a little difficult to take off the grille. The 2nd difficulty was connecting to a powers source. After talking to DB Customs I connected the wires to the Marker Lights. I traced the wires up / down the hood under that padding, then extended it on the driver side of the fender and brought it back up front to the marker light on the driver side. I just tapped into the power.

Really like the way it looks. If I get a chance I'll get some pic at night. it lights up really well.
 

Attachments

  • image3 (2).jpeg
    image3 (2).jpeg
    92.9 KB · Views: 1,065
  • image1 (3).jpeg
    image1 (3).jpeg
    57.8 KB · Views: 1,064
  • image2 (2).jpeg
    image2 (2).jpeg
    50.4 KB · Views: 1,088
  • image2 (1).jpeg
    image2 (1).jpeg
    89.8 KB · Views: 1,065
  • image3 (1).jpeg
    image3 (1).jpeg
    119.4 KB · Views: 1,064
  • image1 (1).jpg
    image1 (1).jpg
    62.2 KB · Views: 1,072
Last edited:
Nice work! I need to do a few more upgrades to make hauling my Tarpon 120 a little easier.

I really struggled with the Kayak issue as I have a kayak or 2 or 4 or 6 on my rig at least 2 days a week so If I put a 2 or 3 inch lift would be problematic for loading and unloading. That's the main reason why I haven't put a 3 inch lift on it. I say with a tarpon 120 you should be fine if that's the only boat you're hauling. You can put on all the after market racks like Victory and other, then just tie down. If you lift your truck just load from the rear and put something on the spoiler to prevent the scratching.

good luck
 
Last edited:
OEM Smoker Kit on Amazon

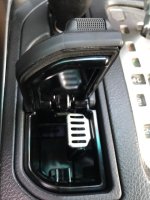
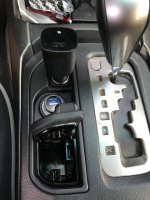
OK, I know this is not a MOD and its an easy plug and play. The main reason why I went with the Smoker's Kit is that it gives me the extra USB outlets that I like to have and the harnesses are already there so no splicing nor tapping into any wire of any sort. Besides I want to keep it as easy and original as possible so that when I do other electrical mod of any sort in the future I don't have to worry about trying to figure out what's what.

Found this for $39 on amazon and it was OEM.

I think I took more time writing this up and posting the pictures than putting this kit in. NO tools required. I think replacing the cabin filter took more time and more tools. The stainless steel for the ash was just pulled off so I can use the ashtray for my coins.
 

Attachments

  • image3.jpeg
    image3.jpeg
    72.6 KB · Views: 884
  • image1.jpeg
    image1.jpeg
    103.6 KB · Views: 854
  • image4.jpeg
    image4.jpeg
    90.4 KB · Views: 862
  • image5.jpeg
    image5.jpeg
    76.8 KB · Views: 890
  • image2.jpeg
    image2.jpeg
    88.9 KB · Views: 873
Last edited:
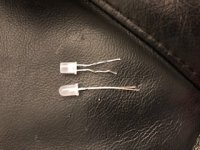
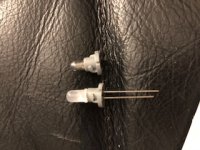
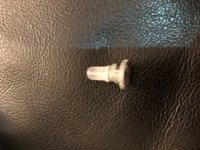
Fu*ken lcd led bulbs

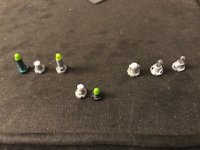
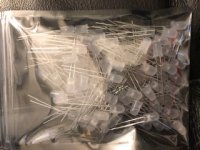
So the 2 light bulbs were driving me nutz. Most of us know that the LCD only take 6v bulbs not the 12v that NEO LED bulbs I bought. SO.... I bought a bag from Amazon thinking I can retro fit the bulbs on to the OEM base and get the LCD display to light up.

As you can see from the pictures I tried, The bulbs lit up when I did a preliminary test by just putting the wires on the LCD connection points. BUT when I installed in on the OEM base, it wouldn't light up. I know polarity is specific so I rotated them BUT to no avail, the screen stayed dark. I thought maybe its too long and too big so I sanded it down to that it'll fit better. (pic) WELL.... it still didn't light up. After wasting MORE time on 2 FU*KEN bulbs than any human should I gave up and bought 2 OEM bulbs from a dealership on Ebay. total cost $12 with shipping.

Feel totally dejected. You can see my failure with the LED Bulbs and had to go back to OEM. My next update is the head unit... was a success but the back up camera ... was a SHIT:wtf:. Time I'll never see again. :biggrin1:
 

Attachments

  • IMG_3664.jpg
    IMG_3664.jpg
    33.5 KB · Views: 802
  • IMG_3665 (1).jpg
    IMG_3665 (1).jpg
    33.9 KB · Views: 800
  • IMG_3666 (1).jpg
    IMG_3666 (1).jpg
    32.5 KB · Views: 840
  • IMG_3668 (1).jpg
    IMG_3668 (1).jpg
    34.5 KB · Views: 800
  • IMG_3765 (1).jpg
    IMG_3765 (1).jpg
    28 KB · Views: 743
Last edited:
Head Unit

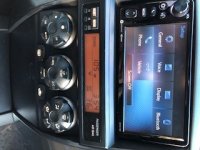
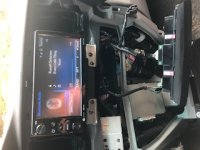
Found a pretty good deal for a Scion FRS/ Toyota 86 Head Unit on eBay. Model Number PT 546-00170. It provides me what I need which would be:
1) hands free calling
2) bluetooth music streaming
3) bluetooth pod cast streaming
4) better sound from AM/FM radio
5) up to date OEM look.

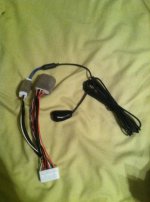
I bought the OEM harness conversion kit: part number PT546-00142. on ebay
AUDIO WIRE HARNESS KIT FITS SCION IQ, TC, XB, XD OEM TOYOTA PT546-00142 | eBay

it was relatively painless and simple. I use the OEM Mic and installed it on the Windshield up the A Pillar.

The only problem I came across was the backup camera. THAT was time I'm never getting back. I'll talk about that next.
 

Attachments

  • IMG_3619.jpg
    IMG_3619.jpg
    30.8 KB · Views: 801
  • IMG_3629.jpg
    IMG_3629.jpg
    71.3 KB · Views: 896
  • IMG_3599.jpg
    IMG_3599.jpg
    32.9 KB · Views: 839
  • IMG_3632.jpg
    IMG_3632.jpg
    28.5 KB · Views: 946
  • IMG_3633.jpg
    IMG_3633.jpg
    27.8 KB · Views: 801
back up camera was FUBAR

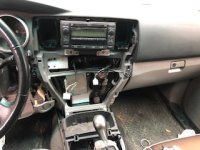
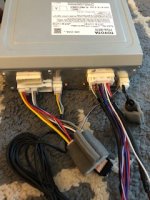
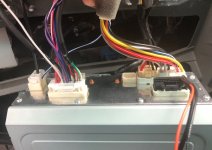
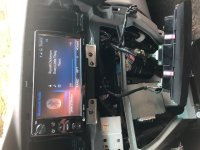
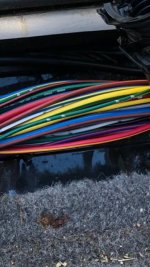
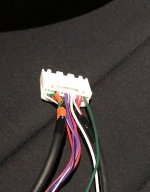
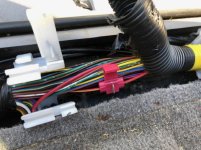
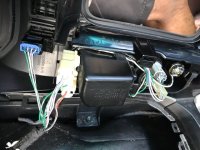
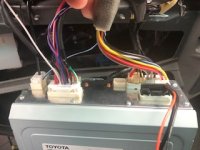
So I spent 4 weekends chasing this and tried make the HU to FLIP to the camera image. BUT IT WAS a complete failure. I found and tapped into the Reverse Trigger that's under that plastic door step in the front driver side. I connect that to the second pin hole in the harness. The reverse trigger is 12 volts and it turns on when the car is in reverse. The HU recognized reverse.

Then I connect the aftermarket backup Camera and it was sending out 6 volts which is what the camera needs but for some F***EN reason the HU won't FLIP. pictures below give you an idea where everything is and what it looked like.

I even took the 4Runner to the pros who installs radios. I was ALL in at this point and had them looked at it. They were amazing in that they spent 2 hours on it and couldn't figure it out and only charged me $15. The guy who I bought it from swore it worked before.

SO long story short, its a FAILED attempt and gave up. I searched the whole internet and couldn't find the answers. PT546-00170 just wouldn't flip to the reverse image.

Hit me up if anyone has the answer. Thanks. I'll just do it the old fashion way of turning my head when I back up.
 

Attachments

  • IMG_3632.jpg
    IMG_3632.jpg
    74.9 KB · Views: 915
  • IMG_3633.jpg
    IMG_3633.jpg
    80.6 KB · Views: 761
  • IMG_3680.jpg
    IMG_3680.jpg
    42.6 KB · Views: 729
  • IMG_3685.jpg
    IMG_3685.jpg
    99.9 KB · Views: 783
  • IMG_3681.jpg
    IMG_3681.jpg
    57 KB · Views: 733

Members online

No members online now.

Forum statistics

Threads
278,316
Messages
3,554,120
Members
248,016
Latest member
Advally Service

Trending content

Back
Top