zcruiser
Senior Member
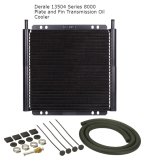
So like anything else, this info is out there but thought I would go ahead and document my install since it seems more complicated than it is and pictures help a lot. This is mainly for [MENTION=28692]GX4SEVEND[/MENTION] but may come in handy for others. I purchased the Derale 13504 kit off Amazon for $65.
To keep it brief, I have installed two B&M 72608 coolers in my previous 3rd gens mainly to prevent pink milkshake. For my 5th gen (102K miles), it's because I am now towing a 4,000 lb camper and want to take it wherever I like (not off-road, just some long climbs out here in Appalachia-country) and I've been seeing my transmission temps climb to 210F even staying S4 which does not make me happy.
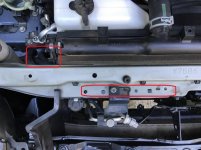
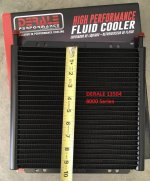
The Derale 13504 seemed to fit the bill, although the 13503 would probably have been sufficient and a slightly easier install. There is JUST enough height for the 13504 but it means tucking the lines up under the fender brace which is fine but hard on the knuckles.
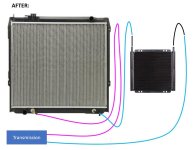
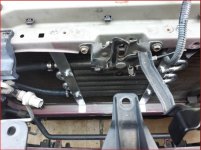
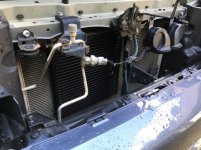
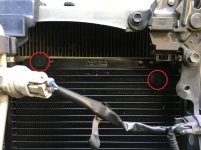
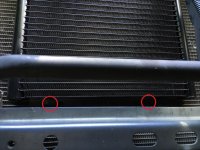
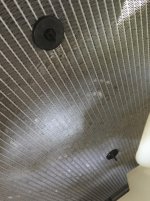
I mounted the Derale on the passenger side of the A/C cooler. Seemed like easier access for whatever reason, could go on either side. The effective 10" x 10" cooler only "blocks" less than 1/4 of the A/C cooler which is 20" x 24" so not too worried about adding heat to the A/C cooler. There are 4 plastic spikes that you push all the way through the fins of the transmission cooler, A/C cooler, and radiator then fasten in the back with a disk that ratchets down on the spike. Thick foam squares sit between the transmission cooler and the A/C cooler. Four spikes, push down the disks, clip off the excess... done.
The hose that came with the Derale unit seemed like the ID was too small to go on the fittings on the cooler, didn't match the stock ID, and wasn't long enough anyway (4'). So, I got 6' of 3/8" ID transmission line hose and a straight brass hose coupler. You may get away with 5', depends on your exact routing. 6' to be safe.
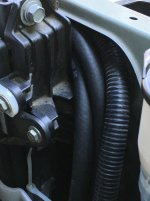
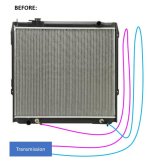
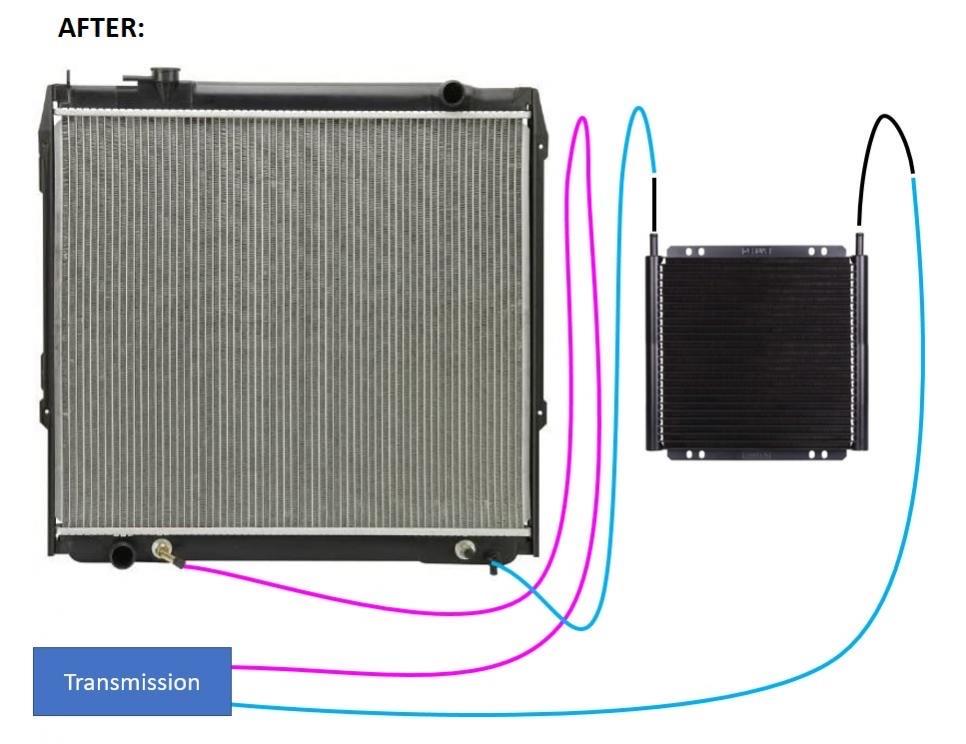
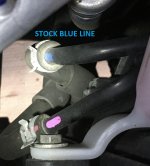
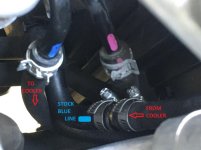
I removed the stock hose from the blue hard line to the left (pass side) of the radiator. Very little ATF dripped from the hard line. It took a 3' section of hose to go from the hard line to the right (driver) side of the Derale with a loop coming down off the hard line and back up to the cooler. It took about a 2' section to go from the left (pass) side of the Derale and back to the stock hose going back to the transmission.
I first hooked the 3' hose to the right (driver) side of the cooler and routed it through a gap near the radiator to go to the blue hard line. But before I hooked it up to the hard line (and before I hooked up the return hose to the cooler) I primed the Derale with Valvoline Max-life full-synth ATF by putting a funnel in the end of the 3' hose, raising it up above the radiator, and pouring ATF in until it started coming out of the left side of the Derale. I then hooked that up to the blue hard line and clamped.
I then connected the shorter hose to the stock hose with the inline coupler and clamps. Again I put the funnel on this hose, held it up straight and poured ATF in, but this time I had to squeeze the bubbles out and up through the funnel since there was nowhere else for the air to go. Once I felt like I had added several ounces of ATF, I routed this through the gap near the top side of the radiator and connected to the left (pass) side of the Derale and clamped.
This sounds easy process step-wise, but the Derale fixtures were up near the top of the fender brace so getting the hoses routed through the brace and down on the nipples ended up being a little bloody. In retrospect I should have done a test mount, prime with ATF, hook up the 2 hoses to the top of the cooler, THEN installed. Oh well, what's a real project w/o some rad scrapes on your knuckles?
So far my normal usage temps are down 30F and I won't be pulling the camper for a couple weeks so will continue to monitor my connections to ensure I don't have an ATF leaking from my couplings.
ETA: I was thinking I might need a pusher fan, but the engine fan does just fine pulling air through this. I can put a blue shop towel on the face of the cooler and it sticks just fine so I know I'm getting airflow w/o needing a pusher fan when sitting in traffic.
Pics below, sorry they're not exactly in order...
To keep it brief, I have installed two B&M 72608 coolers in my previous 3rd gens mainly to prevent pink milkshake. For my 5th gen (102K miles), it's because I am now towing a 4,000 lb camper and want to take it wherever I like (not off-road, just some long climbs out here in Appalachia-country) and I've been seeing my transmission temps climb to 210F even staying S4 which does not make me happy.
The Derale 13504 seemed to fit the bill, although the 13503 would probably have been sufficient and a slightly easier install. There is JUST enough height for the 13504 but it means tucking the lines up under the fender brace which is fine but hard on the knuckles.
I mounted the Derale on the passenger side of the A/C cooler. Seemed like easier access for whatever reason, could go on either side. The effective 10" x 10" cooler only "blocks" less than 1/4 of the A/C cooler which is 20" x 24" so not too worried about adding heat to the A/C cooler. There are 4 plastic spikes that you push all the way through the fins of the transmission cooler, A/C cooler, and radiator then fasten in the back with a disk that ratchets down on the spike. Thick foam squares sit between the transmission cooler and the A/C cooler. Four spikes, push down the disks, clip off the excess... done.
The hose that came with the Derale unit seemed like the ID was too small to go on the fittings on the cooler, didn't match the stock ID, and wasn't long enough anyway (4'). So, I got 6' of 3/8" ID transmission line hose and a straight brass hose coupler. You may get away with 5', depends on your exact routing. 6' to be safe.
I removed the stock hose from the blue hard line to the left (pass side) of the radiator. Very little ATF dripped from the hard line. It took a 3' section of hose to go from the hard line to the right (driver) side of the Derale with a loop coming down off the hard line and back up to the cooler. It took about a 2' section to go from the left (pass) side of the Derale and back to the stock hose going back to the transmission.
I first hooked the 3' hose to the right (driver) side of the cooler and routed it through a gap near the radiator to go to the blue hard line. But before I hooked it up to the hard line (and before I hooked up the return hose to the cooler) I primed the Derale with Valvoline Max-life full-synth ATF by putting a funnel in the end of the 3' hose, raising it up above the radiator, and pouring ATF in until it started coming out of the left side of the Derale. I then hooked that up to the blue hard line and clamped.
I then connected the shorter hose to the stock hose with the inline coupler and clamps. Again I put the funnel on this hose, held it up straight and poured ATF in, but this time I had to squeeze the bubbles out and up through the funnel since there was nowhere else for the air to go. Once I felt like I had added several ounces of ATF, I routed this through the gap near the top side of the radiator and connected to the left (pass) side of the Derale and clamped.
This sounds easy process step-wise, but the Derale fixtures were up near the top of the fender brace so getting the hoses routed through the brace and down on the nipples ended up being a little bloody. In retrospect I should have done a test mount, prime with ATF, hook up the 2 hoses to the top of the cooler, THEN installed. Oh well, what's a real project w/o some rad scrapes on your knuckles?
So far my normal usage temps are down 30F and I won't be pulling the camper for a couple weeks so will continue to monitor my connections to ensure I don't have an ATF leaking from my couplings.
ETA: I was thinking I might need a pusher fan, but the engine fan does just fine pulling air through this. I can put a blue shop towel on the face of the cooler and it sticks just fine so I know I'm getting airflow w/o needing a pusher fan when sitting in traffic.
Pics below, sorry they're not exactly in order...
Attachments
-
 Derale_13504_Kit.jpg124.8 KB · Views: 5,655
 -
 Derale_13504_mounted.jpg126.5 KB · Views: 5,795
 -
 Derale_top.jpg116 KB · Views: 5,672
 -
 Derale_bot.jpg139.3 KB · Views: 5,562
 -
 Derale 13504 dimension.jpg125.1 KB · Views: 5,494
 -
 Back_tabs.jpg128.1 KB · Views: 5,480
 -
 Blue hardline.JPG100 KB · Views: 5,480
 -
 New_blue.jpg75.8 KB · Views: 5,769
Last edited: