DIY Fullsize Roof Rack Build

Lockcuff

New member
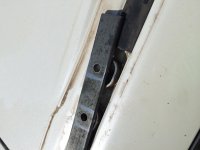
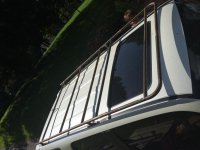
I've been reading over this forum for the last few weeks since purchasing our first 4 Runner getting ideas and such, so I figured it was finally time I started my roof rack to hold our RTT. I am building it out of 1' heavy gauge pipe. We need a strong low profile rack that can can support our 87 inches of tent. I took most of my inspiration from KneeCaps Build. So here goes nothing.


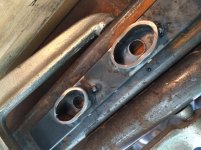
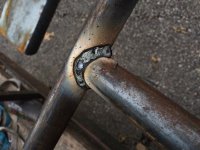
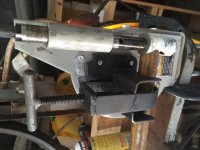
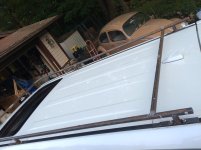
I cut the pipe to a 12mm length and then pressed it into an oval shape to allow it to fit into the gutter.
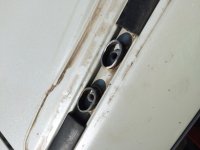
IMG_6417.jpg
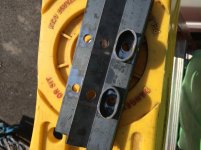
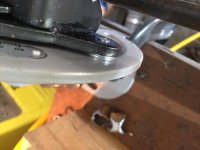
I cut the 1"x1/4" strap to 6.5" long, and drill 3.8" holes that match the holes in the roof.
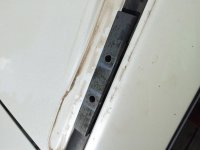
IMG_6418.jpg

IMG_6419.jpg
I checked all clearances and I am able to use the stock bolts and sealing washer.
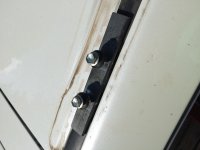
IMG_6420.jpg
Checking to see how things line up.
IMG_6422.jpg
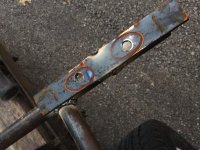
Tacked in place for fitment test.
IMG_6423.jpg

I will post more pic of the process as I continue tomorrow.
Hope you enjoy.

 

Attachments

  • IMG_6417.jpg
    IMG_6417.jpg
    132.9 KB · Views: 10,390
  • IMG_6418.jpg
    IMG_6418.jpg
    133.6 KB · Views: 9,871
  • IMG_6419.jpg
    IMG_6419.jpg
    136 KB · Views: 9,440
  • IMG_6420.jpg
    IMG_6420.jpg
    132.7 KB · Views: 9,323
  • IMG_6422.jpg
    IMG_6422.jpg
    134 KB · Views: 9,656
  • IMG_6423.jpg
    IMG_6423.jpg
    137.1 KB · Views: 9,724
Register to hide this ad
Looking forward to this

I'm also looking forward to see this project! Planning to go DIY rack this summer aswell.

Are you going to try your luck at a DIY ladder?
 
Got some more work done tonight, hopefully I'll have a full day to finish it.

Test fit after welding the bends together
IMG_6453.jpg
Couple more shots
IMG_6454.jpg
Rear crossmember tacked in
IMG_6455.jpg
Another shot
IMG_6456.jpg
This worked out great, this is where my spacers get welded on, I left it bolted on for a couple days of rain and they are showing me where they want to stay!
IMG_6457.jpg
Welding rear crossmember off of vehicle.
IMG_6458.jpg

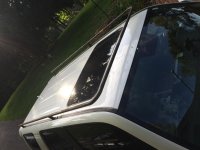
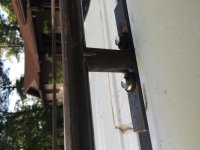
The worst part about this is keeping the slag off the vehicle when tacking the joints. I used a heavy canvas paint tarp and cardboard that was slightly wet, it did the trick. I had one piece of pipe fall off the side and scratch the body above the doors. All the specs on the roof are dirt not slag. :) My wife parked it next to a parking lot being swept this morning and then it sprinkled and made mud spots. She wasn't happy about the scratches though, she thought someone in the parking lot did, I should've just went with that explanation. Tomorrow I will test fit it again before adding more cross-members and the second level. My harbor freight pipe bender and tubing notcher leave a lot to be desired, I have had to modify both to make them work right. I plan on building more racks so I guess I need to invest in some better tools and a perfectly flat 4x8 metal workbench.
 

Attachments

  • IMG_6453.jpg
    IMG_6453.jpg
    130.1 KB · Views: 9,036
  • IMG_6454.jpg
    IMG_6454.jpg
    123.3 KB · Views: 8,784
  • IMG_6455.jpg
    IMG_6455.jpg
    123.8 KB · Views: 8,802
  • IMG_6456.jpg
    IMG_6456.jpg
    129.3 KB · Views: 15,050
  • IMG_6457.jpg
    IMG_6457.jpg
    136.8 KB · Views: 9,032
  • IMG_6458.jpg
    IMG_6458.jpg
    136.7 KB · Views: 9,625
[MENTION=118254]warrenvt[/MENTION] I thought about buying one too, But my rooftop tent is 87" long and the racks that I have seen all have a hump at the front side that is higher than the back, so I would have to make some sort of riser to bolt the tent onto. Not worth the money to me if I have to modify it after spending $1800+. When I am finished I will have roughly 6-8hrs build time and roughly $350 in paint and steel and it will be exactly how I want it and I think it will be sturdier than a Gobi rack.
I would like to see some pics of what you get though.

I am not - going to probably go with a Baja Rack this fall.
 
DIY roof rack

Forgot to add what I will be using to seal the rack to the car. Found this ...

It looks great. I like the shape. I wish I had the welder and welding skills to try this.
I like the cross bars at the shark fin antennae. It looks like you're going to add another bar behind the fin. I prefer this to any of the cut-out sections most racks have that wrap around the fin.
2&1/2 comments: 1) Most of the full length racks have a 3rd pair of posts near the front. It's not an anchor down point, that I can see, because there are no bolts there. It's a dummy post for vertical dead weight loads. Otherwise you won't be able to load past the middle supports.
2) The anchor points look like they're going to trap water and debris. Also all of the load bears on the roof under the tubes. I like the oval tubes but a flat plate may be needed at the bottom that fits the recessed track with round holes around the bolt sleeves. Apply the butyl sealant below the bottom plate. At this point, if it were me, I'd cut or grind the tubes shorter and add a 1/8" plate under them. Weld around the tubes to the bottom plate.
3) The ladder by Gobi or Baja Racks wraps over the back door and spoiler. People say that when you open the hatch it swings forward, contacting some of the racks.
Look at the thread about Drabbits racks. Someone posted picks of the installation. It shows his base seal and the 3rd post install.
FWIW
 
The worst part about this is keeping the slag off the vehicle when tacking the joints. I used a heavy canvas paint tarp and cardboard that was slightly wet, it did the trick.

I love the DIY projects! Yours is looking great. And, great idea on squeezing the pipe in the gutters.

I had the same issue with my rack build! Used cardboard to, but put my welding leathers over it.

 
My harbor freight pipe bender and tubing notcher leave a lot to be desired, I have had to modify both to make them work right. I plan on building more racks so I guess I need to invest in some better tools and a perfectly flat 4x8 metal workbench.

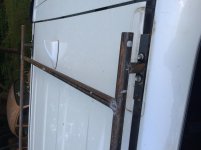
The Pipe bender is one tool that I have yet to buy. For now, I purchase all of my mandrel bends from Sharpe Products and then weld them in. I look under the handrail fabricated parts section for the right sizes. It is a good cheap alternative to buying a big tool.
 
Got some more done today before I ran out of pipe. SO tomorrow I get to buy more. :)

Here is my notcher, it was cheap, and only too 12 1/4" washers to get it to line up to the hole saw correctly.
IMG_6459.jpg
You can see where I had to shim it.
IMG_6460.jpg
Here is the mock up of the crossbars, This is exactly were I welded them in, Ill clean up the welds a bit more after putting the rear bar in after I get more. Then I will post a nicer pic. And if you look closely, my 13yr old slave, I mean Son is waving Hi!
IMG_6462.jpg

So I am getting closer to done, couple more hours and it can be primed. We plan to head to Wyoming with it Friday morning, so it's gotta get done. I'll post some more pics tomorrow.
Later
 

Attachments

  • IMG_6459.jpg
    IMG_6459.jpg
    127.6 KB · Views: 8,725
  • IMG_6460.jpg
    IMG_6460.jpg
    126.6 KB · Views: 8,777
  • IMG_6461.jpg
    IMG_6461.jpg
    127.8 KB · Views: 8,493
  • IMG_6462.jpg
    IMG_6462.jpg
    130.3 KB · Views: 9,837
So, I had to move forward faster than thought, I will add some more pics later today after removing the tent. I did change the "feet" style at last moment. I went with a 6" wide 1/4" thick plate and it worked out perfectly! I am debating on keeping it flat, but would like to have some attachment points for a shovel or axe when camping, but it would need to sit below the tent.(adding a 2nd level would help that.) I did notice that when driving the front portion of the rack would move in the wind. So adding a 2nd level would add rigidity to it. I also thought of making a mounting point up front as well. Drilling a hole through the roof scares me though.
I will get some more pics for you later today.

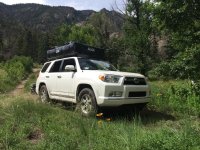
This is at our campsite 3/4 the way up Medano Pass at Great Sand Dunes National Park last week.
2015-07-19 15.51.29.jpg
 

Attachments

  • 2015-07-19 15.51.29.jpg
    2015-07-19 15.51.29.jpg
    137.1 KB · Views: 2,787
Great job!....I'll have a roof rack design I'll be sharing soon as well...thanks for the inspiration! :cheers:
 

Members online

Forum statistics

Threads
278,312
Messages
3,554,083
Members
248,016
Latest member
Advally Service

Trending content

Back
Top