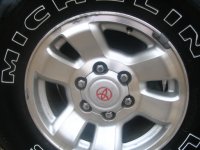
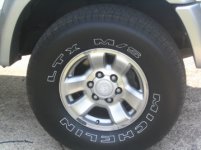
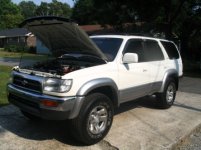
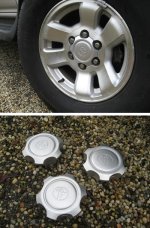
(No pictures just yet.... no camera... sry fellas)
I'm enjoying my Sunday by repainting my old beat up center caps.
I am just finishing my 1st coat and I gotta say that I am very happy with the results so far.
Those of you who would like a no brainer step by step then here you go.
Buyers Guide from Home Depot:
1. Rust-Oleum "Specialty Plastic Primer" (White) $4.87
2. Rust-Oleum "Indoor/Outdoor Durability" (Metallic) $5.57
3. Rustoleum "American Accents" (Gloss Black) $1.99
4. Norton MultiSand Sanding Sponge (Fine/Medium Grit) $2.19
5. Small Paintbrush Assortment $3.97
Grand total: >$20.00
Prep
1. Take those bad boys off.
-Give a tug and feel your shoulders and back crack
2. Sand those bad boys down.
-The medium grain is forgiving enough that you can be somewhat agressive. Get all of the hard to reach places and use your fingers to feel the plastic. It should be smooth with no pits, rough edges or flaws. (think smooth baby....)
3. Wash them with warm soap and water and let dry.
Paint
4. PRIMER- Get your primer ready and shake that bad boy like it's your money maker and you got bills to pay.
5. I always do a test spray everytime I start, and again if I stop for any reason before I reappply. I want to make sure that there isn't any blockage or sputtering. The key here for the primer is a light coat that is even.
6. Dry for 20 minutes.
7. PAINT- Same shake process as the primer, but the application is a tad different. Now I'm not a professional but a buddy of mine always said that the more coats the better. Now that doesn't mean that you should do 50 coats, but what he is trying to say is that if you just lay on one HUGE coat it will cover, but it won't work as well as a good 3-4 light coats one on top of each other. That makes an even, well covered finish.
8. I did 2 coats, you can do 3. I just got lazy. I'm wondering about a clear coat, I remember reading someone else doing the same thing and adding a clear coat, sounds like a good idea.
Conclusion
It really was easy and took about an hour and a half. In retrospect I would do the same thing again, and would advise you to do the same. Unless you want to shell out $60 for new caps. Plus doing it yourself really gives you a sense of pride in your ride.
Good Times,
Drew
It's funny how many 4Runners you see on the road once you own one.
I'm enjoying my Sunday by repainting my old beat up center caps.
I am just finishing my 1st coat and I gotta say that I am very happy with the results so far.
Those of you who would like a no brainer step by step then here you go.
Buyers Guide from Home Depot:
1. Rust-Oleum "Specialty Plastic Primer" (White) $4.87
2. Rust-Oleum "Indoor/Outdoor Durability" (Metallic) $5.57
3. Rustoleum "American Accents" (Gloss Black) $1.99
4. Norton MultiSand Sanding Sponge (Fine/Medium Grit) $2.19
5. Small Paintbrush Assortment $3.97
Grand total: >$20.00
Prep
1. Take those bad boys off.
-Give a tug and feel your shoulders and back crack
2. Sand those bad boys down.
-The medium grain is forgiving enough that you can be somewhat agressive. Get all of the hard to reach places and use your fingers to feel the plastic. It should be smooth with no pits, rough edges or flaws. (think smooth baby....)
3. Wash them with warm soap and water and let dry.
Paint
4. PRIMER- Get your primer ready and shake that bad boy like it's your money maker and you got bills to pay.
5. I always do a test spray everytime I start, and again if I stop for any reason before I reappply. I want to make sure that there isn't any blockage or sputtering. The key here for the primer is a light coat that is even.
6. Dry for 20 minutes.
7. PAINT- Same shake process as the primer, but the application is a tad different. Now I'm not a professional but a buddy of mine always said that the more coats the better. Now that doesn't mean that you should do 50 coats, but what he is trying to say is that if you just lay on one HUGE coat it will cover, but it won't work as well as a good 3-4 light coats one on top of each other. That makes an even, well covered finish.
8. I did 2 coats, you can do 3. I just got lazy. I'm wondering about a clear coat, I remember reading someone else doing the same thing and adding a clear coat, sounds like a good idea.
Conclusion
It really was easy and took about an hour and a half. In retrospect I would do the same thing again, and would advise you to do the same. Unless you want to shell out $60 for new caps. Plus doing it yourself really gives you a sense of pride in your ride.
Good Times,
Drew
It's funny how many 4Runners you see on the road once you own one.