Dobinsons 5th Gen T4R Suspension options - from Exit Offroad

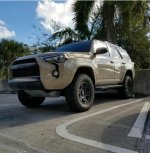
Here is a TRD Pro from Boca Raton, FL

He has these Dobinsons parts installed:
C59-314
GS59-700
C59-325
GS59-701
SC59-001 (strut caps)
 

Attachments

  • WhatsApp Image 2017-02-07 at 12.13.51 PM.jpg
    WhatsApp Image 2017-02-07 at 12.13.51 PM.jpg
    119.7 KB · Views: 4,596
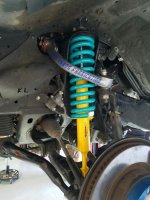
I made some changes to my own 5th gen Trail this weekend. I changed out the OME 90010 and 2887's for Dobinsons GS59-574 struts and C59-314 med/heavy load 2" coils to give 3" of lift, and a little more travel.

Doing the trick of removing the lower ball joint makes the whole process really fast, especially considering that I already had the Total Chaos UCA's installed. I had some fun wrestling around with the KDSS front sway bar, but that was to be expected.

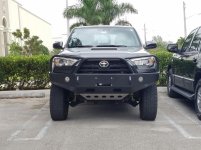
Here's how it looks now. I'm waiting for it to settle another day or 2 before I take photos of the front to rear. I was able to remove my lean too, as the original owner had the trim packer installed on the driver side, which is incorrect.

I've only put 50 miles on it so far, but the shock valving is definitely better. The GS59-574 struts have softer valving than the 700 struts, and I can feel it a lot on the road. The suspension is now soaking up the little bumps on the road a lot better, especially on the concrete bridges and their gaps all over here in Miami. It will be a while before I can take it offroad, but the onroad handling and ride is greatly improved. Also, our 314 coils that I installed are near identical spring rate to the OME 2887 coils, but the shocks have made a big ride difference here.

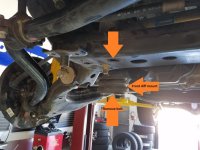
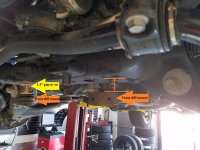
Then after that was done, another 10 mins was added to add the Dobinsons diff drop kit. I removed all my ARB skid plates before working on the suspension as I didn't plan to keep them on. Too many rattles as they weren't installed properly either and were missing some hardware. I'm looking at other skid plate options now, but will probably have a local shop make me exactly what I need to work with the KDSS and the diff drop kit.
 

Attachments

  • WhatsApp Image 2017-02-12 at 9.59.47 PM.jpg
    WhatsApp Image 2017-02-12 at 9.59.47 PM.jpg
    131.2 KB · Views: 9,871
  • 20170211_123329.jpg
    20170211_123329.jpg
    129.1 KB · Views: 8,316
  • 20170211_123334.jpg
    20170211_123334.jpg
    129.1 KB · Views: 8,104
  • 20170211_123401.jpg
    20170211_123401.jpg
    128.4 KB · Views: 6,351
I made some changes to my own 5th gen Trail this weekend. I changed out the OME 90010 and 2887's for Dobinsons GS59-574 struts and C59-314 med/heavy load 2" coils to give 3" of lift, and a little more travel.

Doing the trick of removing the lower ball joint makes the whole process really fast, especially considering that I already had the Total Chaos UCA's installed. I had some fun wrestling around with the KDSS front sway bar, but that was to be expected.

Here's how it looks now. I'm waiting for it to settle another day or 2 before I take photos of the front to rear.

You've definitely got my attention, looking forward to the pics and overall ride impressions as the new gear settles in. Thanks for posting!
 
You've definitely got my attention, looking forward to the pics and overall ride impressions as the new gear settles in. Thanks for posting!

Thanks man. Here's a shot from right now, but the ground isn't level, so it doesn't look right from front to rear in this parking lot. I'll get some more pics up soon. Changing out the wheels and tires this week as well, so it will look a whole lot different here shortly!!
 

Attachments

  • WhatsApp Image 2017-02-22 at 10.16.52 AM.jpg
    WhatsApp Image 2017-02-22 at 10.16.52 AM.jpg
    137 KB · Views: 5,765
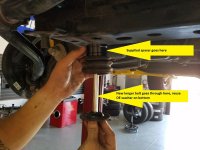
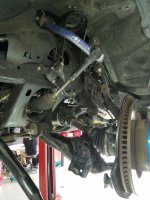
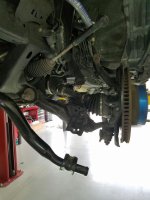
I also wanted to share the installation procedure, as there seems to be a lot of different ways to change out the front strut assemblies. Mine has KDSS and here are the steps that I used to change out the front.

1. Lift car in the air with your buddies 2-post hoist :rockon:
2. Remove the wheels of course and a front skid plate if you have one.
3. Remove KDSS valve protecting plate located under the driver's seat.
4. Mark the 2 x 10mm bolt heads to set a starting point.
5. Undo each of the 2 bolts by 3 full turns ONLY. This relieves the pressure on the sway bar system so that they can be manipulated without too much difficulty during the process.
6. Support sway bar under the piston end, remove bolts from the fixed end of the sway bar mount. Lower the pressure of the sway bar a bit, then remove sway bar from control arm ends on both sides.
7. Remove top 3 small nuts from the top hat.
8. Remove cotter pin and nut from the steering tie rod end, and get that out of the way, then remove 2 x lower ball joint bolts.
9. Leave brakes, brake lines, and upper control arm all where it is. Maybe this just worked for me because I had the Total Chaos UCA installed already?
10. Undo and remove the bottom bolt holding the strut to the lower control arm.
11. With a buddy, one pushes down on the LCA (which is now free to swing down easily, and the other slides the strut assembly down and out towards the front of the vehicle. While pushing down the LCA, it can also help to push the brake and knuckle assembly upwards to gain clearance for the coil spring to come out from inside the UCA.
12. Struts are out, do with them as you will, then put them back in.
13. During reassembly, the sway bar mounts onto the control arms can be very tricky to get aligned, and to make things worse, the nuts that are welded into the mount can strip out without too much effort. Ask me how I know how.... :lalala:

14. Once everything is put back together, don't tighten the lower strut mounting bolt until the truck is on the tires and on the floor. Tightening that lower mounting bolt while in the air can preload the bushing and cause it to tear itself apart prematurely, a very common issue with Toyota IFS trucks. Tightening it on the floor at ride height allows it the bushing to be more "rested".
15. For KDSS people, now once the truck is on the ground and has set there for a few minutes, go back to the 2 x 10mm bolts and tighten them back up to where they were. Don't overtighten though since it's all aluminum. Then put the protective plate back on. The truck should sit level now left to right as long as you installed the coils on the correct side (taller coil goes onto the right side (US passenger side) and if you're using a trim packer in another brand, it also only goes on the right side. If you drive the truck without tightening those valves back up, expect to drive straight to the dealer for an expensive KDSS repair!!!

Anyway, that's the way I've pulled my front end apart 2 times now with no issues anywhere.


Edit 1/23/18: I also want to put this here with this post, as it's the way to correct for a vehicle lean if your truck is leaning once everything is installed. This can be done on the front or the rear.

https://youtu.be/xtURdW66WM4

 

Attachments

  • WhatsApp Image 2017-02-22 at 10.20.18 AM.jpg
    WhatsApp Image 2017-02-22 at 10.20.18 AM.jpg
    132.9 KB · Views: 6,208
  • WhatsApp Image 2017-02-22 at 10.20.18 AM (1).jpg
    WhatsApp Image 2017-02-22 at 10.20.18 AM (1).jpg
    124.4 KB · Views: 5,839
  • WhatsApp Image 2017-02-22 at 10.38.47 AM.jpg
    WhatsApp Image 2017-02-22 at 10.38.47 AM.jpg
    127.8 KB · Views: 5,762
Last edited:
Recently installed my Dobinson setup

C59-300 springs up front w/ GS59-574 Struts for a total lift of 2.75"
(Stock weight springs with their long travel front struts)
C59-325 springs in the rear w/ GS59-701 shocks for a total lift of 2"
(Stock weight rear springs w/ standard shocks)
Also installed the diff drop kit as well.

-Also installed my Light Racing UCAs and Spacers when I did the suspension.

So far, I've put about 300 miles on the suspension setup and pretty happy with it so far. The installation was pretty smooth and straightforward, no issues there. The nose dive is essentially non-existent. The setup is a bit more firm than stock but I prefer it as it doesn't seem to be as "floaty" as it was before. It's definitely not "harsh" by any means. If I was to describe the setup, it's firm but absorbs a lot of bumps and road imperfections. Definitely pleased with my setup so far and can't wait to take it off-road to see how it does. Mike has been extremely helpful throughout the process and communication with him has been great. Definitely would recommend for anyone who is interested.

n31cp2.jpg

jv43ed.jpg
 
Recently installed my Dobinson setup

C59-300 springs up front w/ GS59-574 Struts for a total lift of 2.75"
(Stock weight springs with their long travel front struts)
C59-325 springs in the rear w/ GS59-701 shocks for a total lift of 2"
(Stock weight rear springs w/ standard shocks)
Also installed the diff drop kit as well.

can you post a pic from the side? I am 2.5 in th efront with the same rear coils and I have a little rake (which I like) but I am curious how much if any rake you have
 
can you post a pic from the side? I am 2.5 in th efront with the same rear coils and I have a little rake (which I like) but I am curious how much if any rake you have

I'll try to grab a picture after work, mine looks pretty leveled for the most part but I also do have my old suspension plus a bunch of tools in the back so that might be bringing it down just a tad.
 
I'll post pics and my impressions in a few days. Going to let it settle down a bit after I installed it Saturday.
 
My JBA A-arms are at the powder coater being refinished in the Dobinsons teal color to match the springs - hoping to get them back by Tuesday and do my install then. Can't wait!!
 
[MENTION=148378]Dobinsons Mike[/MENTION] does Dobinsons do any zinc / rust protection so as to avoid any OME-like rusting? Just curious.
Hey Angelo. There's no zinc coating on the shocks or coils, but almost all of our other suspension components are zinc coated (gold color), or zinc coated then powder coated over (like our adjustable panhard rods). What I can say is that it's very rare for the paint to chip and flake like the OME shocks do. A lot has to do with the vehicle though, and the rear shocks on our 4runners are all in front of the axle, so the front tires throw up all the road debris right back into the front of the axle and the shocks. I can see how they do get beat up, but they should last longer.

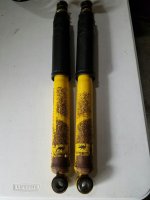
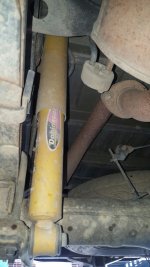
Here's 2 examples. First, the OME shocks I just took off the rear of my new-to-me 4runner I bought with these on there. These shocks were 2 years old. What this proved to me is that the stickers offer a lot of paint protection!! Maybe a thick clear wrap on the lower shock surface wouldn't be a bad idea before installation.

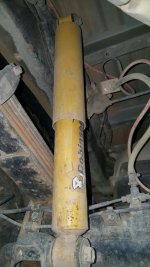
2nd, this is from one of the installers at our HQ in Rockhampton, Queensland, and they have been on for 4 years, and he has been to Cape York and back (very very tough offroad conditions), and you can see they're lasting very well. Those are on a Hilux.

I've asked for a more specific answer on the shocks, and their paint type and finish. I know the coil springs are shot peened with steel shot, washed in hot phosphate, then powdercoated immediately without any hands touching it. Then each coil is individually shrink wrapped, then wrapped together, then boxed, so the coils really show up like new. The other guys on here who have bought them already can tell you.
 

Attachments

  • WhatsApp Image 2017-02-22 at 12.16.06 PM (2).jpg
    WhatsApp Image 2017-02-22 at 12.16.06 PM (2).jpg
    126.5 KB · Views: 5,470
  • WhatsApp Image 2017-02-23 at 4.46.27 PM.jpg
    WhatsApp Image 2017-02-23 at 4.46.27 PM.jpg
    117 KB · Views: 5,456
  • WhatsApp Image 2017-02-23 at 4.46.28 PM.jpeg
    WhatsApp Image 2017-02-23 at 4.46.28 PM.jpeg
    123.8 KB · Views: 5,536

Members online

No members online now.

Forum statistics

Threads
278,316
Messages
3,554,121
Members
248,016
Latest member
Advally Service

Trending content

Back
Top