Man, I’ve been reading through your whole thread for the past couple of days and got bummed when I got to the end. Thanks for all the knowledge and insight. Just got my 95 back from the shop after a slightly botched diy engine install job. Can’t wait to start knocking stuff off the list

You are using an out of date browser. It may not display this or other websites correctly.
You should upgrade or use an alternative browser.
You should upgrade or use an alternative browser.
Dropzone's 1994 4Runner Expedition/Overland Build
- Thread starter Dropzone
- Start date
vi_it_armis
New member
... I ended up with a set of heated, power & leather seats out of a 2005 Subaru Outback. The front mounts measured about 16.5" center and center..same as the stock mounts.
This is great info. I've been thinking about the same seats (2005-2009 legacy outback) for my first gen. What is the height of the outback seats from the floor to the cushion? Did they raise you up any?
Haakasaurus
New member
Wow this is a quality build. I saw a post of yours in some other thread and your signature pic caught my eye. You've got the first 4runner I've seen with my exact paint! Yours is a hell of a lot more built than mine though, keep it up!


Dropzone
New member
Secret Santa 2019!!!
T4R has done a secret santa sign up for a few years. It is pretty cool.
Last year I got a set of multi color rock lights I can control from my phone.
Sign up, send someone some stuff and get some stuff in return!
You can sign up here:
T4R 2019 Secret Santa
T4R has done a secret santa sign up for a few years. It is pretty cool.
Last year I got a set of multi color rock lights I can control from my phone.
Sign up, send someone some stuff and get some stuff in return!
You can sign up here:
T4R 2019 Secret Santa
How to play the game:
Anyone that wants to play please Message me with the below information:
- SECRET SANTA as the title of your pm.
- T4R Username
- First and Last name
- Mailing Address (Complete address)
- Year of your 4Runner
- At least 3 things that interest you (ex. movies, books, car stuff, or anything else that you are interested in or like etc.) Might also want to include Shirt size etc.
Requirements:
In Signing up you are agreeing to provide a gift valued at $30-$40 dollars or more for your person. If your mac an cheese art work is using dollar store glue maybe step your game up.
Every participant will receive one other participants information and wish list, no participants will be matched together (i.e. joe and moe will NOT be getting gifts for each other)
Everyone has until midnight of November 16th to submit their information to me to be entered into the game. By the end of the day on November 18th you will receive a PM from myself containing your person's information. Plenty of time to get a gift for Christmas and in time for Bl@ck Friday sales.
Exchange:
Please try to have your gifts mailed no later than December 17th so that your person will receive their gift(s) before or around Christmas day. That will give at least a week to get it shipped to them(If you are shipping out of the country do not wait until the last seconds to ship it, we do have people from Canada and other parts of the world on the forum pay attention to your gift recipients location when you get their details.
Other Details:
*If you'd like to you can include your T4R username with the gift so that your receiver knows who to thank, but this is not a requirement.
*Make sure to NOT tell your person you are their S.S. during game play!
*Keep gifts PG-13 unless you know the recipient personally
*Absolutely NO WHINING!!!
*Asshattery and douche-baggery will not be tolerated.
*YOU must do the legwork once pm'd. Once on THE LIST, you must send something REASONABLE to the name pm'd to you.
*Same as years past, there is no cap, you can be as generous as you wish but there is a $20 minimum for gifts including shipping. If you decide to go nuts and spend a ton of money, don't expect the same from your secret santa.
*We/I will do our best to make it fair every way possible
*I and or the other moderators here on T4R take no responsibility if someone flakes and does not send a gift. We will do our best to fix it, since we will have their names/addresses.
*if you commit and something comes up that really puts you in a bind let me know, we will make sure your person is taken care of one way or another so there is no one left out this Christmas.
*Your Names, Address, and info you send to me will be confidential. I will NOT share it with anyone period so don't even ask.
*I will not be monitoring messages or this thread all day every day. Please allow a day or two for me to update the list after you send the signup message. All notifications go to my email so I'm on top of it.
List of Santas:
1.) Aha2988
2.) Mstudt
3.) momo.75
4.) 95yodarunner619
5.) Fl_Tigers
6.) Greyhome
7.) rochmpr
8.) NWFL4Runner
9.) SAR_Runner
10.) OKT4RCPL
11.) TodiN
12.) AdventureGirlDulcy
13.) Dillusion
14.) firemedicPQ1
15.) Dominicanborn
16.) gaterose
17.) Kyle_Uran
18.) aa.allen
19.) Dropzone
20.) TrustyAxe
21.)
22.)
23.)
24.)
25.)
26.)
27.)
28.)
29.)
30.)
Dropzone
New member
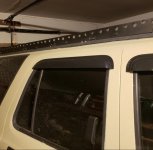
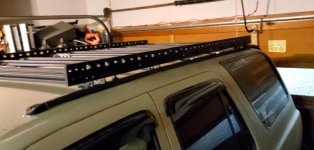
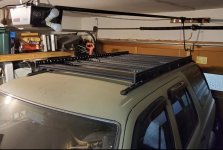
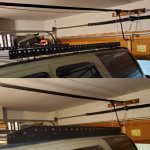
Did a little revamp on the roof rack. Using 8020 makes an old fart feel like kid with an erector set again.
Version 1.0 was only about 34" wide and was very low to the roof. That was fine but difficult to get bungee cords/rope around a crossbar. It was also a bit narrow.
Version 2.0 is 38" wide, 72" longand sits about about 1" above the roof line. May not seem like much but will be better in the long run.
Passenger side pic is old narrow rack
Driver side is the wider rack
Version 1.0 was only about 34" wide and was very low to the roof. That was fine but difficult to get bungee cords/rope around a crossbar. It was also a bit narrow.
Version 2.0 is 38" wide, 72" longand sits about about 1" above the roof line. May not seem like much but will be better in the long run.
Passenger side pic is old narrow rack
Driver side is the wider rack
Attachments
Dropzone
New member
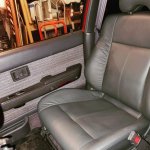
Last summer I picked up a set of 2008 Forester power leather and heated seated to put in the 4runner. Surprisingly 3 out of the 4 Subaru mounts line up perfectly with 3 of the 2nd gen 4runner mounts.
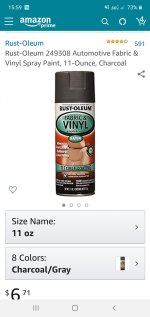
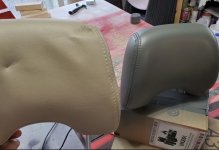
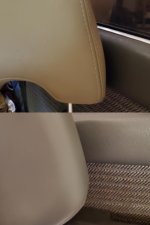
The seats are in great shape, downside they are tan. For the price I paid a U-Pull It I figured i could experiment with the seats like i have pretty much done my whole driving life. In my Air Cooled V-Dub days I used vinyl dye several times, even on leather. Ordered a can of Charcoal Rustoleum on Amazon and shot one of the headrests with it.
3rd pic shows the tan against the stock door panel and the sprayed headrest again against stock vinyl.
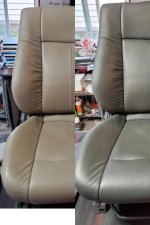
It came out pretty good so decided to take the plunge and see how the passenger seat would come out. Doing several light coats and waiting awhile between each one it's looking pretty good.
The seats are in great shape, downside they are tan. For the price I paid a U-Pull It I figured i could experiment with the seats like i have pretty much done my whole driving life. In my Air Cooled V-Dub days I used vinyl dye several times, even on leather. Ordered a can of Charcoal Rustoleum on Amazon and shot one of the headrests with it.
3rd pic shows the tan against the stock door panel and the sprayed headrest again against stock vinyl.
It came out pretty good so decided to take the plunge and see how the passenger seat would come out. Doing several light coats and waiting awhile between each one it's looking pretty good.
Attachments
Dropzone
New member
Had a couple of hours to waste so Did some miscellaneous crap on the 4runner.
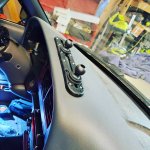
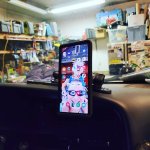
Decided to try the ram mounts tough track mounts. These are cool as you can slide the mount around and have as many devices on the track as you can stuff in there.
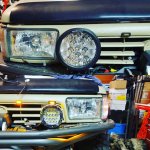
I installed a set of 8" LED's but they were blocking my Truck-Lite led signals so swapped them with some 5" 80w lights.
Decided to try the ram mounts tough track mounts. These are cool as you can slide the mount around and have as many devices on the track as you can stuff in there.
I installed a set of 8" LED's but they were blocking my Truck-Lite led signals so swapped them with some 5" 80w lights.
Attachments
Dropzone
New member
So I have gadgetitis pretty bad. I order junk try stuff and change my mind quite a bit as you can probably see from the various redoing of junk on this truck.
One thing I was looking for as far as a tie down solution on the roof rack was something that would be quick and easy and work with the slots of the 8020 strut crossbars on the roof rack.
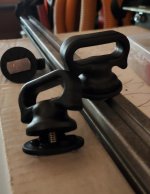
Ordered a couple of sets of these Ram Mounts that are designed for their tough track system. I think they are more geared towards use in a kayak but figured I would give them a shot.
I don't think you can put a huge amount of pressure on them but they slid right into a piece of 8020 and they will easily slide to where you want them to go so for a light load using a bungee cord they should do the trick.
One thing I was looking for as far as a tie down solution on the roof rack was something that would be quick and easy and work with the slots of the 8020 strut crossbars on the roof rack.
Ordered a couple of sets of these Ram Mounts that are designed for their tough track system. I think they are more geared towards use in a kayak but figured I would give them a shot.
I don't think you can put a huge amount of pressure on them but they slid right into a piece of 8020 and they will easily slide to where you want them to go so for a light load using a bungee cord they should do the trick.
Attachments
Dropzone
New member
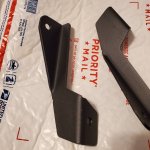
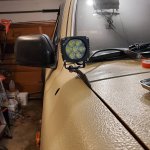
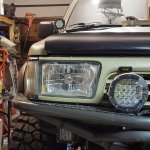
Been trying to figure out an easy way to run the wiring for the ditch lights through the mirror, it just wasn't working so I gave up and picked up a set of Apoc Industries mounts
They are pretty decent
Also mounted a set of Rigid DOT compliant fog lights
They are pretty decent
Also mounted a set of Rigid DOT compliant fog lights
Attachments
Dropzone
New member
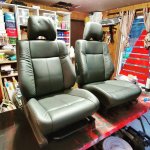
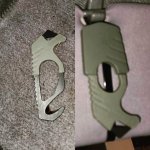
Finished up the last little touch up on the forestor seats.
The color matches pretty decent
Also added a Gerber Military seatbelt cutter to the sun visor just in case
The color matches pretty decent
Also added a Gerber Military seatbelt cutter to the sun visor just in case
Attachments
Dropzone
New member
Was looking at something to use as some daytime running lights.
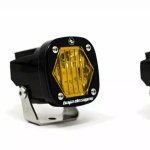
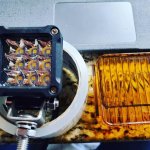
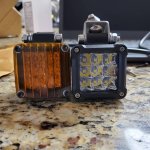
Baja Designs S1's would be awesome since they are very small but at almost $200 a pair hard to justify. Found a set of little 2"x2" 24w pods on Amazon that have some great reviews.
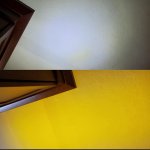
Cut down a set of extra amber covers. Pattern came out pretty good. Not bad for a 30 minute and $30 experiment
Will probably stuff them under the winch plate
Baja Designs S1's would be awesome since they are very small but at almost $200 a pair hard to justify. Found a set of little 2"x2" 24w pods on Amazon that have some great reviews.
Cut down a set of extra amber covers. Pattern came out pretty good. Not bad for a 30 minute and $30 experiment
Will probably stuff them under the winch plate
Attachments

Dropzone
New member
haha, yep i have issues when it comes to lights. Bed liner is holding up well. I have been doing some reworking of my roof rack using a grinder. a lot of sparks from a cut off wheel has been hitting the roof with no effect on the monstaliner. If you decide to go that route order a few extra rollers that they have. I had some that lasted a huge area, some barely lasted half a door.Digging the rig man! Your obsession for lights escapes me lol. I’m curious how well your bed liner is holding up, I have my eye on the monstaliner kit at the moment.
Very cool
Thanks
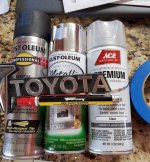
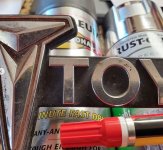
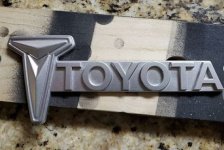
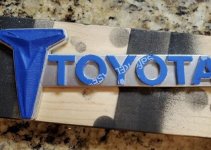
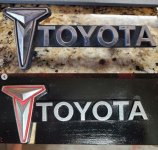
so a week or so ago I found the grill emblem from my 81 Trekker in the garage. Looked at it thinking it would look cool on the 94's grill but the emblem was looking a little bit worse for wear. decided to give it a shot at a sort of restomod to bring some life back into it.
I lightly sanded it with some 320 and 400 grit sand paper. I tried using some rustoleum chrome like paint...it didn't work very well so ended up using a liquid chrome paint pen my wife had stashed.
last pic shows a comparison between the final product and what i started out with.
It's far from perfect but will be fine sitting on a monstalined grill.
Attachments
Dropzone
New member
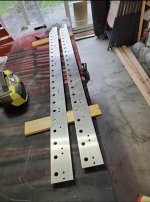
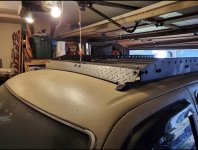
Wasn't happy with the gap of the side rails when I redid the roof rack. Got a great deal on some 4" wide aluminum. Used the old side rails as a jig. It closed up the gap a lot.
Also made a wind deflector out of some aluminum diamond plate
Also made a wind deflector out of some aluminum diamond plate
Attachments
Last edited:

DannyBFresco
New member
Wasn't happy with the gap of the side rails when I redid the roof rack. Got a great deal on some 4" wide aluminum. Used the old side rails as a jig. It closed up the gap a lot.
Also made a wind deflector out of some aluminum diamond plate
Looks good! I would imagine it cut down on wind noise quite a bit
Dropzone
New member
Looks good! I would imagine it cut down on wind noise quite a bit
Thanks, unfortunately this thing still hasn't left the garage in over a year. hopefully find out in a month or so when i get off my butt and re-install the transfercase
DannyBFresco
New member
Thanks, unfortunately this thing still hasn't left the garage in over a year. hopefully find out in a month or so when i get off my butt and re-install the transfercase
Oof, yeah I guess that’s pretty important for driving or whatever lol
Dropzone
New member
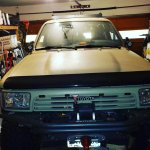
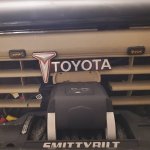
Mounted the 'restored' grill emblem from the 81. Center mounted instead of off to the d/s like the 81 because it would be blocked by one of my lights. Not sure if that's where it will live permanently.
Looking at the crap job I did hacking up the grill I want to find another one and do a better job of clearancing it for the solenoid box
Looking at the crap job I did hacking up the grill I want to find another one and do a better job of clearancing it for the solenoid box
Attachments
Similar threads

- Replies
- 0
- Views
- 2K


- Replies
- 0
- Views
- 2K


