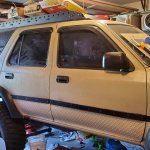
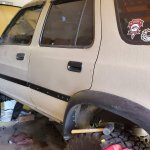
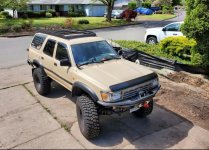
Dropzone's 1994 4Runner Expedition/Overland Build

I haven't been really active on this forum since my long term project has been an 81 Toyota Trekker:


The truck is highly capable: 5.29's, dual cases, full caged.
It has been fun for the last 8 years but it is just getting beat to death. Frame is about shot. I am kind of tired of the whole beat the truck in the rocks phase.

I have been thinking about another truck/4runner as a replacement. SOmething that can act as a capable weekend warrior/semi daily driver.

So a few days ago look what the Dodge dragged home
80-20150831_131056_1_8fcf6fbaf4746fb5acb1ace91cca9ac9589f49ec.jpg~original


Picked up my neice's 1994 4runner with 195k on it.
Recent rebuild on the 3.turd so it actually runs decents, dog slow with the Auto.
I got it dirt cheap, low 3 digit numbers due to a failed bearing/CV on the right front wheel that lead to this
80-20150831_132716_c872aa77b2e313d0c95692e61881367044dbe4ea.jpg~original

Totally froze on her and freaked her out. Her mom said come get it.

It is kind of dirty but should clean up nicely
80-20150831_132753_8359f9e152c78b2220e22b7be43a1f680ade96bc.jpg~original

80-20150831_132744_604c386100b0fb3f15797857d27b84ac4a8d4c5e.jpg~original

Has the usual drivers side torn seat but other than that nothing sometime with a vacuum and carpet cleaner can't cure
80-20150831_133003_57d2281967646e5415039f6cf3ca939c1fb28d36.jpg~original

80-20150831_133127_3984a099686f01bd0a3c654718a10608cb3d521d.jpg~original

80-20150831_132810_0f90ca9d5e7cf9d5fd598c9181434e0d01978215.jpg~original


Plan is to tear apart the right front and see what got fubar'ed.
It needs tires, an exhaust and the left rear passenger window won't roll down.

Long term plan is to turn it into a more family friendly trail runner, won't have the same capabilities as the Trekker but time will tell. Looking to build something I can take the grandkids out to enjoy the woods in and maybe the occasional 2-3 night weekend expedition.

It will get some front (with a winch) and rear bumpers, probably an extra gas tank, drawer unit/sleeping platform. Maybe something like an ARB fridge.
Definitely a locker, sliders.
Thinking 33x10.50's for tires.

Build will be a slow one


great looking rig!
 
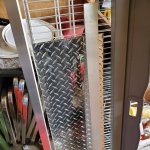
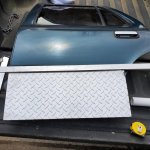
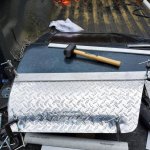
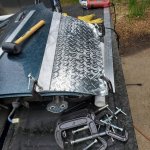
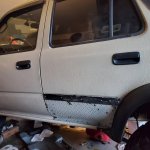
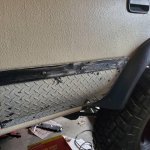
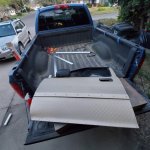
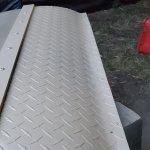
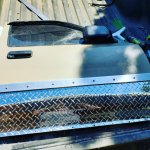
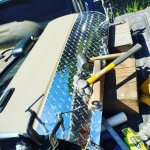
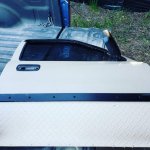
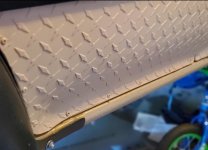
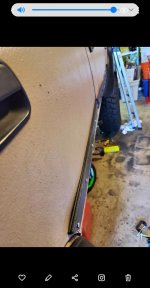
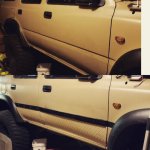
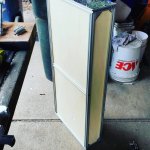
Got bored and decided to see if I could form some diamond plate to fit the curve of a door.
For years I have liked diamond plate on the lower part of a door.
Busted out an extra door to use as a form, a rubber mallet and some clamps. Pound the aluminum and than cut to fit.
It actually fit the curve of the 2nd gen door pretty good.
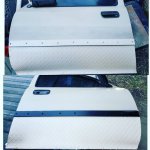
I used some 1/4" thick aluminum stock to act as sort of a door slider for idiots in the parking lot. Borrowed the door slider idea from [MENTION=67615]Dirtco[/MENTION]
.
.
I'll need to strip the aluminum later on since I got a little impatient and didn't wait long enough for the paint to dry.
 

Attachments

  • IMG_20200404_180922_607.jpg
    IMG_20200404_180922_607.jpg
    129.2 KB · Views: 572
  • IMG_20200404_180922_610.jpg
    IMG_20200404_180922_610.jpg
    127.7 KB · Views: 587
  • IMG_20200404_180922_609.jpg
    IMG_20200404_180922_609.jpg
    135.8 KB · Views: 586
  • IMG_20200404_180922_615.jpg
    IMG_20200404_180922_615.jpg
    137.9 KB · Views: 614
  • IMG_20200404_180922_642.jpg
    IMG_20200404_180922_642.jpg
    129.9 KB · Views: 624
  • IMG_20200404_180922_645.jpg
    IMG_20200404_180922_645.jpg
    136.6 KB · Views: 584
Last edited:
Got a late start working on the totally unnecessary diamond plate on the 4runner door project today.
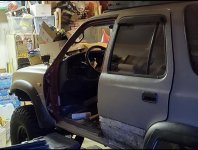
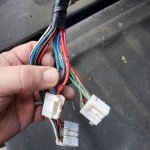
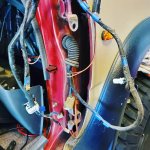
Ended up taking the driver's side door off. And of course forgot there is 3 plugs on the door harness instead of 2 so had to fix a couple of wires I accidentally stripped.
I took vacation tomorrow from work so hopefully I can get this door back on and at least one other door done.


​​​​​​​
 

Attachments

  • Screenshot_20200411-212242_Gallery.jpg
    Screenshot_20200411-212242_Gallery.jpg
    109.7 KB · Views: 572
  • IMG_20200411_201135_380.jpg
    IMG_20200411_201135_380.jpg
    118.5 KB · Views: 562
  • IMG_20200411_201135_381.jpg
    IMG_20200411_201135_381.jpg
    123.5 KB · Views: 567
  • IMG_20200411_201135_383.jpg
    IMG_20200411_201135_383.jpg
    70.9 KB · Views: 545
Day 3 of the #covid19projects that is totally unnecessary but keeps my mind off the BS of the world.
Tried to pull the passenger side harness from the firewall but looked like I would have to pull more of the dash than I wanted.
So plan B was to pull the door harness out of the door.
Gonna be a pain to re-install but oh well.
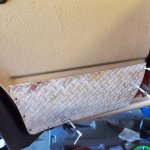
The diamond plate I had left over was a bit thicker than the stuff I used for the driver's side so had to use a bigger hammer and a piece of old railing. Beat it into submission and it seemed to fit the curve of the door nicely.
I almost wish I had left it polished, looks good..if i hadn't #monsterliner this thing i probably would have left it.
The missus suggested painting the door slider black. Actually sort of like it so I may hit the other two doors with it.
I only work 2 days this week so will hopefully have this thing wrapped up
 

Attachments

  • IMG_20200412_190158_715.jpg
    IMG_20200412_190158_715.jpg
    130.8 KB · Views: 543
  • IMG_20200412_190158_713.jpg
    IMG_20200412_190158_713.jpg
    136.8 KB · Views: 551
  • IMG_20200412_190158_710.jpg
    IMG_20200412_190158_710.jpg
    137 KB · Views: 555
  • IMG_20200412_190158_719.jpg
    IMG_20200412_190158_719.jpg
    134.1 KB · Views: 579
  • IMG_20200412_190158_720.jpg
    IMG_20200412_190158_720.jpg
    86.7 KB · Views: 543
Got the front doors hung and the wiring harnesses back in.
on the passenger side back door I decided to see how it would go forming the aluminum with the door still on the truck. It was a pain in the ass but actually went faster..
Not perfect but I like the way it came out.
Door sliders should offer great protection from people in the parking garage at work. It was one of those fun see if I can do it sort of projects to keep my mind off the BS of the world.
I am truly blessed to have a cool wife that let's me have a ton of garage time


​​​​​​​
 

Attachments

  • IMG_20200416_171450_583.jpg
    IMG_20200416_171450_583.jpg
    128.9 KB · Views: 510
  • Screenshot_20200416-172530_Gallery.jpg
    Screenshot_20200416-172530_Gallery.jpg
    63.7 KB · Views: 532
  • IMG_20200416_171450_582.jpg
    IMG_20200416_171450_582.jpg
    130.7 KB · Views: 561
  • Screenshot_20200416-173256_Gallery.jpg
    Screenshot_20200416-173256_Gallery.jpg
    126.2 KB · Views: 504
  • IMG_20200416_131835_758.jpg
    IMG_20200416_131835_758.jpg
    128.9 KB · Views: 531
found an older side shot so did a comparison.
other than some of the black bleeding through i like how it came out. I will probably order some more desert tan monstaliner down the road to do the rockers
 

Attachments

  • IMG_20200418_144727_133.jpg
    IMG_20200418_144727_133.jpg
    95.8 KB · Views: 520
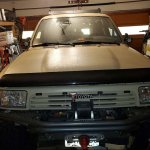
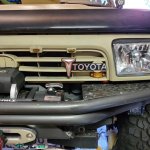
Swapped grills this morning, trimmed it a bit tighter around the winch solenoid box

Got the 81 Trekker's grill emblem in a better spot

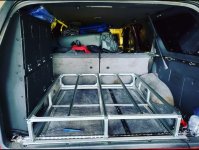
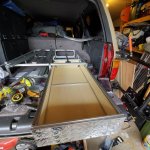
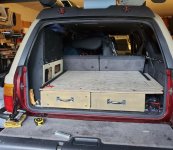
Also had a pile left over 8020 so Decided to give building a drawer unit a shot.
2 drawers, will end up being 16"x6" x 38" deep.
It will be low enough to still get Kenai's crate on top of it and still have head room for sleeping in the back.
I think I will have enough material left to extend it for a sleeping platform with storage underneath.

​​​​​​​
 

Attachments

  • IMG_20200426_122026_399.jpg
    IMG_20200426_122026_399.jpg
    84.6 KB · Views: 528
  • IMG_20200426_122026_398.jpg
    IMG_20200426_122026_398.jpg
    128.5 KB · Views: 488
  • Screenshot_20200426-190513_Gallery.jpg
    Screenshot_20200426-190513_Gallery.jpg
    135.2 KB · Views: 512
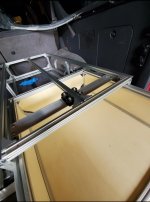
Got one drawer built and all the stuff cut for the other drawer.
I went with a non traditional drawer slide, trying out an overhead track idea. No clue if it will work or not.


​​​​​​​
 

Attachments

  • IMG_20200427_170810_110.jpg
    IMG_20200427_170810_110.jpg
    133 KB · Views: 462
  • IMG_20200427_170810_109.jpg
    IMG_20200427_170810_109.jpg
    129.2 KB · Views: 479
  • Screenshot_20200427-192345_Facebook.jpg
    Screenshot_20200427-192345_Facebook.jpg
    127.1 KB · Views: 471
  • Screenshot_20200427-192848_Gallery.jpg
    Screenshot_20200427-192848_Gallery.jpg
    122.3 KB · Views: 480
That's awesome. Curious how it will all turn out. I'm still on the fence for a drawer system in mine... The tailgate is sort of a gift and a curse all at once.
 
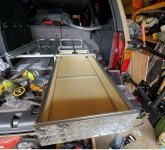
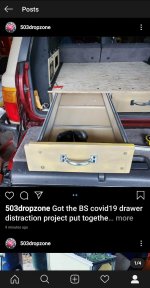
Got the BS covid19 drawer distraction project put together and installed. Need to paint and slap some carpet on top. Ended up taller than I wanted but overall happy with it.
2 drawers, inside dimensions 6 × 16 x 37"
 

Attachments

  • Screenshot_20200429-191518_Instagram.jpg
    Screenshot_20200429-191518_Instagram.jpg
    129.6 KB · Views: 483
  • Screenshot_20200429-191540_Instagram.jpg
    Screenshot_20200429-191540_Instagram.jpg
    139.9 KB · Views: 493
Last edited:
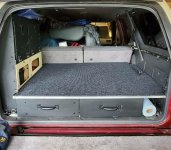
Slapped some carpet on top and added some aluminum channel on the edge
 

Attachments

  • Screenshot_20200502-143739_Instagram.jpg
    Screenshot_20200502-143739_Instagram.jpg
    135.6 KB · Views: 461
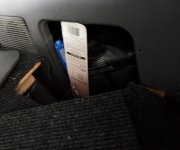
Someone asked if I still had access to the passenger side cubby- yes through a small access plate, I may had hinges sometime
 

Attachments

  • Screenshot_20200503-171849_Gallery.jpg
    Screenshot_20200503-171849_Gallery.jpg
    56.3 KB · Views: 471
The garage ornament has been exiled to become a driveway ornament for a couple of weeks to make way for a small remodeling project..
 

Attachments

  • Screenshot_20200509-162508_Gallery.jpg
    Screenshot_20200509-162508_Gallery.jpg
    135.2 KB · Views: 604
Did a little revamp on the roof rack. Using 8020 makes an old fart feel like kid with an erector set again.
Version 1.0 was only about 34" wide and was very low to the roof. That was fine but difficult to get bungee cords/rope around a crossbar. It was also a bit narrow.
Version 2.0 is 38" wide, 72" longand sits about about 1" above the roof line. May not seem like much but will be better in the long run.
Passenger side pic is old narrow rack
Driver side is the wider rack

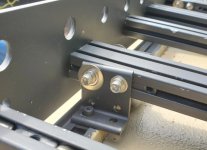
I have all the 8020 10 series parts and two 1/4" alu plates in my cart for my own new roof rack, but I'm hung up on exactly how to manage the small angle on the side of the roof. There are some 8020 hinge pieces available, but I'm unsure as to their strength. Looks like you have some brackets as risers, but it's unclear what's happening behind the side plate. How are you managing that little bit of angle? Thanks again!
 
I have all the 8020 10 series parts and two 1/4" alu plates in my cart for my own new roof rack, but I'm hung up on exactly how to manage the small angle on the side of the roof. There are some 8020 hinge pieces available, but I'm unsure as to their strength. Looks like you have some brackets as risers, but it's unclear what's happening behind the side plate. How are you managing that little bit of angle? Thanks again!
sorry for the slow response, been busy with work and a couple of big back yard projects, i will get a picture of what i did for that tomorrow.
 
No rush and no problem! Always appreciate your help when I've reached out. I've been super busy myself and glad to finally have this new rack underway. I've been wanting to get that basket off the factory rails and crossbars for forever and finally did it last weekend. Had a little cleaning (a lot, actually) to do up there afterwards...
 
I know it’s been a while since you posted about the spare tire swingout but how is it holding up? My boss and I are going over how we’ll mount it and he’s skeptical about bolting straight to the body with the bracket behind it. I personally don’t have any qualms about it since I believe they were bolted that way with a brace behind them from the factory but I figured I’d ask. Congrats on the shed btw, I’ve been following the progress on the Gram.
 
No rush and no problem! Always appreciate your help when I've reached out. I've been super busy myself and glad to finally have this new rack underway. I've been wanting to get that basket off the factory rails and crossbars for forever and finally did it last weekend. Had a little cleaning (a lot, actually) to do up there afterwards...

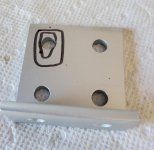
I used some 8020 brackets on each end, I elongated the outer hole(hence the bigger washer) slightly to allow for the curve. If you go this route be sure to make left and right side brackets. I ended up with a couple of extras before I realized my mistake.
Hope that makes sense and the pics help
 

Attachments

  • Screenshot_20200604-105141_Gallery.jpg
    Screenshot_20200604-105141_Gallery.jpg
    60.9 KB · Views: 551
  • Screenshot_20200604-104157_Gallery.jpg
    Screenshot_20200604-104157_Gallery.jpg
    61.8 KB · Views: 553

Members online

No members online now.

Forum statistics

Threads
278,316
Messages
3,554,120
Members
248,016
Latest member
Advally Service

Trending content

Back
Top