enginerd4ni's build thread

enginerd4ni

Member
Welcome to my build thread!

I have a black 2013 TE w/KDSS and Entune/Nav that I will try to slowly build over the years for an overlanding rig. I've owned two 4th gens previously (SR5-4WD and SE-4WD) but was tired of fixing previous owners' neglect and abuse so had my friend in the biz order one for me. This platform is truly exceptional.

My previous projects include nearly doubling the output of an MR2 by adding a Rotrex Supercharger (details) and hacking into the computer of my Z06 (details).

I'll update this thread as I get time to share with the community what I've learned and have been able to do to an already great vehicle. Forums are my inspiration and I appreciate all of the hard work that people do to share ideas and information. Thanks everybody on T4R!

Table of Contents:
Rigoshi Grille
Bud Built Beefy Bumpout Sliders
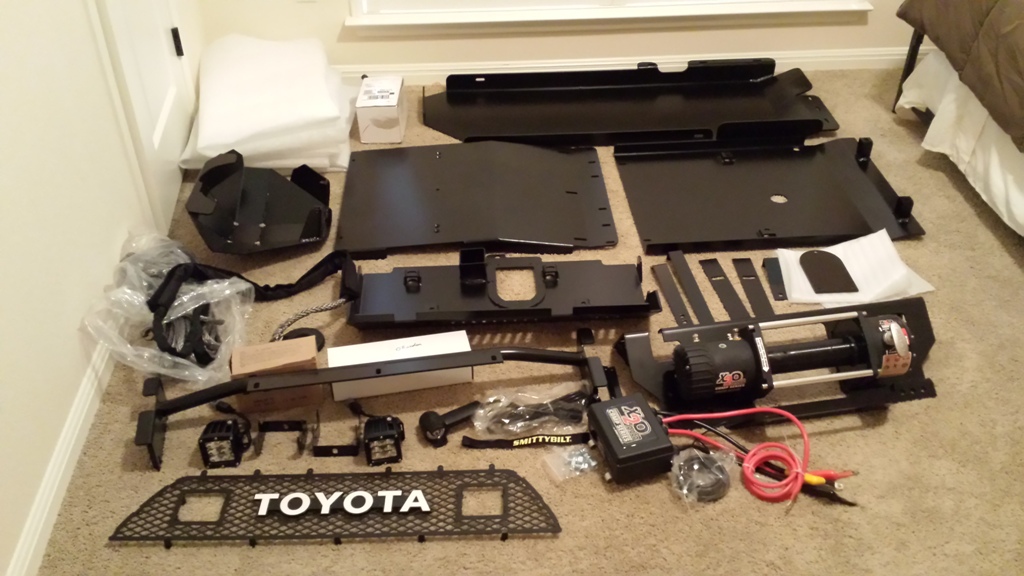
Bud Built Hidden Winch + Smittybilt X20 10K Comp
Bud Built Aluminum Skid Combo and Steel Diff Skid
ARB CKMA12 Compressor Install and Custom Bracket
Driver Accessible Fire Extinguisher Mounted to Husky Liner
Breather Manifold
Second Battery, Smog Pump Relocation, Air Compressor Relocation
ICON Stage 6 Suspension
Powder Coated Trail Wheels and Cooper Discoverer S/T Maxx
Front Mounted Air Compressor Line
CTEK Charging System, Switch Breakout, and RTMR Fuse/Relay Setup
Custom Trail roof rack cross bars and ARB Simpson III Roof Top Tent
LED Strip Lighting for Underhood Illumination and Scoop Light
Overland Computer w/ Resistive Touch Screen
RENOGY Solar Suitcase 100W
Cobra 75 WX-ST + Firefly 4ft (coming soon)

Thanks for visiting!

Before:
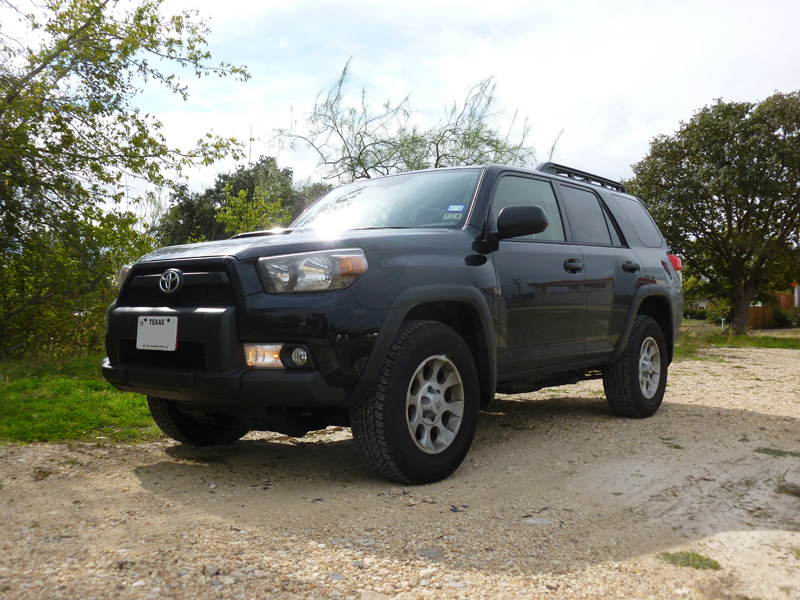
stock_01.jpg


Latest:
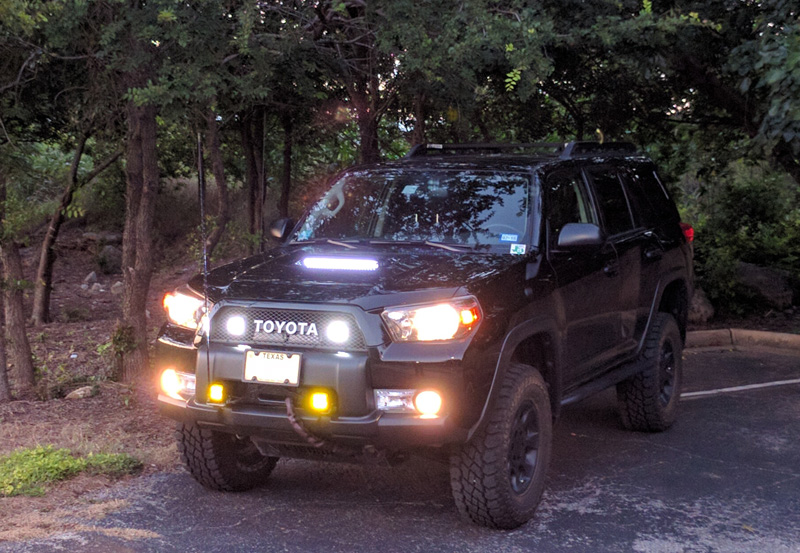
lights_01.jpg
 
Last edited:
Register to hide this ad
Rigoshi Grille Mod

My inspiration for this is the classic Satoshi grille mixed with the Rigid Industries LED Grille which is pretty expensive and doesn't quite have the look I was desiring. I took off the bumper, made some measurements, and put it back on so I could still drive around while I then made a CAD design.

This won't be exactly a how-to but feel free to copy my design (literally, I'll tell you how to do it later) and try it. Warning- much dremel expertise is needed!

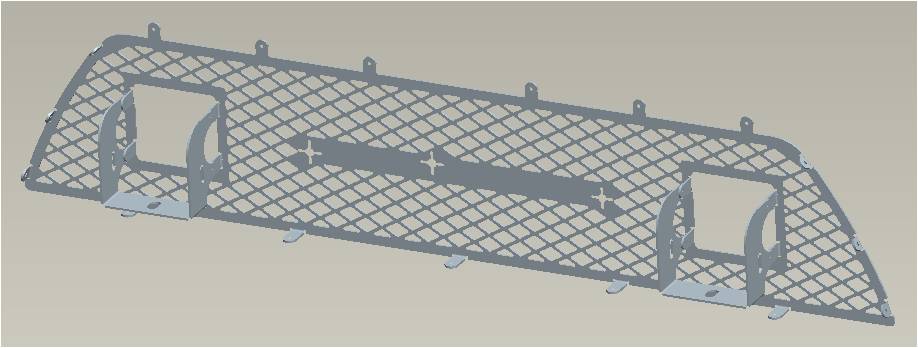
Here is the design in CAD:
grille_preoe.jpg


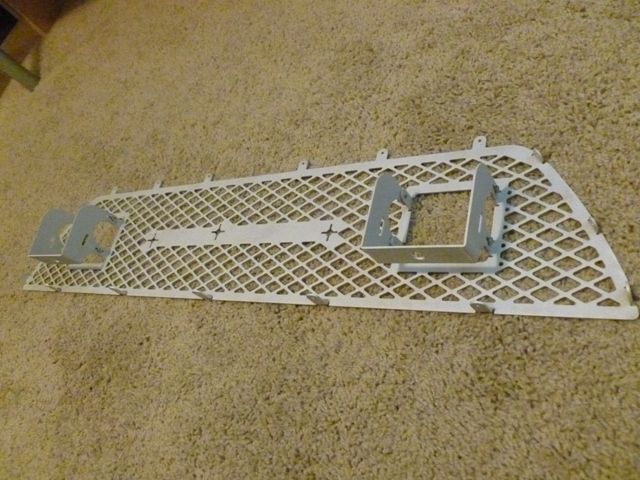
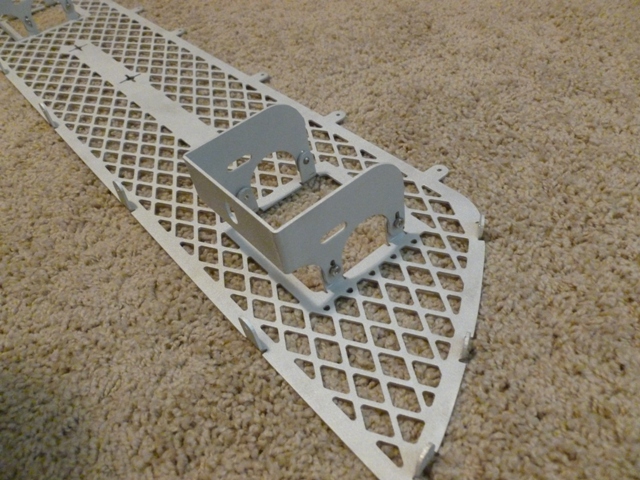
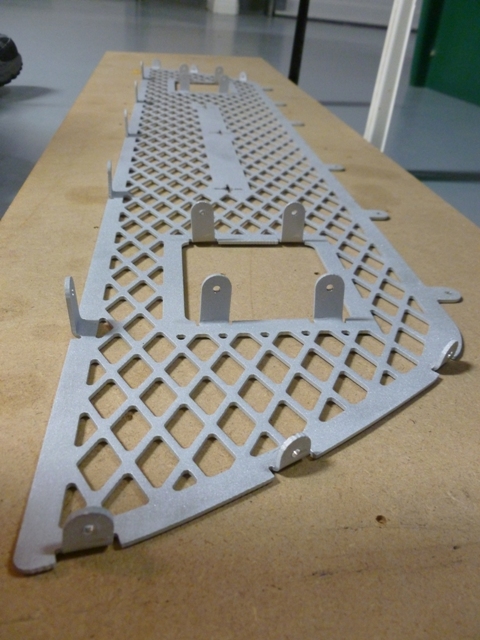
It consists of a grille and two support brackets that fit Rigid D-Series Lights. The middle area supports the OEM badge.

I had it water jet cut at Big Blue Saw - Waterjet and Laser Cutting - Big Blue Saw using .08 thick 5052 Aluminum for about $200. You can use this CAD file if you want to order it yourself or you have access to a waterjet.

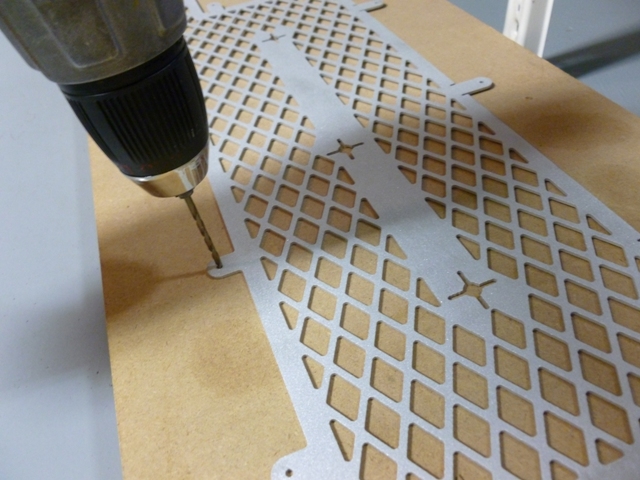
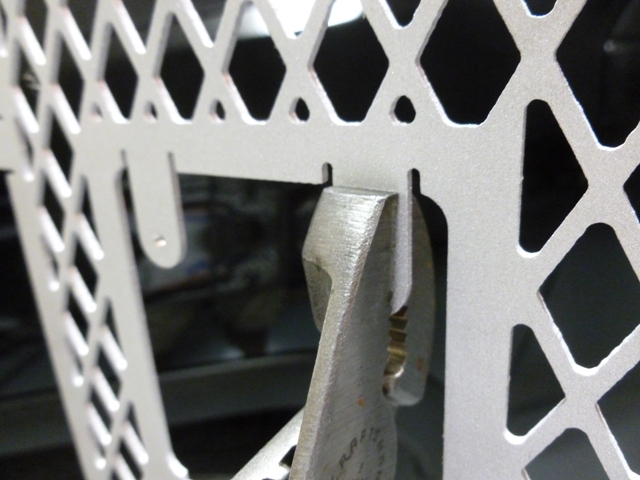
Before painting it, you need to drill the holes out to fit 4-40 fasteners and then bend the tabs so they are flush with the external perimeter. I bent them with a pair of channel-lock groove style pliers.

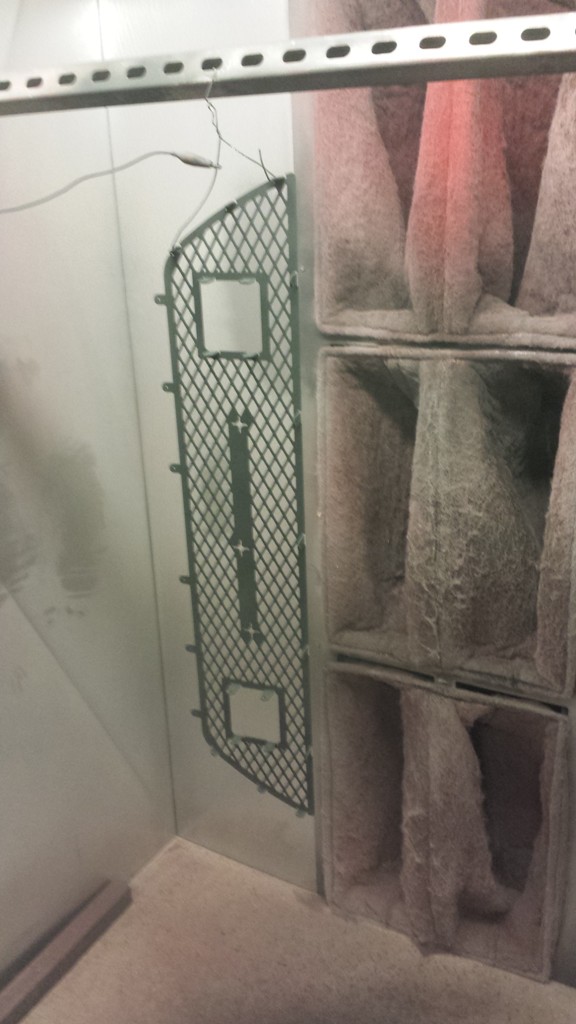
I then took it to my local Tech Shop and powder coated it with the same black powder that Bud Built uses (they sold me a 5 lb bag).

grille3.JPG


When it was time to take the bumper off again and commit to destroying the plastic grille, I was ready with a full weekend just in case.

The first thing I did was paint the A/C hi pressure line flat black with a high temp rattle can.

grille2a%20(1280x960).jpg

grille2b%20(1280x960).jpg

grille2c%20(1280x960).jpg


Now for getting to the grille:
grille4%20(1280x960).jpg


Some major dremel surgery leaving the bottom rail and about 1/4 inch of diamond as a backing for my grille.
grille5a%20(960x1280).jpg


Now making some slots for the top tabs to fit through:
grille5b%20(1280x960).jpg

(I recommend a dremel saw bit)

Showing the tabs sliding through the top.
grille5c%20(1280x960).jpg


Once the top tabs (the ones that do not get bent) slide in, the side tabs and finally the bottom tabs (the ones that are bent) slide in to recesses in the bezel.
grille5d%20(1280x960).jpg

grille5e%20(1280x960).jpg


Then mark and drill through the plastic bezel for your mounting hardware. I used stainless steel screws and locknuts.
grille5f%20(1280x960).jpg

grille5g%20(1280x960).jpg


You might need to sand down the radii near the top left and right corners to get a snug fit. If you do this after painting, use black nail polish to seal it back up.

Put everything back together:
grille6a%20(1280x960).jpg


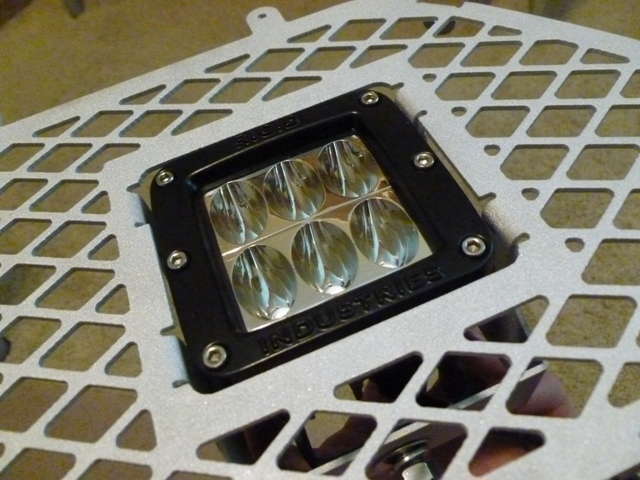
Install the light brackets carefully paying attention to which screws get installed first and when to tighten down the Rigid mounting brackets. My only gripe with this entire design is that the brackets don't let the lights rotate down as much as I would like. Nevertheless, they point pretty much straight forward and after testing at night, they look great.
grille7%20(1280x960).jpg

grille6b%20(1280x960).jpg


Now put some double sided tape on the back of the emblem. I used extreme outdoor 3M stuff from Home Depot since I couldn't find my VHB.
grille6c%20(1280x960).jpg


And finally:
grille6d%20(1280x960).jpg

grille8%20(1280x960).jpg
 
[MENTION=96749]enginerd4ni[/MENTION] tell me more about that Spyder :) I'm curious as to how you got it to pass emissions in ATX with the PowerFC. It's the one thing keeping me from boosting my 2zz swapped spyder as i have to swap out ECUs so that it'll pass the ODBII testing.
Pretty sweet build so far and good to see another TE in town. I think I've seen a handful floating around.
 
[MENTION=96749]enginerd4ni[/MENTION] tell me more about that Spyder :) I'm curious as to how you got it to pass emissions in ATX with the PowerFC. It's the one thing keeping me from boosting my 2zz swapped spyder as i have to swap out ECUs so that it'll pass the ODBII testing.
Pretty sweet build so far and good to see another TE in town. I think I've seen a handful floating around.

Yeah, that was the painful part. I had to swap back the ECU, fuel injectors, belt, etc. every year and then swap it back. The only way to do it and keep the OEM ECU with OBD is to use a piggyback but those setups are very limited in how much you can modify the pulses. Can't actually change the MAP. I bet your 2ZZ swap is pretty sweet though. Any pictures/links? I miss the MRS (pun intended), lots of fun, especially in the corners.

Are there a bunch of T4R members in the Austin area?
 
Yeah, that was the painful part. I had to swap back the ECU, fuel injectors, belt, etc. every year and then swap it back. The only way to do it and keep the OEM ECU with OBD is to use a piggyback but those setups are very limited in how much you can modify the pulses. Can't actually change the MAP. I bet your 2ZZ swap is pretty sweet though. Any pictures/links? I miss the MRS (pun intended), lots of fun, especially in the corners.

Are there a bunch of T4R members in the Austin area?

Thats what I was afraid of.

My 2zz tuned is putting down 194 to the ground now and is still fun although I've been driving the TE much more lately.

I think there are a couple of T4R members in Austin but I haven't met any of them.
 
Rigoshi grill

Loving that grill! When I saw the rigid grill for fj and t4r I said to myself that fj grill would look sick on the 4runner with old skool toyota badge! Again looks awesome
 
More pics of the grille construction

Drilling out the holes before bending the tabs
grille9.jpg


Using pliers to bend the tabs instead of a proper press brake.
grille10.jpg


Make the outside surface of the tab flush with the curvature of the profile. Don't bend the tabs on the top edge though!
grille11.jpg


Test fitting the light brackets
grille12.jpg


I bent the light brackets on a press brake but you can use a vice, block, hammer, duct tape, etc. if you don't have access to one. ymmv. Just aim to make the distance between the inside bracket surfaces just big enough to clear the tabs from the grille. The bracket fits around, not inside, the tabs.
grille12b.jpg


It is a tight fit with the D2 lights so choose your fasteners carefully. Flatheads are a good choice but if you do that, try to put the countersink in before you bend the tabs.
grille13.jpg
 
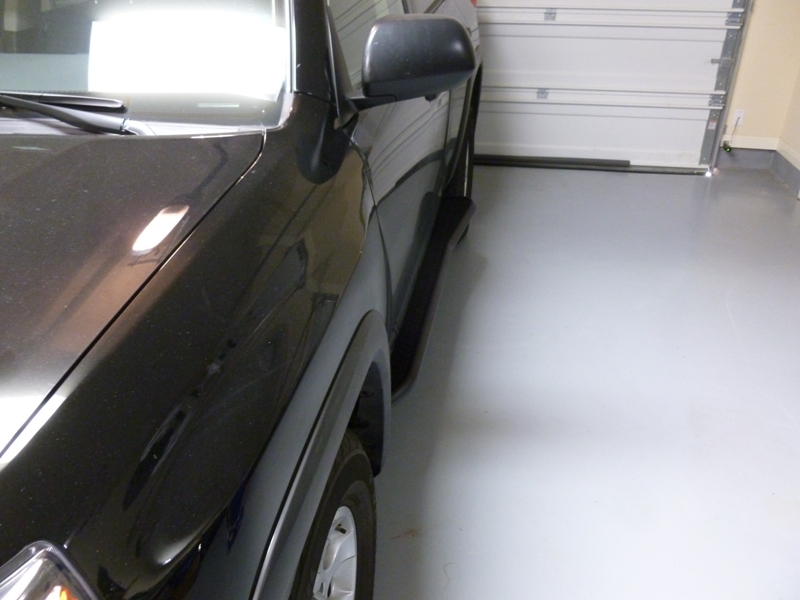
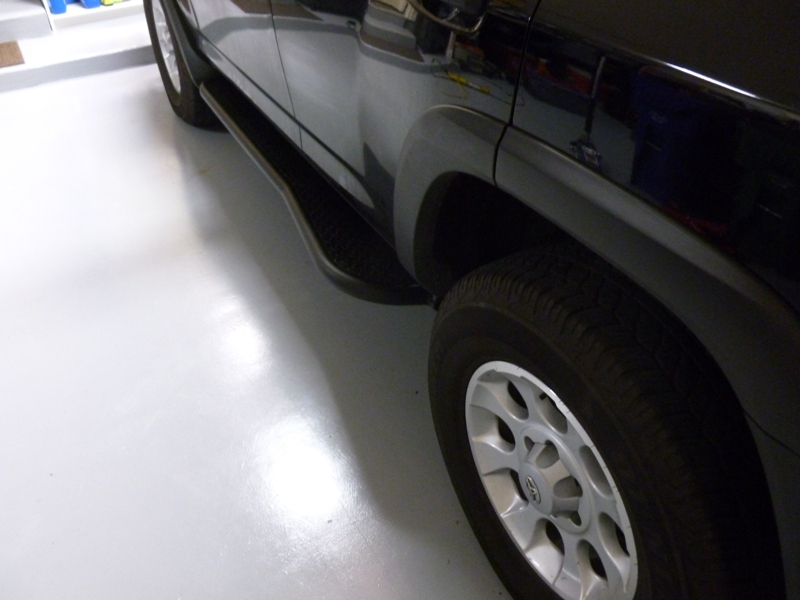
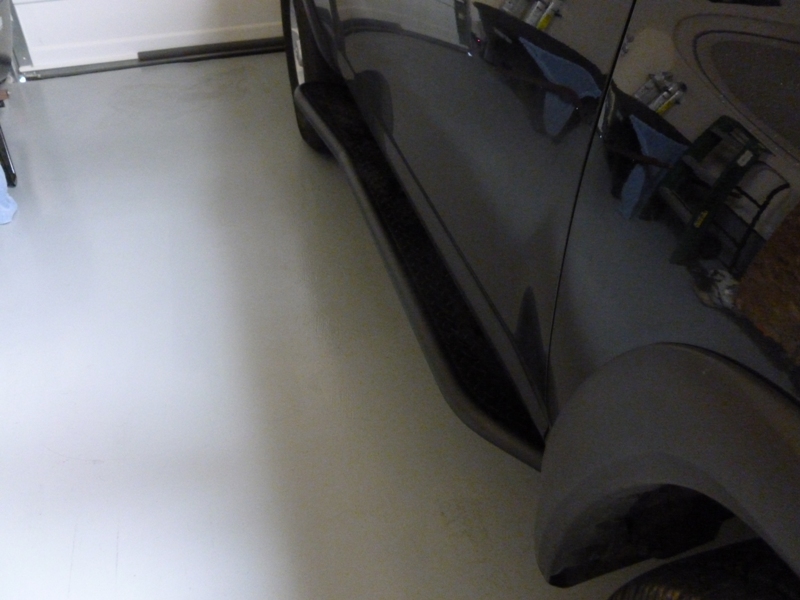
Bud Built Sliders on 2013 Traill KDSS

I went with the beefy bump out plus full tread plate for a few reasons. Though I'm trying to conserve weight, I felt that the added strength of DOM in the somewhat likely case I slam down on a big rock justifies the cost and heaviness.

The bump out sticks out pretty far which I like for two reasons. First, extra protection for the fender/door against a rogue Treebeard. Second, with the tread plate, it makes a really nice step to access the roof without having to open the door. Even by the front door, there is plenty of room for a large boot to stand securely without slipping off.

However, these sliders are by no means running boards and to an extent, they make it a bit more challenging to get in both for me and the lady. Nothing you can't quickly get used to and well worth the tradeoffs.

So here is the install summary:

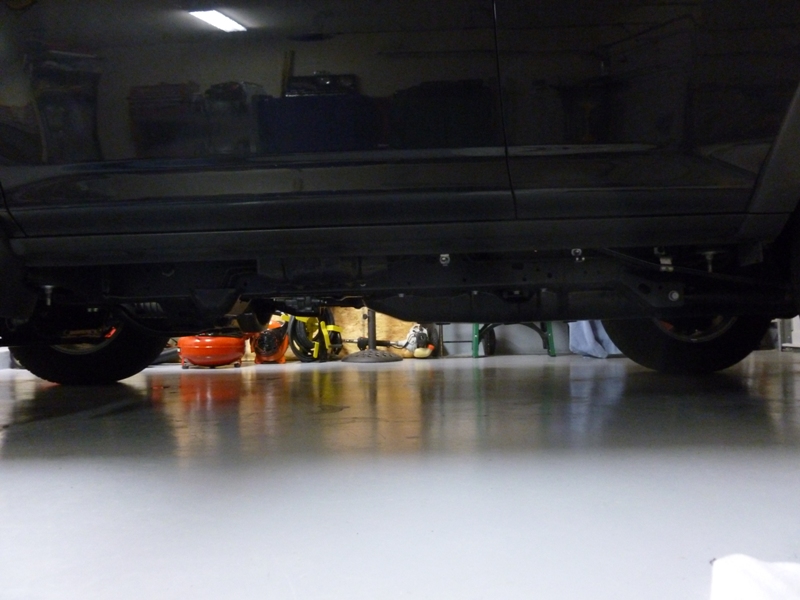
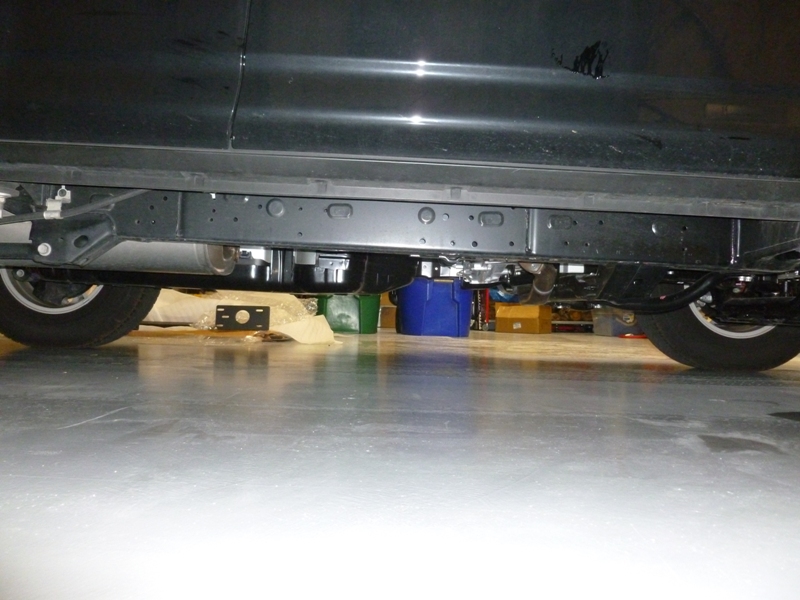
A bad shot showing the driver side exposed rocker panels of the Trail Edition
slider01.jpg


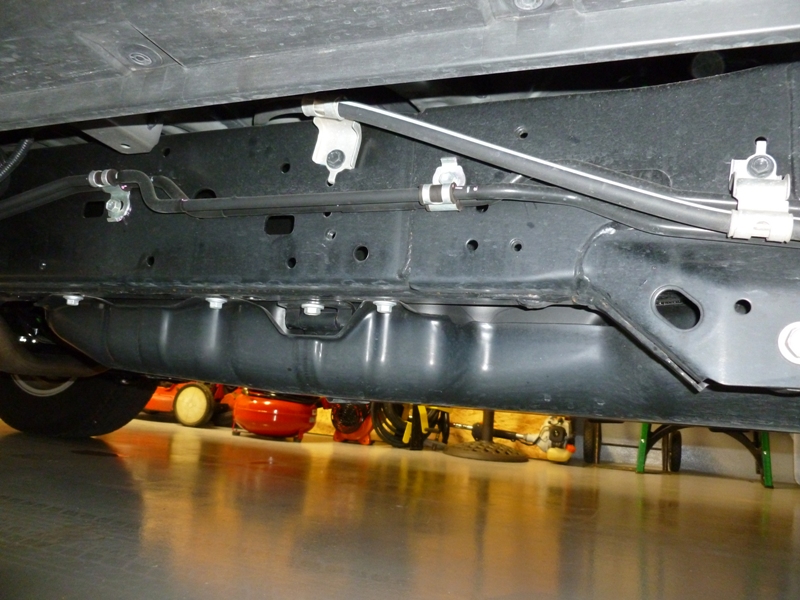
The passenger frame:
slider02.jpg


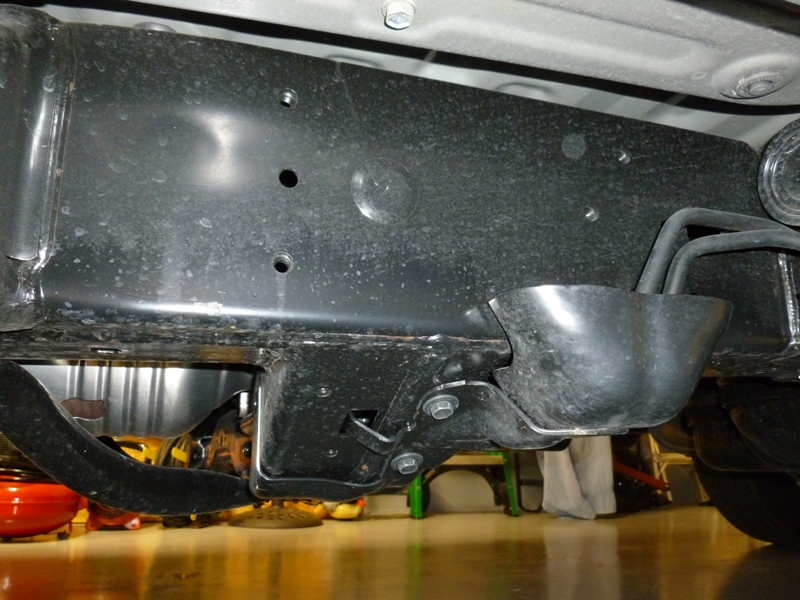
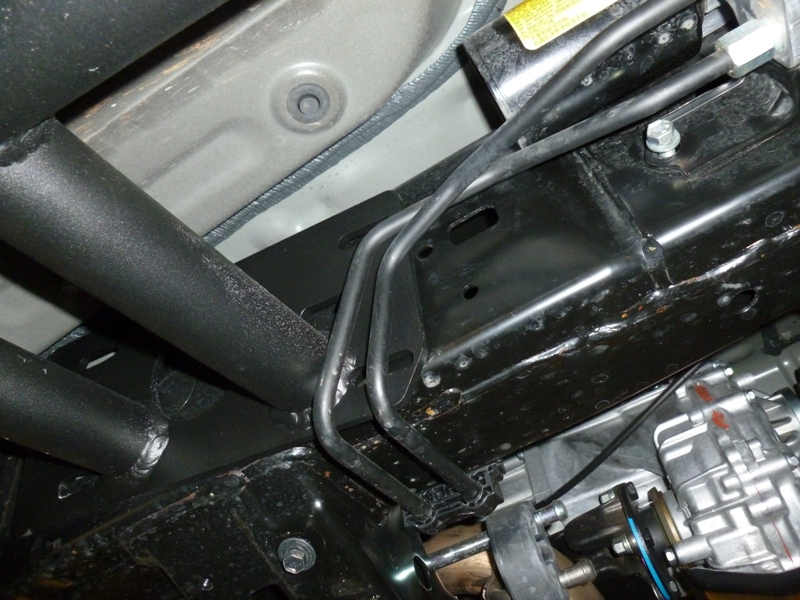
Driver side showing KDSS lines and shields. I removed the shields.
slider03.jpg


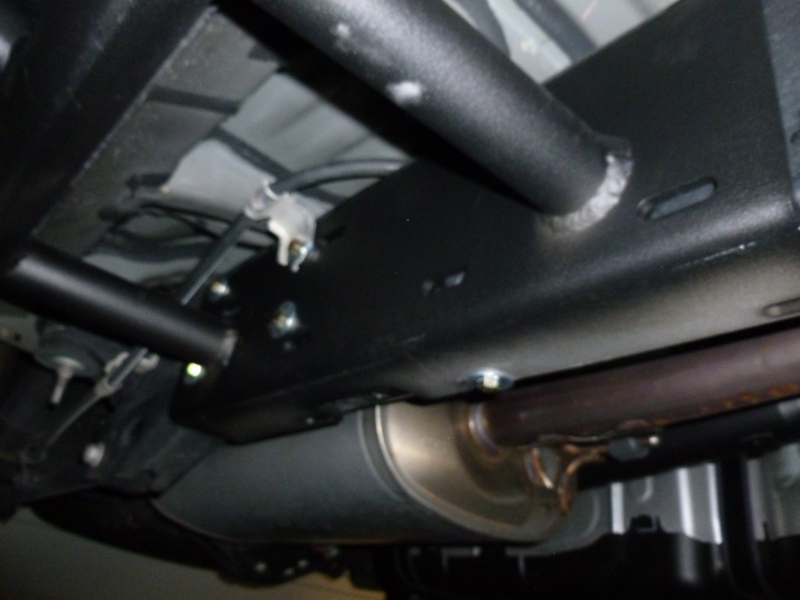
More driver side KDSS lines and brake line toward the rear. Remove the bolts for these clamp brackets so the slider bracket can slide in behind them.
slider04.jpg


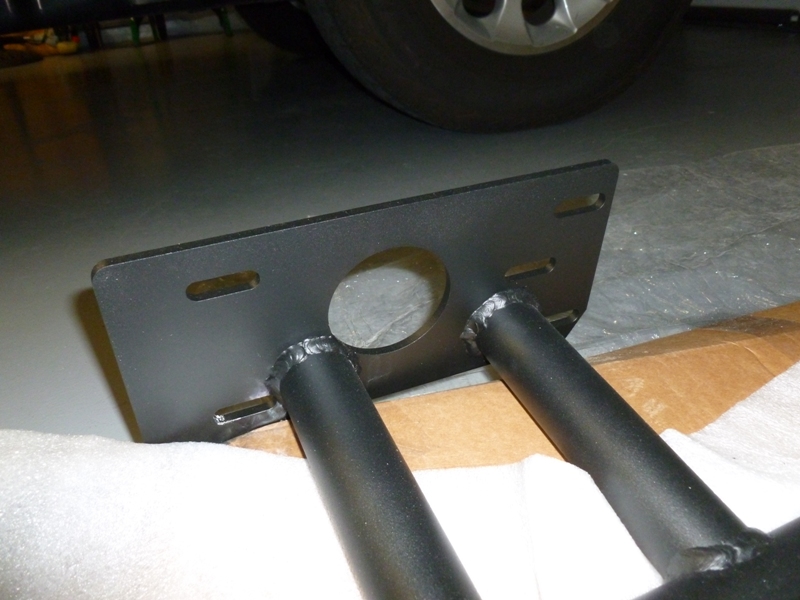
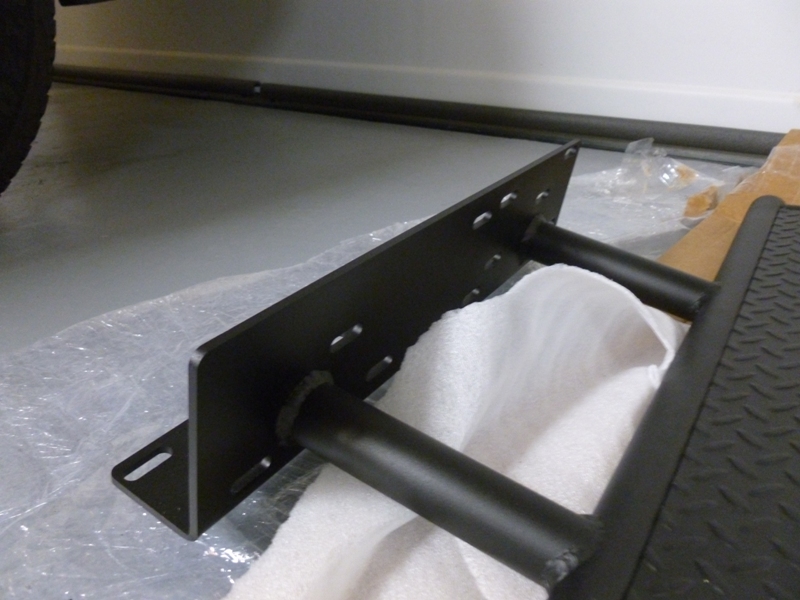
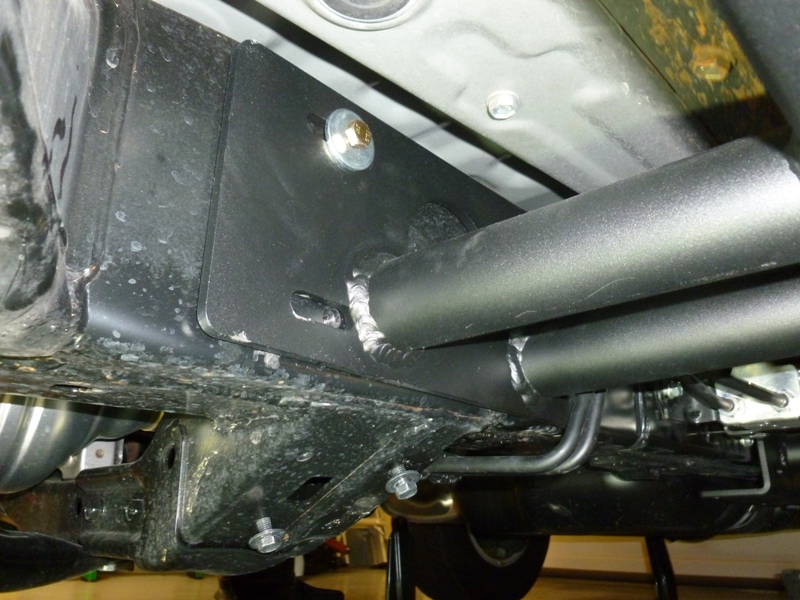
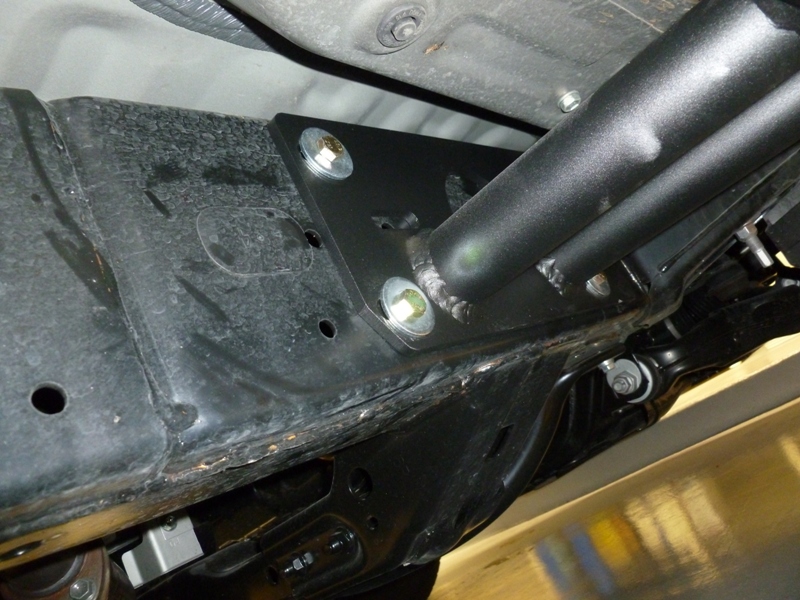
A look at the front bracket of the driver side slider.
slider05.jpg


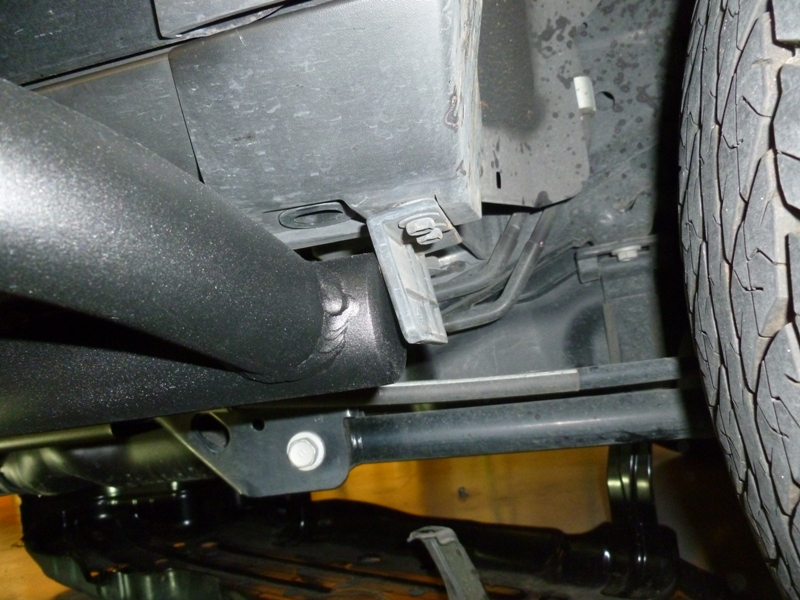
The rear bracket of the driver side slider.
slider06.jpg


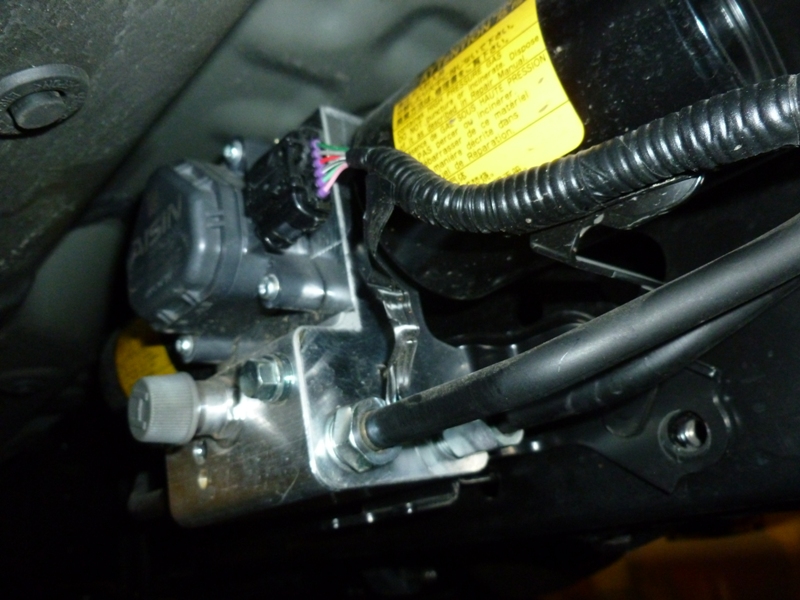
I had to loosen the KDSS reservoir from the frame by loosening the bolts left and right of the "H" pressure fitting. This allowed me to flex the lines a little bit to slide in the slider bracket underneath the line clamp brackets.
slider07b.jpg


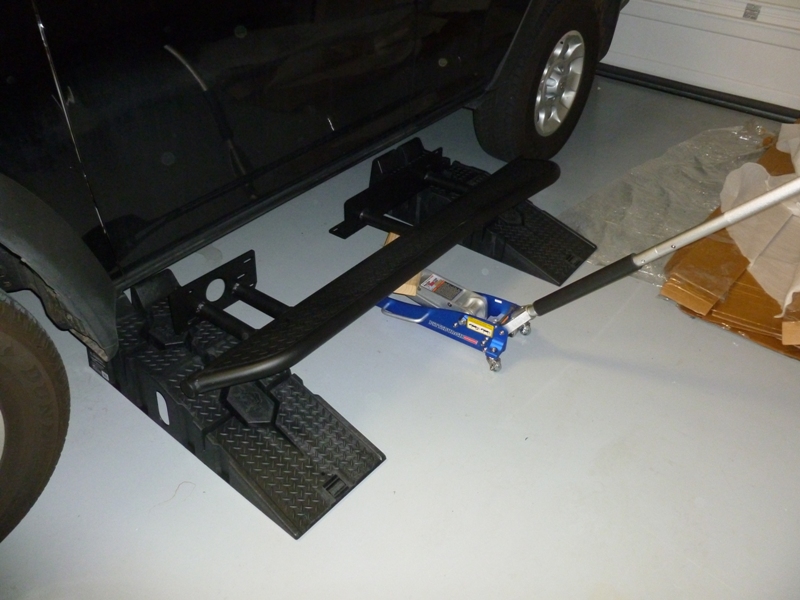
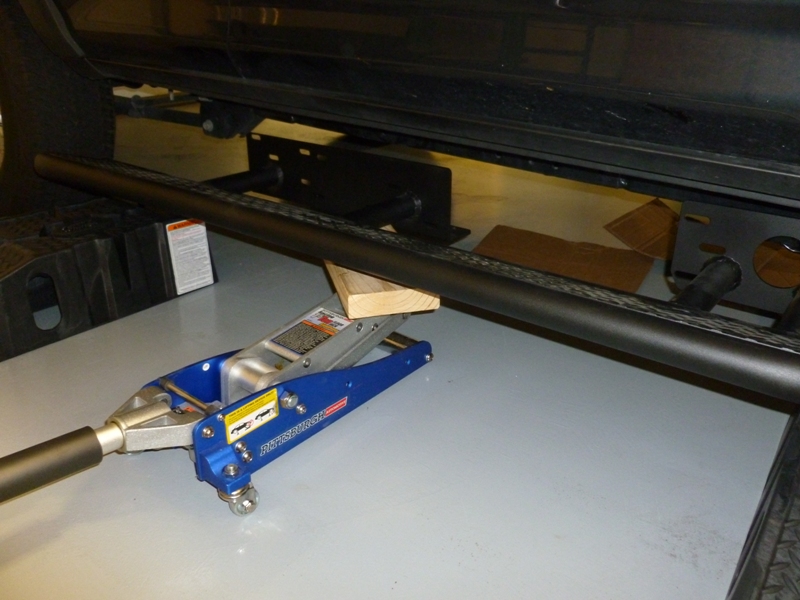
Balancing the slider on a jack with ramps underneath in case it tips over.
slider09.jpg


Tip: I had to tilt the slider like this to get it to wedge in up front.
slider10.jpg


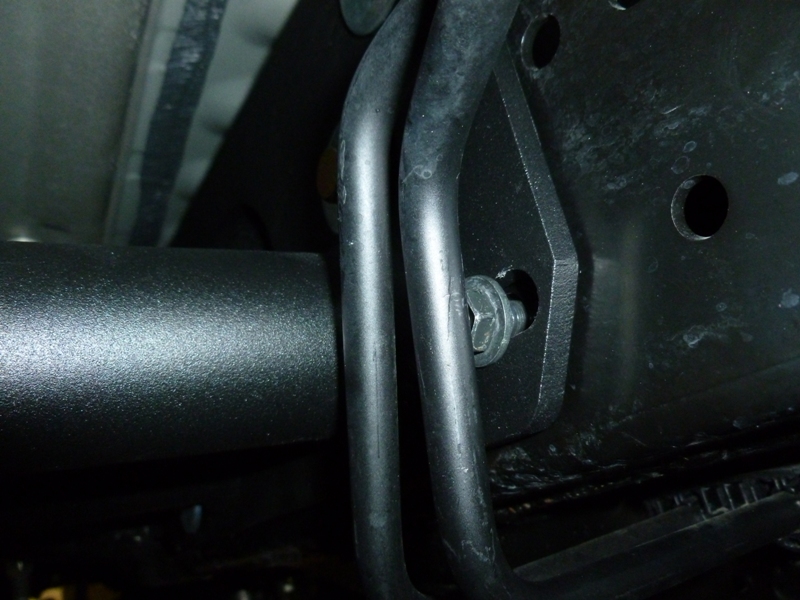
The challenging part is getting the bracket to fit behind the KDSS lines. I was paranoid about really moving, relocating, or otherwise tampering with the KDSS so I just tried to work around the system.
slider11.jpg


Get a bolt in so it will hang then move to the rear and get a bolt in there. You may want to still use the jack to help align the slots.
slider12.jpg


Oh yeah, remove this bracket with the two bolts on both drive and passenger sides.
slider13.jpg


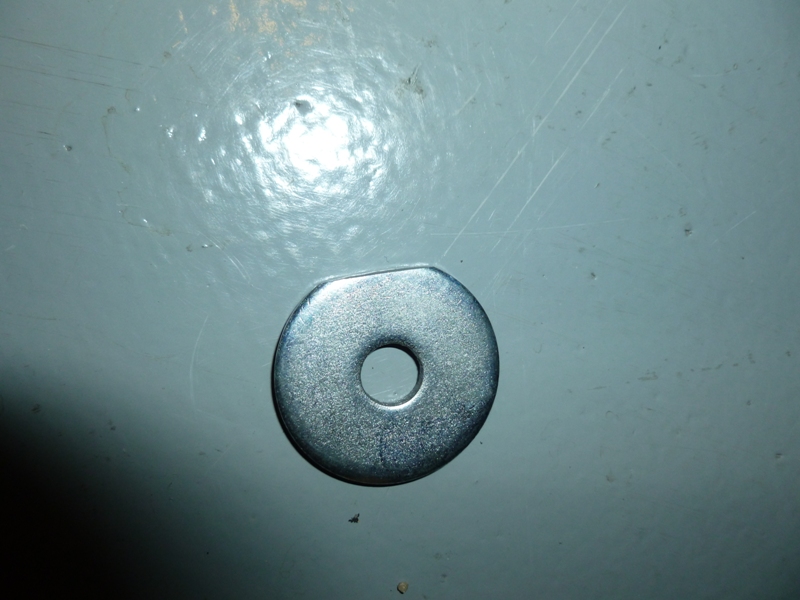
Some of the washers needed a little trimming to fit next to the welds and allow sitting flush against the bracket.
slider14.jpg


Back to the KDSS lines. I had to use a shorter bolt as I couldn't persuade the Bud Built supplied bolt to get into the slot behind the lines.
slider13b.jpg


Other than that, it is just putting a bolt where there are threads on the frame. Not all slots have corresponding threads as I presume the brackets are used for other versions or similar frames like FJ. The bolts supplied are good but I would recommend using anti-seize on all the threads.
 
Now for the passenger side (piece of cake comparatively).
slider15.jpg


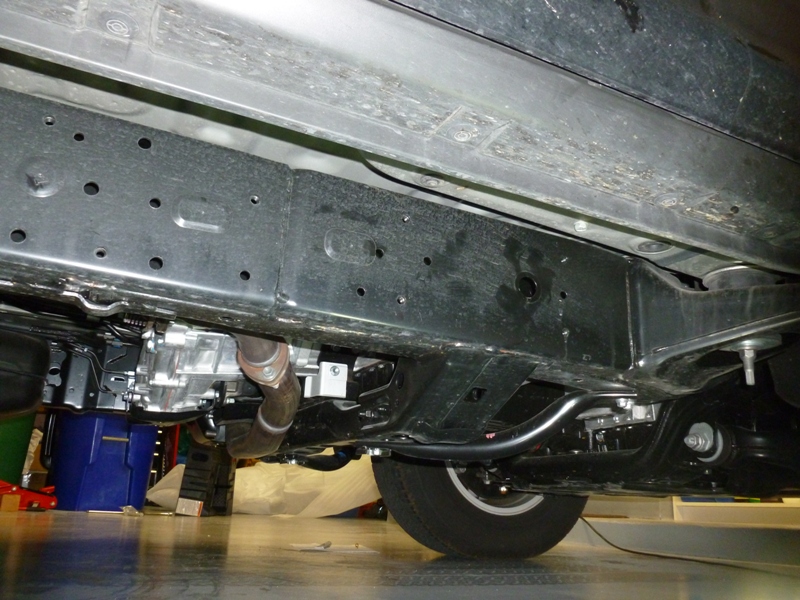
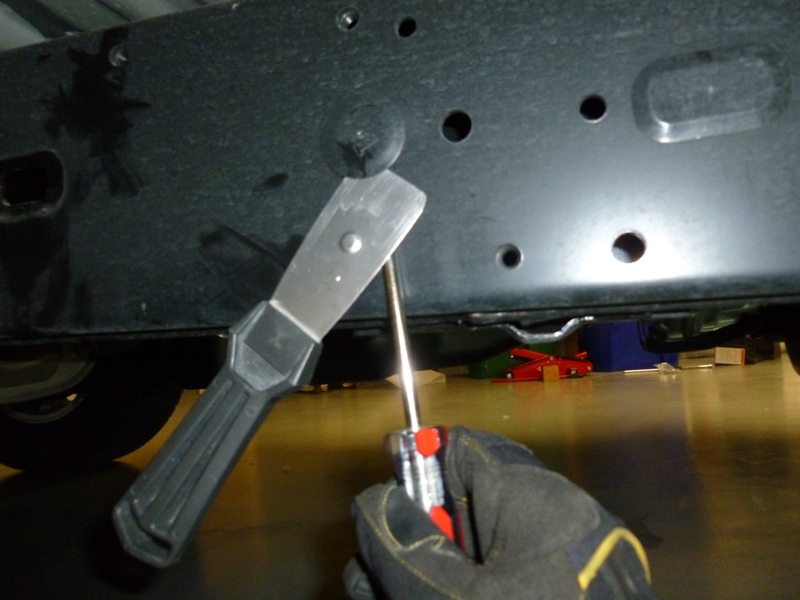
I removed these plastic frame opening covers because I wanted the bracket to sit flush against the frame.
slider15c.jpg


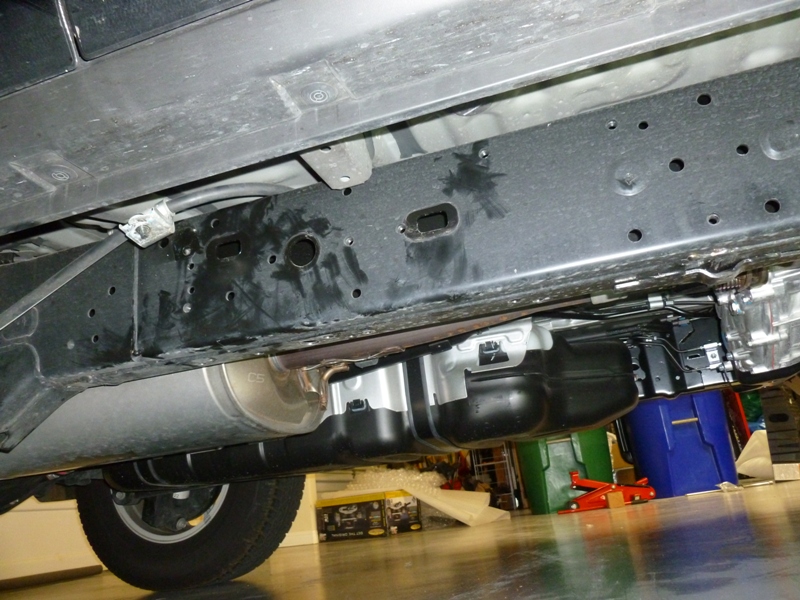
These are the ones I removed from the rear. Also, undo the brake line bracket and move it out of the way for now.
slider16.jpg


Moving into position on the passenger side.
slider18.jpg


Not that many of the holes on the rear bracket had corresponding threads but the design still seems very robust and the main moment arms are constrained so this engineer is happy.
slider19.jpg


The front passenger side bracket.
slider20.jpg


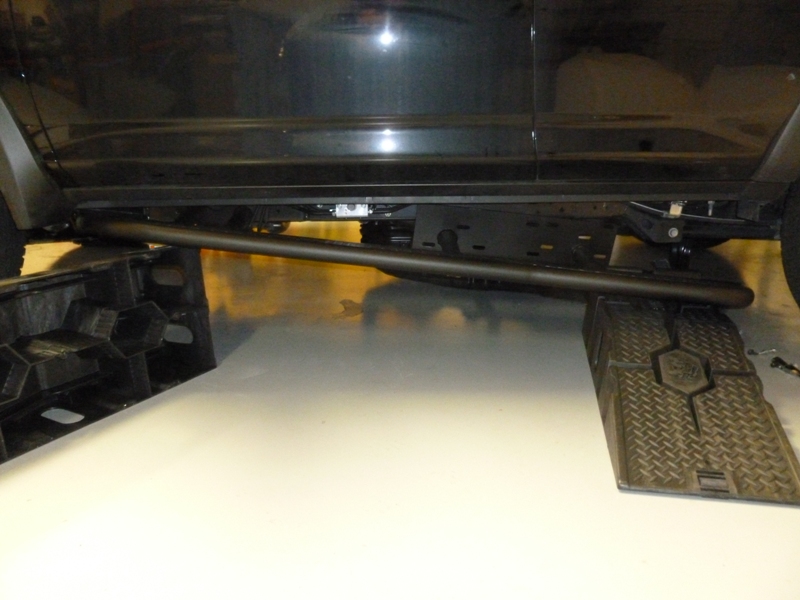
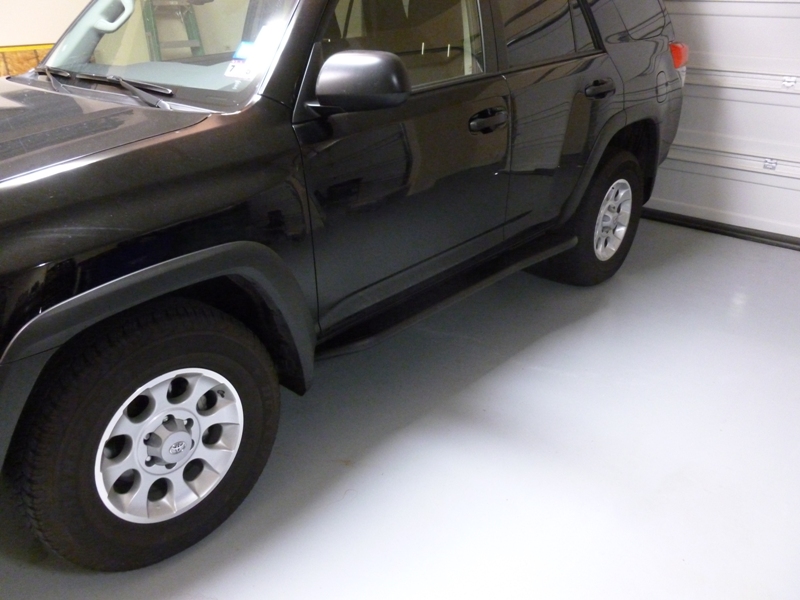
Showing the driver side slider.
slider21.jpg


The profile and bump out from the front.
slider22.jpg


The profile and bump out from the rear.
slider23.jpg


Passenger side.
slider24.jpg
 
Looks great! Seems like you did pretty well on your own, I absolutely needed my wife to install the driver's side one, lol.

Could I ask you for a quick favor...can you swing both rear doors open and tell me if the clearance between the bottom edge of the doors and the highest point of the bumpout portion are the same? (basically swing the door open until the edge is right over the closest portion of the tube, if that makes sense)

I noticed on mine the passenger side seems to be ~1/4" closer or so. Not sure if that's just normal tolerances considering it is body on frame and all...

Anyway, thanks a ton!
 
Looks great! Seems like you did pretty well on your own, I absolutely needed my wife to install the driver's side one, lol.

Could I ask you for a quick favor...can you swing both rear doors open and tell me if the clearance between the bottom edge of the doors and the highest point of the bumpout portion are the same? (basically swing the door open until the edge is right over the closest portion of the tube, if that makes sense)

I noticed on mine the passenger side seems to be ~1/4" closer or so. Not sure if that's just normal tolerances considering it is body on frame and all...

Anyway, thanks a ton!

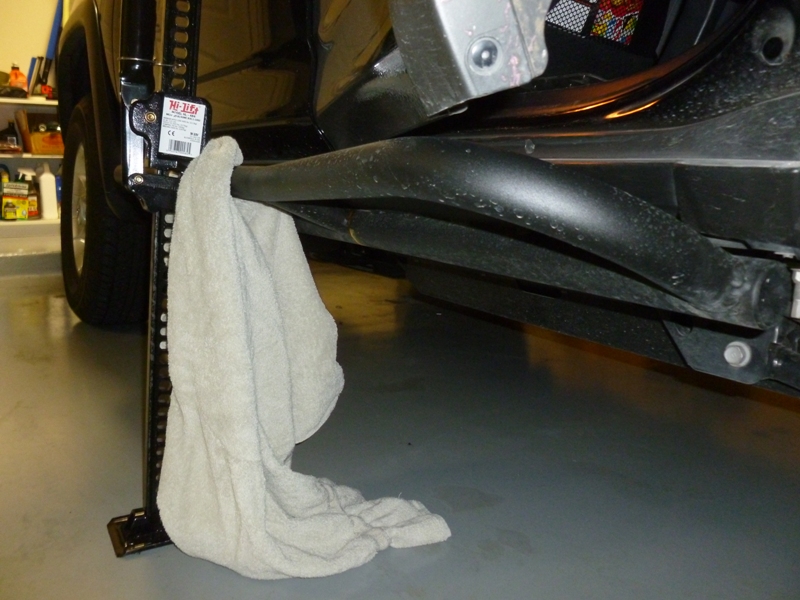
The gap on the driver side is a little over 3/8" and the gap on the passenger side is a little over 1/4". To me, that is close enough given the crazy tolerance stack up. Just to be worst case, I jacked the driver side up using a hi-lift on the outer tube of the slider. I can't think of any real world use cases where I would need to access the rear door while being only supported by the jack or a giant rock, but my engineering curiosity got the better of me.

slider26.jpg


I only jacked it up until the wheels were starting to squeak loose. The door still opens barely on the driver side but I might not be as lucky on the passenger side which sits a bit lower or if I keep jacking sky high. Here is a close up of the driver side gap.

slider25.jpg


My opinion is job well done by Bud.

I hope this helps.
 

Members online

Forum statistics

Threads
278,306
Messages
3,554,045
Members
248,016
Latest member
Advally Service

Trending content

Back
Top