
You are using an out of date browser. It may not display this or other websites correctly.
You should upgrade or use an alternative browser.
You should upgrade or use an alternative browser.
enginerd4ni's build thread
- Thread starter enginerd4ni
- Start date


On Point
New member
This all started with a desire to have a clean way of toggling certain switches that I didn't use frequently and didn't want to clutter up the dash with banks of switches. Then I realized I could add a lot more functionality than switches.
Phase 1
I had some old hardware laying around so I figured I would create an overland computer platform as a proof of concept and to enter into my company's internal science and maker fair competition. The performance of the system is overkill for the needs but the software platform it runs on is very easy for a non computer science guy like me to use and I have access to all of this stuff for free soooo....
Simple OTS aluminum extrusion box + a real time controller w/ FPGA + various digital and analog IO + hack job wiring to solder cup dsubs.


Then I added a touchscreen display from Amulet Technologies and I used their Gem Script software to create an interactive human machine interface. Many hours were spent in Adobe Illustrator and Photoshop to create the buttons, icons, animations, etc. I fabricated a sheet metal faceplate and mounted it just in front of the overhead console.

The main screen shows the most useful information and allows access to the most frequently needed switches. At a glance, I can check the voltage of both batteries, the pressure in my compressor, the transmission temperature at the torque converter (useful when wheeling) and my favorite part, the clinometer. This is a throwback to the old school mechanical clinometers found in some 1st gen 4Runners and trucks:

My clinometer is digital of course and uses a three axis accelerometer to calculate roll, pitch, and yaw.
From the main screen you can also access the other menu pages. So here is a screenshot of the layout:

The settings page isn't very interesting but has some useful stuff for debugging:

The GPS page just pulls down coordinates, allows for toggling of how the coordinates are presented, and also provides calculated elevation:

The battery page shows again the battery voltage readings and hitting the "link" button engages the 200A relay. I wanted this relay to be intentionally activated and not just a switch on the dash that could accidentally be toggled and not realize it. When linked, a bright flashing animation reminds you of the status.

Similarly, the locker page has a button to activate the solenoid of the front locker that I will eventually install. Again, trying to avoid accidental toggling.

The OBD page pulls readings from the ECU in case I want more detailed information about vehicle condition:

And finally, the switch page shows the status of all the digital outputs and allows some to be manually toggled. The "radioactive mode" turns on all the lights to scare away the zombies or to be that guy, and the "SOS mode" flashes all of the lights in Morse code.

Here is a shot of the screen on the first section of Black Gap Road in Big Bend NP.

amazing!
High_Country
New member
Holy crap! X2. Amazing stuff.

Ohio_Steve
New member
That's just amazing! I can see these as a commercial offering, but know that I couldn't afford it, and that each application would be quite different.
I got a kick out of this:
Followed by this, of which I don't understand a word.
I got a kick out of this:
the software platform it runs on is very easy for a non computer science guy like me to use
Followed by this, of which I don't understand a word.
Simple OTS aluminum extrusion box + a real time controller w/ FPGA + various digital and analog IO + hack job wiring to solder cup dsubs.
I live in Austin too. If I show up at your house with $1M cash in the back of my T4R will you make me a system like that?
BTW, I had the first 4Runner in Austin in 1984, thanks to a friend of mine that worked at Austin Toyota (long out of business). I had forgotten about that altimeter/inclinometer on the dash. Thanks for the memories!
BTW, I had the first 4Runner in Austin in 1984, thanks to a friend of mine that worked at Austin Toyota (long out of business). I had forgotten about that altimeter/inclinometer on the dash. Thanks for the memories!
There are plenty of install how-to threads for Icon so I won't bother detailing each laborious step. I took my time on this install to make sure things were right and to be honest, it took me almost 4 days to complete. If it weren't for KDSS, I think a single day would be more appropriate. I love how KDSS feels on the road at speed and on the trail but boy is it a pain to work around. I'm now second guessing whether I made the right choice to add KDSS when I ordered my 2013. I have a ridiculous amount of "KDSS lean", nearly 2 inches in the back at times, and have not yet been able to find a good solution so I'll keep you posted with what I figure out later. ***Please don't turn my build thread into a battlefield of "KDSS ran the baja so it must be awesome sauce" vs. "I'm smarter than you because I ordered my trail without it and now my life is bliss". Save those discussions for the existing threads. ***
So here's a few interesting details from my install that I thought I would share:
Staging the stage 6:
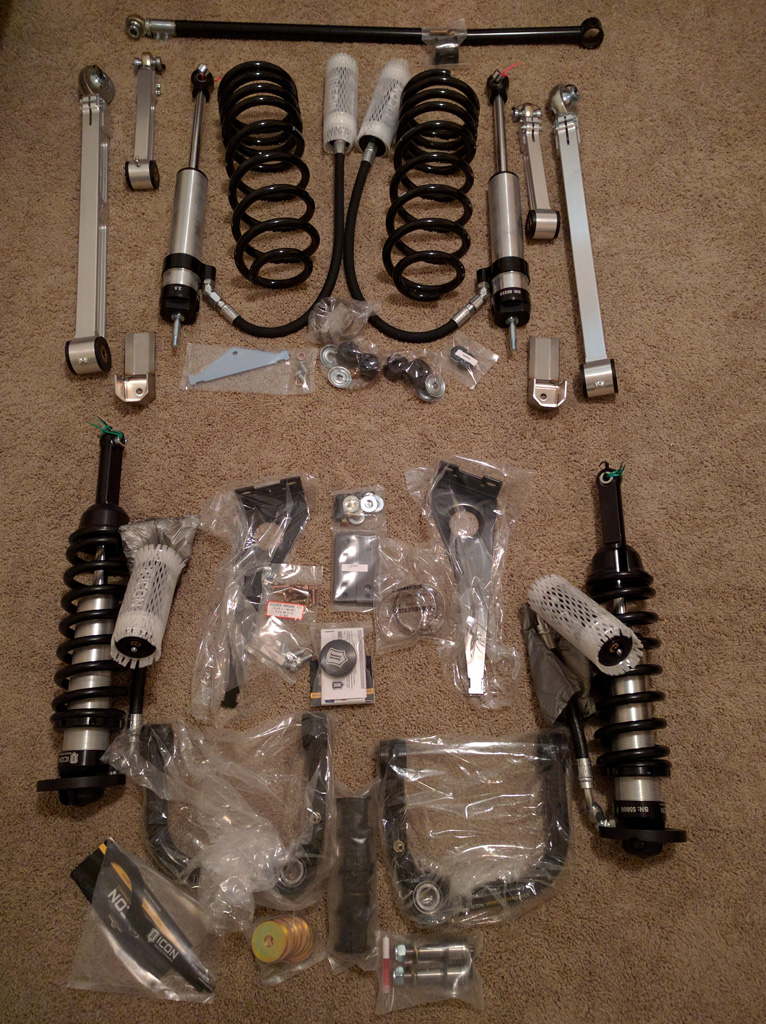
The front driver remote reservoir required grinding off a bracket that holds the wheel well flexible liner out where the KDSS lines come through. Whipped out the angle grinder and then some chassis paint.
Overall, I'm really happy with the product and have since been able to test it in the desert of west Texas. Performance is exactly what I wanted and this stood up to 106° heated trails at decent speed. Also, seeing the way the rear end articulates, I'm glad I decided to go with the upper and lower links with heims rather than bushings.
I'm waiting for stage my stage II including the adjustable track bar. Any updates on your suspension? Any issues with the KDSS and the track bar? I'm having second thoughts about the Icon lift...but I figure I would have the same issues with any lift.

enginerd4ni
Member
I live in Austin too. If I show up at your house with $1M cash in the back of my T4R will you make me a system like that?
BTW, I had the first 4Runner in Austin in 1984, thanks to a friend of mine that worked at Austin Toyota (long out of business). I had forgotten about that altimeter/inclinometer on the dash. Thanks for the memories!
haha, that's awesome you had the first T4R in these parts! I bet you had lots of great adventures and still miss that 1st gen!
If anyone wants me to build a similar setup:

enginerd4ni
Member
I'm waiting for stage my stage II including the adjustable track bar. Any updates on your suspension? Any issues with the KDSS and the track bar? I'm having second thoughts about the Icon lift...but I figure I would have the same issues with any lift.
Sorry to keep you suspended, I haven't had time to sort it all out yet. I think the driving factor is the use of expedition springs which exaggerate the rear suspension angles when not enough weight is compressing them down. The KDSS hard mount is fixed length and thus the piston on the other side may be extending or compressing to compensate for the change in geometry thus trying to rotate the frame. This frame rotation did not exist after I had installed the front lift but showed up in full force just a moment after I finished bolting together the rear lift.
I think the lean gets less pronounced when more weight is added to the back. So the only reasonable solution is to get a new rear bumper with tire and fuel carrier!

The rear track bar rubbing issue however should theoretically be independent of the taller springs since droop should be similar/same. But I could be wrong, suspensions are not my most understood subject. There are several other track bars on the market, some of which don't have a bend, all of which claim no interference with KDSS. It could be that I am the unlucky one and others are ok but I plan on following up with Icon soon to figure this out.

Jasalvas
New member
I'm now second guessing whether I made the right choice to add KDSS when I ordered my 2013. I have a ridiculous amount of "KDSS lean" said:Are you still having issues with the KDSS lean?? It was pretty extreme on mine as well for a good couple of weeks. Seems to be evening out but was wondering what's going on with yours.
Sent from my iPhone using Tapatalk
enginerd4ni
Member
Are you still having issues with the KDSS lean?? It was pretty extreme on mine as well for a good couple of weeks. Seems to be evening out but was wondering what's going on with yours.
Still leaning hard to passenger. But it seems much better when heavily loaded. Didn't have level ground readily available to take measurements so can't be certain. I tried the equalization procedure to no avail. I found a tech out of San Antonio that knows how to bleed KDSS, he said bleeding wouldn't help either. So I've decided to live with it for now and eventually get more weight on the back (which is why I got the stiffer springs).

SteadFAST 4Runner
New member
This is one of the coolest threads ever!
Still leaning hard to passenger. But it seems much better when heavily loaded. Didn't have level ground readily available to take measurements so can't be certain. I tried the equalization procedure to no avail. I found a tech out of San Antonio that knows how to bleed KDSS, he said bleeding wouldn't help either. So I've decided to live with it for now and eventually get more weight on the back (which is why I got the stiffer springs).
Are your coilovers set to the same preload (exposed threads on the adjustable perch for the coil spring) on both the drivers side (LH) and the passenger side (RH)? Also, it's very important to be on level ground both front to back and side to side. Also check the tire pressure to ensure they are all the same. Summer tire pressure increases due to heat compared to winter tire pressures.
Sorry if this sounds so simple but I am hoping to help if these variables are removed from the equation first.
enginerd4ni
Member
Are your coilovers set to the same preload (exposed threads on the adjustable perch for the coil spring) on both the drivers side (LH) and the passenger side (RH)? Also, it's very important to be on level ground both front to back and side to side. Also check the tire pressure to ensure they are all the same. Summer tire pressure increases due to heat compared to winter tire pressures.
Sorry if this sounds so simple but I am hoping to help if these variables are removed from the equation first.
Yes, yes, and yes. Upon completion of front install (both were set at factory to same pre-load and at same thread), there was no measurable lean left to right. The factory (Icon) setting was not very aggressive so it only raised vehicle height to estimated 1" above a stock T4R ride height or about 1.5-2" from where I was with my heavily weighted front. 0.5-1" effective lift didn't seem to mess with KDSS. Then I installed the rear suspension springs and that jacked everything up. Passenger lean was ~1.5". There was also a silly rake angle from back to front so I cranked up the front coilovers equal rotations but well below the max. Rake is better but KDSS lean still ~1.5 to 2" depending on a few factors.

enginerd4ni
Member
Solar Suitcase
I hit up the group buy a few months ago for panels from Renogy. Since my CTEK system has a solar panel input with maximum power point tracking functionality, I opted for the Renogy Solar Suitcase kit without the charge controller, RNG-KIT-STCS-100D-NC. Originally I was going to add a panel or two on top of the roof rack that I will eventually build. However, putting panels up there would likely be a trade off between robustness, mounting, size, output, and efficiency. This is due to the panels not being in the optimum position for solar efficiency (facing up rather than toward the equator at the appropriate angle based on latitude). I may still put a smaller panel up there so I can get a little bit of juice when away from base camp.
Here's the kit. Overall build quality looks good and design is reasonably well thought out.
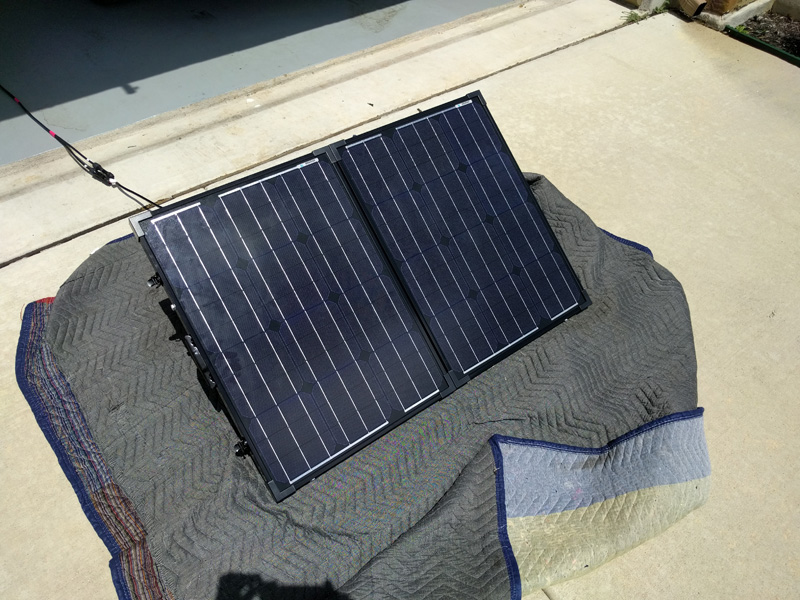
I'm glad this kit has the formed plastic/fabric "case" because opening up the panel without something below would likely risk scratching the glass on the ground.
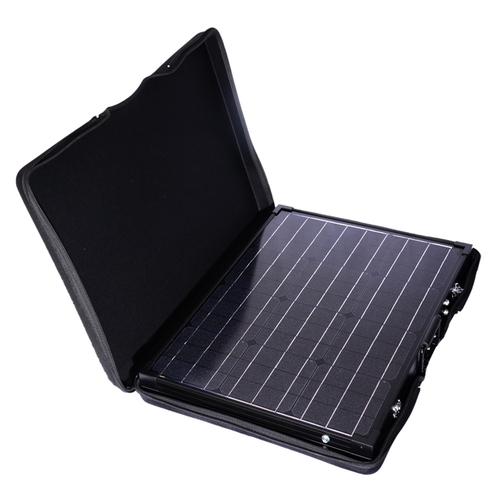
After receiving the kit, I got a coupon code via email for $10 off so I put that toward a beefy 20 foot extension cable pre-terminated on one end with MC4 connectors, AK-20FT-10. The wire is advertised as 10 AWG but really it is 6 mm^2 which is a bit bigger and also has a double jacket making the OD huge. The two wires are independent so I joined them every 12 inches with heat shrink.
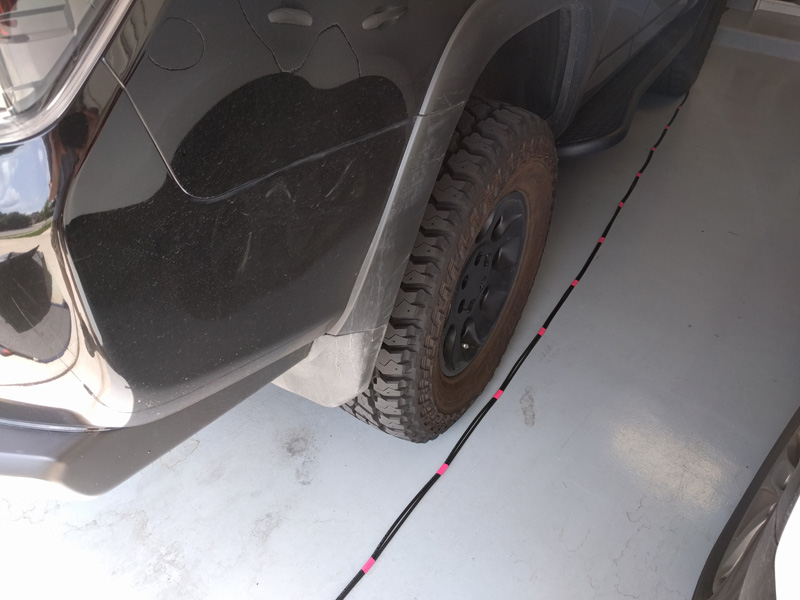
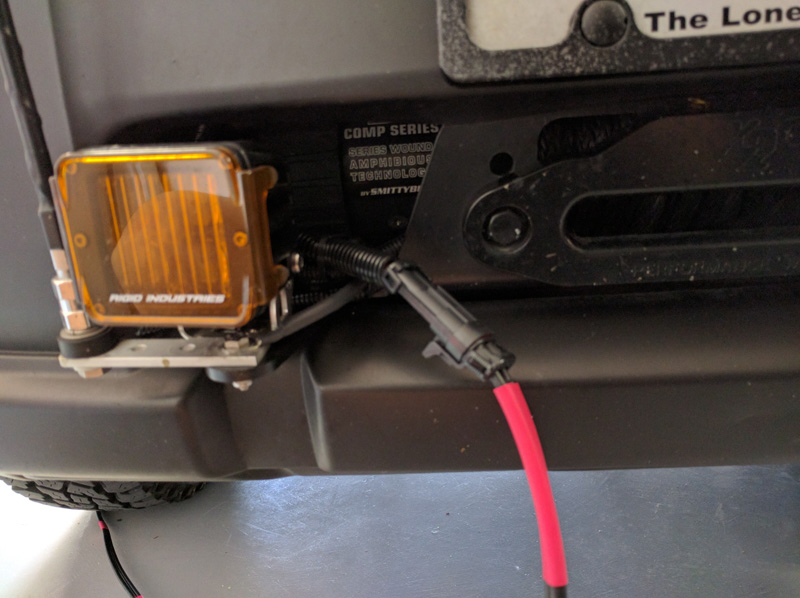
At the front of the vehicle, I used a 480 series Metri-Pack quick disconnect. When the panel is not connected, I replace the plug with a dummy plug to keep out the elements and tuck it behind the side of the fairlead flange but out of the way of the winch line.
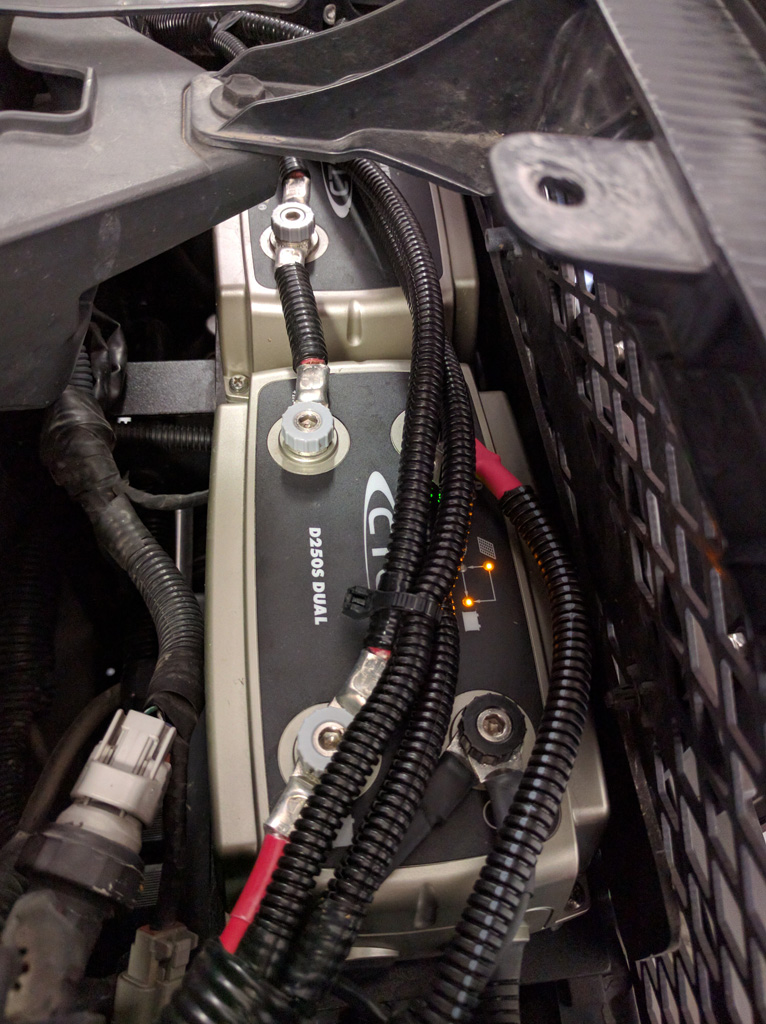
Then a short run of 10 AWG goes up through an inline MIDI fuse to the CTEK charger. I still have another connection pre-wired for the eventual roof top panel.
I hit up the group buy a few months ago for panels from Renogy. Since my CTEK system has a solar panel input with maximum power point tracking functionality, I opted for the Renogy Solar Suitcase kit without the charge controller, RNG-KIT-STCS-100D-NC. Originally I was going to add a panel or two on top of the roof rack that I will eventually build. However, putting panels up there would likely be a trade off between robustness, mounting, size, output, and efficiency. This is due to the panels not being in the optimum position for solar efficiency (facing up rather than toward the equator at the appropriate angle based on latitude). I may still put a smaller panel up there so I can get a little bit of juice when away from base camp.
Here's the kit. Overall build quality looks good and design is reasonably well thought out.
I'm glad this kit has the formed plastic/fabric "case" because opening up the panel without something below would likely risk scratching the glass on the ground.
After receiving the kit, I got a coupon code via email for $10 off so I put that toward a beefy 20 foot extension cable pre-terminated on one end with MC4 connectors, AK-20FT-10. The wire is advertised as 10 AWG but really it is 6 mm^2 which is a bit bigger and also has a double jacket making the OD huge. The two wires are independent so I joined them every 12 inches with heat shrink.
At the front of the vehicle, I used a 480 series Metri-Pack quick disconnect. When the panel is not connected, I replace the plug with a dummy plug to keep out the elements and tuck it behind the side of the fairlead flange but out of the way of the winch line.
Then a short run of 10 AWG goes up through an inline MIDI fuse to the CTEK charger. I still have another connection pre-wired for the eventual roof top panel.

Battle Wagon
New member
Love the LED in the scoop <3
enginerd4ni
Member
Overland Computer Update
I tried posting this on the previous post but it seemed to mess things up so here it is again:
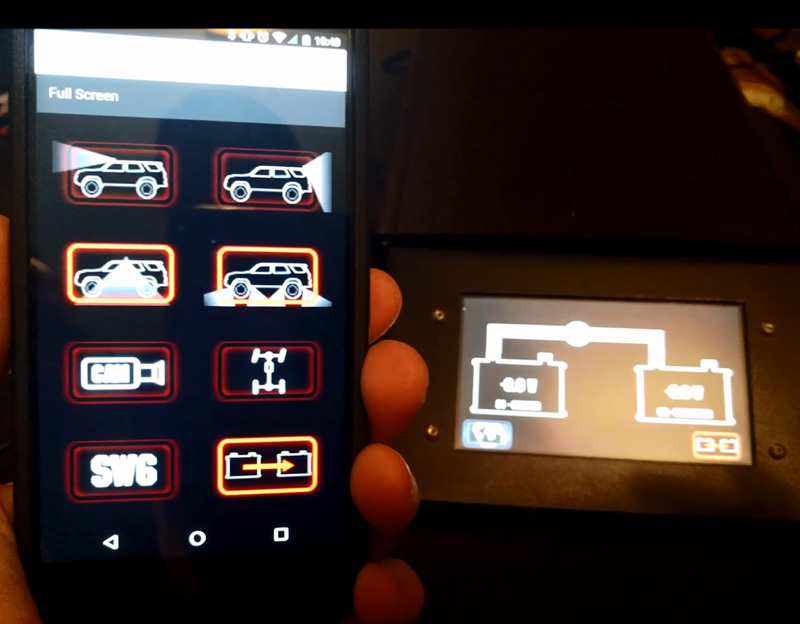
Here is a proof of concept showing some of the platform capabilities of the Overland Computer.
Problem: I'm in my roof top tent and I want to turn on or off some lights without having to climb down into the cabin.
Overly complicated solution:
Basically, the sbRIO system running LabVIEW RT can also host a web service to interact with the data running on the application. Since the web service can host html, java script, style sheets, bootstraps, images, etc., all you need is an internet browser and a shared wi-fi connection to get and put from the application. A friend of mine at work did the heavy lifting to develop some java script that I could adapt to my needs. I wanted a button press on the mobile browser to not only turn on that particular digital output (controlling the relay), but also for that new state to be reflected on the Amulet display panel mounted in the cabin. Also, I wanted a button press inside the cabin to show up on the mobile device. This turned out to be harder than I thought when implementing into the state machine running on the computer but I hacked it together and it seems to work now.
I think this solution isn't practical for real deployment so I probably won't set it up in the truck. It would work better if it was just a simple bluetooth connection running from an android app but that requires me to actually know how to program stuff. However, it demonstrates the capabilities. I'd like to be able to log in to my overland computer remotely from anywhere in the world so now my research is heading toward mobile modems and GPRS like stuff.
Anyway, here's a simple demonstration of the system in action:
I tried posting this on the previous post but it seemed to mess things up so here it is again:
Here is a proof of concept showing some of the platform capabilities of the Overland Computer.
Problem: I'm in my roof top tent and I want to turn on or off some lights without having to climb down into the cabin.
Overly complicated solution:
Basically, the sbRIO system running LabVIEW RT can also host a web service to interact with the data running on the application. Since the web service can host html, java script, style sheets, bootstraps, images, etc., all you need is an internet browser and a shared wi-fi connection to get and put from the application. A friend of mine at work did the heavy lifting to develop some java script that I could adapt to my needs. I wanted a button press on the mobile browser to not only turn on that particular digital output (controlling the relay), but also for that new state to be reflected on the Amulet display panel mounted in the cabin. Also, I wanted a button press inside the cabin to show up on the mobile device. This turned out to be harder than I thought when implementing into the state machine running on the computer but I hacked it together and it seems to work now.
I think this solution isn't practical for real deployment so I probably won't set it up in the truck. It would work better if it was just a simple bluetooth connection running from an android app but that requires me to actually know how to program stuff. However, it demonstrates the capabilities. I'd like to be able to log in to my overland computer remotely from anywhere in the world so now my research is heading toward mobile modems and GPRS like stuff.
Anyway, here's a simple demonstration of the system in action:
Similar threads
- Replies
- 2
- Views
- 10K


