Fightman's Build Thread

Ceasar, I honestly can remember what I had used the claw hammer for! As for the castle nut, i used the one i had from old driverside tierod and buttoned it up this morning

As for total parts replaced.... driverside Ubj, Lbj, inner and outer tierod, brake line. We also did the lower bj o. tbe passenger side and will be doing the upper tomorrow. I'mgoing to order an outer tie rod for tbe passenger side and then get the alignment.

Next up.... I may do the sterring rack bushings. I'm feeling some movement in the steering wheel when I hit bumps.... From what I've read... it seems to be related to the rack bushings??? Can anybody confirm or deny this????
 
Fightman,

I have never done the rack bushings myself so I will leave it up to others. I will hopefully get to it over the summer.

If you and LDForget take some pics of how you remove and press in the UBJ, there would be more than a couple of interested people in the method.

I have used a rock before to drive in a hex bolt on my Mazda; wrenching in the Fred Flinstone era.
 
Lol, a rock? cant say ive ever used that for this application.

The only way to use a huge all ball joint press like mine is moving the brake line. I ended up just replacing fightman80's due to it leaking after moving it. Basically, the cup (small piece of pipe)and the plate(round part, comes with the kit) goes on the bottom of the ball joint, and a socket on top of it, then place the press so the bolt part is on the top. wrench it down and eventually the ball joint explodes out. To install it, you have to flip the press around so the bolt part is on the bottom, and the cup and plate are on the top. You have to make sure you use the plate with the large hole in the middle so it fits around the bolt part of the ball joint. using a wrench press it in. It may not want to go in very straight, to remidy this i moved the bolt of the press around the bottom of the ball joint where ever it needed to be to straighten it out. This is probably not the easiest way to do it on a 4 runner to be completely honest, but its the way that worked for me.
 
Alright, so, the 4Runner was put on hold for a day, as I had a family emergency to take care of. However, yesterday, both my buddy Mike (same guy that built the spreading tool for the Timing belt pulley), and I tackled the upper ball joint.

The first thing I did, was install the castle nut on the passenger outer tie rod end. (which... needs to be replaced, but is still driveable) We then removed the UBJ castle nut by cutting the tail off the cotter pin and carefully tapping a socket over it. Once the socket was on there good and tight, the Impact Gun did the magic, and zipped that sucker off!

The next step, we used a pry bar and inserted it between 2 rows of coils on the strut, and under the upper control arm, and hammered on the the control arm with a ball pin hammer. The ball joint then popped out of the upper control arm.

The next step, was a little scary! lol! Mike tells me to hold the long knuckle and pull it out from the inner fender area, so he can whack it with the hammer! It took a few whacks, but no press was necessary for the upper ball joint to come out.

Here's a shot of the ball joint after it was out:

DSCF6903.jpg~original


After wards, we moved the brake line from the knuckle, by removing all the fastening clips that kept it in place. (10mm socket is needed for this)

We then used Lee's ball joint press, in the manner Lee described in the post above, but used a thicker piece of stainless steel I had lying around to use under the ball joint so it would press in straight:

DSCF6902.jpg~original


I just realized I didn't post a pic of the ball joint installed, so I'll get those done today, and post them later tonight.

Thanks for reading!
 
Fightman,

I do hope everyone in the Fightman family is A OK.

Sometimes pictures say it all. When using Lee's ball joint press, he must have the adapter set that does not come with the basic kit. Here in my neck of the woods (Southern US), when stores loan out tools, they only give you the basic kit, so without the adapter set, renting the basic tool for ball joint work is worthless for the 4runner and other cars and trucks.

Thanks for the pics.
 
Fightman,

I do hope everyone in the Fightman family is A OK.

Sometimes pictures say it all. When using Lee's ball joint press, he must have the adapter set that does not come with the basic kit. Here in my neck of the woods (Southern US), when stores loan out tools, they only give you the basic kit, so without the adapter set, renting the basic tool for ball joint work is worthless for the 4runner and other cars and trucks.

Thanks for the pics.

I'm not sure what the basic set comes with, but I know that there are the adaptor cups and the variable sized pipes that can be used for the top of the ball joint stud.

This kit was sold at one of those Tractor Supply stores... kinda like your Harbour Freight locations.

Another little tip I forgot to mention.... when using the tool, Mike would cease wrenching on the press, and use a hammer to tap the knuckle near the ball joint it being pressed in. He claimed that it would help the BJ settle into the Control Arm, and that wrenching on the press again, would actually become easier. Every time it got hard to wrench... he would hammer that control arm, and then it would get easy again.
 
Fightman,

I do hope everyone in the Fightman family is A OK.

Sometimes pictures say it all. When using Lee's ball joint press, he must have the adapter set that does not come with the basic kit. Here in my neck of the woods (Southern US), when stores loan out tools, they only give you the basic kit, so without the adapter set, renting the basic tool for ball joint work is worthless for the 4runner and other cars and trucks.

Thanks for the pics.

*my kit is quite basic. I hope to get a better one in the future. As rob said, it was bought at princess auto,which is a tractor supply store similar to harbour freight.
 
Lee,

Thanks for the heads up. Next time I have the basic kit in front of me I may recheck the three or four spacers the basic kit includes. I may just buy one from Harbor Freight when they have one of their seasonal mega sales. But if I remember correctly, the size I need or always need for other applications is in the extra spacer kit.
 
Go Fast Parts! ( :D )

Thanks for the comment Endgame_vdc! I love this rig too! :)

Well, internet issues stopped me from uploading the installed ball joint pic last night. (it can be found in my last post along with the passenger side remove/install pics)

Also, got a little package in the mail the other day:

DSCF6905.jpg~original


Go fast parts! (TRD valve stem caps)

DSCF6907.jpg~original


If figure these babies will give my truck AT LEAST another 10hp! :D


I mainly got them because my current ones were starting to wear out, and because these ones has locking screws on them. I've had issues with kids coming around and stealing the valve caps so they can put them on their bikes! lol! I never seized them, and then tightened them down. Alan Key will be kept in my center console storage compartment.
 
I have had little brat neighborhood kids even steal the basic valve stem caps.

Thanks Lee for the info. If I have to press out any more ball joints, I may have to lay down some green for one of these.
 
:peace: i used to do that as a kid, so i don't let it get to me when i do lose them now, man i had one trick:boxer:ed out BMX ... always laced with chrome caps
 
Passenger side outer tie rod end (removal and instalation)

Alright, so I had some time to kill this morning, before going to pick up the wife's "Pimpala" (aka, piece of crap Chevy Impala), from the windshield shop. As a result, I brought the truck inside the garage, and got to work!

First thing I did was jack up the passenger side, placed a jack stand under the lower control arm and removed the tire.

Next I made sure the wheel was turned so that if I was sitting in the truck... I'd be making a left turn. This exposes the tie rod/lower ball joint, which enables you to remove the cotter pin and place an impact on the castle nut to remove it. I then re-threaded the castle nut so that the top "castle" slots are facing down, and so that the nut was flush with the top of the stud. I couple of whacks and the tie rod dropped down. and took off my tie rod end.

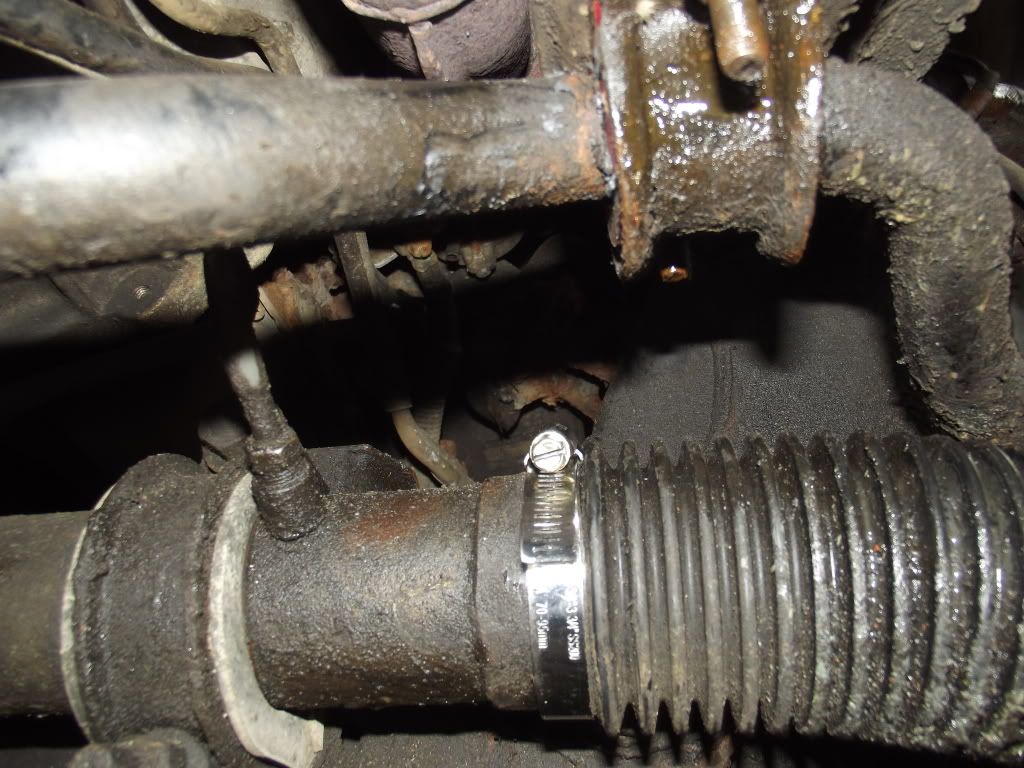
Next I removed the clamps that keep the Tie Rod boot on, and slipped the boot down to the end of the tie rod. Once the boot is off, you see where the inner and outer tie rod are threaded into each other. I chose not to try separating them while they were installed in the truck, and decided to take them out as a unit. The inner tie rod is threaded into the steering rack. In order to remove it, you have to unfold the round washer that is folded over the inner tie rod, and keeps it in place.

Once I unfolded the washer using a hammer and large flat screwdriver, I used a medium sized pipe wrench with a piece of pipe on the end for leverage.

Here's a shot of my pipe wrench setup:

DSCF6920.jpg~original


Here's a shot of the wrench on the inner tie rod as I'm removing it from the rack:

DSCF6916.jpg~original


I then brought the entire assembly to my bench vice, clamped it into place and used the pipe wrench and pipe to un-thread them apart:

DSCF6919.jpg~original


Next, I had to removed the adjustment nut from the old tie rod end. I was having issues, so once again I placed the end of the tie rod with the nut on it, in the vice and used the pipe wrench on the top portion to un-thread them:

DSCF6922.jpg~original


I then installed the new outer tie rod on the inner tie rod, and installed it using the reverse instructions I mentioned above.

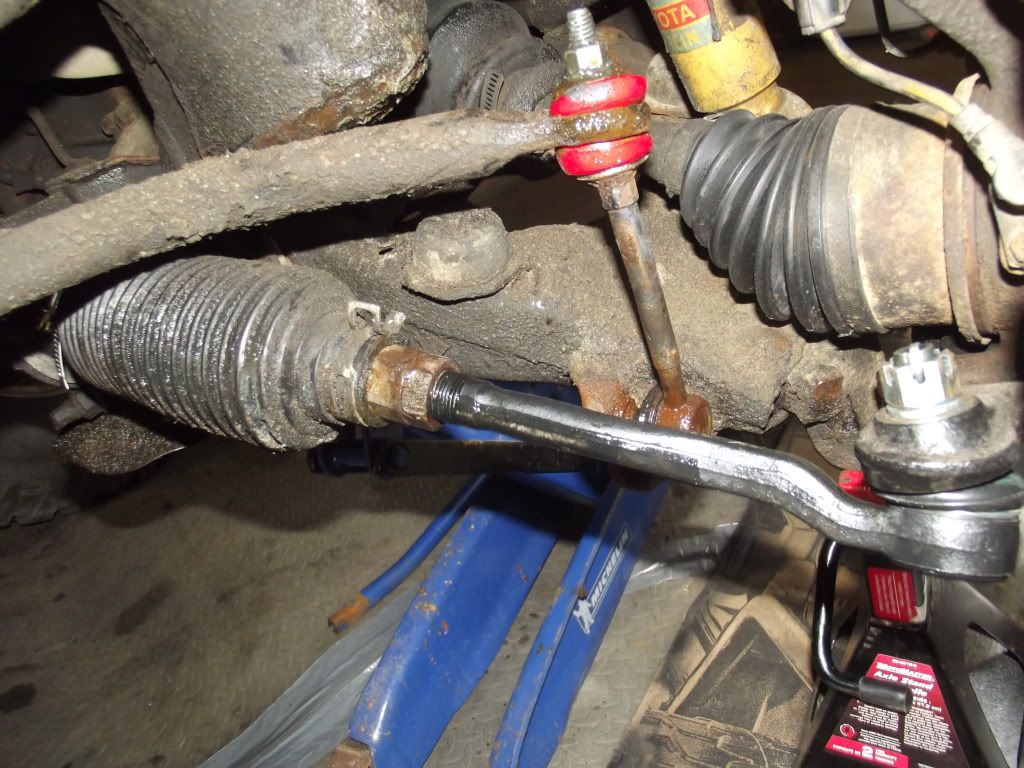
Here's a shot of the assembly in the truck (new hose clamp and all):

DSCF6924.jpg~original


Inner hose clamp in place:

DSCF6926.jpg~original


Outer tie rod installed and ready for an alignment!

DSCF6925.jpg~original


*Yes I'm aware that my stabilizer link is crooked... see previous posts for explanation for that! :)
 
Fightman,

Yea, if you are doing the tie rods, then I would get an alignment. If you still have the bushings to change out, I'd go ahead and do them;get as much steering and suspension work completed and then go in for the alignment.

Cheers,
 
Fightman,

Yea, if you are doing the tie rods, then I would get an alignment. If you still have the bushings to change out, I'd go ahead and do them;get as much steering and suspension work completed and then go in for the alignment.

Cheers,

I'm not going to do the bushings and such this month... I've spend well over $600.00 this month on all the front components! I'm thinking I'll just take your advice, get the alignment tomorrow... and next month, maybe even June, I'll get the rack guide and bushings done.
 
Well, the alignment didn't go as planned! Looks like the simulated bead locks on my Procomp wheels are too thick, and the shop didn't want to chance marking them up!!!

I'm gonna have to take my stock Yota wheels with the 265's out of the garage attic, and get them mounted up on the 4Runner just for the alignment! FML!

I wonder if I could just mount the front wheels???? It's only to drive them to and from the shop?????
 

Members online

Forum statistics

Threads
278,307
Messages
3,554,056
Members
248,016
Latest member
Advally Service

Trending content

Back
Top