Fightman's Build Thread

Thanks for the info on the headlights. I used the same link to order a new pair of 99's as well. I have a 97 4Runner myself and although the stock headlight is glass, it looks crappy.

I also ordered a set of 99 turn signals to match, only $30 with free shipping. I chose the stock look, I don't prefer the clear turn signals.

About your bumper issue.... to bad you don't live near San Diego. I am taking off my 97 Limited bumper to put on an ARB next week. I am hoping to sell the excellent condition stock one for $100.

BTW don't go with one of those bumpers (fat lip) that stick out 6 inches. I don't know what year it is .. 99,00 or 01 but they look terrible IMO.
 
Last edited:
Hey guys,

Just to clarify, I'm getting a stock replacement Chrome bumper for the 98. I decided to just replace what I have, as I was happy with it. I am however going to modify my lower valance again, put the driving light pods back in, maybe, just maybe paint the plastic the same color as the truck. The only issue I'm having, is I'm wondering how durable the paint will be on the valance??? When I go to pick up the bumper, I'm going to ask the paint shop there, what they think I should do. I may just Plasti-dip the valance, if I can find a can of that stuff here locally.
 
Another bump!

I got a call this morning from the Autobody Store this morning....My Bumper was in! I picked it up, along with some opoxy to fix my valance. I should start working on the valance tomorrow! I asked them about painting my valance, but they advised against it, since it was textured. They said, with it being textured, the paint wouldn't cover very well. Looks like I'm going to go hunting for some Plasti-dip!
 
Valance refurbishing

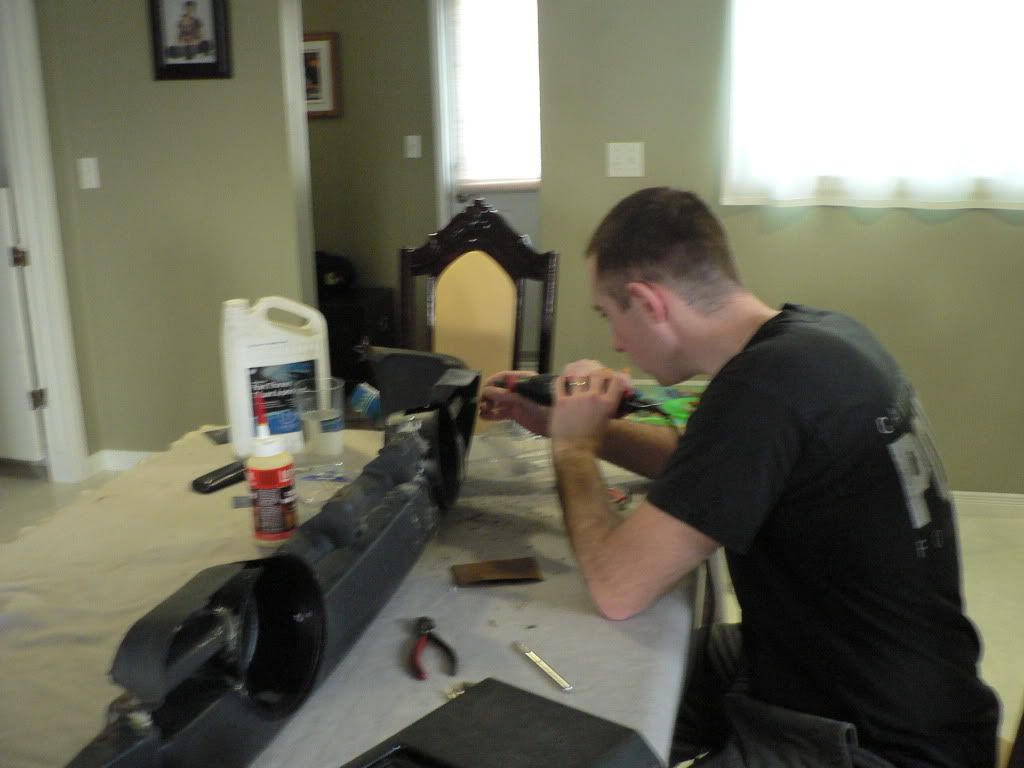
So, I got the bumper home, bought some Plasti-dip ($15.00 a can here!), and started patching the valance with the epoxy and some mesh.

Here's the valance mocked up with the margerine container light pods I made in November!

P1120219.jpg~original


P1120218.jpg~original


I'm hoping to do a much better job than I did in the fall, however, you'll probably not even notice the difference! Last fall, I used silicone to glue the light pods into the valance. This time, I'm using 2 part Epoxy, and some mesh to make it stronger. Once it's all filled in, I'm goint to sand it down, and then paint it with the Plasti-dip.

Here's a pic mid-way into the Epoxy stage:

P1120220.jpg~original


There is still alot of work to do, but I'm hoping to get it done by Tuesday. I'm planning on maybe making a trip to my dad's place, so I can use his heated Garage to paint the valance.
 
Good idea with the margerine containers! My valence is also messed up and I was thinking about cutting it and putting some lights in it - thanks for the idea!

I found a place near me that sells the bumper for $65 and the valence for $16 - both new, so I'm not too concerned if i mess up the cutting.
 
Valance refurbishing II

Ok, so I've been working on restructuring the valance, making it solid again, and properly grafting the light pods in. After using the mesh and Epoxy, I took out the Dremel, and a sanding bit, and got to work on cleaning up the rough edges. I then used a sand paper to soften the sanding bit marks.

P1120232.jpg~original


Once that was done, it was time for the Plasti-dip:

P1120239.jpg~original


It's still too cold in my garage to let it dry there, so I decided to bring it in the basement to dry by the fireplace:

P1120240.jpg~original


It will most likely be another day before I mount it on the bumper and then back on my truck. That being said.....IT'S COMING ALONG!
 
looks good man. wish i had time like that to work on the rig. always fun when i'm doing projects like that. any big plans for the future?
 
I couldn't go to sleep!

So, my OCD took over my body tonight, and made me assemble the bumper!

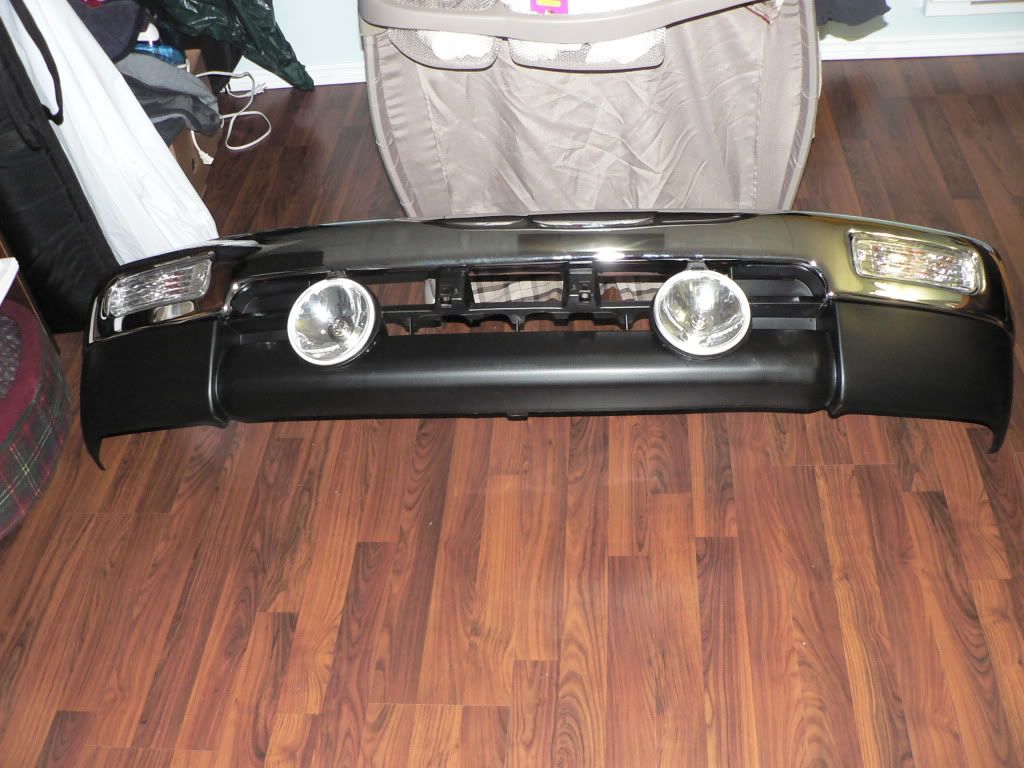
Here's a pic of the valance on the New Chrome Bumper:

P1120241.jpg~original


Here's a pic of the entire assembly with the new bumper lights and the driving lights:

P1120246.jpg~original


Turned out alright....now just to mount it on the truck, and aim the driving lights!
 
Thanks for all the complitments guys! It was alot of work, but I'm happy with the end result. I'm going over my receipts, and looks like the entire assembly, minus the round driving lights, cost me about $230.00! That's counting the purchase of the Epoxy, plasti-dip and the new hardware!

Now I can't wait to put my mud tires back on, and give the old truck a good Wash!
 
Last edited:
wow that looks awesome! those margarine containers really fit those lights. you are an :artist2: with epoxi and a dremel
 
Thanks guys! I can't wait to get it on the truck now! Also looking forward to the weather getting better so I can wash the truck and put on my Bighorns back on!
 
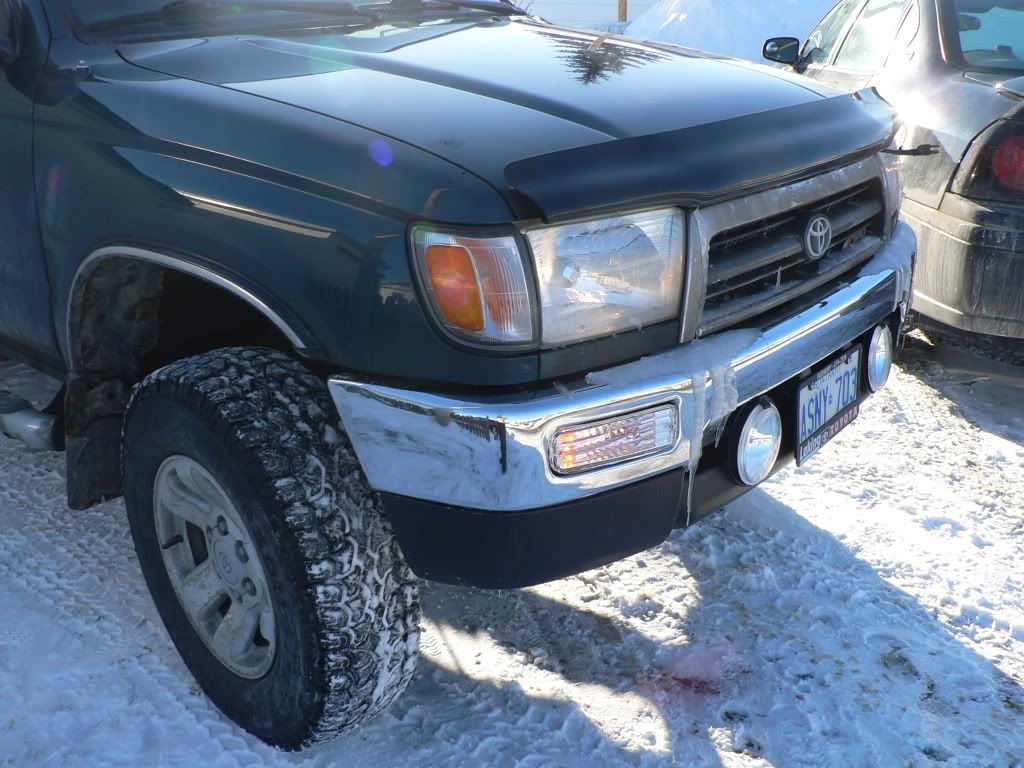
So, I got the bumper on the truck! However, it seems that my passenger side bumper bracket did get tweeked by the accident! :cry2: The pictures don't really show it, but the passenger side gap, between the bumper and the lower fender edge, is about an inch and a half and the driver side is only half an inch! :rant:


(don't mind the 245's, these are my winter set!)

P1120261.jpg~original


P1120262.jpg~original


P1120263.jpg~original


I ended up simply unbolting the bumper again on the passenger side, adding some washers to the top stud of the bumper and then re-torquing it all. Leveled everything out nicely!
 
Last edited:
I've also been working on revising my roof rack this winter. I've decided to take some of the advice I've been getting, and cut off the ends of the lateral bars from the roof rack. This will make the rack look more square, instead of having the cross bars hanging half a foot on each side of the truck.

I started out by grinding off the ends of the cross bars:

P1120265.jpg~original


P1120264.jpg~original


I wanted to have something to cap off the ends of the tubing. So, I got creative, ha ha ha, and used some recycled cabinet nobs, to cap the tubing!

P1120266.jpg~original


My next step will be to rubber guard the caps, and then maybe plasti-dip the whole rack!

I'm also thinking about buying another 2 square lights to match the current front ones, and add those to the front. I'm going to have to fab out some mounts for all of that, so that may take a while.
 
Last edited:
Thanks NickF! I can't wait for all this snow to melt, so I can start washing and detailing the truck! Once that is all said and done, the Bighorns are coming out of the Garage Attic, and back on to my rig!
 

Members online

Forum statistics

Threads
278,309
Messages
3,554,067
Members
248,016
Latest member
Advally Service

Trending content

Back
Top