FJC/4Runner Offset Lower Link Group Buy - Metal Tech 4x4

Let us know how the installation went after you're done. Mine came in on Monday but probably won't get to it for some time.

When I installed mine last year, it was pretty simple. I lifted the rear axle by the differential so I could use a ratchet strap to push/pull the axle in order to get the bolt holes to line up. I was told by LT to take the factory link out, then adjust the new MT link to match the length of the factory one. With up to a 3" lift, I was told you do not have to worry about shifting the axle by lengthening the lower link.

I did each side separately so you do not get any shifting of the axle. One link will hold the axle in place while you are replacing the opposite side.

I do remember the factory bolts/nuts being very tight since they are lock-tite'd on. Throw some elbow grease into it and use a big breaker bar. They will eventually come off.

I also remember having to wallow out the factory bolt holes a little bit since the new hardware sent by Metal Tech was slightly bigger in diameter than stock. I did this by placing the old bolts in the mounting holes and hitting them with a rubber mallet sideways to make the factory holes just a hair bigger. If you do not want to do this, you can always reuse the factory hardware.

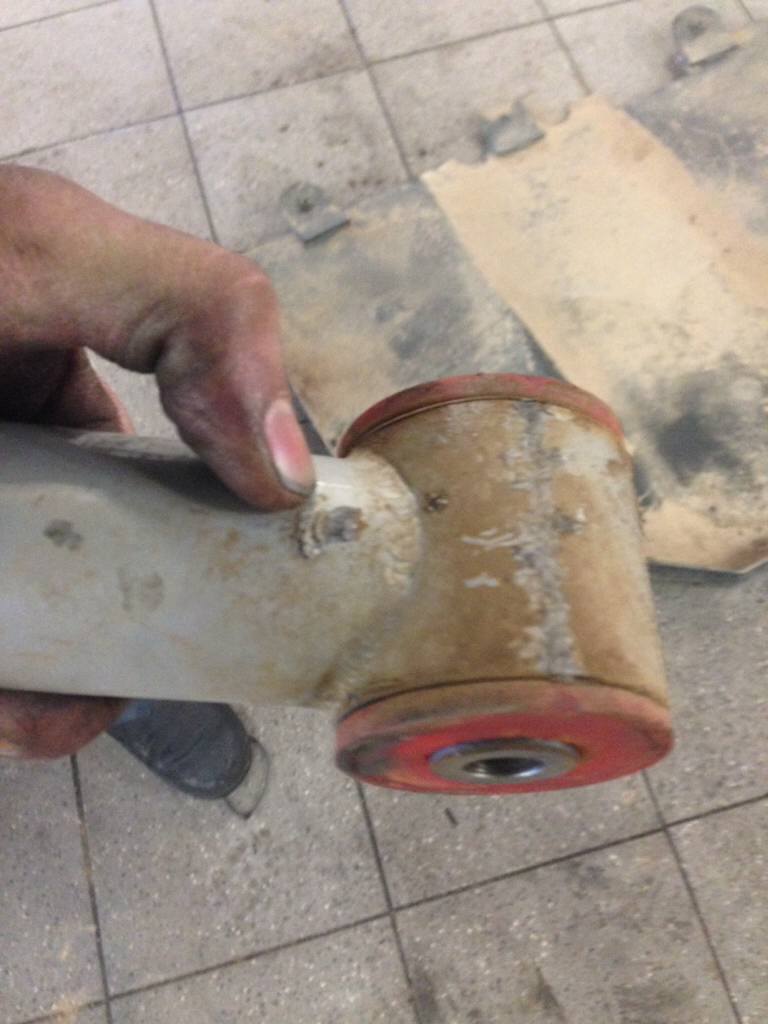
Remember to install the link with both zerks facing upwards. Use some polyurethane bushing grease when installing the bushings in the link as well.

I was just talking to Harper7 in another thread about the length of the MT links. When I matched my factory link length to the MT link, I had approximately 3 threads showing on the adjustable end once the jamb nut was tightened. Harper7 only had one thread showing. So, the best way to get the proper length for your rig is to match the length of the factory link, not by thread count.

Hope this helps with your installs. It is definitely not a hard install and I encourage everyone to tackle it themselves.

Good luck and post questions if you have them.

 
When I installed mine last year, it was pretty simple. I lifted the rear axle by the differential so I could use a ratchet strap to push/pull the axle in order to get the bolt holes to line up. I was told by LT to take the factory link out, then adjust the new MT link to match the length of the factory one. With up to a 3" lift, I was told you do not have to worry about shifting the axle by lengthening the lower link.

I did each side separately so you do not get any shifting of the axle. One link will hold the axle in place while you are replacing the opposite side.

I do remember the factory bolts/nuts being very tight since they are lock-tite'd on. Throw some elbow grease into it and use a big breaker bar. They will eventually come off.

I also remember having to wallow out the factory bolt holes a little bit since the new hardware sent by Metal Tech was slightly bigger in diameter than stock. I did this by placing the old bolts in the mounting holes and hitting them with a rubber mallet sideways to make the factory holes just a hair bigger. If you do not want to do this, you can always reuse the factory hardware.

Remember to install the link with both zerks facing upwards. Use some polyurethane bushing grease when installing the bushings in the link as well.

I was just talking to Harper7 in another thread about the length of the MT links. When I matched my factory link length to the MT link, I had approximately 3 threads showing on the adjustable end once the jamb nut was tightened. Harper7 only had one thread showing. So, the best way to get the proper length for your rig is to match the length of the factory link, not by thread count.

Hope this helps with your installs. It is definitely not a hard install and I encourage everyone to tackle it themselves.

Good luck and post questions if you have them.

Great notes, very helpful. Thank you.
That said, my links arrived today. On time, well packaged and VERY heavy! Damn these things are beefy!
 
I also remember having to wallow out the factory bolt holes a little bit since the new hardware sent by Metal Tech was slightly bigger in diameter than stock. I did this by placing the old bolts in the mounting holes and hitting them with a rubber mallet sideways to make the factory holes just a hair bigger. If you do not want to do this, you can always reuse the factory hardware.

Remember to install the link with both zerks facing upwards. Use some polyurethane bushing grease when installing the bushings in the link as well.

I was just talking to Harper7 in another thread about the length of the MT links. When I matched my factory link length to the MT link, I had approximately 3 threads showing on the adjustable end once the jamb nut was tightened. Harper7 only had one thread showing. So, the best way to get the proper length for your rig is to match the length of the factory link, not by thread count.

For the 9/16" bolts I just put them in place and use a 3lb hammer to get them through the hole with the link in place. Once you get the bolt through once it can be installed without the use of the SST :)

You are correct in that it doesn't matter about the thread exposure, adjust the Johnny joint to the factory length. I usually adjust them to factory and then give it about two full turns beyond that for lifted applications.
 
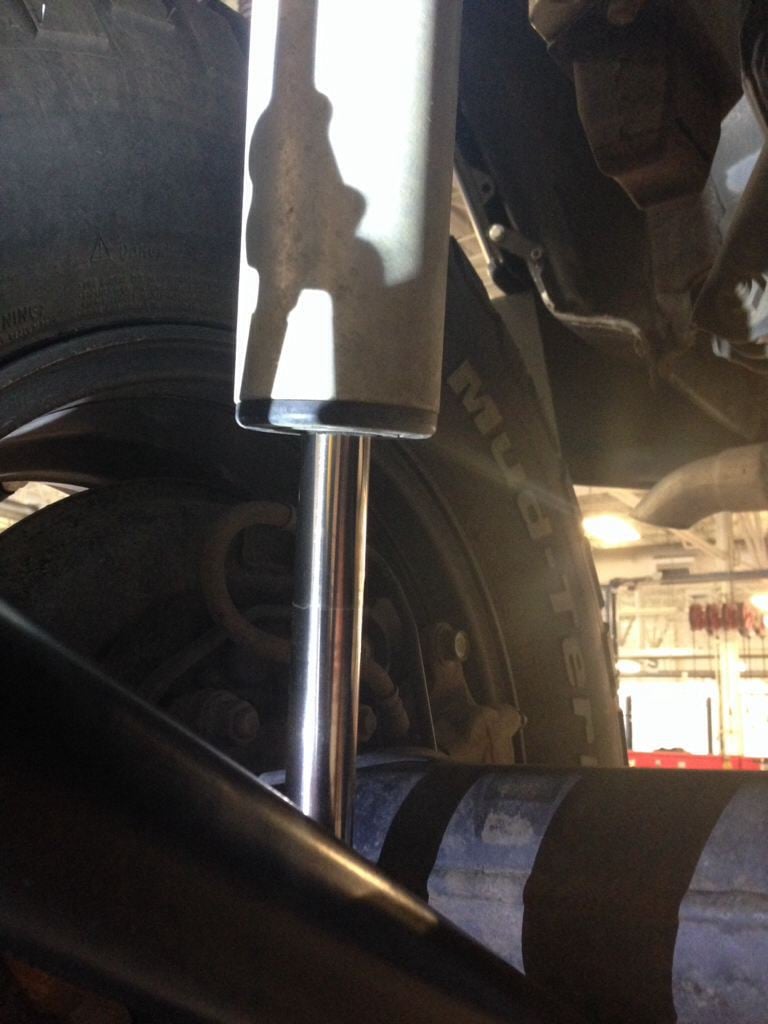
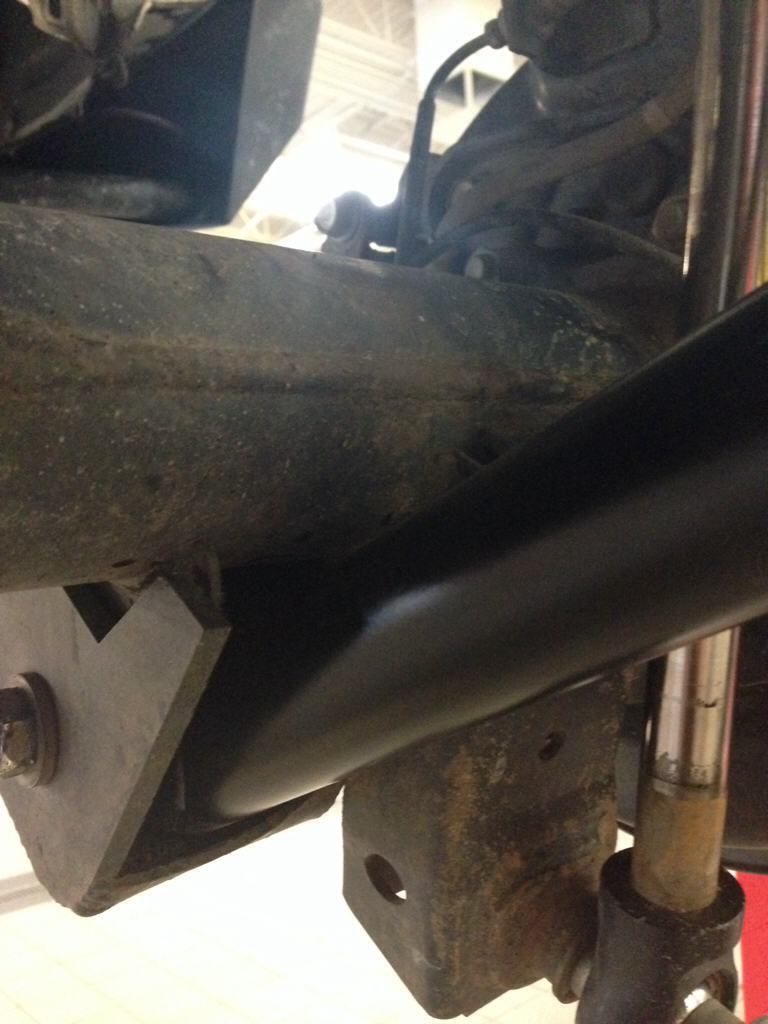
Just installed mine. Note the new dust line on the shock. Definite gain over All Pro control arms.

ynymevy6.jpg


emu8ynus.jpg


Note where the All Pro arms would hit the control arm mounts.
de9ezu3u.jpg
 
LL skids

Been looking around for info on mounting bracket skid fitment on these offset LL's. Asked LT and found out that the TC skids on their website won't fit because of the offset. Found one post a while back naming a brand that would fit fine but can't seem to re-find it. @WarnerD9 Looks like you're rockin the all-pro skids without fitment issues, did you have to alter the skid at all to get it to fit the offset link? I'm not sure what side the offset is on but I'm assuming its the rear mount, maybe front mount won't be an issue. Anyone run into fit problems with the TC rear mount skids and offset LL's? Any insight would be much appreciated.
 
Been looking around for info on mounting bracket skid fitment on these offset LL's. Asked LT and found out that the TC skids on their website won't fit because of the offset. Found one post a while back naming a brand that would fit fine but can't seem to re-find it. @WarnerD9 Looks like you're rockin the all-pro skids without fitment issues, did you have to alter the skid at all to get it to fit the offset link? I'm not sure what side the offset is on but I'm assuming its the rear mount, maybe front mount won't be an issue. Anyone run into fit problems with the TC rear mount skids and offset LL's? Any insight would be much appreciated.

There was some minor altering involved.
 
Really random, but is there supposed to be a washer on both the bolt and the nut side of the more forward mounting bracket?
Yes, I found this out after I had one side installed. Also, grease the fittings before you install them, cause I still haven't found a 90 degree zerk fitting for my grease gun.
They did go on quickly though they are 3/16" longer than stock, which is the shortest they would go.
 
Yes, I found this out after I had one side installed. Also, grease the fittings before you install them, cause I still haven't found a 90 degree zerk fitting for my grease gun.
They did go on quickly though they are 3/16" longer than stock, which is the shortest they would go.

I can't remember, was the bolt/nut I'm referring to (the fastener for the more forward mount) included from MetalTech or OEM?
 

Members online

No members online now.

Forum statistics

Threads
278,315
Messages
3,554,104
Members
248,016
Latest member
Advally Service

Trending content

Back
Top