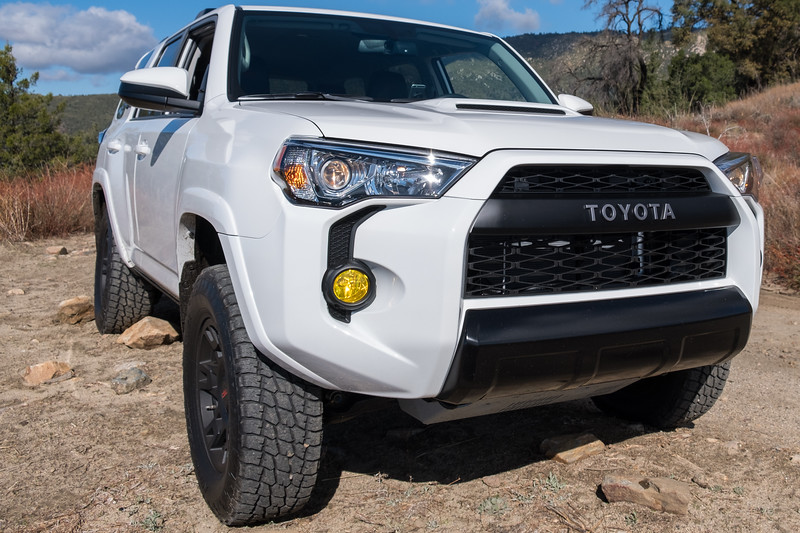
couple tabs behind the bumper... easy to remove... you cna laminx without removing I did mine without issue2015 Trail Premium Do they pop off or is there a hidden screw somewhere. I want to install Lamin-x lens covers but the lens are too curved to do a wet install. I'll have to pull the bezel to do a dry install as far as I can see.
Yep just one or two screws, then a couple tabs. There's a thread here somewhere that I followed to do mine. I actually have to re-lamin-x mine and I think instead of pulling the housing out, I'll just do it from the front.
couple tabs behind the bumper... easy to remove... you cna laminx without removing I did mine without issue
2015 SR5, same foglights... the limited requires the entire bumper to be removed I thinkWhat year and model is yours.??
You absolutely do NOT have to remove the bezel to get a perfect install, and you do not have to do a wet install. It is a dead simple install. All you need is a thin plastic trim tool (wrap the tip in some painter's tape or masking tape if you're really being careful) or a credit card, and a utility knife.
Install as follows:
- Clean the lens with isopropyl alcohol or Windex.
- Remove the backing from the film, and center it exactly over the lens, keeping it about 1/4" away from the lens itself.
- Using one finger (in a latex glove if you're being really careful), touch the center of the film to the center of the lens.
- Keep the same finger pressed down, and smoothly move it in an expanding spiral from the center of the lens all the way out to the edges. This will avoid bubbles or other adhesion problems.
- Where there is excess film at the outer edge, use the trim tool or corner of the credit card to tuck it under the bezel.
- Use the utility knife to carefully cut off the two tabs on the film pieces if you can't get them tucked under.
I'm far from a skilled mechanic, but I got both sides done in under 10 minutes using this technique and the install is 100% perfect. Remember that if you make a mistake the film is forgiving enough that you can lift it off and reapply several times before having problems.

![]()
You absolutely do NOT have to remove the bezel to get a perfect install, and you do not have to do a wet install. It is a dead simple install. All you need is a thin plastic trim tool (wrap the tip in some painter's tape or masking tape if you're really being careful) or a credit card, and a utility knife.
Install as follows:
- Clean the lens with isopropyl alcohol or Windex.
- Remove the backing from the film, and center it exactly over the lens, keeping it about 1/4" away from the lens itself.
- Using one finger (in a latex glove if you're being really careful), touch the center of the film to the center of the lens.
- Keep the same finger pressed down, and smoothly move it in an expanding spiral from the center of the lens all the way out to the edges. This will avoid bubbles or other adhesion problems.
- Where there is excess film at the outer edge, use the trim tool or corner of the credit card to tuck it under the bezel.
- Use the utility knife to carefully cut off the two tabs on the film pieces if you can't get them tucked under.
I'm far from a skilled mechanic, but I got both sides done in under 10 minutes using this technique and the install is 100% perfect. Remember that if you make a mistake the film is forgiving enough that you can lift it off and reapply several times before having problems.
![]()