Frank

majdomo

New member
I posted a version of this over at Mud, and may keep that up if it makes sense, but realizing there are way more of y’all here than over there for the T4R. I’m also learning this platform, apologies in advance for weird photo placements!

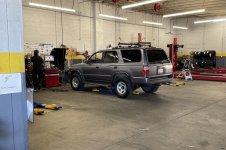
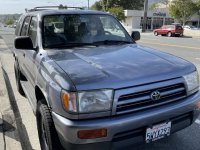
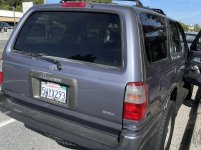
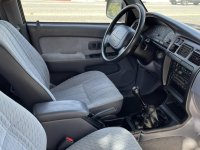
With the 80 off to a new home soon, it was time to pick up another daily. While I loved having the space and unmatched capability, I missed the smaller dimensions of the 4Runner and wanted a little more engagement in my drive. Was originally looking for a 2nd gen 22RE with a 5 speed, but found this one instead up in the Bay Area. 1997 3rd gen 5 speed with 4WD, Lavender Steel. Geez what a wussy name for a great color. Kids had named it Frank before I even got it home.

First time I’ve done a fly and buy. I reached a deal with the seller around 11am, was on the plane by 2pm, on the drive home by 4pm, and home again by 11pm. Busy day.

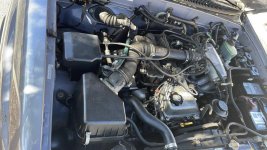
Radiator is new Denso (China) and filled with Toyota red. Clutch is relatively new, has a quality respray that color matches excellent with the door jambs, done mainly to correct for peeling clear. They painted the bumpers too, though, so may fix that sometime. 4WD engages smoothly, new front brakes, all else is in good working order. Does have a few needs, particularly upper and lower ball joints (baseline), shocks are really bad and probably original, and it has a minor steering wheel shake at around 60-70 mph. Taking out the ball joints first, hoping that does it but we’ll see. 168K miles.

Interior in good condition, typical wear and a small tear on the outer bolster on the driver’s side seat. I was able to find the covers and non-sport seat pad on Amayama, so those are on order. Replaced aftermarket stereo with my favorite single DIN Toyota head unit out of a Camry with a Crux BT adapter, my third one of those.

Some photos for your perusal…
 

Attachments

  • 95334263-2D96-4679-91ED-CF79C329A1B2.jpg
    95334263-2D96-4679-91ED-CF79C329A1B2.jpg
    108.4 KB · Views: 638
  • CA823C9C-47E7-448A-B5BE-34C1442059EF.jpg
    CA823C9C-47E7-448A-B5BE-34C1442059EF.jpg
    64.1 KB · Views: 624
  • 20B36B28-84D1-4C1F-81AF-B9CC2099FFE7.jpg
    20B36B28-84D1-4C1F-81AF-B9CC2099FFE7.jpg
    106.5 KB · Views: 643
  • 16051752-6F23-4532-BE69-B020A36DCED0.jpg
    16051752-6F23-4532-BE69-B020A36DCED0.jpg
    138.2 KB · Views: 641
  • 8E2F46EB-CADE-45D3-A04E-113CB8F8081C.jpg
    8E2F46EB-CADE-45D3-A04E-113CB8F8081C.jpg
    133.7 KB · Views: 622
Register to hide this ad
You are lucky to have obtained a 4 cylinder in good shape. That configuration, eg 4WD/3VZ-E/5-speed/no sunroof was my preference when I was shopping for a 3rd Gen 4R in 2013. 7-8 months of daily searching the CL and Autotrader postings yielded only a few trashed 4 cyl trucks, so I settled for a 6-cyl version.
 
You are lucky to have obtained a 4 cylinder in good shape. That configuration, eg 4WD/3VZ-E/5-speed/no sunroof was my preference when I was shopping for a 3rd Gen 4R in 2013. 7-8 months of daily searching the CL and Autotrader postings yielded only a few trashed 4 cyl trucks, so I settled for a 6-cyl version.

Thanks and agreed! I found a few roached-out 4 cyl trucks as well but none this well kept. Came close to getting a project 95 22RE 4WD 5 speed with a broken timing chain, but it was up and gone within a few days and too far from home, and no idea what the bottom end looked like.
 
Upper and lower ball joints replaced, took a day and a half after screwing up one of the ball joints with the press (user idiocy) and having to replace the passenger side tie rod due to messed up threads (not my fault). Also had a bolt head shear off in the knuckle arm, the one that holds the brake line in place between the soft line and the hard line to the caliper. That was a 2 second job that ate up probably 2 hours of faffing around with a drill, tap, chisels, and all other manner of punches, liquid, and fire persuasion. Finally just tapped a new smaller hole and went with it. Also managed to replace one of the wheel lug studs, good as new.

All in it was an easy job, but it was all the other garbage that made it awful. On top of that, Amayama cancelled my order as none of the parts are available. Which isn’t a surprise, really. Rough day but it’s done, taking it down for an alignment tomorrow.

Next up - Bilstein 5100s on the way.
 
Last edited:
Great story, I'll enjoy following along. Nice looking truck!

Sounds like we have had many of the same adventures.

~Jason
 
3RZ 4WD -- the ultimate 4Runner configuration! Congrats!

Make sure to take a look at valve adjustment... V6 guys can get away with neglecting it but the valves usually tighten on the 3RZ over time. I've touched mine up a few times and it's nearing 300k
 
3RZ 4WD -- the ultimate 4Runner configuration! Congrats!

Make sure to take a look at valve adjustment... V6 guys can get away with neglecting it but the valves usually tighten on the 3RZ over time. I've touched mine up a few times and it's nearing 300k

I need to add to the list. Thanks for the reminder! Never did one on the V6, but have on my FJ40 and 2002. The whole shim-over-bucket thing seems like a pain, to be honest. Thank goodness for Tim’s videos!

Alignment done, fixing up the radio backlight with some 3mm incandescent bulbs since one was burnt out. Re-flowed solder on the power contacts in the clock and the 4 larger diodes (I think?) on the board, which hopefully is the fix for the LCD fading out a bit. Tested good last night.

RockAuto cart is filling up with a few other odds and ends - replacement headlight bulbs, end links, windshield wipers, the important stuff. FZJ80 heads off to its new home today.
 
Clock backlight fix worked, holding nicely the last 2 days driving to and from work. Shocks and front top mounts have arrived for install this weekend. Other parts on order to arrive next week, end links, headlight bulbs, wipers, etc. Has a funky stink though that I need to eradicate from the interior. Nothing mechanical, just smelly.

Fun truck to drive, averaging about 20 mpg in traffic and can prob do better. Big relief!
 
Mine stunk like gear oil. The rubber shifter boot under the cloth/leather shifter cover was not properly seated on the shift rod. A 2 second fix got rid of the stank.

Sent from my Pixel 4 XL using Tapatalk
 
13WLs from the junkyard, the rest of the parts are OEM on the way from Claremont Toyota.

96ef8657960c14fa792bb5636be17956.jpg


Sent from my iPhone using Tapatalk
 
13WLs from the junkyard, the rest of the parts are OEM on the way from Claremont Toyota.

96ef8657960c14fa792bb5636be17956.jpg


Sent from my iPhone using Tapatalk
Not Toyota but I got an entire 13WL kit with complete calipers, pads and drilled & sotted rotors from Callahan for $220, no core charge

Sent from my Pixel 4 XL using Tapatalk
 
Not Toyota but I got an entire 13WL kit with complete calipers, pads and drilled & sotted rotors from Callahan for $220, no core charge

Sent from my Pixel 4 XL using Tapatalk

That’s a deal. I paid $80 for the junkyard calipers total, and another $300 for OEM parts including a rebuild kit, rotors, brake pads, and shims, shipped w tax. I did this with my last 3rd gen, wasn’t going to do it with this one until it was needed but already hating on the stock brakes. Need to check the rears too at some point. Brake pads got $$, geez.

Installed some eBay tweeters and redid the backlights on the LCD. Sounds better but need to do the LCD backlights AGAIN because one of the little green doodads didn’t get pushed on all the way, and is causing that light to shine slightly dimmer than the other one… could probably do that with my eyes closed at this point.
 
Some better photos from the dinner run.
 

Attachments

  • 2356C5B5-AFF4-43F7-AC45-AAD657FBF13F.jpg
    2356C5B5-AFF4-43F7-AC45-AAD657FBF13F.jpg
    135.9 KB · Views: 420
  • FD4A54B8-66A7-4F75-A03F-357A47CCB547.jpg
    FD4A54B8-66A7-4F75-A03F-357A47CCB547.jpg
    133 KB · Views: 427
  • 83AF823E-FA71-4D11-8525-87F834A69D53.jpg
    83AF823E-FA71-4D11-8525-87F834A69D53.jpg
    133.2 KB · Views: 429
Busy day yesterday. Started with a trip out to Ontario to try my luck at picking up seats at yet another pick and pull. This time got lucky and scored a good condition passenger seat that matches the upholstery, a good looking OEM rear bumper that needs some paint correction, a rear windshield wiper arm, and a few other odds and ends. It looks like these seats came in the 1996-1998 non-sport GRAY color way, I’ll keep this in a saved search and check LKQ every few days to see when another one comes up locally.

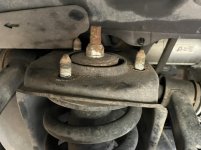
Next was to tackle shocks. I was able to install all 4 corners, but this truck wants to fight me every step of the way. Rusty fasteners slow work to a crawl. I pulled the driver’s side shock and spring assembly, loaded up the springs to remove the top hat, but the top nut was rusted on so badly that I ended up using the Dremel on the nut and shaft. Passenger side came off ok. This was a bad sign for the rears.

The rear shock mount was designed by a masochist, which is probably why these were never changed. The washers were rusted out flakes of their former selves, and I had to bathe the top nut in PB to get it to finally, thankfully, move on each side. I mopped up the pool of PB before getting up there with the 14mm, and used a pipe wrench to keep the top half of the old shock from turning. There’s just no room to get good torque on that nut, but made it work eventually.

Test drive was great, the truck doesn’t wallow all over the place like it did before. Steering wheel shake is still present at higher speeds, I have the steering rack bushing kit here for install probably later today.
 

Attachments

  • A5C7B038-BDC5-4ABC-8065-857551791920.jpg
    A5C7B038-BDC5-4ABC-8065-857551791920.jpg
    120.3 KB · Views: 414
Nice progress

The rear shock mount was designed by a masochist, which is probably why these were never changed. The washers were rusted out flakes of their former selves, and I had to bathe the top nut in PB to get it to finally, thankfully, move on each side. I mopped up the pool of PB before getting up there with the 14mm, and used a pipe wrench to keep the top half of the old shock from turning. There’s just no room to get good torque on that nut, but made it work eventually.

I just bend the crap out of the rear shocks, back and forth, repeatedly, until the upper shaft snapped. I got lucky, there were holes in the floor board covered by gummy tape right above the shock nuts; i tightened the nuts from the cargo area.

Sent from my Pixel 4 XL using Tapatalk
 
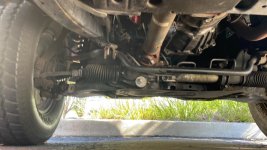
Shortened garage session today installing steering rack bushings. That went super smooth compared to yesterday’s cage match against the shocks. New TRW poly bushes installed, along with junkyard pulled sway brackets. I did manage to bust a fastener on the passenger side, which was all rusted out, but I had another one from the junkyard ready to go anticipating this. Hooray for CA junkyard trucks!

This cleaned up most of my steering slop and steering wheel shaking at speed, as the passenger side bushing was completely hosed. The driver and center bushes seemed ok, but they are just rubber and pliable.

It seems like the passenger side rust on the sway bracket / bolt was mainly due to the A/C condenser outlet, which drips right on top of that bracket. I’ll need to take a look and see if there’s maybe a drain hose missing from an outlet, that would otherwise guide condensation away from the frame.

I also got a nice look at my sway bushings, which are shot. I’ll order those up and install once the end links show up next week.

Tired but excited, next few weekends are busy with lots of social engagements, glad I was able to get this work out of the way.
 
Last edited:
Nice progress


I just bend the crap out of the rear shocks, back and forth, repeatedly, until the upper shaft snapped. I got lucky, there were holes in the floor board covered by gummy tape right above the shock nuts; i tightened the nuts from the cargo area.

Sent from my Pixel 4 XL using Tapatalk

I hadn’t thought of that, but I was about 5 minutes away from busting out that Dremel again and hacking into the upper shaft. That IS lucky to have those holes already cut. No idea why Mr. T didn’t design it that way from the outset, seems like that would have made service way easier and more cost-effective.

Totally different trucks, not IFS, but this job on the FZJ80 and the FJ40 took about an hour. Yesterday was a ball-busting 8 hours on the concrete, the last 2 in the dark. BUT, driving down to OC and back today was awesome, just so much more responsive.
 
It seems like the passenger side rust on the sway bracket / bolt was mainly due to the A/C condenser outlet, which drips right on top of that bracket. I’ll need to take a look and see if there’s maybe a drain hose missing from an outlet, that would otherwise guide condensation away from the frame.

I attached a 3/8 ID hose to the outlet of the AC drain and routed along the firewall, down to below the frame by around 3" - drains directly to the ground

I have a thread on this "mod" which is really just a common sense completion of what Toyota engineers probably want to do

Extended AC Drain mod
 
Last edited:
I attached a 3/8 ID hose to the outlet of the AC drain and routed along the firewall, down to below the frame by around 3" - drains directly to the ground

I have a thread on this "mod" which is really just a common sense completion of what Toyota engineers probably want to do

Extended AC Drain mod

Thanks for the link, adding this to the list. Seems silly, but the amount of rust on that bracket and under the passenger side steering rack bushing was enough to put this on anyone’s 3rd gen baseline list.
 

Members online

Forum statistics

Threads
278,304
Messages
3,554,041
Members
248,016
Latest member
Advally Service

Trending content

Back
Top