You are using an out of date browser. It may not display this or other websites correctly.
You should upgrade or use an alternative browser.
You should upgrade or use an alternative browser.
Full frame swap - Advice/input needed
- Thread starter chewybtc
- Start date
Well it's been a tough week. I had three death's recently, so 3 viewing/services/etc this week. Been a bit hectic to say the least.
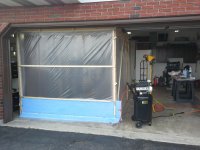
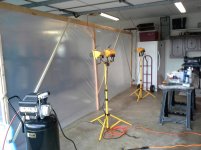
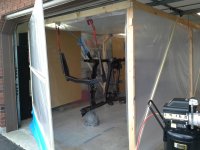
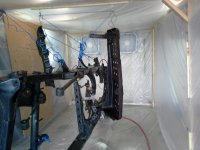
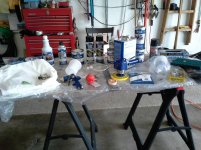
But I did get the paint booth completed. :rockon:
Couple of things I learned with some more research. You only want to put the Rust Convertor product on the rust areas and not all over everything. Although Eastwood techs said it should be fine to just spray it over everything, from my research it is best to keep it on the rust areas only.
Here's where I am at this point:
I bought a much bigger air compressor (actually it's my Dad's birthday/father days gift, I'm just using it ) It pretty much doubles the old one we had both in tank size and SCFM.
I've sprayed degreaser on all the parts and then pressure washed everything with some simple green in the soap tank.
I rinsed everything really well and let everything dry.
I then took a air grinder with a wire brush wheel and went over everything. This was to get the major flakes of rust off and also to scuff the good paint up a bit to give the new paint something to bite to.
I sprayed everything off with the air compressor and then moved everything inside and wiped it down with acetone.
On Monday I brushed (with a foam brush) the Eastwood Rust Convertor . I did 2 coats as the bottle suggested. It turned black like it's supposed to, and after 2 days was pretty hard. The stuff isn't cheap but really seems to work well.
I am hoping to get the Eastwood Rust Inhibitor sprayed tomorrow on the frame, hitch, and all the skid plates. 2 coats is what I am going to be doing. I've never used a HVLP spray gun before, so I am hoping it comes out OK.
I'm also going to be doing the Internal Frame Coating from Eastwood tomorrow as well on the frame and the hitch. My hitch has a hole in the bottom where it rusted thru, so before I get a piece welded in there, I'm spraying the IFC in there as well.
I'll let this cure for 24 hours and then should be top coating on Saturday. I'll most likely scuff it up with a scotch pad a bit and then wipe it down with acetone before spraying the top coat.
I've changed my plan on the top coat a little. I will now be HVLP spraying Eastwood 2K Ceramic Chassis Black instead of the Extreme Chassis Black. The 2K Ceramic is a 2 part mix and according to Eastwood much stronger and chip resistant than even the Extreme (which they said is very good). So for a couple dollars more I feel I got the better paint that should last a long time. (plus a quart covers a lot more than the 1 spray can I had bought originally. Now I should have enough to do everything for sure)
So wish me luck guys!
I'll have some pics/video to post in a couple days when I get some time.
But I did get the paint booth completed. :rockon:
Couple of things I learned with some more research. You only want to put the Rust Convertor product on the rust areas and not all over everything. Although Eastwood techs said it should be fine to just spray it over everything, from my research it is best to keep it on the rust areas only.
Here's where I am at this point:
I bought a much bigger air compressor (actually it's my Dad's birthday/father days gift, I'm just using it
) It pretty much doubles the old one we had both in tank size and SCFM.I've sprayed degreaser on all the parts and then pressure washed everything with some simple green in the soap tank.
I rinsed everything really well and let everything dry.
I then took a air grinder with a wire brush wheel and went over everything. This was to get the major flakes of rust off and also to scuff the good paint up a bit to give the new paint something to bite to.
I sprayed everything off with the air compressor and then moved everything inside and wiped it down with acetone.
On Monday I brushed (with a foam brush) the Eastwood Rust Convertor . I did 2 coats as the bottle suggested. It turned black like it's supposed to, and after 2 days was pretty hard. The stuff isn't cheap but really seems to work well.
I am hoping to get the Eastwood Rust Inhibitor sprayed tomorrow on the frame, hitch, and all the skid plates. 2 coats is what I am going to be doing. I've never used a HVLP spray gun before, so I am hoping it comes out OK.
I'm also going to be doing the Internal Frame Coating from Eastwood tomorrow as well on the frame and the hitch. My hitch has a hole in the bottom where it rusted thru, so before I get a piece welded in there, I'm spraying the IFC in there as well.
I'll let this cure for 24 hours and then should be top coating on Saturday. I'll most likely scuff it up with a scotch pad a bit and then wipe it down with acetone before spraying the top coat.
I've changed my plan on the top coat a little. I will now be HVLP spraying Eastwood 2K Ceramic Chassis Black instead of the Extreme Chassis Black. The 2K Ceramic is a 2 part mix and according to Eastwood much stronger and chip resistant than even the Extreme (which they said is very good). So for a couple dollars more I feel I got the better paint that should last a long time. (plus a quart covers a lot more than the 1 spray can I had bought originally. Now I should have enough to do everything for sure)
So wish me luck guys!
I'll have some pics/video to post in a couple days when I get some time.
Last edited:
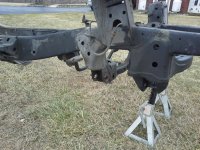
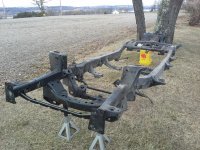
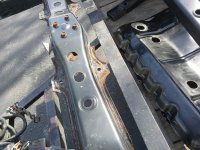
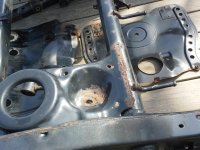
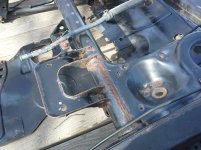
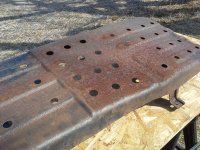
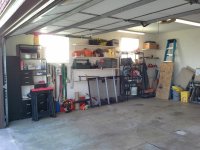
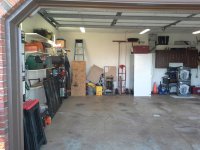
Garage before and after
Attachments
-
 2015-04-11 07.49.15.jpg132.2 KB · Views: 2,177
 -
 2015-04-11 07.49.37.jpg130.8 KB · Views: 2,155
 -
 2015-04-16 09.26.16.jpg132.9 KB · Views: 2,231
 -
 2015-04-16 09.26.28.jpg128 KB · Views: 2,134
 -
 2015-04-16 09.27.01.jpg127.9 KB · Views: 2,236
 -
 2015-04-16 09.27.17.jpg124.6 KB · Views: 2,158
 -
 2015-04-16 09.25.46.jpg137.3 KB · Views: 2,153

Kryptoroxx
New member
That paint booth is bonafide! Much better than what I used when I was painting my frame.....which was nothing. I laid underneath it and brushed it on after scrubbing the hell outta it.
BTW couldn't view the videos. By the look of things though you are going to have a really bulletproof frame!
BTW couldn't view the videos. By the look of things though you are going to have a really bulletproof frame!
BlackRustBucket
New member
That booth is awesome, sounds like your doing all the right stuff from what I've researched. Can't believe there was a frame in that good of condition in PA. I was going to ask him for it but he said somebody (you) had already claimed it but I'm glad you did cause your making way better use of it. Where in PA are you? I'm in northern harford county MD.
That booth is awesome, sounds like your doing all the right stuff from what I've researched. Can't believe there was a frame in that good of condition in PA. I was going to ask him for it but he said somebody (you) had already claimed it but I'm glad you did cause your making way better use of it. Where in PA are you? I'm in northern harford county MD.
Thanks! I'm in Allentown PA
That paint booth is bonafide! Much better than what I used when I was painting my frame.....which was nothing. I laid underneath it and brushed it on after scrubbing the hell outta it.
BTW couldn't view the videos. By the look of things though you are going to have a really bulletproof frame!
Thanks! Not sure why you couldn't view them, they are just links to dropbox and I have them open to everyone.

pattycakes77
New member
Yeah, awesome paint booth. I like how you have the frame on the side so you can get the top and bottom sprayed really well. I had mine in the booth on Jack stands and it was not fun wiggling around on my back to spray the underside of the frame. I don't know if you have any air tools but at work I use a die grinder with a 3M rustbuster to quickly knock off any scale and clean up the metal. The rustbuster is a purple roloc abrasive disc, don't know the part number. I put the Eastwood internal frame coating on as well as the extreme chassis black, then put some 3M rust fighter in certain places. I was under the 4runner all yesterday and after 2 winters in iowa there is some orange creeping in on spots even after all my work and prevention. I'll keep cleaning and touching up every year but rust is inevitable if you daily drive in salt.
Can't wait to see the fished product, you're doing great!
Can't wait to see the fished product, you're doing great!
Frame is finished!!!
Well, it's finally finished. I had a couple areas on the frame that had paint dust on it from the rust encapsulator. I'm assuming it was some over spray, don't know for sure. I wiped the whole frame down with some clean water and then let it dry for a while.
Everything looked good after drying a bit, so I got to work on spraying the Eastwood 2k Ceramic Chassis Black. Mixing was a pain as I bought small cups, another lesson learned.
I adjusted my fan much smaller this time and cut way back on the fluid control as well. This worked much better and didn't waste anywhere near as much paint.
I was able to get 2 good coats on everything. I even had a little left from the quart so I sprayed some of the trouble areas with some extra paint.
I had none of the "dust" this time and everything looked pretty good. Again, for my first time, I'm pretty happy with myself.
The only real issue I had was that with the frame being on it's side, it was very hard to get good coverage on the side of the frame as it was too close to the floor. Nothing I could do about it now, but when I take it out of the booth in 5 days I will have to see how that driver side came out. Might need some touch up.
So the frame, hitch, and all the skids are done to the best of my ability. It was a lot of work, but was fun learning. I spent about $200 in supplies, but now I have a HVLP gun and respirator I can use again (when I do my bumpers and sliders). And I still have lots of the rust convertor left over as well.
The paint booth set me back about $100, but was well worth it. I would do it again in a heart beat!
I think it was worth it, as I had a local paint shop quote me $350 just to do my front bumper with primer and raptor bedliner.
I'm sure the frame would have been much more.
Here's a video for you guys.
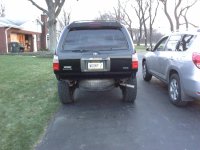
Oh, and I got my rear bumper off as well to sand the chrome off in preparation for painting the epoxy primer and then monstaliner. What a huge pain as 3 of the bolts were rusted pretty good. There really isn't a rear aftermarket bumper I like, so it's worth the work to keep the factory style in the rear.
Let me know what you all think!
Well, it's finally finished. I had a couple areas on the frame that had paint dust on it from the rust encapsulator. I'm assuming it was some over spray, don't know for sure. I wiped the whole frame down with some clean water and then let it dry for a while.
Everything looked good after drying a bit, so I got to work on spraying the Eastwood 2k Ceramic Chassis Black. Mixing was a pain as I bought small cups, another lesson learned.
I adjusted my fan much smaller this time and cut way back on the fluid control as well. This worked much better and didn't waste anywhere near as much paint.
I was able to get 2 good coats on everything. I even had a little left from the quart so I sprayed some of the trouble areas with some extra paint.
I had none of the "dust" this time and everything looked pretty good. Again, for my first time, I'm pretty happy with myself.
The only real issue I had was that with the frame being on it's side, it was very hard to get good coverage on the side of the frame as it was too close to the floor. Nothing I could do about it now, but when I take it out of the booth in 5 days I will have to see how that driver side came out. Might need some touch up.
So the frame, hitch, and all the skids are done to the best of my ability. It was a lot of work, but was fun learning. I spent about $200 in supplies, but now I have a HVLP gun and respirator I can use again (when I do my bumpers and sliders). And I still have lots of the rust convertor left over as well.
The paint booth set me back about $100, but was well worth it. I would do it again in a heart beat!
I think it was worth it, as I had a local paint shop quote me $350 just to do my front bumper with primer and raptor bedliner.
I'm sure the frame would have been much more.
Here's a video for you guys.
Oh, and I got my rear bumper off as well to sand the chrome off in preparation for painting the epoxy primer and then monstaliner. What a huge pain as 3 of the bolts were rusted pretty good. There really isn't a rear aftermarket bumper I like, so it's worth the work to keep the factory style in the rear.
Let me know what you all think!
Attachments
Last edited:

Epoxy Primer IS Done!
Just a quick update on the project. I have a new front bumper and sliders along with my factory chrome rear bumper that I wanted to bedliner. I did plenty of research and decided I would go with monstaliner.
For the rear chrome bumper I sanded all the chrome with my DA air sander and some 80 grit paper. I took all the shine off the chrome, but there was no way I was going to take the time to get down to bare metal, would have taken forever.
I also wire wheeled the inside of the bumper which was pretty rusty. I wiped everything down with acetone to get all the dust off, etc. I then applied 2 coats of the rust convertor to the inside of the bumper and let dry for 2 days. I forgot to take pictures, sorry.
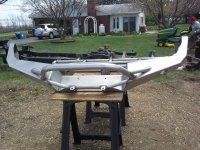
For the new front bumper and sliders I wasn't sure what coating AOR and 4X Inovations puts on the new metal, but nothing seemed to remove it. I tried acetone, grease remover, etc. I finally used some brake cleaner, but there seemed to still be some kind of coating on the metal. You can see the difference in the below pic where I sanded until it was nice and shiny (like aluminum almost) and the darker metal.
I don't know if I needed to go this far with the sanding, but it was a pain in the ass and 2 full days of work. In the end there was still some of the darker colored steel in the hard to reach areas and i just left it. To be honest I was just sick of sanding and wanted to get these things into the paint booth for primer. You'll see the final result of sanding in the 2nd picture.
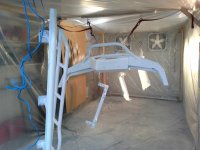
After a good wipe down with acetone I hung everything in the paint booth and got to spraying the Eastwood Epoxy Primer. I was really tired from the prior days of sanding and knew I would be top coating with Monstaliner, so I really didn't care too much if i had some drips. The primer was a little harder to spray as it was very thin paint, almost like water. It took me a while to set the gun, but in the end I think it came out pretty good.
Yes, there are some drips and runs, but I know everything has 2 good coats of epoxy primer now and the monstaliner should hide those imperfections. I used white primer because I thought it would help me see where the black Monstaliner had been applied already or not. I had a pretty rough time with the ceramic chassis black going over top of the black rust encapsulator on the frame. It was hard to see where you painted already and where you didn't.
Video of the primer
I'm leaving the primer dry overnight for about 12 hours and then will be rolling the Monstaliner 1st coat in the morning. (tech at monstaliner said that would be enough time for primer and that I wouldn't have to sand the primer then) After a couple hours I'll roll the 2nd coat of monstaliner and not do the back pull with the roller so that I obtain the smoother finish I am looking for. (that's what the tech said at Monstaliner)
I'll try to get some pictures/video of the frame in the sunlight today, but I think it came out really good. Hoping the other pieces come out as good today!
Appreciate the comments guys! (especially about the metal coating and sanding, etc.)
Just a quick update on the project. I have a new front bumper and sliders along with my factory chrome rear bumper that I wanted to bedliner. I did plenty of research and decided I would go with monstaliner.
For the rear chrome bumper I sanded all the chrome with my DA air sander and some 80 grit paper. I took all the shine off the chrome, but there was no way I was going to take the time to get down to bare metal, would have taken forever.
I also wire wheeled the inside of the bumper which was pretty rusty. I wiped everything down with acetone to get all the dust off, etc. I then applied 2 coats of the rust convertor to the inside of the bumper and let dry for 2 days. I forgot to take pictures, sorry.
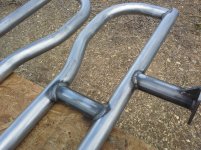
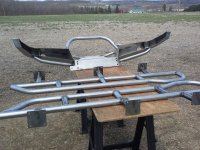
For the new front bumper and sliders I wasn't sure what coating AOR and 4X Inovations puts on the new metal, but nothing seemed to remove it. I tried acetone, grease remover, etc. I finally used some brake cleaner, but there seemed to still be some kind of coating on the metal. You can see the difference in the below pic where I sanded until it was nice and shiny (like aluminum almost) and the darker metal.
I don't know if I needed to go this far with the sanding, but it was a pain in the ass and 2 full days of work. In the end there was still some of the darker colored steel in the hard to reach areas and i just left it. To be honest I was just sick of sanding and wanted to get these things into the paint booth for primer. You'll see the final result of sanding in the 2nd picture.
After a good wipe down with acetone I hung everything in the paint booth and got to spraying the Eastwood Epoxy Primer. I was really tired from the prior days of sanding and knew I would be top coating with Monstaliner, so I really didn't care too much if i had some drips. The primer was a little harder to spray as it was very thin paint, almost like water. It took me a while to set the gun, but in the end I think it came out pretty good.
Yes, there are some drips and runs, but I know everything has 2 good coats of epoxy primer now and the monstaliner should hide those imperfections. I used white primer because I thought it would help me see where the black Monstaliner had been applied already or not. I had a pretty rough time with the ceramic chassis black going over top of the black rust encapsulator on the frame. It was hard to see where you painted already and where you didn't.
Video of the primer
I'm leaving the primer dry overnight for about 12 hours and then will be rolling the Monstaliner 1st coat in the morning. (tech at monstaliner said that would be enough time for primer and that I wouldn't have to sand the primer then) After a couple hours I'll roll the 2nd coat of monstaliner and not do the back pull with the roller so that I obtain the smoother finish I am looking for. (that's what the tech said at Monstaliner)
I'll try to get some pictures/video of the frame in the sunlight today, but I think it came out really good. Hoping the other pieces come out as good today!
Appreciate the comments guys! (especially about the metal coating and sanding, etc.)
Attachments


Everything is done and bolted on!! FINALLY!!
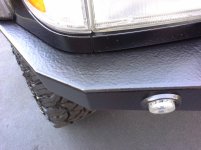
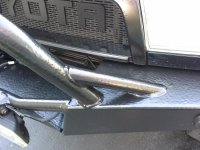
So I have been trying to finish everything up over the last week or so and finally got everything done yesterday. I'm a perfectionist, so to be honest I'm not completely happy with the monstaliner. I guess it's not bad for doing it myself and having no experience painting, but it's not perfect. I guess to save money that's what I have to deal with.
The problem I had was that rolling this stuff was pretty easy on wide flat spots, but when you had to do tubes or hard to reach areas, it just was very difficult to get a uniform coating.
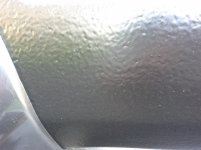
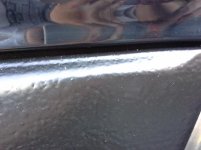
Then to add insult to injury, the monstaliner started to develop bubbles. I don't know why. Was it the primer still drying and releasing air, or was it the monstaliner itself. I mixed it perfectly, so I don't know what happened. I'm going to call monstaliner this week to see what they say.
But basically I was getting small pin hole type air bubbles that would pop and then you could see the white primer underneath. The second coat of monstaliner I was hoping would fill in all those spots, and it did somewhat, but I still had those pin holes in the final surface. So it is what it is at this point.
To be honest, I'm just exhausted from doing all the research and the actual work and just want to be happy with the end result.
I was hoping to be overjoyed, but I will have to settle for just feeling OK with my job. (I guess having no experience doing this stuff, didn't help)
So all of the pre planning and painting is done, and we are hoping to get a couple decent days in a row at the end of the month to do the frame swap.
I've got some more research to do before then on some parts that we want to replace, but I'm taking a break from the beast for a couple days before I do that.
But to sum it all up here is what I accomplished so far:
The frame is rust proofed (inside and out) to the best of my ability and completely ready to be swapped with my old rusty frame
The new AOR front bumper is rust proofed and monstaliner'd and installed on the old frame. (it's only a couple of bolts and I needed some motivation!!)
The 4xInnovations sliders are rust proofed and monstaliner'd and ready to be welded to the new frame when the swap is complete.
The stock rear chrome bumper is rust proofed and monstaliner'd and installed back on the truck. (there are a couple bolts that snapped that I will have to deal with later, but it's only a couple and everything feels pretty solid)
I removed the hitch and rust proofed and painted it. (also welded a plate on a small section that was rusting thru the bottom) It's back on now so I can haul the new frame to Kenworth.
I removed the rear spoiler and repainted it gloss black.
I removed the license plate molding and painted it gloss black. I still have to put the 4runner badge back on. (what a pain in the ass that molding was to get off and reinstall)
The satoshi grill is complete and installed (I love it)
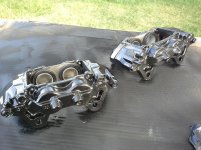
I painted my new Tundra calipers I got from Advanced Auto with black caliper paint and they are ready to do the upgrade when we do the frame swap
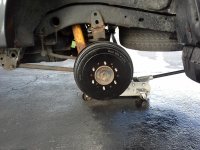
I removed the rear drums (which were very rusty) and brushed rust convertor on them and then after they were dry for 2 days I painted them with the black caliper paint
I plastidipped my new FJ wheels and then installed LT285/70/17 Fierce Attitude tires
Things that have to be done yet:
Snorkel install
Have to pick up my Whitson Metalworks full roof rack from Madsbell (who I also got my front AOR bumper from Thanks buddy!)
Full clay bar wipe down and detail (going to try this stuff called Forever Black dye for the moldings and things that are oxidized)
Spray undercoating after the frame and sliders are all done
Full engine detail (and engine bay) when we have the body off during the frame swap
And a couple of maintenance and parts fixes during frame swap
I'm sure I missed some things while taking pictures, but here is what I got for you guys for now. I'm going to wash it today and take some full pics and some close ups of the monstaliner, etc. I'll post those later
Let me know your thoughts/comments!
So I have been trying to finish everything up over the last week or so and finally got everything done yesterday. I'm a perfectionist, so to be honest I'm not completely happy with the monstaliner. I guess it's not bad for doing it myself and having no experience painting, but it's not perfect. I guess to save money that's what I have to deal with.
The problem I had was that rolling this stuff was pretty easy on wide flat spots, but when you had to do tubes or hard to reach areas, it just was very difficult to get a uniform coating.
Then to add insult to injury, the monstaliner started to develop bubbles. I don't know why. Was it the primer still drying and releasing air, or was it the monstaliner itself. I mixed it perfectly, so I don't know what happened. I'm going to call monstaliner this week to see what they say.
But basically I was getting small pin hole type air bubbles that would pop and then you could see the white primer underneath. The second coat of monstaliner I was hoping would fill in all those spots, and it did somewhat, but I still had those pin holes in the final surface. So it is what it is at this point.
To be honest, I'm just exhausted from doing all the research and the actual work and just want to be happy with the end result.
I was hoping to be overjoyed, but I will have to settle for just feeling OK with my job. (I guess having no experience doing this stuff, didn't help)
So all of the pre planning and painting is done, and we are hoping to get a couple decent days in a row at the end of the month to do the frame swap.
I've got some more research to do before then on some parts that we want to replace, but I'm taking a break from the beast for a couple days before I do that.
But to sum it all up here is what I accomplished so far:
The frame is rust proofed (inside and out) to the best of my ability and completely ready to be swapped with my old rusty frame
The new AOR front bumper is rust proofed and monstaliner'd and installed on the old frame. (it's only a couple of bolts and I needed some motivation!!)
The 4xInnovations sliders are rust proofed and monstaliner'd and ready to be welded to the new frame when the swap is complete.
The stock rear chrome bumper is rust proofed and monstaliner'd and installed back on the truck. (there are a couple bolts that snapped that I will have to deal with later, but it's only a couple and everything feels pretty solid)
I removed the hitch and rust proofed and painted it. (also welded a plate on a small section that was rusting thru the bottom) It's back on now so I can haul the new frame to Kenworth.
I removed the rear spoiler and repainted it gloss black.
I removed the license plate molding and painted it gloss black. I still have to put the 4runner badge back on. (what a pain in the ass that molding was to get off and reinstall)
The satoshi grill is complete and installed (I love it)
I painted my new Tundra calipers I got from Advanced Auto with black caliper paint and they are ready to do the upgrade when we do the frame swap
I removed the rear drums (which were very rusty) and brushed rust convertor on them and then after they were dry for 2 days I painted them with the black caliper paint
I plastidipped my new FJ wheels and then installed LT285/70/17 Fierce Attitude tires
Things that have to be done yet:
Snorkel install
Have to pick up my Whitson Metalworks full roof rack from Madsbell (who I also got my front AOR bumper from Thanks buddy!)
Full clay bar wipe down and detail (going to try this stuff called Forever Black dye for the moldings and things that are oxidized)
Spray undercoating after the frame and sliders are all done
Full engine detail (and engine bay) when we have the body off during the frame swap
And a couple of maintenance and parts fixes during frame swap
I'm sure I missed some things while taking pictures, but here is what I got for you guys for now. I'm going to wash it today and take some full pics and some close ups of the monstaliner, etc. I'll post those later
Let me know your thoughts/comments!
Attachments
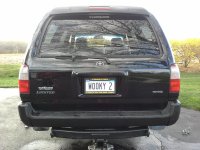
Here's a couple with everything back on...I'll get some close ups of the monstaliner later
Attachments
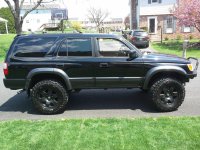
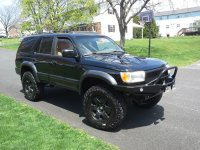
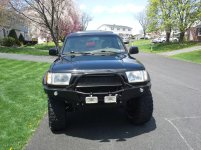
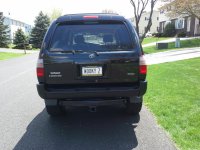
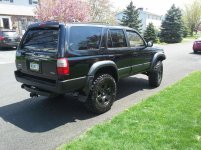
Some close up views of the Monstaliner. Maybe you can see the small little pin holes I was talking about.