Group buy : DC power Engineering 270amp alternator

Got it...thanks for the GB!!!

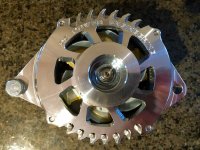
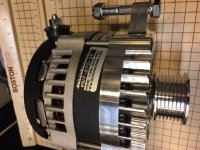
DC Power.jpg
 

Attachments

  • DC Power.jpg
    DC Power.jpg
    134.3 KB · Views: 791
I got mine in yesterday morning actually, given it was shipped to residential address it didn't even take 24 hours to deliver it.

I may be able to install it Saturday morning since the wife will not be home for good part of the day.

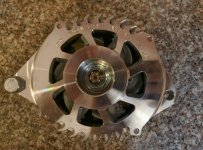
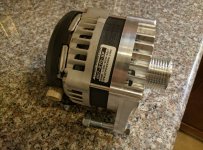
IMG_20160831_105933.jpg
IMG_20160831_105913.jpg

Sent from my Nexus 6 using Tapatalk
 

Attachments

  • IMG_20160831_105933.jpg
    IMG_20160831_105933.jpg
    100.5 KB · Views: 524
  • IMG_20160831_105913.jpg
    IMG_20160831_105913.jpg
    125.5 KB · Views: 868
Man it's good to have so many more members of the 270xp club. Had mine installed for about 2 months and love it. No issues and an abundance of power for my 1000 watt stereo and aux lights
 
Man it's good to have so many more members of the 270xp club. Had mine installed for about 2 months and love it. No issues and an abundance of power for my 1000 watt stereo and aux lights
Can you provide any tidbits on the install if you did it yourself?
 
You won't use all three tabs. Just the two on the 270xp. Other than that it is pretty straightforward. You are going to want to do the big three wire upgrade at the same time.
 
Last edited:
It has Arrived!!

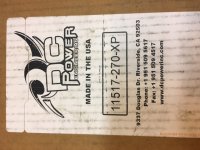
Anyone else notice the part number seems to be different?

11517-270-XP vs. the 11139-270-XP that we ordered?

I see at least one other picture with the 11517 part number, whats up with that? Did we get shipped the wrong item?
 

Attachments

  • IMG_3967.JPG
    IMG_3967.JPG
    118.6 KB · Views: 461
  • IMG_3969.JPG
    IMG_3969.JPG
    126 KB · Views: 514
Anyone else notice the part number seems to be different?

11517-270-XP vs. the 11139-270-XP that we ordered?

I see at least one other picture with the 11517 part number, whats up with that? Did we get shipped the wrong item?

Nah, that's okay... one's a PT# and one's their internal Stock#; nothing to do with us! 'ENJOY'!

rig
 
Today I got to install mine. Did the big 3 upgrade at the same time.

Thanks to @Okki, [MENTION=144561]DCPower_Anthony[/MENTION] and [MENTION=83083]rigtec[/MENTION] for the effort, good quality product and sharing experience.

IMG_20160903_191657.jpg

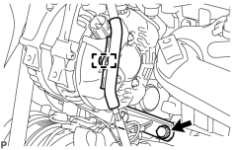
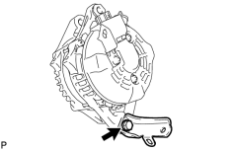
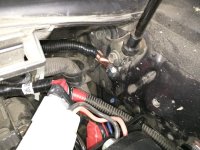
Unfortunately I'm not good in writing write ups, however there is one point I want to share: To remove the third bolt mounted on a bracket at the back side of the stock alternator, remove the driver side front wheel and then remove the driver side exhaust shield (accessed from driver side wheel well.) Also the best access to the rear bracket and its bolt is from driver side front wheel well:

A222882.png

A222885.png

Everything else should be pretty easy to handle.

I recommend to read the FSM, however there is no need to remove the V-Bank cover as FSM advises.


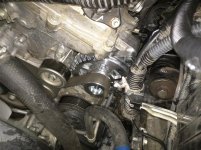
And here is where I connected my engine second ground since under the hood is already busy with dual battery, secondary fuse box, compressor, etc:

IMG_20160903_191713.jpg
 

Attachments

  • IMG_20160903_191657.jpg
    IMG_20160903_191657.jpg
    136.9 KB · Views: 1,692
  • IMG_20160903_191713.jpg
    IMG_20160903_191713.jpg
    136 KB · Views: 1,021
  • A222882.png
    A222882.png
    41.9 KB · Views: 937
  • A222885.png
    A222885.png
    19.9 KB · Views: 932
Last edited:
Today I got to install mine. Did the big 3 upgrade at the same time.

Thanks to @Okki, [MENTION=144561]DCPower_Anthony[/MENTION] and [MENTION=83083]rigtec[/MENTION] for the effort, good quality product and sharing experience.

View attachment 218001

Unfortunately I'm not good in writing write ups, however there is one point I want to share: To remove the third bolt mounted on a bracket at the back side of the stock alternator, remove the driver side front wheel and then remove the driver side exhaust shield (accessed from driver side wheel well.) Also the best access to the rear bracket and its bolt is from driver side front wheel well:

View attachment 218003

View attachment 218004

Everything else should be pretty easy to handle.

I recommend to read the FSM, however there is no need to remove the V-Bank cover as FSM advises.


And here is where I connected my engine second ground since under the hood is already busy with dual battery, secondary fuse box, compressor, etc:

View attachment 218002

Did you have to pull off the idler pulley to get it into its spot, or did you have enough room to get it in on the right after the wire loom was loose?
About how long did it take for just the alternator install? Just curious as to the time to set aside. Whatever time you had, I'll just double it for my purposes!

Thank you!
 
Did you have to pull off the idler pulley to get it into its spot, or did you have enough room to get it in on the right after the wire loom was loose?
About how long did it take for just the alternator install? Just curious as to the time to set aside. Whatever time you had, I'll just double it for my purposes!

Thank you!
I did. You have to remove the idler pulley that is right by alternator and I assume you know how to remove the belt. You'll need a 14 mm socket and a break bar to rotate the tensioner counterclockwise and meanwhile you'll need a rod maximum 6 millimeters thick to hold the belt tensioner in place. There is whole at the bottom of the pulley ( I used a small screw driver instead of a rod).

It took around 4 hours because I didn't read the FSM thoroughly and didn't know about the third bolt of the stock alternator. I skipped the last 3 items in FSM while reading. Otherwise it should take 2 to 3 hours including the big 3 upgrade. It's pretty easy to do.

For big 3 I used the same cables and lugs [MENTION=55815]Okki[/MENTION] used. He shared Amazon links few posts earlier. They are soft and are easy to rout.

Good luck.

Sent from my Nexus 6 using Tapatalk
 
29402201761_3218abbb8b.jpg

Okki's cat eats high output alternators for breakfast. :naughty: :hurt:

(or is this part of a new electric projectile weapon project being implemented by kitty? Any time; anywhere... code-name "Thor's Hammer"????)
 
I'm back!

Hey Everyone,

Just got back from vacation and I am playing catch up at the moment! I talked to my production manager back there about the current status of the remaining alternators that haven't been shipped out. Looks like they're machining pulleys for them and then they can be sent out! They were a little behind when I left but they're working to catch up at the moment. I apologize to those of you who are still waiting on delivery confirmations, thank you everyone for your patience and as always if there are any questions please let me know!
 
Hey Everyone,

Just got back from vacation and I am playing catch up at the moment! I talked to my production manager back there about the current status of the remaining alternators that haven't been shipped out. Looks like they're machining pulleys for them and then they can be sent out! They were a little behind when I left but they're working to catch up at the moment. I apologize to those of you who are still waiting on delivery confirmations, thank you everyone for your patience and as always if there are any questions please let me know!
Received mine last night [MENTION=144561]DCPower_Anthony[/MENTION]. Thanks again!
 
Hey Everyone,

Just got back from vacation and I am playing catch up at the moment! I talked to my production manager back there about the current status of the remaining alternators that haven't been shipped out. Looks like they're machining pulleys for them and then they can be sent out! They were a little behind when I left but they're working to catch up at the moment. I apologize to those of you who are still waiting on delivery confirmations, thank you everyone for your patience and as always if there are any questions please let me know!

:hungry: :hungry: :hungry: :hungry: :hungry:


:eyebrows:
 

Members online

Forum statistics

Threads
278,316
Messages
3,554,120
Members
248,016
Latest member
Advally Service

Trending content

Back
Top