Jcmeadows82
Member
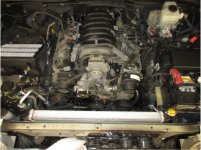
I just completed my first timing belt replacement job and thought I would share my experience here. This guide is (of course) follow at your own risk. I wouldn't recommend doing this as your first foray into working on your own vehicle, but if you have done work like this on cars before it is a straight forward timing belt job.
Here is a link to the you tube video I followed along with. It isnt the VVT-I engine, but I found the differences between the engine he was working on and mine to be miniscule. He gives a lot of little tips and tricks as well as some very important information about this engine in general that I found invaluable. If you are going to use my guide, I would HIGHLY recommend following along with him as well.
Part 1:
https://www.youtube.com/watch?v=I8DP4DrtQrE
Part 2:
https://www.youtube.com/watch?v=faaiapF0snQ&t=2488s
Next is a list of parts that I purchased to complete the job. My general rule of thumb is, if I can take it off, I replace it. You may not need to replace everything I replaced, or you may want to replace more things (I found myself wishing I had purchased a new fan bracket, power steering pump, and alternator for various reasons) I am just listing what I replaced.
Timing belt/Water pump kit:
https://www.amazon.com/gp/product/B0033DOKLQ/ref=oh_aui_detailpage_o02_s00?ie=UTF8&psc=1
I didn’t use the bolts, or the paper gasket for the thermostat housing frim this kit.
Drive Belt Kit:
https://www.amazon.com/gp/product/B00IU70SH0/ref=oh_aui_detailpage_o07_s00?ie=UTF8&psc=1
Crankshaft front seal kit:
https://www.amazon.com/gp/product/B000Q0S9G6/ref=oh_aui_detailpage_o08_s00?ie=UTF8&psc=1
Thermostat Gasket:
https://www.amazon.com/gp/product/B00J09FONU/ref=oh_aui_detailpage_o02_s05?ie=UTF8&psc=1
Strangely enough Amazon doesn’t think this fits my car…. But it does
Thermostat:
https://www.oreillyauto.com/detail/...436291/2007/toyota/4runner?q=Thermostat&pos=0
I will say, I was very impressed with the factory thermostat and in retrospect I wish I had purchased one from Toyota. As this is an easy to replace part in the future if I ever need it, I wasn’t too worried.
Coolant:
https://www.amazon.com/gp/product/B004QQDA2O/ref=oh_aui_detailpage_o03_s00?ie=UTF8&psc=1
bought 4 have one and some left.
Toyotas special FIPG gasket maker that you will need between the water pump and lower thermostat housing:
https://www.amazon.ca/Genuine-Toyota-00295-00103-Formed-Place/dp/B000EDDTV0
I didn’t buy this on Amazon. I got it from the dealer for about 19 bucks.
Oil and filter of your choice.
Next, I will list non-standard tools that bought and was very glad I had:
- A second 12mm wrench. The longer the better
- 10 mm hex bit socket
- 2-foot-long ½ drive breaker bar
- 3/8” Torque wrench
- ½” torque wrench. Make sure it is rated at least 200 LB
- A huge drain funnel (like this one https://www.amazon.com/gp/product/B000P0XMBO/ref=oh_aui_detailpage_o02_s04?ie=UTF8&psc=1) and a 5 gallon bucket
- Damper pulley holding tool
https://www.amazon.com/gp/product/B0051XDBBG/ref=oh_aui_detailpage_o02_s01?ie=UTF8&psc=1
- 3/8” drive swivel
I parked my 4runner on ramps which allowed me to get my coolant drain pan and bucket under it, used a 4’ ladder to do work under the hood (3” lift and ramps = no way to get under the hood without), and had a huge shop light to work with.
Here is a link to the you tube video I followed along with. It isnt the VVT-I engine, but I found the differences between the engine he was working on and mine to be miniscule. He gives a lot of little tips and tricks as well as some very important information about this engine in general that I found invaluable. If you are going to use my guide, I would HIGHLY recommend following along with him as well.
Part 1:
https://www.youtube.com/watch?v=I8DP4DrtQrE
Part 2:
https://www.youtube.com/watch?v=faaiapF0snQ&t=2488s
Next is a list of parts that I purchased to complete the job. My general rule of thumb is, if I can take it off, I replace it. You may not need to replace everything I replaced, or you may want to replace more things (I found myself wishing I had purchased a new fan bracket, power steering pump, and alternator for various reasons) I am just listing what I replaced.
Timing belt/Water pump kit:
https://www.amazon.com/gp/product/B0033DOKLQ/ref=oh_aui_detailpage_o02_s00?ie=UTF8&psc=1
I didn’t use the bolts, or the paper gasket for the thermostat housing frim this kit.
Drive Belt Kit:
https://www.amazon.com/gp/product/B00IU70SH0/ref=oh_aui_detailpage_o07_s00?ie=UTF8&psc=1
Crankshaft front seal kit:
https://www.amazon.com/gp/product/B000Q0S9G6/ref=oh_aui_detailpage_o08_s00?ie=UTF8&psc=1
Thermostat Gasket:
https://www.amazon.com/gp/product/B00J09FONU/ref=oh_aui_detailpage_o02_s05?ie=UTF8&psc=1
Strangely enough Amazon doesn’t think this fits my car…. But it does
Thermostat:
https://www.oreillyauto.com/detail/...436291/2007/toyota/4runner?q=Thermostat&pos=0
I will say, I was very impressed with the factory thermostat and in retrospect I wish I had purchased one from Toyota. As this is an easy to replace part in the future if I ever need it, I wasn’t too worried.
Coolant:
https://www.amazon.com/gp/product/B004QQDA2O/ref=oh_aui_detailpage_o03_s00?ie=UTF8&psc=1
bought 4 have one and some left.
Toyotas special FIPG gasket maker that you will need between the water pump and lower thermostat housing:
https://www.amazon.ca/Genuine-Toyota-00295-00103-Formed-Place/dp/B000EDDTV0
I didn’t buy this on Amazon. I got it from the dealer for about 19 bucks.
Oil and filter of your choice.
Next, I will list non-standard tools that bought and was very glad I had:
- A second 12mm wrench. The longer the better
- 10 mm hex bit socket
- 2-foot-long ½ drive breaker bar
- 3/8” Torque wrench
- ½” torque wrench. Make sure it is rated at least 200 LB
- A huge drain funnel (like this one https://www.amazon.com/gp/product/B000P0XMBO/ref=oh_aui_detailpage_o02_s04?ie=UTF8&psc=1) and a 5 gallon bucket
- Damper pulley holding tool
https://www.amazon.com/gp/product/B0051XDBBG/ref=oh_aui_detailpage_o02_s01?ie=UTF8&psc=1
- 3/8” drive swivel
I parked my 4runner on ramps which allowed me to get my coolant drain pan and bucket under it, used a 4’ ladder to do work under the hood (3” lift and ramps = no way to get under the hood without), and had a huge shop light to work with.
Attachments
Last edited: