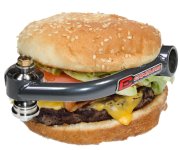
Hamburg UCA Rant

Alright after two and a half hours of dicking around with just the UCAs I'm about to call it a night with my truck sitting in pieces in my driveway.

I am trying to install the Camburg Moog UCA and I have a few issues with it
1. Why would you sell a UCA assembly with a Moog ball installed but not install, or tap out the holes for, the zerk fittings?
2. The reason I've gotten to the point of calling the junk yard: How in the holy Hell am I supposed to fit the two inner spacers/washers? I'm all for tight clearances and good engineering but the damned things just don't F!@#ing fit. Anybody have any ideas how I can get the damned things lined up and push the bolt through with out causing the entire assembly to fall out of alignment?

Just a word to the wise, don't do what I did. Don't get excited about installing a lift the two days before a trip. At this rate I'll be lucky just to get my truck put back together by the end of the weekend.
 
Last edited:
Register to hide this ad
Alright after two and a half hours of dicking around with just the UCAs I'm about to call it a night with my truck sitting in pieces in my driveway.

I am trying to install the Camburg Moog UCA and I have a few issues with it
1. Why would you sell a UCA assembly with a Moog ball installed but not install, or tap out the holes for, the zerk fittings?
2. The reason I've gotten to the point of calling the junk yard: How in the holy Hell am I supposed to fit the two inner spacers/washers? I'm all for tight clearances and good engineering but the damned things just don't F!@#ing fit. Anybody have any ideas how I can get the damned things lined up and push the bolt through with out causing the entire assembly to fall out of alignment?

Just a word to the wise, don't do what I did. Don't get excited about installing a lift the two days before a trip. At this rate I'll be lucky just to get my truck put back together by the end of the weekend.

1. All the UCAs are like that... Good news is that the zerk fitting are pretty universal, you can tear one up and find replacements at any auto parts store. Just look in the section where they have grease guns. A tap is not necessary, but it sure would be nice to have one in that size. You can make a tap out of an extra... by shaving two opposing sides of the threads down. Also, those fitting don't need to be down in there very far at all. Just a few turns will do the job.

2. They fit just fine... It has to be tight. It really makes it easier to have a helper pushing the bolt for you. Also, I usually get the most forward side on first. Then slip in the inner washer on the aft one before pushing the bolt through. Grease helps...

The first time doing something on a given vehicle is always the most challenging. I can swap UCAs in about 1 hr now.

Hint: make sure you take the entire speed sensor wire off during the install.


Yep, being in a rush is the worst. I did that about a year ago and swapped UCAs 2 days before a trip. Speed sensor wire went bad and I was stressed out... Lesson learned, but I still always end up working on my truck just before something... it is always a bad idea.
 
Last edited:
Helps to use a screw driver or punch to hold the arm to the mount while you align the long bolt and washers. You should remove the battery and undo a bracket on the passenger side for better access through the engine compartment.
 
Helps to use a screw driver or punch to hold the arm to the mount while you align the long bolt and washers. You should remove the battery and undo a bracket on the passenger side for better access through the engine compartment.
Yea, I've used the screw driver from the other end technique also.

I've swapped UCAs about 4 times now on different 5th gens. I've also done it solo, but having a helper make it so much easier. They are only needed to push and help align the long bolt from within the engine bay.

It is possible to not remove anything from the engine bay. The last one I did was on a truck with Dual batteries... and all kinds of crap in the engine bay. I was shocked that we got the bolts out without removing all that crap. But it does make it much easier...
 
Here's what I did..

Get the bolt started with the front two washers first. There's enough clearance to get them in and set. Then knock the bolt through the back part without the washer. At this point, take a 3/8" extension through the back, and tap the bolt back out past where the first washer on the back end needs to go (just so there's play to move it up and down.

Then get yourself a crowbar, slip it in between the UCA and something solid, and pull on it until you can force the washer in. Once the washer is in, tap the bolt and move the washer until the bolt goes through.

It's a real pain in the ass, but it's doable. There should be enough play in the bushings in the front to clear the rear washer. Two sets of hands is helpful, but can be done solo.

Also granted this was on my 4th Gen, but it sounds like it's pretty similar for the 5th.
 
when I did mine this past weekend (solo btw) I just removed a few bolts on the pass side to create a little additional wiggle room/flexibility for the lines and a bracket on the drivers side by the battery (left the battery in place).

Used a screwdriver to hold the "back side" in place and inserted the bolt through that way. The washers were tight but with a little grease, a screwdriver to help pry things and a hammer to tap it into place it wasn't too bad.

Took me about 2 hours for the first one and 20 minutes for the second.
 
Yeah, tried the screw driver, tried to grease them and pound them in. The gap, at most, is 1/32, the spacer is about 1/8th. I've got the forward side done on both diver and passenger, I spent about an hour and a half trying to get the spacers in on each side, they just aren't going in.

As far as space goes I'm actually pretty good. There was an AC line on the passenger side that thankfully just popped out of a rubber bracket; the driver side it wide open (as far as vehicles go).
Honestly the only thing that is making things difficult are the brackets for the brake lines, they are just close enough to the UCAs that it is difficult to get a pin in there to line things up.

The biggest issue I see is that the bushings are tapered just enough that by the time I get them up on the truck after pressing them in they have popped out just enough to not fit up. I'm sure that after I get everything torqued together and they have had some time to seat properly they will be much easier to put together.

As far as "they are all like that" I'm sure they are, but the factory ones aren't. Seems to be the engineers over at Toyota made it just a bit better.

I'm done for the night, I'll pick it up in the morning. Hopefully taking the night off will make things easier.
 
Don't be afraid to pry on them. You aren't going to hurt them. Use a stiff pry bar. It takes some force to get them over enough but you just need an edge of the washer in there and then you can tap it the rest of the way.
 
It is possible to not remove anything from the engine bay.
True. I removed my driver side UCA yesterday without pulling the battery to replace the uniball that was starting to get noisy. If I still had the OE battery, I would have pulled it to make thing easier, but the 31M is damn heavy.
 
Honestly the only thing that is making things difficult are the brackets for the brake lines, they are just close enough to the UCAs that it is difficult to get a pin in there to line things up.
Remove the 12mm bolt securing them to the frame rail and slightly bend them out of the way. Can't really get a torque wrench in there otherwise, without using a crow's foot. Not a bad idea to add a lock nut behind the main nut. I had that nut loosen up enough to destroy my UCA bushings, others have had it loosen up enough to fall off and the bolt to work its way out of 1 side of the UCA.
 
Here's what I did..

Get the bolt started with the front two washers first. There's enough clearance to get them in and set. Then knock the bolt through the back part without the washer. At this point, take a 3/8" extension through the back, and tap the bolt back out past where the first washer on the back end needs to go (just so there's play to move it up and down.

Then get yourself a crowbar, slip it in between the UCA and something solid, and pull on it until you can force the washer in. Once the washer is in, tap the bolt and move the washer until the bolt goes through.

It's a real pain in the ass, but it's doable. There should be enough play in the bushings in the front to clear the rear washer. Two sets of hands is helpful, but can be done solo.

Also granted this was on my 4th Gen, but it sounds like it's pretty similar for the 5th.

This exactly how I installed mine on both 4runners. IIRC, they were both pretty easy. Trying to do this right before a trip is the worst but doable.
 
I am very unhandy and it all sounds like the issues I hit, I believe we used the Toyota tire iron on the backside to help keep it aligned, a screwdriver would work as well. Also there is no way I could have done it by myself, that second set of hands made such quick work of it. One side was super tight but I think a couple hits with the rubber mallet got it in enough to then wiggle into place the washer, again that second set of hands was critical.

If I can do it you can to, just grab a friend, plus a good nights sleep will cool things off and steady the hands.
 
Just a word to the wise, don't do what I did. Don't get excited about installing a lift the two days before a trip. At this rate I'll be lucky just to get my truck put back together by the end of the weekend.

Hope you get her all put back together in time for tomorrow's trip! I myself and tearing off my front end tonight to install a hidden mount / winch so hopefully nothing unexpected comes up and puts me in the same crunch as you.
 
Remove the 12mm bolt securing them to the frame rail and slightly bend them out of the way. Can't really get a torque wrench in there otherwise, without using a crow's foot. Not a bad idea to add a lock nut behind the main nut. I had that nut loosen up enough to destroy my UCA bushings, others have had it loosen up enough to fall off and the bolt to work its way out of 1 side of the UCA.

I have seen people mention this stuff a few times. Kinda makes you wonder why they don't come with a castle nut, or at the very least a cotter pin near the end of the bolt to keep the nut from completely backing out.

Good stuff here, I am getting ready to change out my first 5th gen UCA's too, thanks for the tips :)
 
Last edited:
64643-004-60A2BE85.gif
 

Members online

Forum statistics

Threads
278,306
Messages
3,554,045
Members
248,016
Latest member
Advally Service

Trending content

Back
Top