Heated steering wheel mod - success!

emmantik

New member
EDIT: It has come up that the OEM NON-HEATED clockspring is not sufficient enough to handle a heating pad. I plan to tweak this mod and make changes to heir on the side of safety. Please see post #54 for link to the other forum which goes into more detail.

----------------------------------------------------------------------------------------------------

So I plan to add heat to my 2015 SR5P steering wheel. After reading this thread I am convinced that it can be done to our 4Runners.

DIY: Heated Steering Wheel | Toyota Nation Forum

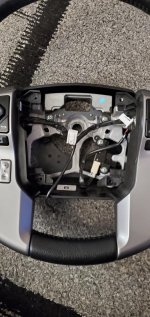
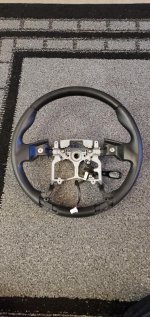
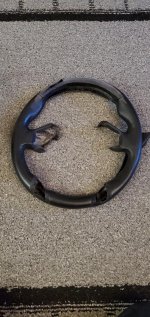
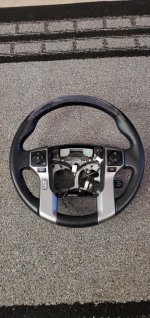
I recently bought a used cheap steering wheel which matched what I currently have from Facebook marketplace. Bought it to examine, take apart, etc.

So this is the first thing I need help with;

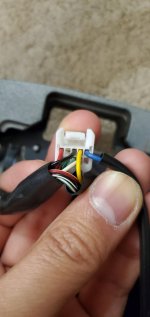
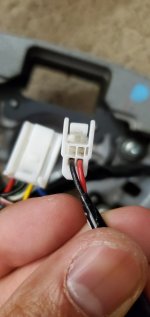
The 2 connectors inside the steering wheel have empty slots. I plan to use them to run the wire(s) from/to the heat pads/switch. My question is, where do these connectors end up (through the clockspring) and on the other side of the steering wheel? And specifically, which wire(s) on the backside relate to the blank slots on the connectors? I am not an automotive electrical expert nor good at reading wiring diagrams but I am willing to tackle this mod if I can get some expert help. Any advice or leads on where to start looking would be greatly appreciated! Here are the 2 connectors in question which shows the empty slots I plan to use;
 

Attachments
  • steering1.jpg
    steering1.jpg
    154.7 KB · Views: 4,003
  • steering2.jpg
    steering2.jpg
    151.7 KB · Views: 3,945
  • steering3.jpg
    steering3.jpg
    121.2 KB · Views: 3,974
  • steering4.jpg
    steering4.jpg
    114.5 KB · Views: 3,931
Last edited:
Register to hide this ad
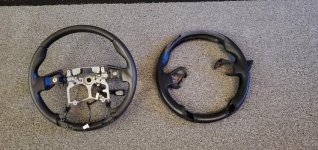
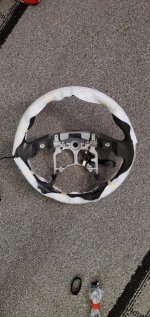
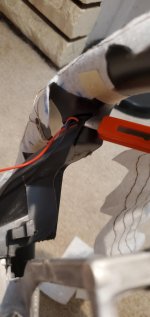
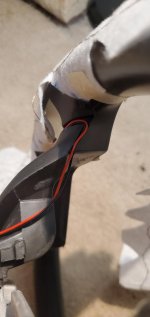
I removed the leather upholstery in preparation for the heating pads. Here's what your steering wheel looks like without it's skin.
 

Attachments

  • steering1.jpg
    steering1.jpg
    152.2 KB · Views: 4,134
  • steering2.jpg
    steering2.jpg
    152 KB · Views: 4,144
  • steering3.jpg
    steering3.jpg
    151.5 KB · Views: 4,082
So the clockspring has 2 plugs/harnesses on the bottom of it where the wires come out of, the yellow one is ABS, and the other one is for the steering wheel controls, it's directly under the clockspring on the bottom. Curious to see how you accomplish this, very cool mod if you can pull it off :dance:

It's the black harness shown here

pxl_20230917_003348696_dd4568928839e3bf9be419856319bbfb43ad9727.jpg
 
So the clockspring has 2 plugs/harnesses on the bottom of it where the wires come out of, the yellow one is ABS, and the other one is for the steering wheel controls, it's directly under the clockspring on the bottom. Curious to see how you accomplish this, very cool mod if you can pull it off :dance:

It's the black harness shown here

pxl_20230917_003348696_dd4568928839e3bf9be419856319bbfb43ad9727.jpg

Thanks! I plan to explore it this weekend. Not looking forward to moving the airbag out of the way so I can get a multimeter to the pins on the connectors. But from what I've read it should be fairly easy and straightforward. I think the most important thing is to disconnect the battery for at least 15mins. I will report back with my findings.
 
Thanks! I plan to explore it this weekend. Not looking forward to moving the airbag out of the way so I can get a multimeter to the pins on the connectors. But from what I've read it should be fairly easy and straightforward. I think the most important thing is to disconnect the battery for at least 15mins. I will report back with my findings.

Yep, as someone who's had their steering wheel and airbag off a lot in the last month, the biggest thing is unhooking the battery and waiting so the airbag is decharged. Removing the steering wheel is very straight forward, however I recommend a steering wheel puller for the first time
 
Yep, as someone who's had their steering wheel and airbag off a lot in the last month, the biggest thing is unhooking the battery and waiting so the airbag is decharged. Removing the steering wheel is very straight forward, however I recommend a steering wheel puller for the first time

I'll look into it!

Would it not be possible by hand? Or is a puller used to reduce damage?
 
So the clockspring has 2 plugs/harnesses on the bottom of it where the wires come out of, the yellow one is ABS, and the other one is for the steering wheel controls, it's directly under the clockspring on the bottom. Curious to see how you accomplish this, very cool mod if you can pull it off :dance:

It's the black harness shown here

pxl_20230917_003348696_dd4568928839e3bf9be419856319bbfb43ad9727.jpg

Would you happen to have a pic of the connectors behind the airbag? I won't tackle this for a few days and was just wondering if male ends correspond to the blank slots on the connector. No worries if you don't. Thanks!
 
Would you happen to have a pic of the connectors behind the airbag? I won't tackle this for a few days and was just wondering if male ends correspond to the blank slots on the connector. No worries if you don't. Thanks!

The airbag connectors are the black and orange wires shown coming out of the clockspring? The 2 plugs you showed plug into the clockspring in the ports to the right of there
 
The airbag connectors are the black and orange wires shown coming out of the clockspring? The 2 plugs you showed plug into the clockspring in the ports to the right of there

Sorry the answer was right in front of me! Thanks for clarifying!

So based on your pic it looks like there are male terminal ends that would correspond to the empty slots in the connectors. (Correct me If I'm wrong!) This is a good thing! Now just have to figure out which wires that would be! I will try this Sunday or Monday.

Just thinking out loud, if I find the corresponding wire that is connected to the blank slots, would I be able to tap into that to provide power from say the fuse box to send power to the switch -> heating pads? Or would I have to cut that wire? Just worried that there is something on the other end that would be affected. Why would there be a wire that leads to a blank slot?
 
Sorry the answer was right in front of me! Thanks for clarifying!

So based on your pic it looks like there are male terminal ends that would correspond to the empty slots in the connectors. (Correct me If I'm wrong!) This is a good thing! Now just have to figure out which wires that would be! I will try this Sunday or Monday.

Just thinking out loud, if I find the corresponding wire that is connected to the blank slots, would I be able to tap into that to provide power from say the fuse box to send power to the switch -> heating pads? Or would I have to cut that wire? Just worried that there is something on the other end that would be affected. Why would there be a wire that leads to a blank slot?

I haven't studied the harness that closely but I would assume the blank spots are empty pins/wires. I have an extra clockspring sitting on my workbench if you want me to send you any pics of the plug
 
I haven't studied the harness that closely but I would assume the blank spots are empty pins/wires. I have an extra clockspring sitting on my workbench if you want me to send you any pics of the plug

No don't worry about it! The only thing to do next is to take it apart and start testing with a multimeter. Until then, not much to do. Thanks for the input so far though!
 
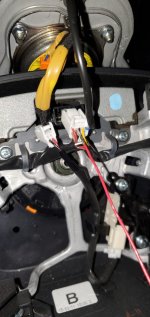
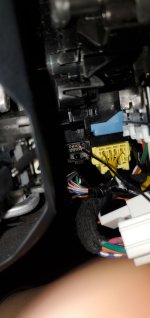
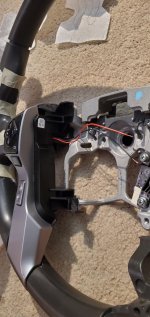
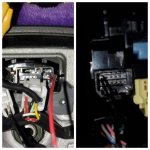
So today I had time to remove the airbag so I can test the pins/wires of the empty slots with a multimeter. The empty slot as pictured here where the red wire is inserted, corresponds to this pin on the bottom black connector under the clockspring (top row 2nd from the right). Good news is the black connector on the other side also has the empty slot!

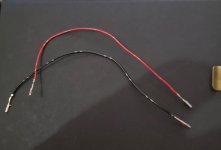
Since I have an extra harness for the cruise control, I depinned and removed the wires as shown in the 3rd pic. I will use these to insert into the empy slots on both connectors. One will lead to the heating pad from inside th steering wheel and the other on the clockspring side will go to the fusebox.

Q: Which circuit should I use in the fusebox? Suggestions welcome!
 

Attachments

  • pin1.jpg
    pin1.jpg
    140.9 KB · Views: 4,010
  • pin2.jpg
    pin2.jpg
    127 KB · Views: 3,962
  • pins3.jpg
    pins3.jpg
    131.5 KB · Views: 3,865
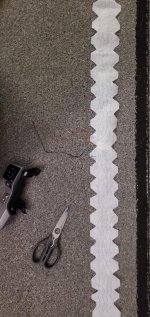
Heating pad came in today! Did a test fit and realized that I need to do some trimming to prevent bunching of the material.
 

Attachments

  • heatpad1.jpg
    heatpad1.jpg
    153.2 KB · Views: 3,840
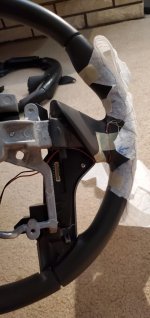
How I ran the wires;
 

Attachments

  • wire1.jpg
    wire1.jpg
    132 KB · Views: 2,347
  • wire2.jpg
    wire2.jpg
    117.7 KB · Views: 2,348
  • wire3.jpg
    wire3.jpg
    109 KB · Views: 2,406
  • wire4.jpg
    wire4.jpg
    142.7 KB · Views: 2,383
My original plan was to ground to a bolt inside the steering wheel to prevent having to run another wire through the clockspring. But after testing the bolts for a good ground, none was giving me continuity. So I had to find another blank slot in the connector and the corresponding pin on the other side. the very top right pin in the steering wheel corresponds to the very top left pin on the backside as per the pic.
 

Attachments

  • groundpins.jpg
    groundpins.jpg
    109.9 KB · Views: 2,262
Last edited:
Have a 2023 ORP with the heated steering wheel. It is the most overrated pos feature I’ve seen yet. The car spends most of its time in Montana and I doubt it will be used at all.
 
Have a 2023 ORP with the heated steering wheel. It is the most overrated pos feature I’ve seen yet. The car spends most of its time in Montana and I doubt it will be used at all.

Speak for yourself. I freaking love my heated seats and steering wheel. It gets below 50F and they go on.

You go on being a real man!
 

Members online

No members online now.

Forum statistics

Threads
278,312
Messages
3,554,083
Members
248,016
Latest member
Advally Service

Trending content

Back
Top