Help with small lift and tire size options....

that would be awesome for the pics. u think i would need new shocks right away or could i wait a bit for them cause i might not have enough for em right away. u doing the spacer kit all four corners of your ride? what kit u using?

If you are doing a basic 2" lift and have the stock shocks on there, you should be ok regarding travel, ....., as long as you don't do any major off-roading that involves flexing or articulation. I learned that the hard way. Did the 2.5" lift, left the stock shocks on there, took it off-road and found myself stuck on a sand hill with the left rear wheel/tire flexed about 15" down (an estimate). I extended the shock beyond its intended travel. The next weekend installed Rancho RS5000's all the way around, and OME 891 rear coil prings (removing the Daystar coil spacers), and I am in great shape now.

Good luck. The fun of all this is deciding what you are going to do next, doing it, then enjoying what you have done.
 
Alright, I started on the front this morning. Total time was about 4 hours. Both front and rear should be able to be completed in a weekend day.

Tools needed for the front:

11/16" box end and socket
14mm box end and socket
3/4" box end and socket
Other box ends and sockets that I cant remember.
Strut Spring compressor (you might not need this)
Ball joint/U-joint tool (cheap one like the version I use can be purchased from Harbor Freight)

Here is a before picture:
P1020447.jpg~original


First thing is to chock the rear wheel. I also pulled the e-brake. Loosen the lug nuts on one wheel. Jack up the front end and put the jack stand under the chassis. Pull the wheel and loosen the anti-sway bar link (14mm box end and socket):
P1020448.jpg~original


Also loosen the lower shock mount bolt.
P1020449.jpg~original

(you might need to adjust the floor jack to take tension off of the lower shock mount bolt)

Then remove the three bolts from the top of the strut and remove the strut from the vehicle. Take apart strut. Remove the upper shock bolt (be careful...the spring can be under pressure). Disassemble the strut.

Next you need to take the upper part of the strut (with the three bolts). These bolt will need to be removed. They are splined near the "head" of the bolt and will come out easily. Just thread the nut on the top of the bolt and smack it with a hammer:
P1020450.jpg~original


The spacers will come with longer bolts (the spacer will sit above the upper spring plate) and appropriate nuts. You need to press in the new longer bolts. Make sure you put them in the the same direction that you took the others out (I made this mistake). Use the ball joint tool to press in the new bolts:
P1020453.jpg~original


P1020451.jpg~original


Then reassemble the strut:
P1020454.jpg~original


You might need the strut spring compressor here. I was able to complete one side with out it (brute force), but had to head over to O-Reilly's to borrow theirs for the driver's side. Most auto parts stores will "rent" you this tool (you pay full price...use it and they'll give your money back when you are done). I just used the tool in the store.

Here is a close-up of the spacer assembly and the new longer bolts.
P1020455.jpg~original


The next part is rather dangerous, but I chose this method because I am lazy. You are "supposed" to remove the upper ball joint....but I chose to use the stock bottle jack placed upside down on the upper ball joint and then extend the jack to push down the lower shock mount.
P1020456.jpg~original


Extend the bottle jack (it can be done by hand without the tool) until you have enough room to insert the shock. Insert the top of the shock first and tighten down one of the three nuts by hand, then slide the lower end of the shock into the mount and insert the bolt and thread the nut on by hand. Now you can remove the bottle jack. Phew...

Tighten the three upper bolts and the lower shock mount bolt. Raise the control arm with the floor jack until you are able to align and reinstall the anti-sway bar link and tighten down the bolt.

It should look like this when you are finished:
P1020457.jpg~original


Using the floor jack (placed under the control arm), raise the vehicle high enough for you to install the wheel as well as remove the jack stand. Tighten the lug nuts by hand and give them a spin with the 4-way. Lower the vehicle and tighten the lug nuts down fully.

Repeat for the other side.

Finished. Here is an after pic:

P1020458.jpg~original
 
The last thing that you need to do is to have a shop perform a full alignment on the vehicle. If you are somewhat competent with a tape measure, you can do the alignment yourself. I've aligned my solid axled vehicles by myself for years...but I plan to have a shop do this one.

I hope all of this helps you guys install your lifts. It's really not a difficult task...it just requires some time....and a friend is sometimes helpful, but not necessary.
 
great pics and installation process. had a question if anyone knows. so i've been reading about the recall on many of our 3rd gen. rear coils. so if i were to do the daystar spacer lift front and rear, then should i see if i am eligible for new rear coils from toyota (if i can get it authorized). i don't know if i feel a sagging effect since i haven't had the 4runner too long as i bought it used. i was wondering if the spacers in the rear are a good idea or is it better to use coils? anybody?
 
Well, I too read about that recall and asked the local dealership adn they told me that it had already been performed (even thought the PO said it hadnt). I didnt really want to argue with them, so I went the spacer route.

If the dealership wants to replace the coils for you, then let them.

The coils have been working out fine on my truck and I have really been enjoying the nice ride lately. Getting a new set of tires today as well...
 
what size tires are you getting. gonna try to get coils replaced if there gonna be free anyway. so your ride is pretty much like stock since puttin on the spacers? i was gonna buy the daystar 2.5" spacer lift and i found it online for under 200 bux. get some pics with your tires on, i would like to see. thanks
 
Well, I'm not sure how it rides stock....when I got it (January of 2009) the shocks were destroyed and the ride was absolutely terrible.

It currently has badly worn 265/70/R16 tires on it. I am going to get a set of BFG ATs in the same size. They should fill out the wheel well a bit better and I've always had good luck with BFG ATs and MTs. They will be installed today and I'll make sure to post a few pics.

Jeremy
 
jeremyh....heck yes. i got a 98 and am putting in my daystar spacer kit this weekend. i looked on a lot of forums, and hadnt seen a step-by-step (with pics) of this process. i was planning on taking pics and putting them up myself, but just came across yours. so now i will use yours as my guideline. sweet, thanks.

one question...you said its best to unhook the sway bar "at ride height"...what does that mean, exactly? thanks
 
one more thing...on the rears, did jacking up one side of the axel enable you to not use a spring comepressor to get the spring out of the other side? ive changed my shocks/struts before so i know i need them in the front. but you just never mentioned using spring compressors for the rear. i belive your words were that you just "popped it out"??
 
one question...you said its best to unhook the sway bar "at ride height"...what does that mean, exactly? thanks

Ride Height = before you raise the vehicle with the jack.

As for the rear, yeah, if you force the axle articulation, then you wont need a spring compressor. The only spring that I couldn't get in place by hand was one of the fronts...
 
BTW, sorry for the late response, I was out of town all weekend. Also, I drove this thing to northern Oklahoma and back (~1100 miles) towing a loaded trailer and the ride was great!
 
BTW, sorry for the late response, I was out of town all weekend. Also, I drove this thing to northern Oklahoma and back (~1100 miles) towing a loaded trailer and the ride was great!

Great write up! It was by far the most accurate and simple one I have seen. I put the same lift on my 4runner last night and using your guide it took me just under 3 hours.

I had a slightly different front spacer that didn't require disassembly of the struts which was really nice. The floor jack trick was awesome - not sure how I would have done it otherwise.

How much lift did the 1" front spacer give you? I got exactly 1.5" from it which was perfect with the 1.5" rear spacers.
 
hey kip....did you get the daystar 1" front lift. seems like you have the easy install kit. i ordered the same and got the old kit which you have to disassemble and wanted the new kit. i called daystar and they said our year 4runners wont work with easy install. are they bs ing me. sent u pm.
 
hey kip....did you get the daystar 1" front lift. seems like you have the easy install kit. i ordered the same and got the old kit which you have to disassemble and wanted the new kit. i called daystar and they said our year 4runners wont work with easy install. are they bs ing me. sent u pm.

Got them on Ebay. They seem to be good quality... Only time will tell I guess.

Just search 2" 4runner lift and you will find them.
 
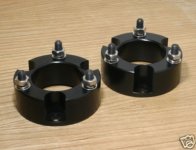
Just to clarify, there are spacers that are installed into the front strut assemblies and then there are spacers that are installed on top of the strut assemblies. The ones that go on top DON'T compress the coils, while the ones that get installed into the struts DO compress the coils. Obviously manhunter was talking about the traditional ones that go inside the strut and jeremyH was talking about the ones that go on top.

Top spacers still require taking the strut assemblies apart so you can replace the short stock upper bolts with longer ones that will go all the way through the thickness of the spacer and still have meat to get the nut on at the top. Recently Daystar has come out with spacers that go on top and don't even require taking the struts apart to put longer bolts in, but AFAIK they don't make them for 3rd gens yet, just 4th gens:
Daystar Toyota 4RUNNER 03-08; 2-1/2" Lift Kit "Full Package"; KT09115BK
These are better than traditional ones because they do not compress the coils at rest (like all top spacers) but they're also way easier to install since there's no disassembling of the struts. To the OP: Since it's just for looks, I would really just suggest a 1" or 1.5" body lift from 4crawler.com instead of the spacers and some meaty 265/75R16 M/Ts (basically 32s). If you want 33s, then you'll have to get a 2.5" lift and I think ALL of those are the type that have a spacer installed into the strut which will compress the coils. In other words, the top spacers aren't offered that thick, they're like 1" or 1.5" and most likely will not allow you to get 33s on.
 
Not sure if Daystar makes them but a guy on ebay sells them. Again, not sure of the quality but they looked fine to me. I guess the bolts could snap but if you were worried you could get higher grade bolts.

I will not be doing much offroading and was just looking for the cheapest solution without doing a bodylift. You do not need a spring compressor to install these.
 

Attachments

  • spacers.jpg
    spacers.jpg
    21.2 KB · Views: 1,162

Members online

Forum statistics

Threads
278,316
Messages
3,554,111
Members
248,016
Latest member
Advally Service

Trending content

Back
Top