HID upgrade, which one to go with?

You have any idea what the necessary wire modification is (in terms of the dust boot) i.e. is there drilling required?

Also - I know there was a thread somewhere about wiring the TRS harness to the stock adapters - has there been any clarification if the harness directly plugs into the stock adapters?

The 2014's have a gray plate on the back of the headlight housing. The wires for the OEM bulb goes into the bottom of the housing. You have to cut a 7/8" hole in the back of the gray plate and the HID bulb assembly comes with a waterproof plug that has the wires running thru it and that plug inserts into the 7/8" hole you previously cut into your gray plates.

The harness plugs into your existing bulb plugs, no modification is required from what I have seen and read.
TRS has videos on their site illustrating this.

Hope this helps!
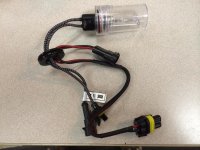
 
Anyone bother upgrading their DRL with HID's? Assume you will go through bulbs just that much quicker but I see more and more newer vehicles with them. Just curious. Do they even make them for it?
 
Last edited:
I purchased the Morimoto XB35 Bulbs in 5000k from the retrofit source, they look great and have a nice cutoff. The 6000K if you so choose will give you a little more blue.

The XB35 has the return wire on the opposing side as the regular H11 and work nice in the stock projectors with no shadows and a decent cutoff, I haven't been flashed at at... For my ballasts I had some older Zenex 35 watt ballasts that still work nice. Here is a link to both. You get a nice kit with a nice cutoff at a good price.

H11: Morimoto XB35

Amazon.com: Zenex 35W AC Universal Replacement HID Digital Ballast: Automotive

2014 SR5
 
Last edited:
I received my TRS package today.... (ordered it Monday).
So here is what I have so far. Not doing the install today, but have some pictures / pointers for people that are interested.

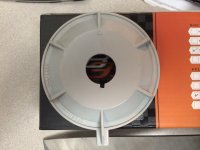
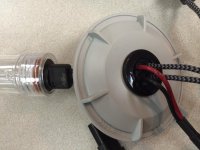
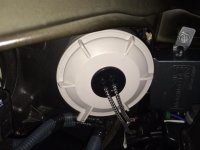
*** For the 2014's, you will be required to drill a 7/8" hole in the Grey Plastic cover on the backside of the headlight assembly.
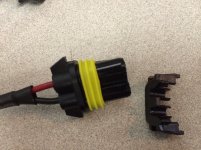
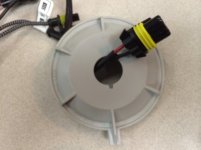
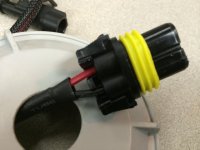
You will also need to make a 1/8" slot (as pictured) at the bottom of that hole. That is so the the connector with the HB35 HID Plug Wire Protector Removed will pass thru the 7/8" hole.

This is the order of the pictures:
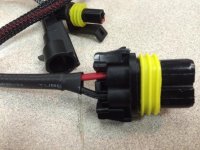
  • HB35 HID Assembly
  • HB35 HID Plug Complete
  • HB35 HID Plug Wire Protector Removed
  • Gray Cover with Hole and Slot
  • Gray Cover with Plug Passage
  • HB35 HID Plug Wire Protector Re-installed
  • Gray Cover with Waterproof Rubber Grommet Installed
 

Attachments

  • HB35 HID Assembly.jpg
    HB35 HID Assembly.jpg
    136.5 KB · Views: 7,200
  • HB35 HID Plug Complete.jpg
    HB35 HID Plug Complete.jpg
    126.8 KB · Views: 7,183
  • HB35 HID Plug Wire Protector Removed.jpg
    HB35 HID Plug Wire Protector Removed.jpg
    134 KB · Views: 7,225
  • Gray Cover with Hole and Slot.jpg
    Gray Cover with Hole and Slot.jpg
    118.2 KB · Views: 7,274
  • Gray Cover with Plug Passage.jpg
    Gray Cover with Plug Passage.jpg
    98.8 KB · Views: 7,617
  • HB35 HID Plug Wire Protector Re-installed.jpg
    HB35 HID Plug Wire Protector Re-installed.jpg
    113.6 KB · Views: 7,203
  • Gray Cover with Waterproof Rubber Grommet Installed.jpg
    Gray Cover with Waterproof Rubber Grommet Installed.jpg
    118.3 KB · Views: 8,072
Last edited:
Saker, any install pictured you would like to post, lets say of the drilling, would be great!

[MENTION=2458]scott78945[/MENTION]

I don't have any of me drilling the Grey Covers, I just used a hand held drill with a 7/8" hole saw at a slow speed, don't get in a hurry.... it's easily done!
 
Lights from The Retrofit Source

Look thru this thread to find helpful tips and pictures of installs & the quality of parts from TRS.
 
Last edited:
I completed my HID install this afternoon on my 2014 T4R.
Parts from THE RETROFIT SOURCE: H11: Morimoto Elite HID System

I made it much easier for myself by laying everything out on the desk, identifying all connections and where they had to plug into. (marked them and it made the install very easy)

When I received my bulbs and laid everything out, I noticed I would only have the drivers side that needed all 4 wires to connect.
The drivers side is where the OEM plug feeds to the Harness Input. After install, I was able to remove the 2 wires that did not go to the HID bulb.
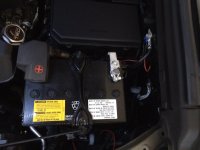
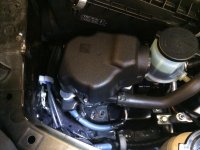
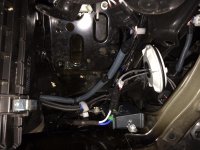
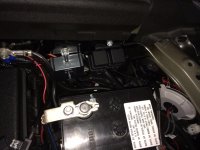
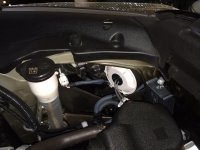
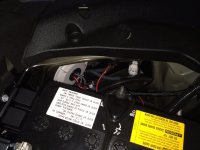
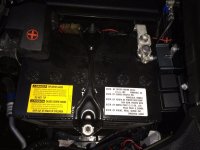
I did have to remove the 3 bolts for the air pump so I could install the ballast on the passenger side and shifted the battery over to install the ballast and the relays/harness.

I hope the pictures and descriptions help!

  • Shifted Battery
  • Shifted Air Pump
  • Pass Side Plugged for Test
  • Drivers Side Plugged for Test
  • Pass Side Wires Removed Closed Up
  • Pass Side Complete
  • Drivers Side Complete
  • Drivers Side Harness and Ballast Complete
 

Attachments

  • Shifted Battery.jpg
    Shifted Battery.jpg
    122.8 KB · Views: 7,113
  • Shifted Air Pump.jpg
    Shifted Air Pump.jpg
    132.7 KB · Views: 7,118
  • Pass Side Plugged for Test.jpg
    Pass Side Plugged for Test.jpg
    126.8 KB · Views: 7,134
  • Drivers Side Plugged for Test.jpg
    Drivers Side Plugged for Test.jpg
    125.4 KB · Views: 7,121
  • Pass Side Wires Removed Closed Up.jpg
    Pass Side Wires Removed Closed Up.jpg
    119.9 KB · Views: 7,080
  • Pass Side Complete.jpg
    Pass Side Complete.jpg
    130.6 KB · Views: 7,394
  • Drivers Side Complete.jpg
    Drivers Side Complete.jpg
    126.8 KB · Views: 7,120
  • Drivers Side Harness and Ballast Complete.jpg
    Drivers Side Harness and Ballast Complete.jpg
    128.4 KB · Views: 7,050
Last edited:
Thanks for the info in this post. Just installed my TRS kit last night and am very happy with the results!

I went with the following:
H11: Morimoto Elite HID System HIDKIT-H11-R
Ballasts
2 x AMP: Morimoto 3Five DSP 35AMP-DSP
Bulbs
2 x H11: 3Five 4300K H-ELEVEN-43K
Harness Type
1 x HD Relay: H11/H9/H8 RELAY-H11

When I spoke to Carlos he stated that the bulbs didn't matter and that the only difference between the 3Five and XB35 bulbs was where the bar was placed (top or bottom). For the 4Runner, we have side mount projector bulbs so the location of the bar doesn't really matter.

I went with the 35w kit because it runs at a lower heat. Carlos stated that the 55w kit runs at a higher temperature and has a greater risk of melting or possibly damaging things (also why the 55w has a shorter warranty period).

I also asked Carlos about if there was any projector modification we could do to enhance our projectors - he said that the only option would be to upgrade to a more clear lens (STI glass or something?) but that the 4Runner projector is actually quite good as is.

Thanks again for the pictures and posts in this thread!
 
Saw a 2014 with HIDs the other night and it definitely has notable glare from the squirrel finders. I'll be doing a retrofit soon so I'll post up what I find when I open the headlight up to see if the projector is moddable.
 
[MENTION=45500]crackiswack[/MENTION]

There is actually no squirrel spotters on the 4Runner projectors as found by BTLAW on this thread. Read page two, he has torn apart a salvaged projector. http://www.toyota-4runner.org/5th-g...ource-group-buy-interested-2.html#post1671056

There are 2 types of squirrel spotters or squirrel finders.
1 - Built in. These are built into the [halogen] projector itself. They allow for a certain, measured, and calculated amount of light to escape in a predictable manner. Aimed against a wall, these are clearly a rectangular box. These are used for lighting up road signs without allowing the full beam upward over the cutoff.

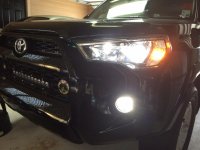
2 - Unintended. These are the result of a bulb that is producing too much light at incorrect locations inside the [halogen] projector. Halogen bulbs have a certain design to them. HID bulbs have a different, but certain design to them. When you put the HID bulb onto a halogen base, you can see that the 2 will not product the same amount of light from the same filament locations. This causes major glare issues, known playfully as squirrel finders since they are aimed upward over the cutoff where generally there is very little light seen from a true HID projector. People say it "isn't bad" or "isn't an issue" or "I haven't been flashed all week", but it's pretty clear to see the glare. example - see over cutoff


That being said, I am quite positive that he meant the squirrel finders aren't built in to the halogen OEM projector.
 
[MENTION=45500]crackiswack[/MENTION]

There is actually no squirrel spotters on the 4Runner projectors as found by BTLAW on this thread. Read page two, he has torn apart a salvaged projector. http://www.toyota-4runner.org/5th-g...ource-group-buy-interested-2.html#post1671056

Like I said, I haven't physically opened the projectors to determine the source, but there is definitely a lot of glare. Some people here might consider that acceptable but I certainly don't. The thread you linked is pretty ambiguous and the image posted with the STI-R lens has quite a bit of stray light above the cutoff
 

Members online

Forum statistics

Threads
278,316
Messages
3,554,107
Members
248,016
Latest member
Advally Service

Trending content

Back
Top